Caring for a Dental Leaf Gauge

February 21, 2024 Lee Ann Brady

Caring for a Dental Leaf Gauge 

Lee Ann Brady, DMD 

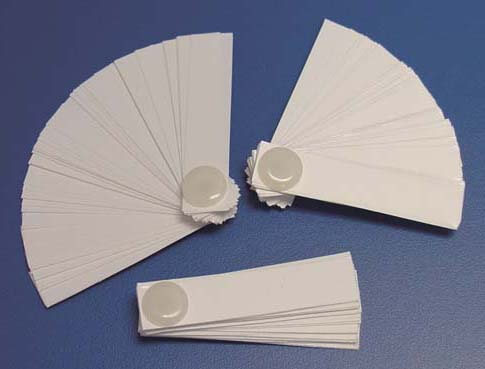
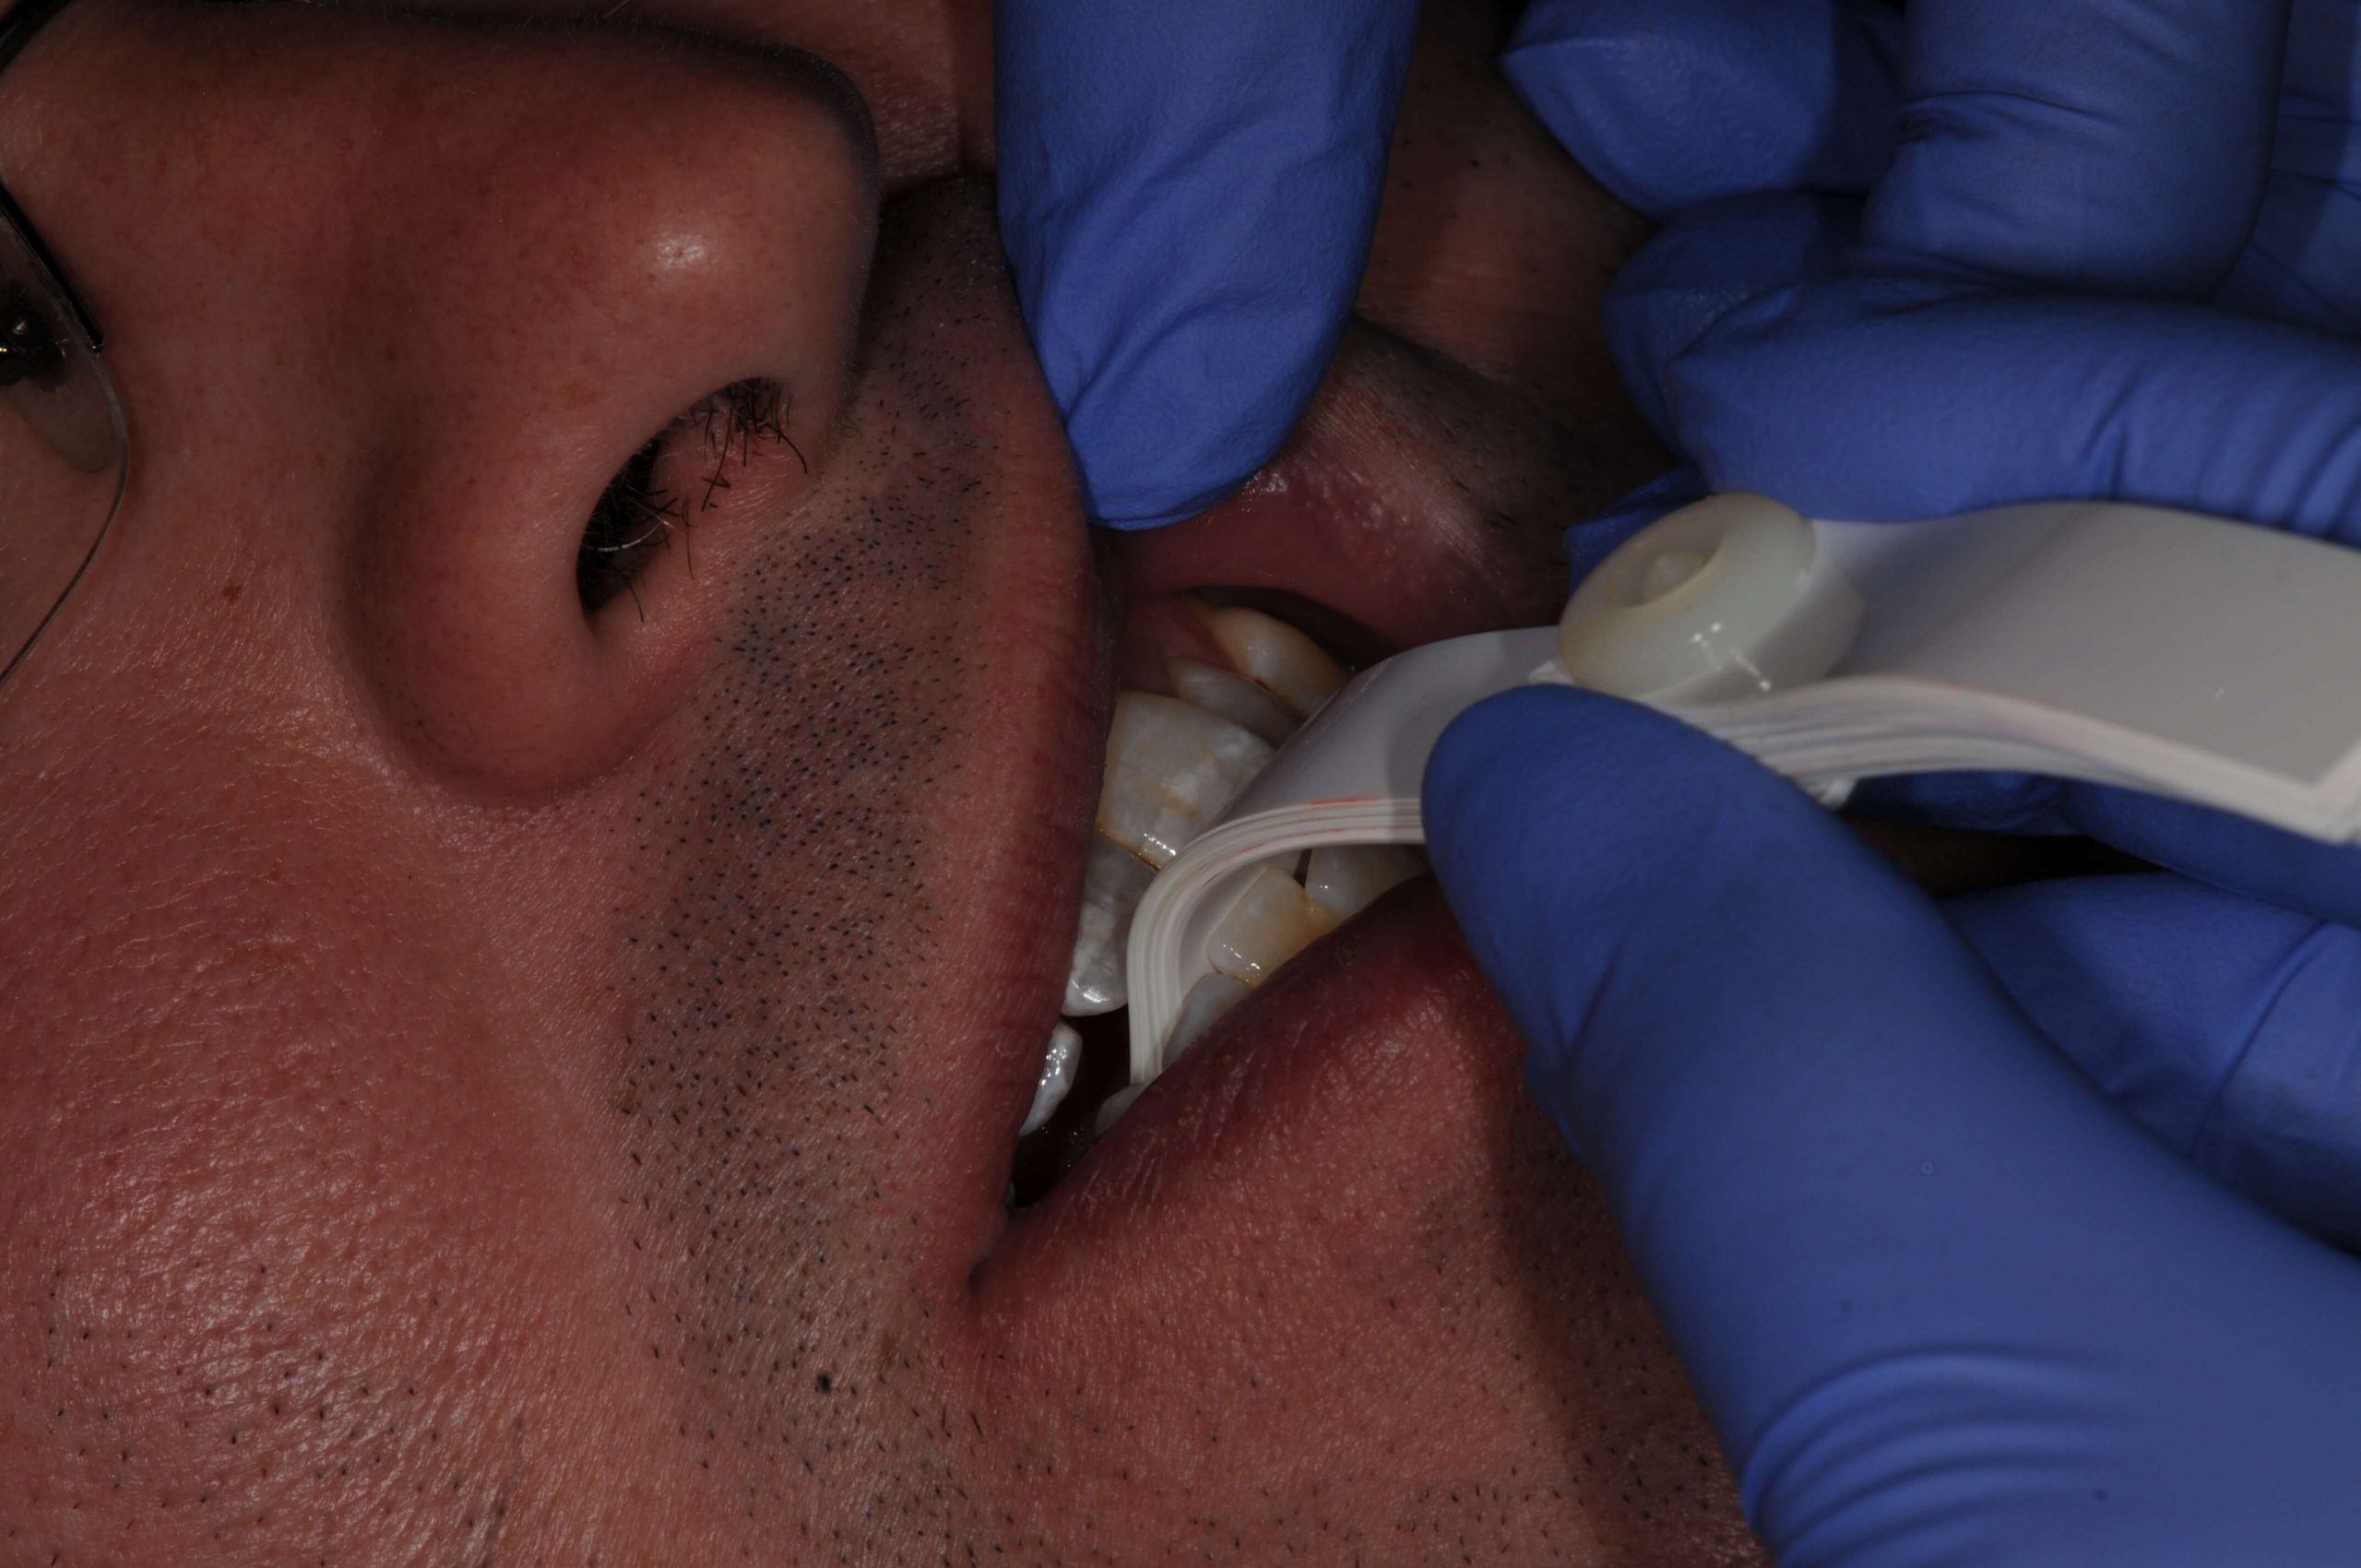
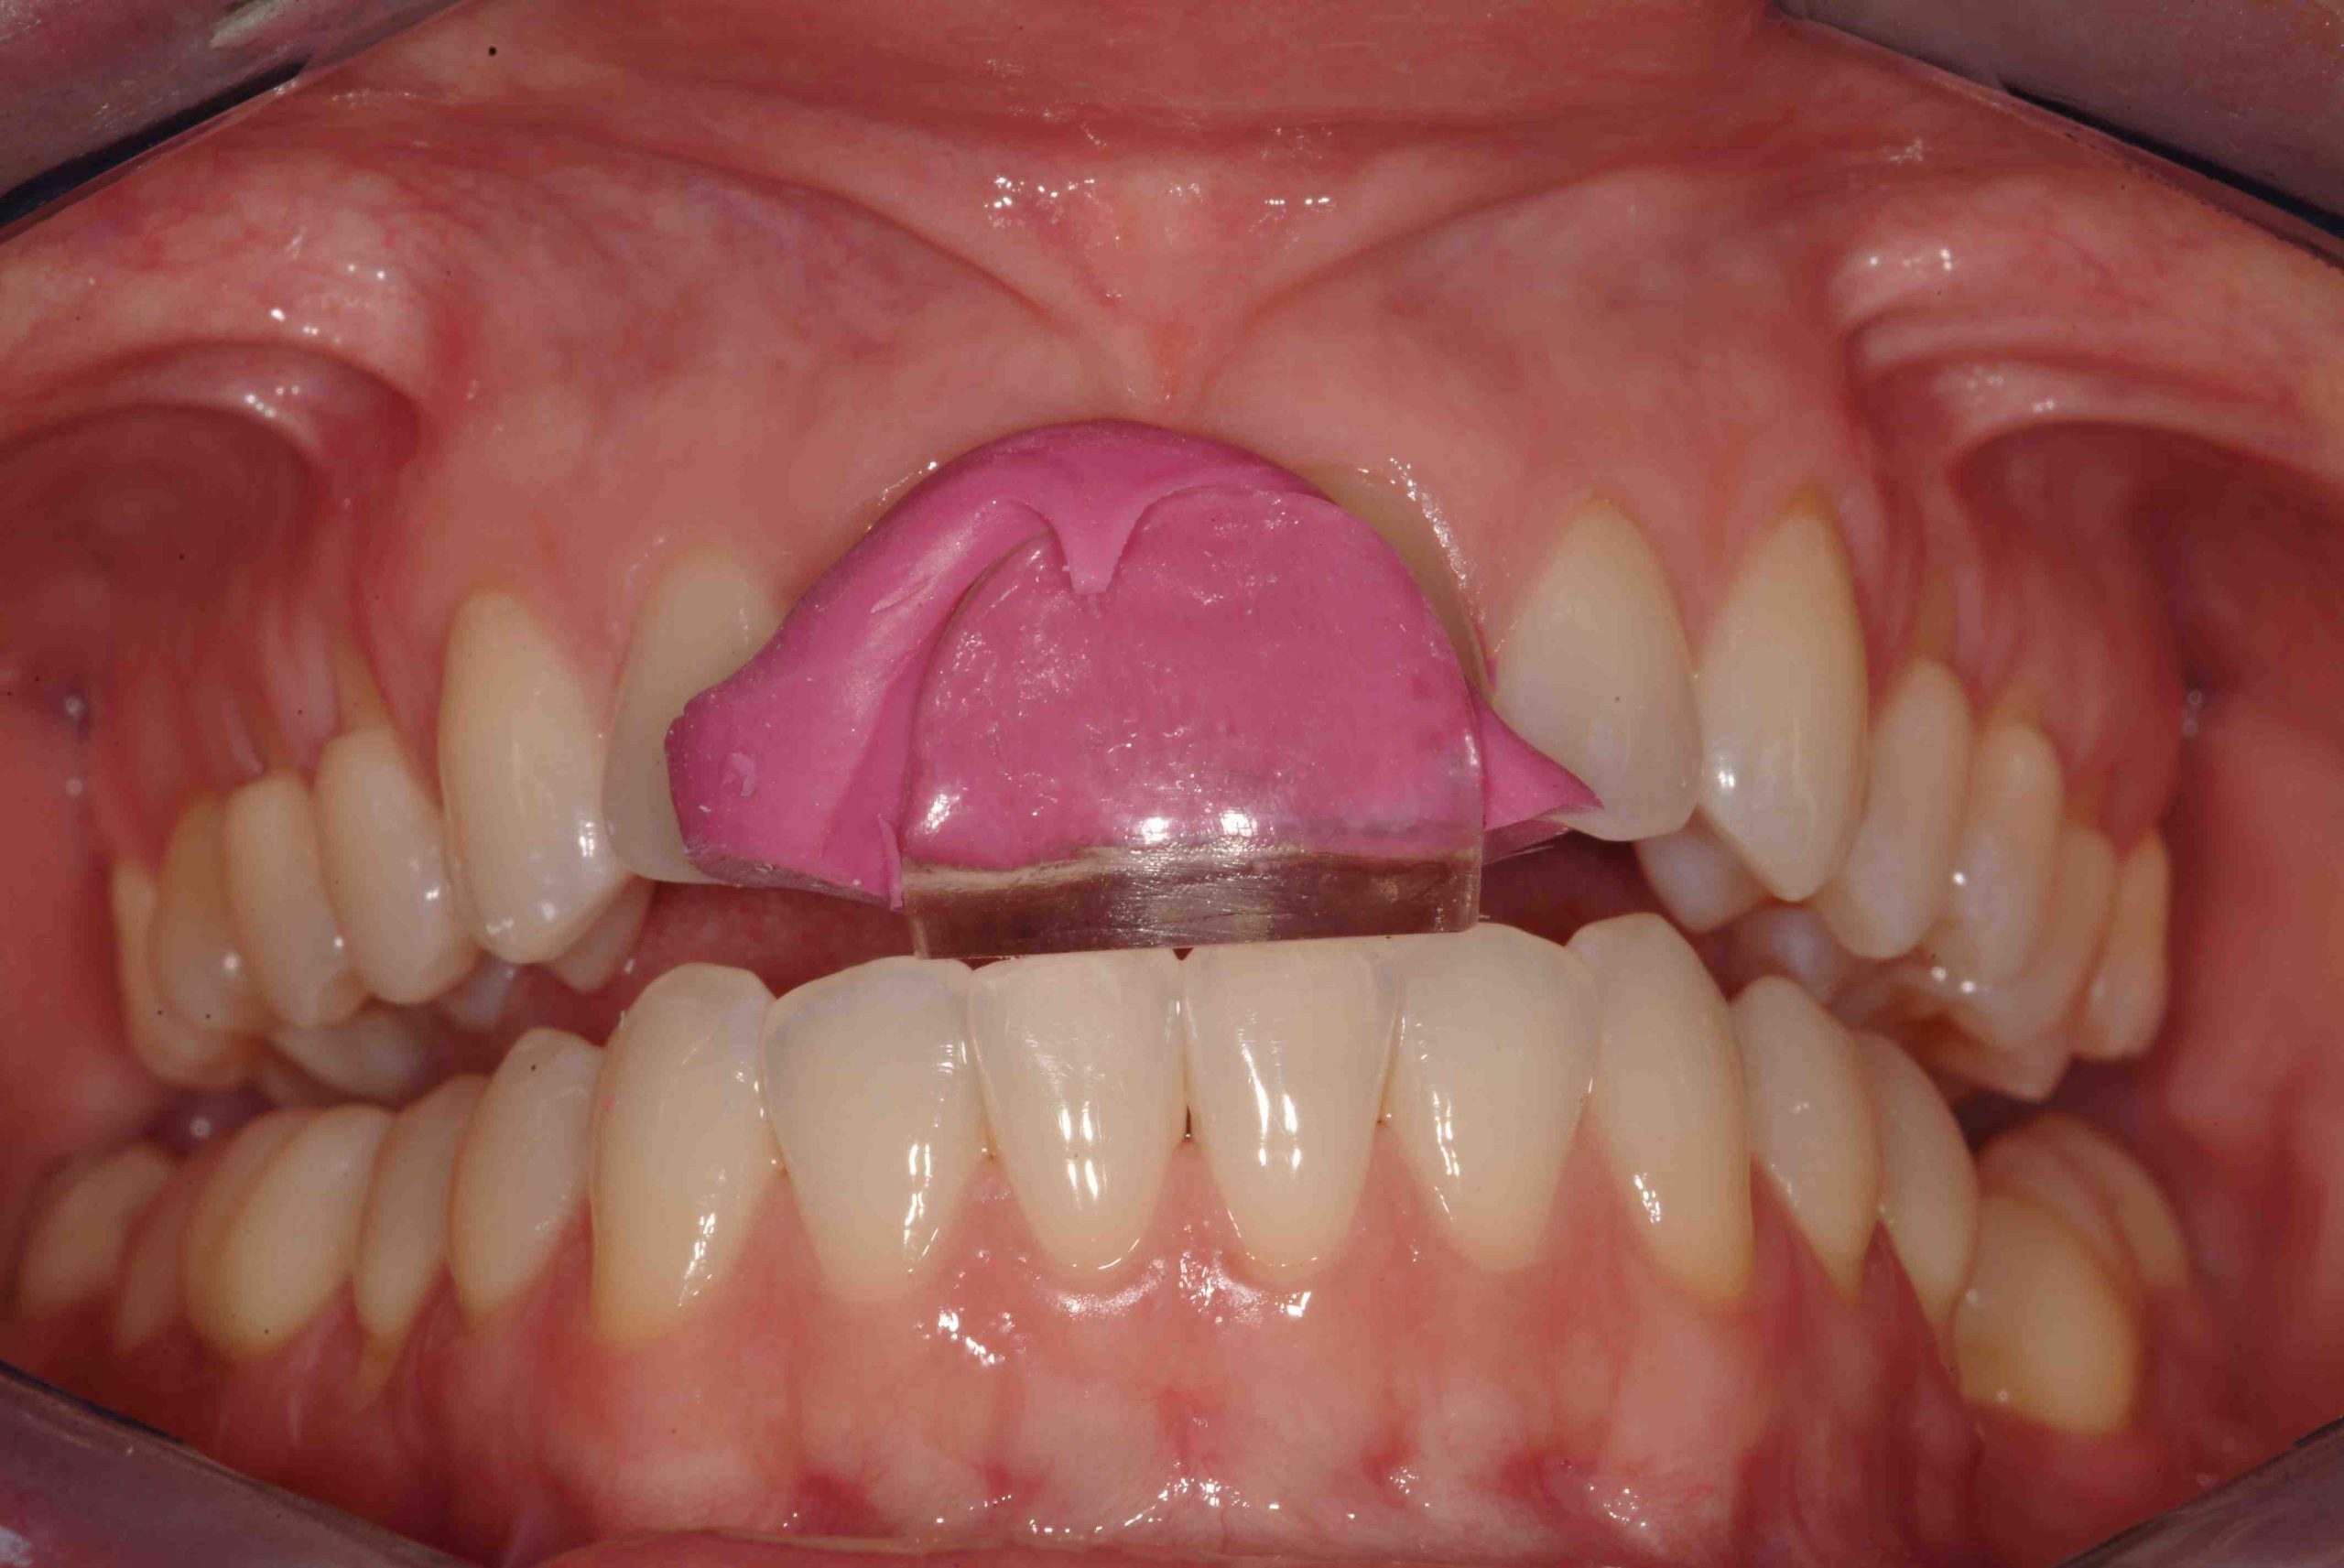
In the Pankey Essentials courses, we use dental leaf gauges to train dentists in how to feel for the first point of occlusal contact, as a method for occlusal deprogramming, and as a tool for articulating models on an articulator in centric relation. Dental leaf gauges not only assist us in diagnosis and treatment planning but also in enabling our patients to discover the nature of their occlusion as we help them understand how malocclusion can manifest in TMD symptoms, parafunction, tooth damage, and more. 

In our Essentials 1 course, I am sometimes asked how to take care of leaf gauges, so I thought I would share my answer.  

Although they don’t last forever, dental leaf gauges do last a long time and you can autoclave them between uses. When you sterilize them, the leaves become sticky, so I separate them like a hand of cards before putting the gauge in the autoclave bag and separate them again when I take them out of the bag just before going to the mouth. 

Over time, with use, a leaf gauge will start to look a little beat up. I’m looking at one now. The Teflon screw that holds it together has turned color from going through the autoclave. I can see some ink stains from Madame Butterfly silk. It’s at the point where I think it looks too grungy to keep using. Although it might continue functioning for quite some time, I’m going to toss it and use a new one. After all, they are relatively low cost with a high return on investment.  

I’ve never seen a dental leaf gauge break after many trips through the autoclave. I tested cold sterilizing one and discovered the chemistry in the ultrasonic cleaner started to make the leaves brittle and they came out stickier than when autoclaved. So, my preference (and the protocol in my practice) is to bag them and put them through the autoclave. 

Related Course

TMD & Orofacial Pain: Managing Complex Patients

DATE: January 29 2025 @ 8:00 am - February 2 2025 @ 1:00 pm

Location: The Pankey Institute

CE HOURS: 37

Dentist Tuition: $ 7200

Single Occupancy with Ensuite Private Bath (per night): $ 345

TMD patients present with a wide range of concerns and symptoms from tension headaches and muscle challenges to significant joint inflammation and breakdown. Accurate thorough diagnosis is the first step…

Learn More>

About Author

User Image
Lee Ann Brady

FIND A PANKEY DENTIST OR TECHNICIAN

I AM A
I AM INTERESTED IN

VIEW COURSE CALENDAR

When Your Occlusal Clearance Disappears

April 19, 2019 Lee Ann Brady DMD

It can be an incredibly frustrating clinical situation, when you have been meticulous about preparing a posterior tooth, (most commonly a molar) for a crown and things aren’t predictable. Using your burs you created depth cuts to ensure adequate occlusal clearance. After the impression you allow your assistant to fabricate the temporary only to have them come get you. Why? Because the temp is thin or perforated on the occlusal. When you go back to check, and have the patient bite, sure enough the opposing tooth is touching your prep.

A common reason that this happens is because we just prepared away the patient’s first point of contact in centric relation. The lateral pterygoid muscle in coordination with the elevator muscles has a learned pattern of firing that bring the mandibular teeth into maximum intercuspal position. This “learned” position is programmed by the patient’s first point of contact when the condyles are seated. For some patients when we remove this contact, and therefore the message that was programming the muscles to locate MIP, they release quickly. When the muscles release and the condyles seat, the occlusion is now totally different than MIP was moments before.

Leaf Gauge
Finding First Point of Contact

One solution that I considered briefly was to no longer work on molars! Alas, not a great business strategy.

Removing this frustration is about understanding which patients are at risk. Identifying risk begins with the exam, whether we are discussing caries or occlusion. There are several key factors that alert me to this potential issue. I start by identifying the patient’s first point of contact and clarifying if it is on the tooth we are about to prepare. If I am going to prepare FPC away, then I look at the magnitude and direction of the patient’s slide, or the difference between this position and MIP. If the difference is small (1-2mm), then even if their condyle does seat the occlusal difference will not cause an issue for clearance. So large slides (3mm or greater) could cost approximately 1mm of clearance on the prepared tooth. Other factors include whether they have a history of occlusal changes or more than one MIP they can find.

Understanding the risk, still leaves us with the question of how to proceed. That is a longer conversation for another post. However, if we proceed as we would before, at least knowing the risk we can explain this to the patient ahead of time, and help them understand how we would manage it if it happens.

Related Course

Pankey Scholar 14B

DATE: August 15 2024 @ 6:00 pm - August 17 2024 @ 3:00 pm

Location: The Pankey Institute

CE HOURS: 0

Dentist Tuition: $ 3905

Single Occupancy with Ensuite Private Bath (per night): $ 290

“A Pankey Scholar is one who has demonstrated a commitment to apply the principles, practices and philosophy they learned through their journey at The Pankey Institute.”   At its core,…

Learn More>

About Author

User Image
Lee Ann Brady DMD

Dr. Lee Ann Brady is passionate about dentistry, her family and making a difference. She is a general dentist and owns a practice in Glendale, AZ limited to restorative dentistry. Lee’s passion for dental education began as a CE junkie herself, pursuing lots of advanced continuing education focused on Restorative and Occlusion. In 2005, she became a full time resident faculty member for The Pankey Institute, and was promoted to Clinical Director in 2006. Lee joined Spear Education as Executive VP of Education in the fall of 2008 to teach and coordinate the educational curriculum. In June of 2011, she left Spear Education, founded leeannbrady.com and joined the dental practice she now owns as an associate. Today, she teaches at dental meetings and study clubs both nationally and internationally, continues to write for dental journals and her website, sits on the editorial board of the Journal of Cosmetic Dentistry, Inside Dentistry and DentalTown Magazines and is the Director of Education for The Pankey Institute.

FIND A PANKEY DENTIST OR TECHNICIAN

I AM A
I AM INTERESTED IN

VIEW COURSE CALENDAR

Do Patients Parafunction In Centric Relation?

April 13, 2019 Lee Ann Brady DMD

Seated Condylar Position

I know even the mention of the words centric relation probably has some readers bristling, as this is a much argued over topic. With that said the research by Lundeen and Gibbs at the University of Florida shows that we do seat our condyles into the fossa during the chewing stroke. This seated condylar position is often used as a reference position to treat patients whether as part of reorganizing their occlusion to alleviate TMD symptoms or for restorative or orthodontic treatments.

Centric Relation & Parafunction

The next question is do people seat their condyles other than during normal function as part of the chewing stroke. I believe the answer is yes. One of the pieces of evidence is the number of patients that I have with wear facets that correspond exactly to their first point of contact with their condyles seated. These same patients do not mark this area with articulating paper in intercuspal position or when following their excursives.

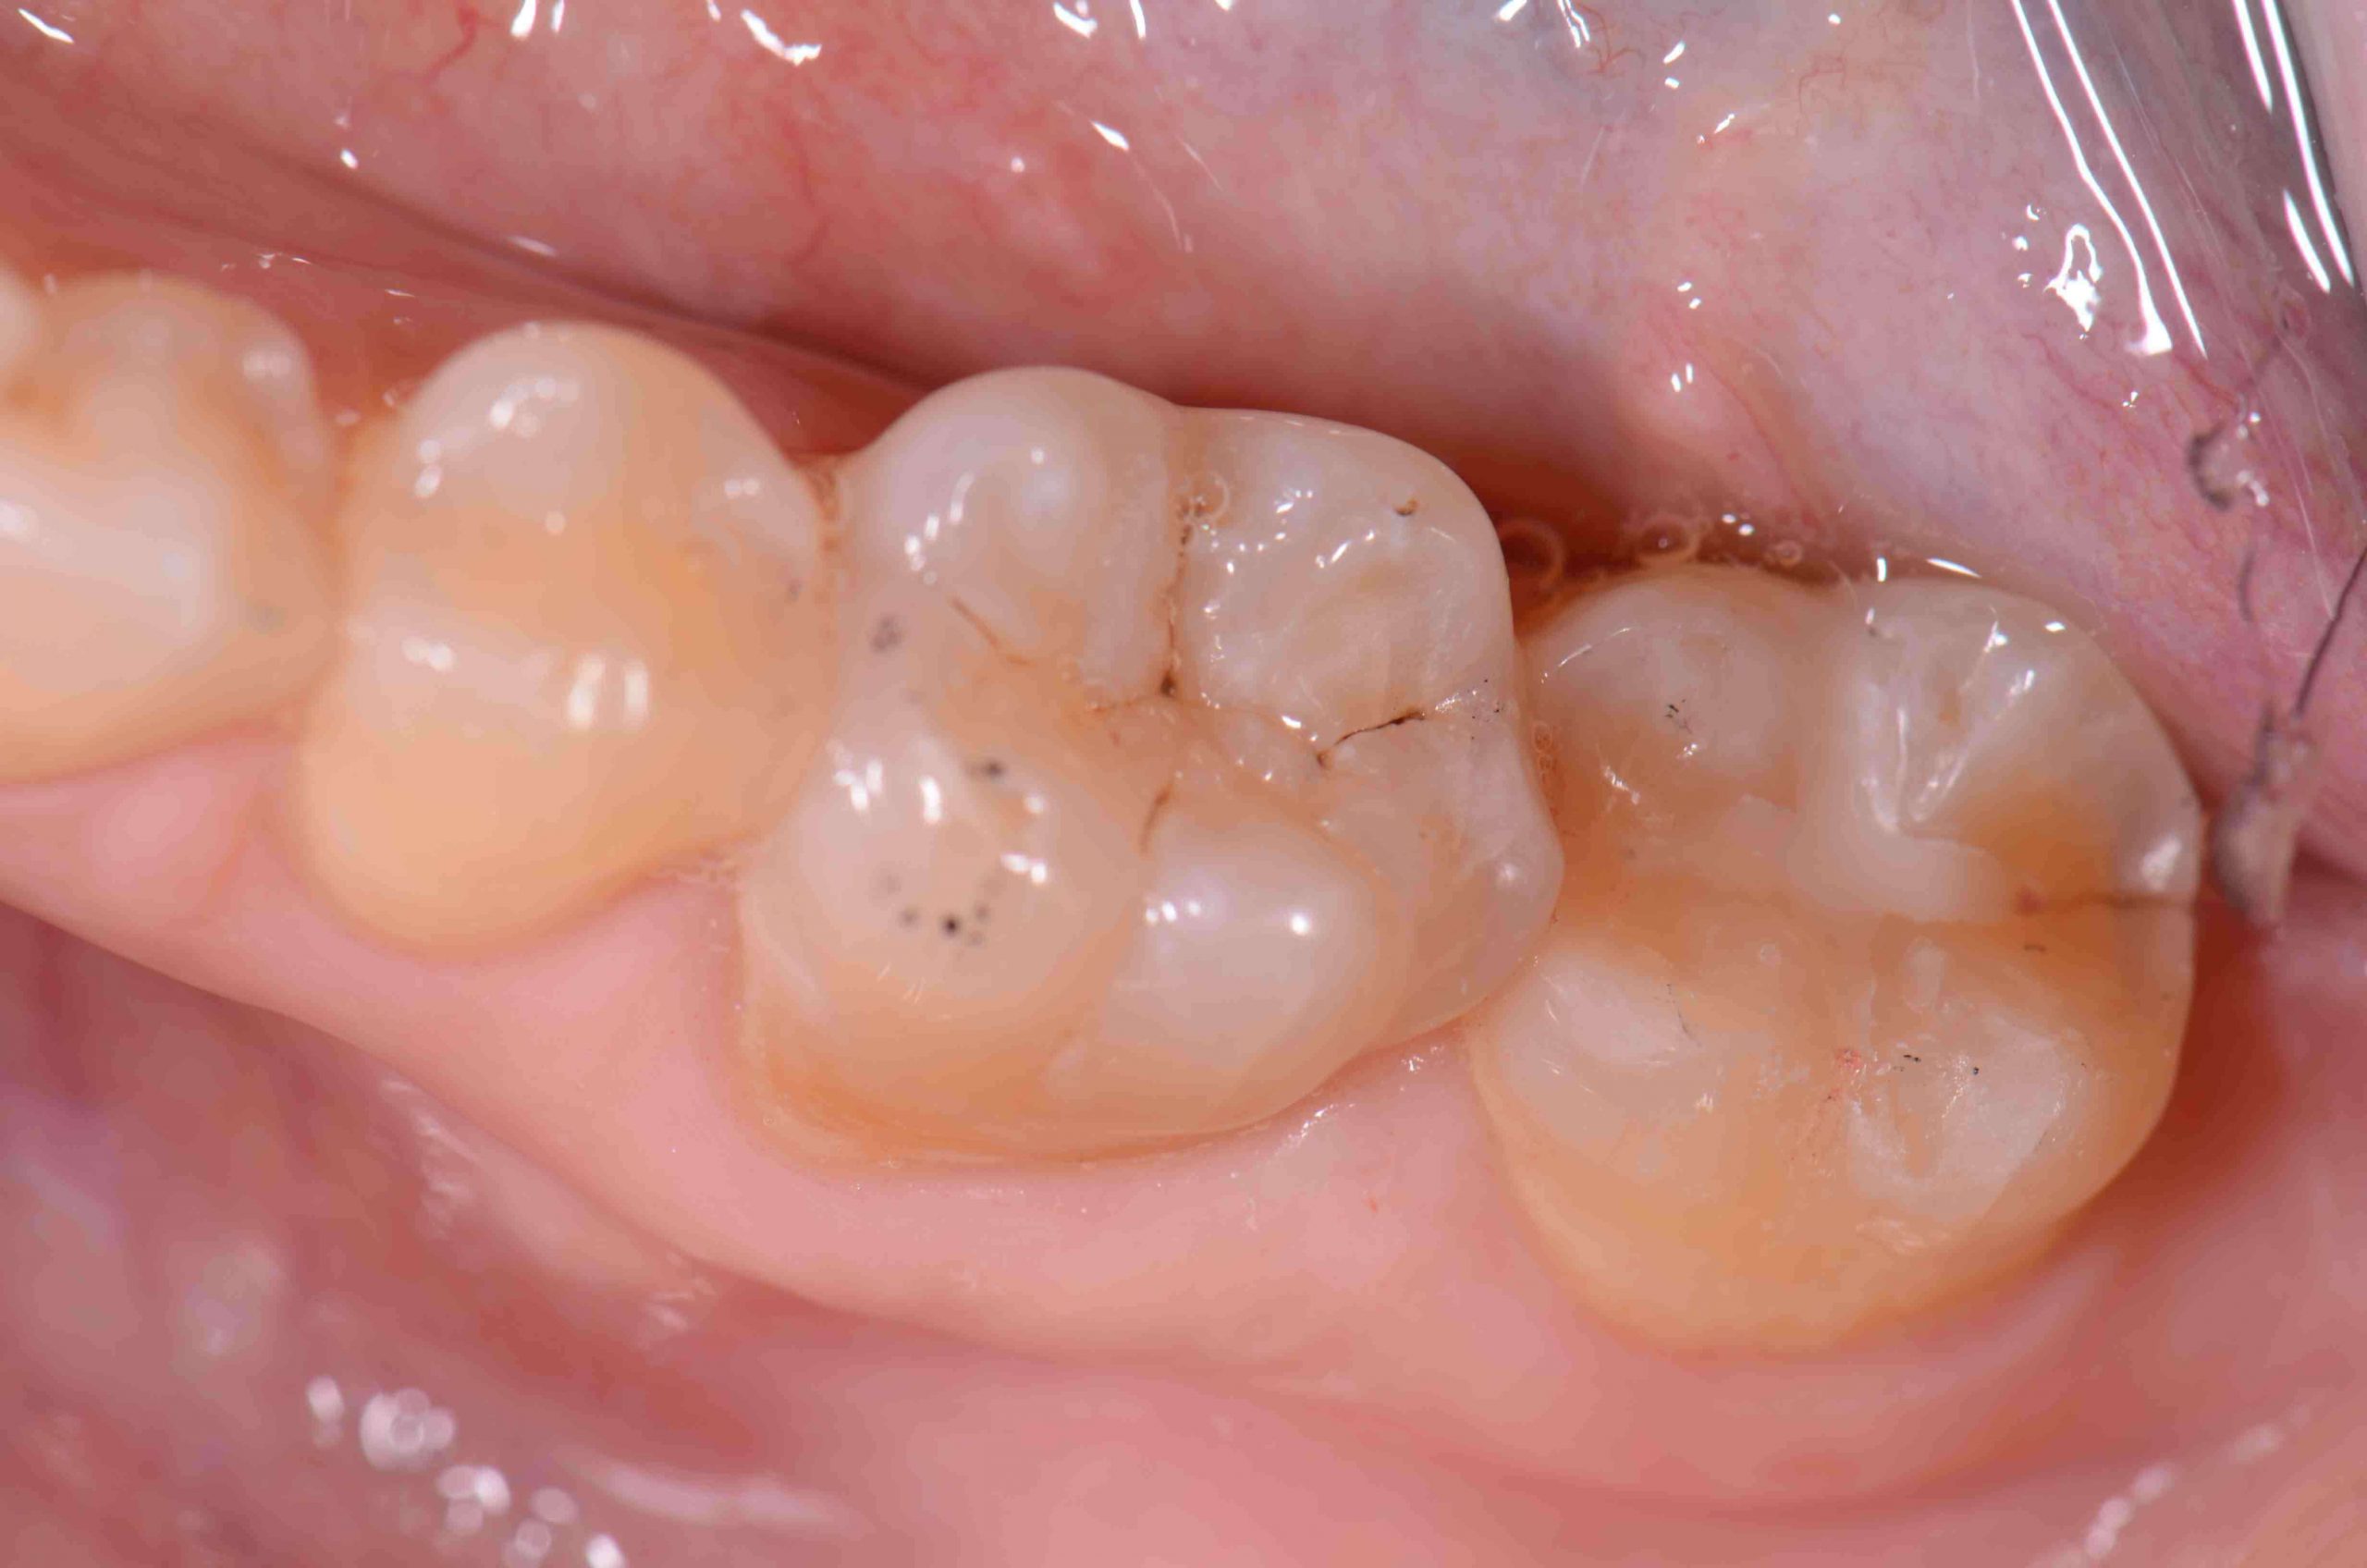
I took the photo with this post in my office. The patient has no other wear facets. #31 has a small, less than .5mm combination sealant/occlusal composite on this tooth. The distal wear facet does not touch in intercuspal position or excursives, but will mark using a leaf gauge to seat the condyles as the first point of contact. This facet marks in both the arc of closure and a power wiggle or abbreviated excursive movement from this first contact. #31 is also split from the gingival margin on the distal over the marginal ridge and right to the margin of the composite. I have seen and restored multiple examples just like this. In my experience when the crown comes back from the lab we will be able to adjust it in without issue, but the patient will report it feels high, or it will become chronically sensitive. The solution will be to either adjust this crown in both intercuspal position and centric relation, or incorporate an equilibration with the restorative care.

My belief is this patient parafunctions in centric relation.

Related Course

Direct Composite: Predictable, Easy and Beautiful

DATE: October 25 2024 @ 8:00 am - October 26 2024 @ 4:00 pm

Location: The Pankey Institute

CE HOURS: 14

Regular Tuition: $ 2195

Single Occupancy with Ensuite Private Bath (per night): $ 290

Achieving Predictable and Stunning Anterior Results Direct composite is something we do every day in our practices. Yet, they can sometimes be frustrating when we don’t get a tight contact…

Learn More>

About Author

User Image
Lee Ann Brady DMD

Dr. Lee Ann Brady is passionate about dentistry, her family and making a difference. She is a general dentist and owns a practice in Glendale, AZ limited to restorative dentistry. Lee’s passion for dental education began as a CE junkie herself, pursuing lots of advanced continuing education focused on Restorative and Occlusion. In 2005, she became a full time resident faculty member for The Pankey Institute, and was promoted to Clinical Director in 2006. Lee joined Spear Education as Executive VP of Education in the fall of 2008 to teach and coordinate the educational curriculum. In June of 2011, she left Spear Education, founded leeannbrady.com and joined the dental practice she now owns as an associate. Today, she teaches at dental meetings and study clubs both nationally and internationally, continues to write for dental journals and her website, sits on the editorial board of the Journal of Cosmetic Dentistry, Inside Dentistry and DentalTown Magazines and is the Director of Education for The Pankey Institute.

FIND A PANKEY DENTIST OR TECHNICIAN

I AM A
I AM INTERESTED IN

VIEW COURSE CALENDAR

Master Wax Centric Relation Bite Record 2

October 15, 2018 Pankey Gram

Now that you have fabricated the platform, the next step is to capture the record with the patient. You will need a heat source and a blue Delar wax Pencil.

The first step is to heat the sides of the Master Wax Platform so they are tempered. Take the wax to the patient’s mouth and place it over the maxillary teeth. The anterior edge of the wax should be at the embrasure between the canine and the lateral. Bend the corners over the canines to help with retention. Press the wax against the teeth and ask the patient to close gently into the wax. Cool the wax with your air water syringe, have the patient open, and continue to cool the platform before removing from the mouth.

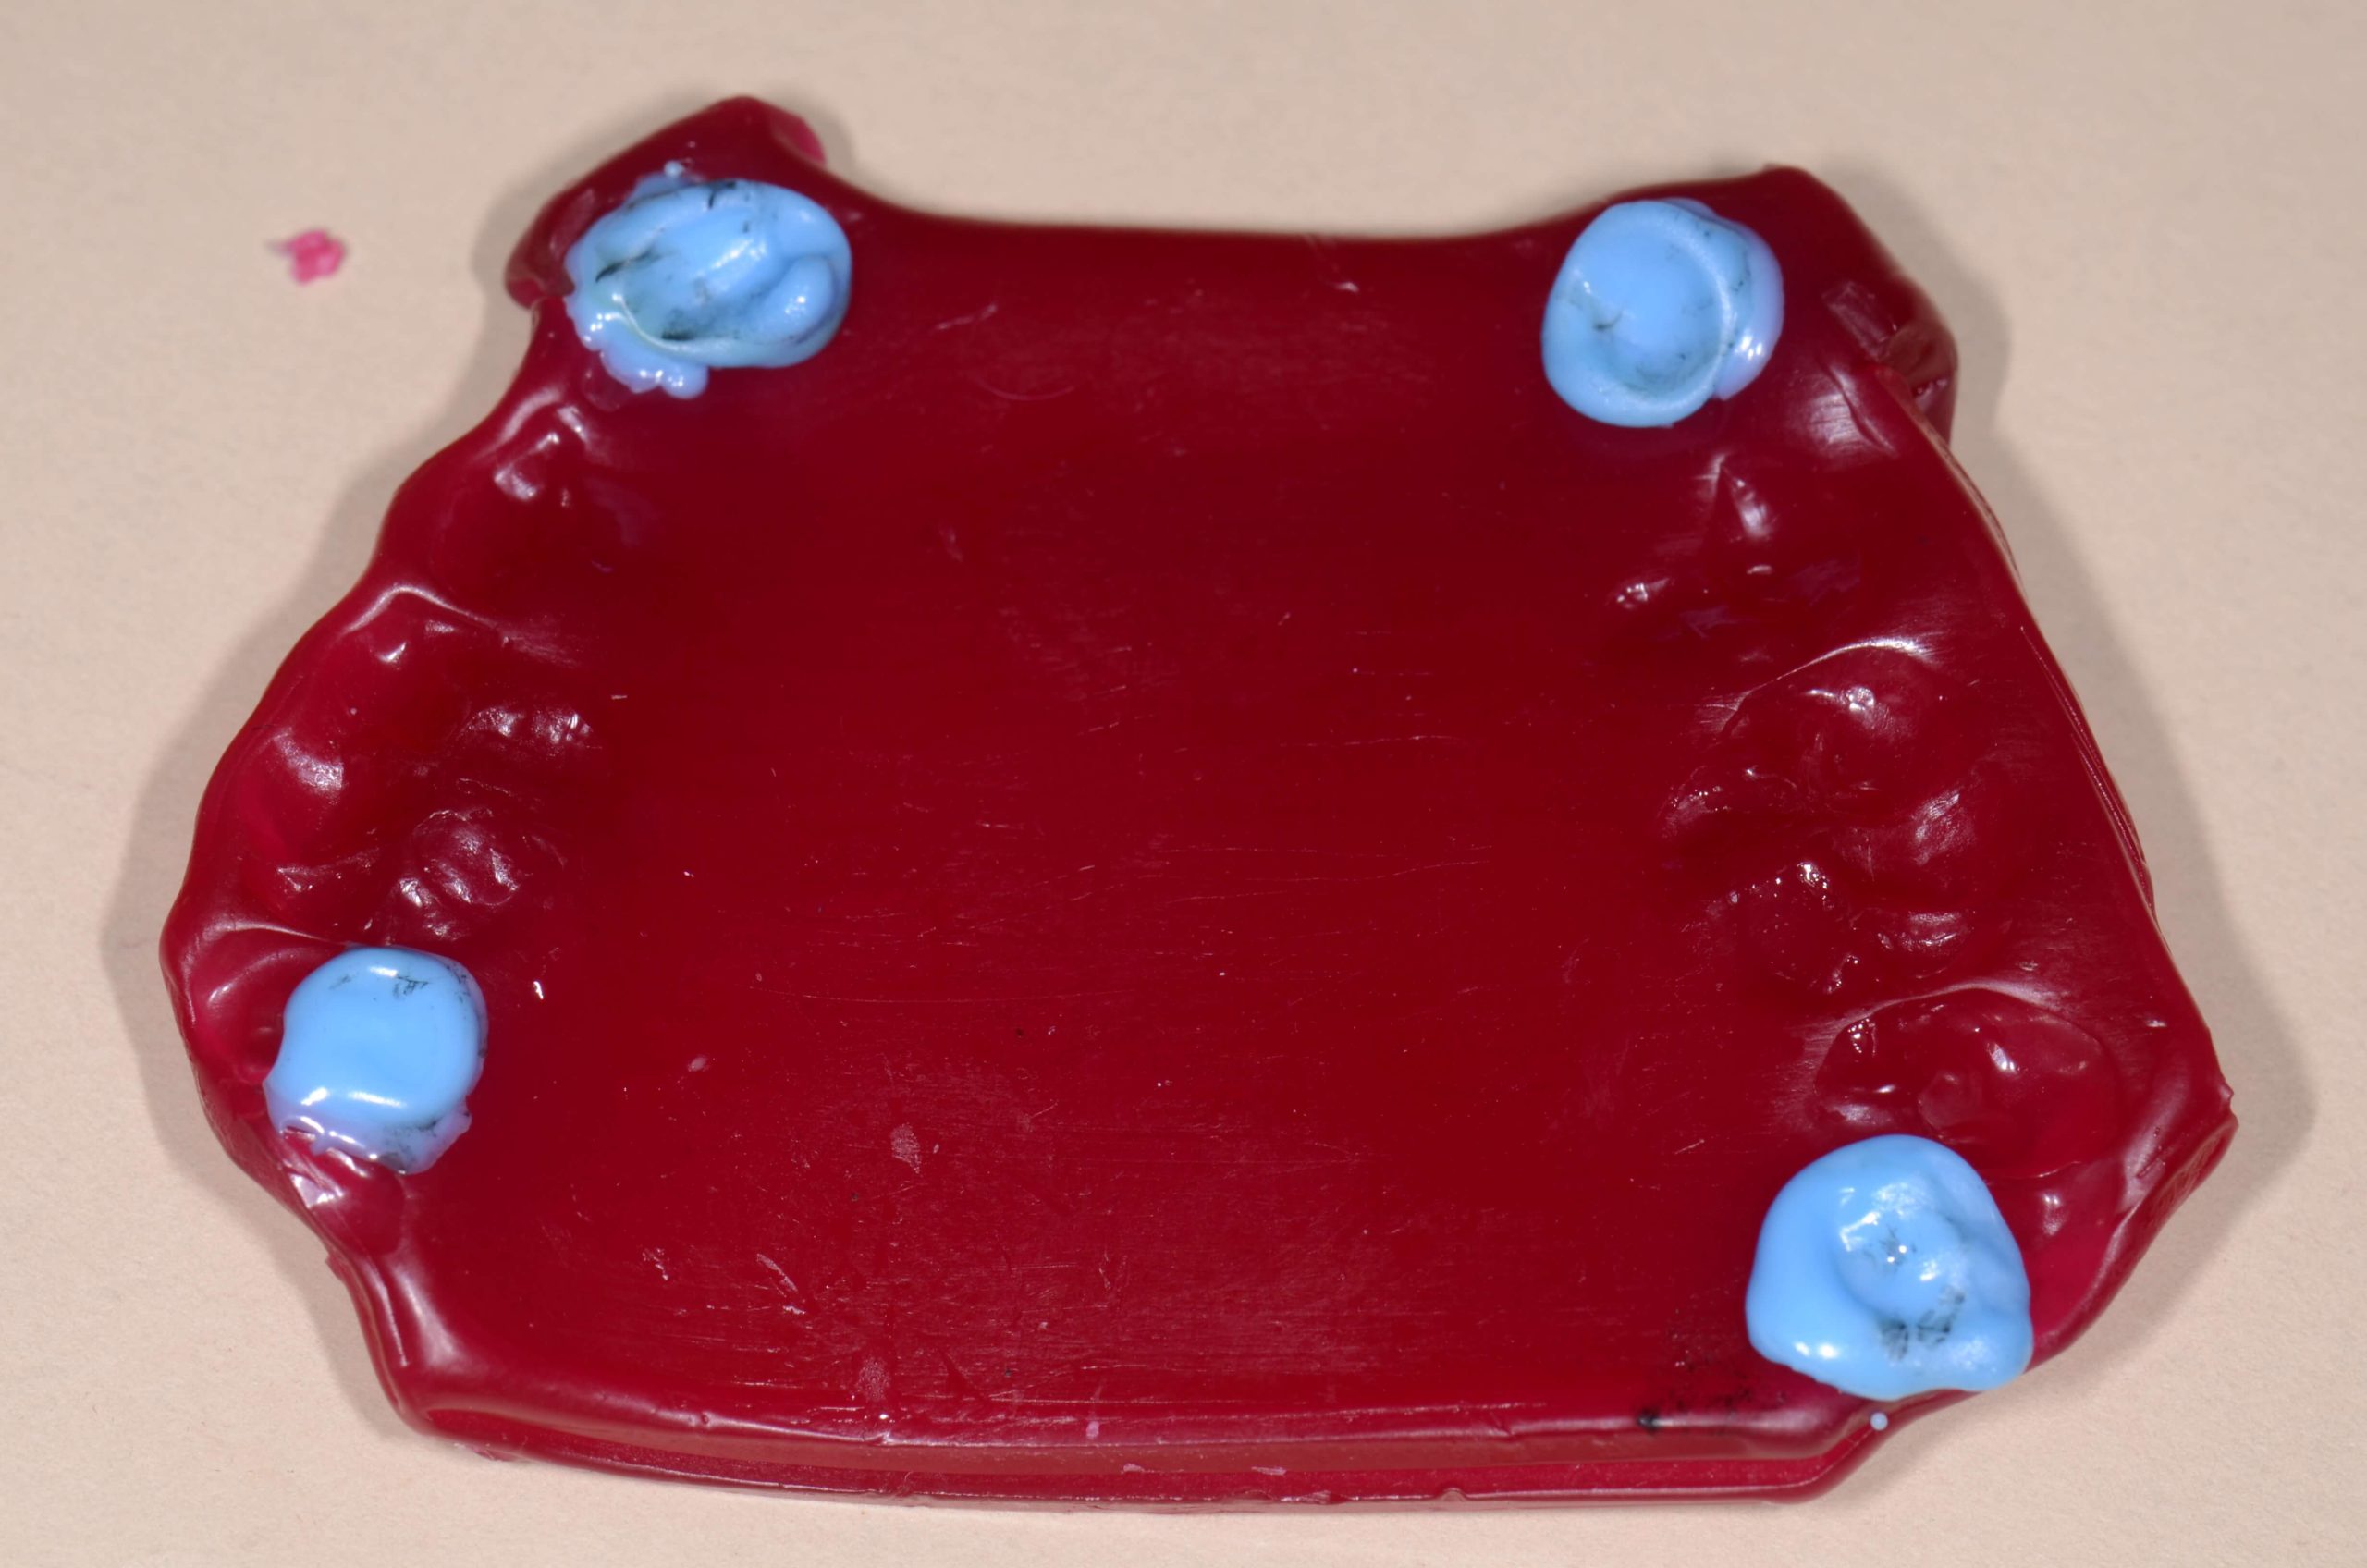
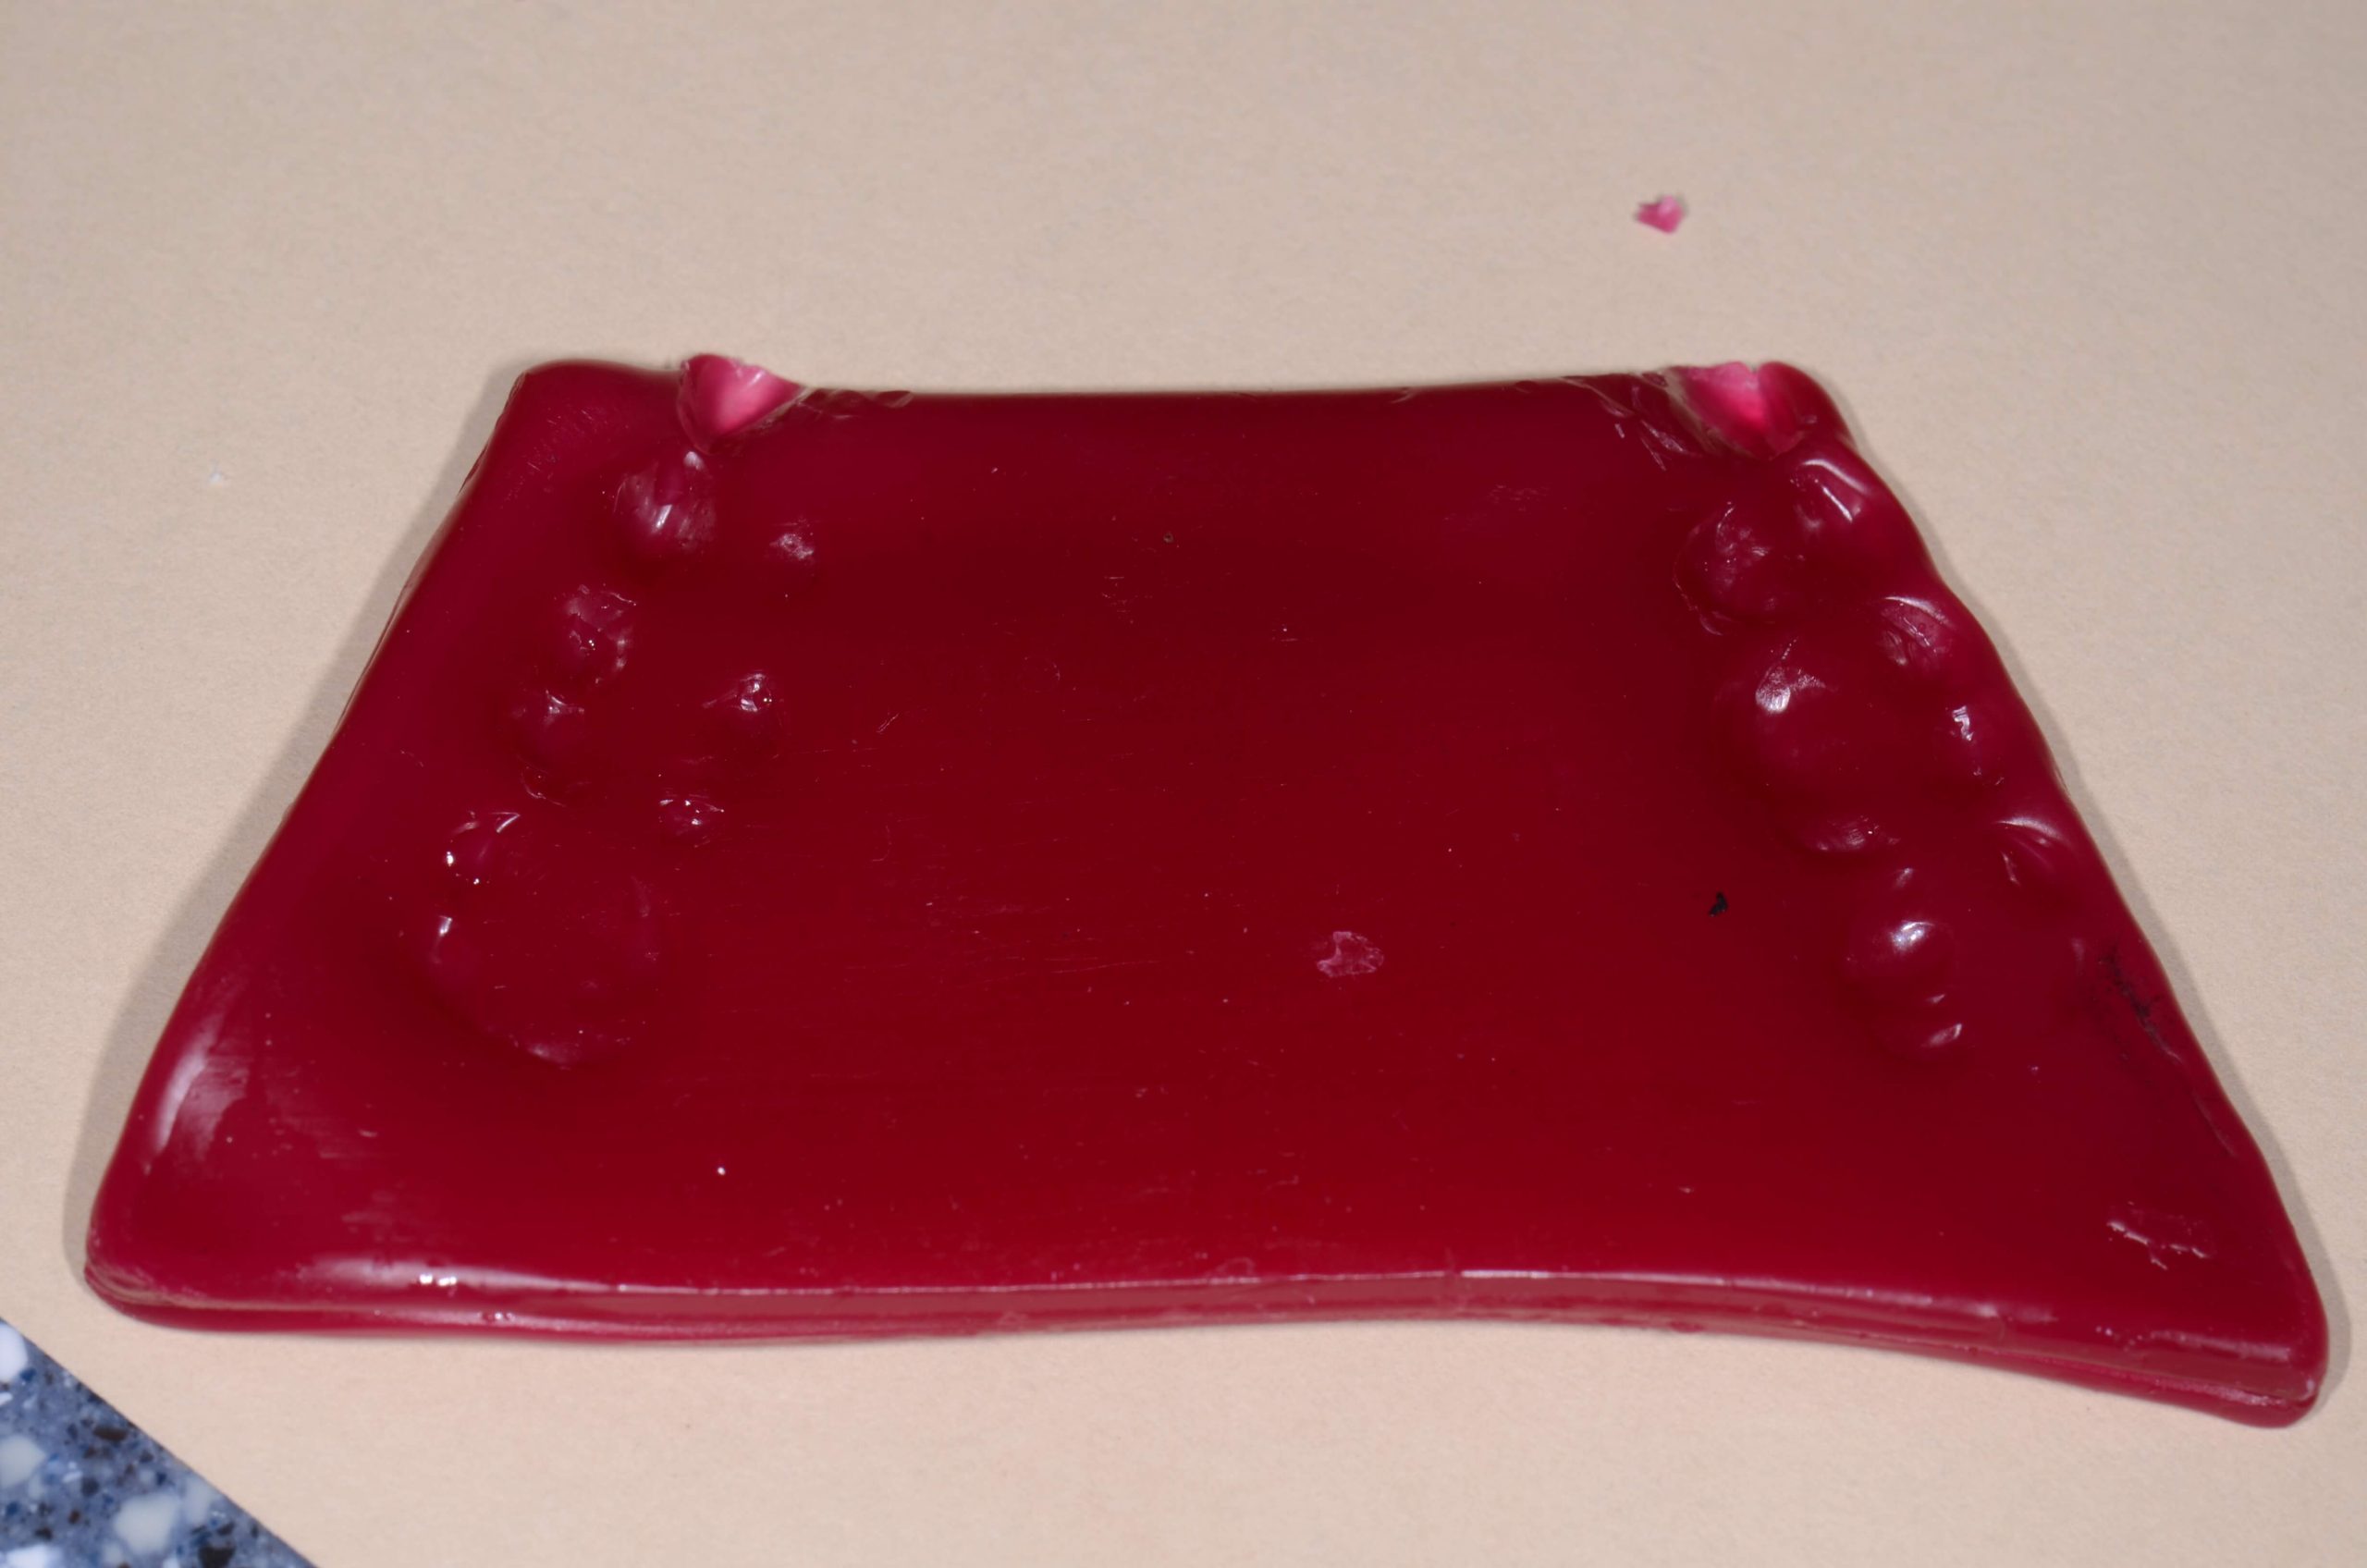
Using blue delar wax created a small bead where the lower canines have left an impression. Reseat the platform over the maxillary teeth and using bimanual guidance bring the lower canine cusp tips up until they just touch the blue wax. Have your assistant cool the wax with air. After removing the platform from the mouth add Delar wax where the second molars have left a cusp imprint. Then return the platform to the mouth and using bimanual guidance arc the patient into the wax so the lower molar cusp touches, then cool with air.

Your record should now be dropped into cool water. A disposable plastic container from the grocery works great. Write the patients name on it with sharpie marker and add it to their lab pan.


Related Course

E1: Aesthetic & Functional Treatment Planning

DATE: October 3 2024 @ 8:00 am - October 6 2024 @ 2:30 pm

Location: The Pankey Institute

CE HOURS: 39

Dentist Tuition: $ 6500

Single Occupancy Room with Ensuite Bath (Per Night): $ 290

Transform your experience of practicing dentistry, increase predictability, profitability and fulfillment. The Essentials Series is the Key, and Aesthetic and Functional Treatment Planning is where your journey begins.  Following a system of…

Learn More>

About Author

User Image
Pankey Gram

FIND A PANKEY DENTIST OR TECHNICIAN

I AM A
I AM INTERESTED IN

VIEW COURSE CALENDAR

Master Wax Centric Relation Bite Record 1

October 12, 2018 Pankey Gram

Analyzing a patient’s occlusion is key to providing optimal care. There are multiple ways to take a centric relation bite record, but one of the classics at Pankey has to be utilizing master wax. Easily mounting models in the laboratory is one of the main advantages of this method.

Although a slightly more challenging technique from a chairside perspective, it can still be accomplished with ease. Here is where to start:

Intro to the Master Wax Centric Relation Bite Record

Begin by gathering your necessary tools and materials. Start with a red master wax that looks just like baseplate wax from a standpoint of the size of the wax sheets, although it is different because it’s both softer and tackier. You will also need a blue wax pencil, scissors to cut the wax, a heat source such as an alcohol torch, and a way to light the heat source.

Take a single sheet of wax and temper it in the middle with the intention of being able to bend it in half. Once it is thoroughly tempered, bend it in half without cracking or breaking the wax. Make sure the bend is fairly crisp. After the wax has cooled a little bit, open it back up and cut it in half. Out of every sheet of wax, you should be able to generate two platforms for wax records.

Once again temper the wax halfway in the middle with the heat source. Tempering refers to heating to flexibility but not dripping. Again, fold the wax in half so you have a double thickness sheet. Then, cut the wax into the shape of the platform …

Look for the second part in this series about our master wax technique coming soon. And did you get a chance to read this Pankey Gram blog on enjoying Miami while you visit Pankey? Let us know what you think!

Related Course

E1: Aesthetic & Functional Treatment Planning

DATE: December 11 2025 @ 8:00 am - December 14 2025 @ 2:30 pm

Location: The Pankey Institute

CE HOURS: 39

Dentist Tuition: $ 6800

Single Occupancy with Ensuite Private Bath (Per Night): $ 345

Transform your experience of practicing dentistry, increase predictability, profitability and fulfillment. The Essentials Series is the Key, and Aesthetic and Functional Treatment Planning is where your journey begins.  Following a system of…

Learn More>

About Author

User Image
Pankey Gram

FIND A PANKEY DENTIST OR TECHNICIAN

I AM A
I AM INTERESTED IN

VIEW COURSE CALENDAR

Pankey Bite Stop Centric Relation Record

February 3, 2018 Jeff Baggett DDS

Taking a centric relation record with a Pankey Bite Stop can be simple and straightforward. Gather your tools and use these five steps to achieve success:

Five Steps of Taking a Centric Relation Record

1. Try-In: Evaluate the patient’s lower incisal plane for evenness. Try the Pankey Bite Stop on the upper teeth and have the patient close. Move the stop left or right to get an even contact between the most level area of the lower incisal edges.  

2. Preparing the Bite Stop: Squirt Futar-D Polyvinylsiloxane bite registration (regular set) into the underside of the Pankey Bite Stop. Reposition it onto the maxillary anterior teeth as done in step 1. Again, the goal is to position it in such a way as to capture two lower incisal edges that are as level as possible. They should also touch the upper occlusal surface of the record as parallel to each other as possible.   

Have the patient close to touch the bite stop and hold it until the Futar-D registration material is set firm (at least 45 seconds). As it is setting, you can have the patient quickly open once to wipe any excess registration material that has come out around the sides. This is so it does NOT go down past the incisal plane of the bite stop or catch any incisor on a protrusive movement. Have the patient close back down on the record lightly and hold until the registration material sets up.

3. Full Record: Now that the anterior Pankey Bite Stop is stable, in a very calm tone instruct the patient to slide their lower jaw forward, backward, and squeeze. Every 15 seconds, repeat this process. I will often go check on a hygiene patient and leave them to continue this movement as we are deprogramming muscles. 

Next, insert accufilm articulation paper (red side up) and have the patient slide forward and backward. Flip the articulation paper over and instruct the patient to bite in the very back position with the black side up. These posterior occlusal marks will be your reference points to check as you verify your record in the mouth.   

Dry the maxillary teeth with a 2×2 gauze. Squirt new Futar-D regular set polyvinylsiloxane material starting with the posterior teeth on both sides. The goal is to cover both the lingual and buccal cusps. This registers the lower buccal and lingual cusps for an accurate, stable record.

4. Trimming the Record: Beforehand, go to Home Depot/Lowes. Get a 1.5 inch drum sander and some fine sandpaper that fits on the drum. The sander will fit in your quick change lathe for gross trimming of the record. After gross trimming, go back with your E cutter lab carbide burs and fine-tune trim the record so only flat planes are left. There should be no grooves or sharp areas. 

5. Mounting Your Models: Once the record is properly trimmed and your accurate diagnostic models are properly groomed, place the records on the models. The records should sit passively and not lift off. If they do lift off the stone, go back and look for discrepancies in the record and the models. You are now ready to mount the models on a semi-adjustable articulator.

Pankey Bite Stops are available at the L.D.Pankey Resource center. Call 1-800-4-Pankey and ask for Mark Collis.

Related Course

E4: Posterior Reconstruction and Completing the Comprehensive Treatment Sequence

DATE: August 1 2024 @ 8:00 am - August 5 2024 @ 2:30 pm

Location: The Pankey Institute

CE HOURS: 44

Dentist Tuition: $ 7300

night with private bath: $ 290

This Course Is Sold Out! The purpose of this course is to help you develop mastery with complex cases involving advanced restorative procedures, precise sequencing and interdisciplinary coordination. Building on…

Learn More>

About Author

User Image
Jeff Baggett DDS

Dr. Jeff D. Baggett attended Oklahoma State University where he received his undergraduate degree and attended professional school at the University of Oklahoma College of Dentistry. After obtaining his Doctorate of Dental Surgery degree, Dr. Baggett received postgraduate training at the L.D. Pankey Institute, recognized worldwide for its excellence in advanced technical dentistry. He was accredited as a Pankey Scholar. Practicing for over 30 years, Dr. Baggett is also a visiting faculty member at the L.D. Pankey Institute. He lectures various dental study clubs and dental meetings. He is a guest speaker of the Victim's Impact Panel Against Drunk Driving. A published author, Dr. Baggett wrote sections in the book Photoshop CS3 and PowerPoint 2007 for the Dental Professional. Dr. Baggett is also the team dentist for the Oklahoma City Thunder with his partner, Dr. Lembke. An esteemed member of the dental community, Dr. Baggett is a member of many professional organizations including the American Dental Association, the Oklahoma Dental Association, the Oklahoma County Dental Society, the Southwest Academy of Restorative Dentistry, the McGarry Study Club, the University Oklahoma College of Dentistry Alumni Association and the Oklahoma State University Alumni Association. He also served on the Board of Directors of the Oklahoma County Dental Society.

FIND A PANKEY DENTIST OR TECHNICIAN

I AM A
I AM INTERESTED IN

VIEW COURSE CALENDAR

3 Tips to Capture Bite Records For Diagnostic Models

September 29, 2017 Lee Ann Brady DMD

We have multiple options when we want to capture bite records for diagnostic models that will be mounted in a seated condylar position. Our approach will depend on specific patients and their needs. This will ensure we can get more accuracy on a more consistent basis. In the end, we’ll have less frustration when we modify our methods to the unique situation.

Here is a great go-to guide for bite records in a variety of circumstances:

3 Tips for Bite Records

1. Patients who need to release muscles or who tighten their muscles as a response to procedures.

In this case, we use bite registration silicone with a leaf gauge or a lucia jig. The leaf gauge allows is to set the vertical dimension to only allow 1mm of thickness of silicone between the posterior teeth. A lucia jig bite record is taken at a more open vertical dimension, but this is the perfect distance for a universal appliance.

Patients with positive muscle findings are most commonly deprogramed through appliance therapy at night, and then true centric relation bite records are taken at the end. Deprogramming can be accomplished with a temporary anterior discluder called a QuickSplint or a more permanent appliance in multiple different designs.

The main challenges with silicone bites include trimming and mounting for an accurate representation and dealing with patients who posture forward.

2. Patients who have relaxed musculature and no findings on a joint & muscle exam.

This situation calls for capturing records with a wax platform. This is a very popular technique at Pankey and produces quite an accurate record result as it is taken at the smallest increase of vertical dimension. Plus, it’s easy to mount while maintaining that high accuracy. As a second choice a leaf gauge with silicone can be used making sure that the fewest number of leaves possible are used just to gain adequate thickness of the silicone.

3. Patients at the end of deprogramming or appliance therapy.

Here again a wax platform record is very advantageous. Wax platforms are made from Schuyler wax. This wax comes in sheets that resemble baseplate, but are a deep red.

For this, you’ll want to tell the patient to take their appliance out to brush and eat breakfast the morning of the appointment. Then they should wear it to the office and then you can take it out to capture the bite record.

For the wax platform: Heat the sheet at the midpoint, cut it in half, then heat each half at the midline, folding to double thickness. Finally, cut the sides for a trapezoid shape. The occlusal stops are placed at the canine and second molar positions and made out of Delar wax. The record is captured using bimanual guidance or can be done with a leaf gauge.

What indicators make you decide to change your technical approach? We’d love to hear from you in the comments! 

Related Course

E4: Posterior Reconstruction and Completing the Comprehensive Treatment Sequence

DATE: August 1 2024 @ 8:00 am - August 5 2024 @ 2:30 pm

Location: The Pankey Institute

CE HOURS: 44

Dentist Tuition: $ 7300

night with private bath: $ 290

This Course Is Sold Out! The purpose of this course is to help you develop mastery with complex cases involving advanced restorative procedures, precise sequencing and interdisciplinary coordination. Building on…

Learn More>

About Author

User Image
Lee Ann Brady DMD

Dr. Lee Ann Brady is passionate about dentistry, her family and making a difference. She is a general dentist and owns a practice in Glendale, AZ limited to restorative dentistry. Lee’s passion for dental education began as a CE junkie herself, pursuing lots of advanced continuing education focused on Restorative and Occlusion. In 2005, she became a full time resident faculty member for The Pankey Institute, and was promoted to Clinical Director in 2006. Lee joined Spear Education as Executive VP of Education in the fall of 2008 to teach and coordinate the educational curriculum. In June of 2011, she left Spear Education, founded leeannbrady.com and joined the dental practice she now owns as an associate. Today, she teaches at dental meetings and study clubs both nationally and internationally, continues to write for dental journals and her website, sits on the editorial board of the Journal of Cosmetic Dentistry, Inside Dentistry and DentalTown Magazines and is the Director of Education for The Pankey Institute.

FIND A PANKEY DENTIST OR TECHNICIAN

I AM A
I AM INTERESTED IN

VIEW COURSE CALENDAR