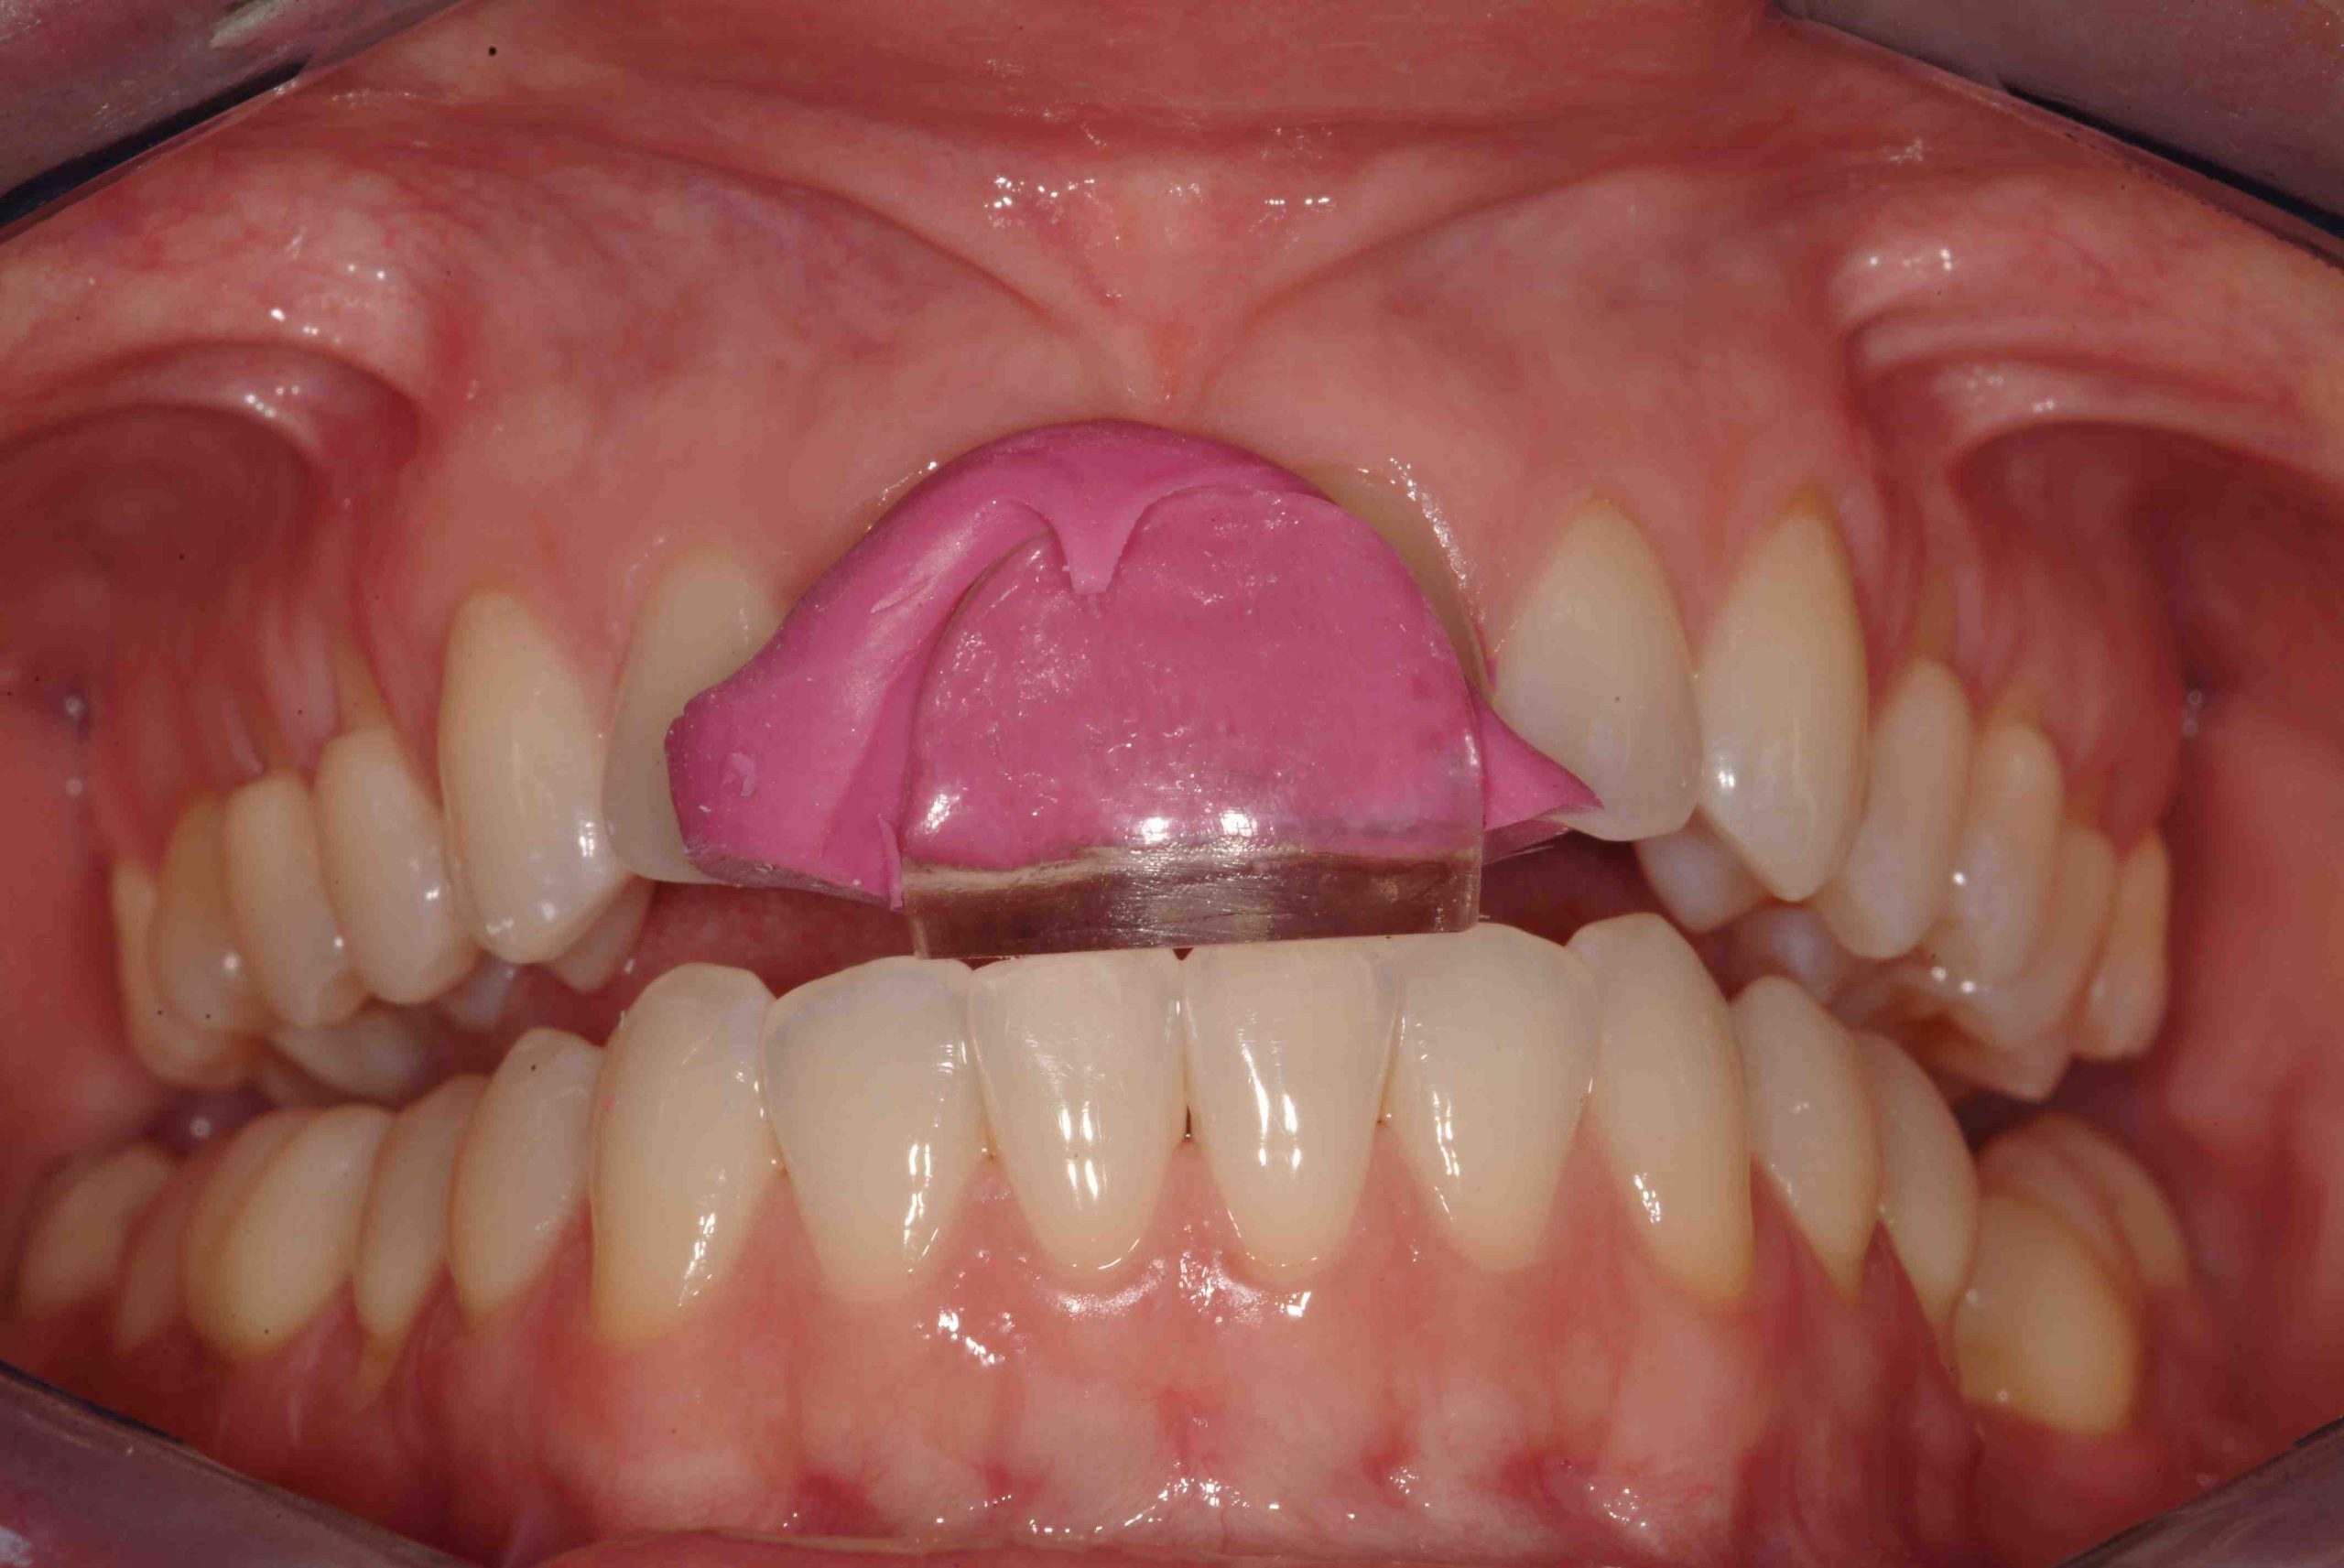
Pankey Bite Stop Centric Relation Record
Taking a centric relation record with a Pankey Bite Stop can be simple and straightforward. Gather your tools and use these five steps to achieve success:
Five Steps of Taking a Centric Relation Record
1. Try-In: Evaluate the patient’s lower incisal plane for evenness. Try the Pankey Bite Stop on the upper teeth and have the patient close. Move the stop left or right to get an even contact between the most level area of the lower incisal edges.
2. Preparing the Bite Stop: Squirt Futar-D Polyvinylsiloxane bite registration (regular set) into the underside of the Pankey Bite Stop. Reposition it onto the maxillary anterior teeth as done in step 1. Again, the goal is to position it in such a way as to capture two lower incisal edges that are as level as possible. They should also touch the upper occlusal surface of the record as parallel to each other as possible.
Have the patient close to touch the bite stop and hold it until the Futar-D registration material is set firm (at least 45 seconds). As it is setting, you can have the patient quickly open once to wipe any excess registration material that has come out around the sides. This is so it does NOT go down past the incisal plane of the bite stop or catch any incisor on a protrusive movement. Have the patient close back down on the record lightly and hold until the registration material sets up.
3. Full Record: Now that the anterior Pankey Bite Stop is stable, in a very calm tone instruct the patient to slide their lower jaw forward, backward, and squeeze. Every 15 seconds, repeat this process. I will often go check on a hygiene patient and leave them to continue this movement as we are deprogramming muscles.
Next, insert accufilm articulation paper (red side up) and have the patient slide forward and backward. Flip the articulation paper over and instruct the patient to bite in the very back position with the black side up. These posterior occlusal marks will be your reference points to check as you verify your record in the mouth.
Dry the maxillary teeth with a 2×2 gauze. Squirt new Futar-D regular set polyvinylsiloxane material starting with the posterior teeth on both sides. The goal is to cover both the lingual and buccal cusps. This registers the lower buccal and lingual cusps for an accurate, stable record.
4. Trimming the Record: Beforehand, go to Home Depot/Lowes. Get a 1.5 inch drum sander and some fine sandpaper that fits on the drum. The sander will fit in your quick change lathe for gross trimming of the record. After gross trimming, go back with your E cutter lab carbide burs and fine-tune trim the record so only flat planes are left. There should be no grooves or sharp areas.
5. Mounting Your Models: Once the record is properly trimmed and your accurate diagnostic models are properly groomed, place the records on the models. The records should sit passively and not lift off. If they do lift off the stone, go back and look for discrepancies in the record and the models. You are now ready to mount the models on a semi-adjustable articulator.
Pankey Bite Stops are available at the L.D.Pankey Resource center. Call 1-800-4-Pankey and ask for Mark Collis.
Related Course
E4: Posterior Reconstruction and Completing the Comprehensive Treatment Sequence
DATE: May 15 2025 @ 8:00 am - May 19 2025 @ 2:30 pmLocation: The Pankey Institute
CE HOURS: 44
Dentist Tuition: $ 7400
Single Occupancy with Ensuite Private Bath (per night): $ 345
The purpose of this course is to help you develop mastery with complex cases involving advanced restorative procedures, precise sequencing and interdisciplinary coordination. Building on the learning in Essentials Three…
Learn More>


