Precise Prepping for Veneers 

November 6, 2024 Charlie Ward, DDS

By Charlie Ward, DDS,

You’ve done your digital planning, printed your models, and created a mockup. That’s great! But before you start prepping those teeth, we need to make sure that mockup is spot on. Why? Because a precise mockup ensures that our preparations create enough space for the restorative material. 

Here’s where the magic happens: digital calipers. Yep, those little measuring tools are our secret weapon. We measure the distal-most tooth on each side and one in the middle. Then, we compare those measurements to the ones we took from the model. If they’re within a tenth of a millimeter, we’re good to go! 

A quick tip: If you’re right-handed like me, be mindful of applying even pressure when seating the matrices. You don’t want to push harder on one side than the other. 

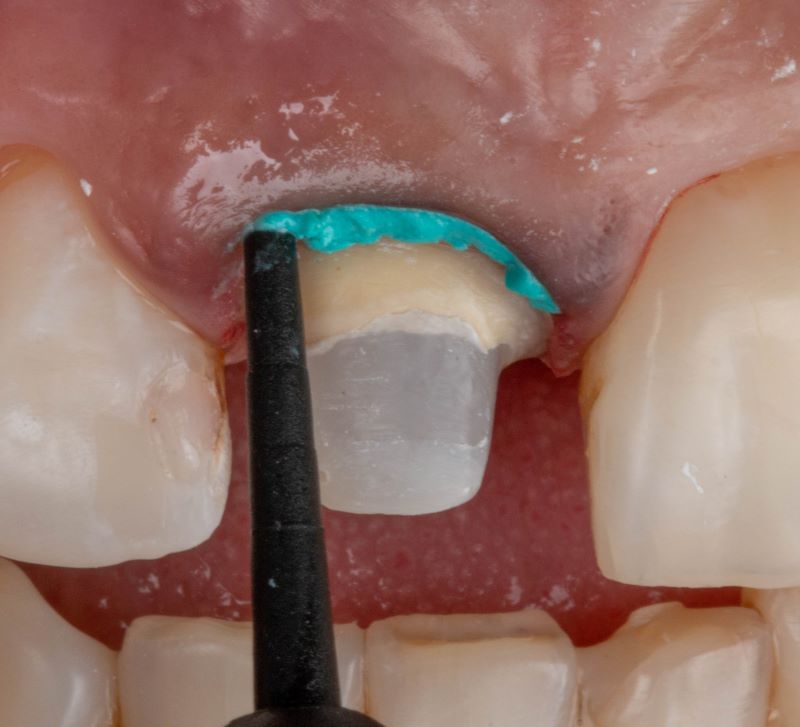
The next step is the prep stage. When working with veneer patients, we must be very intentional while removing tooth structure from our mockup so that we can create adequate room for restorative material. On Restorative Nation, Veneers Tips and Tricks Prep With Intention – Restorative Nation, I demonstrate various burs. It’s through a thorough understanding and careful selection of burs that we can guarantee an accurate preparation. 

Related Course

Mastering Dental Photography: From Start to Finish

DATE: October 29 2026 @ 8:00 am - October 31 2026 @ 12:00 pm

Location: The Pankey Institute

CE HOURS: 19

Regular Tuition: $ 2995

Single Occupancy with Ensuite Private Bath (per night): $ 355

Dental photography is an indispensable tool for a high level practice. We will review camera set-up and what settings to use for each photo. All photos from diagnostic series, portraits,…

Learn More>

About Author

Default Avatar
Charlie Ward, DDS

FIND A PANKEY DENTIST OR TECHNICIAN

I AM A
I AM INTERESTED IN

VIEW COURSE CALENDAR

Unraveling the Mystery of Dental Wear  

October 26, 2024 Lee Ann Brady DMD

Lee Ann Brady, DMD 

The origin of a patient’s dental wear may be deceiving. Is it physiological or pathological? This minor difference could spell major consequences for the lifetime oral health of your patients. We care about understanding the differences and how to manage them for the benefit of our patients. 

What is the amount of normal tooth wear? 

To understand normal tooth wear, let’s compare the size of teeth at age 10 to their size at age 70. Based on extensive research, we’ve found that the average loss of tooth structure over this 60-year period is approximately: 

  • 1.74 millimeters on posterior teeth (first molars) 
  • 1.01 millimeters on upper anterior teeth (centrals and laterals) 

This equates to roughly 15-26 microns of wear per year, depending on the tooth type. 

It’s important to note that this includes all forms of wear, such as attrition, erosion, and abrasion. Even with this normal wear, most people should still have a layer of enamel on their teeth at age 70. In fact, you might expect to retain at least half of the original enamel thickness on your incisal edges and cusps. 

While a certain amount of tooth wear is a normal part of aging, it’s important to distinguish between physiologic wear and pathologic wear. Physiologic wear is a natural part of aging and includes abrasion, erosion, and attrition. It occurs at a predictable rate and typically does not result in significant tooth structure loss. If you notice excessive tooth wear beyond the expected range of 15-26 microns of wear per year, it may be a sign of an underlying issue that requires further evaluation. 

What is the patient-centered approach to discussing wear and understanding the cause of tooth wear? 

When discussing tooth wear with patients, it’s essential to approach the conversation with empathy and understanding. By using a patient-centered approach, you can foster open communication and encourage patients to take an active role in their oral health care. 

  • Open-Ended Questions: Ask open-ended questions to encourage patients to share their observations and experiences. For example, you might say, “I’ve noticed some wear on your teeth. Have you noticed any changes in how your teeth feel or look?” 
  • Avoid Assumptions: Don’t jump to conclusions about the cause of tooth wear. Instead, ask questions to gather more information and explore potential contributing factors. 
  • Emphasize Collaboration: Emphasize that you’re working together to identify the cause of tooth wear and develop a treatment plan. This fosters a sense of partnership and encourages patient involvement. 
  • Avoid Blame: Avoid blaming the patient for tooth wear. Instead, focus on identifying the underlying causes and developing strategies for prevention and treatment. 

What do I say to my patients? 

I always start from a place of curiosity. I might say, “When I examine your teeth, I notice some wear that seems more than what’s typical for your age. I’m curious if you’ve noticed any changes in how your teeth feel or look. Sometimes, unusual wear can be a sign of underlying issues like teeth grinding, acid reflux, or other factors.” 

Many times, patients will then say to me, “I don’t know. Do you think I grind my teeth?” or “I don’t know. I do have acid reflux.” If the patient says, “Gosh, I don’t know what that’s about,” the next piece of the puzzle is to take my curiosity and help them understand what we would do diagnostically to figure that out and potentially what we would do to manage that. 

If I think the wear is erosive, the conversation can turn to acid reflux or an acidic diet or abrasive toothpaste. If I think it’s erosive, the conversation leads to “seeing if we can learn what your teeth are doing when you sleep at night. If you’re grinding your teeth, that is something we can manage.” 

I never start with “I think you grind your teeth,” or “I think you have acid reflux,” no matter how confident I am that that is the case. I don’t approach it that way for a couple of reasons. I need to give the patient a chance to process that information and come to terms with the fact that something may be going on that they weren’t aware of beforehand. There’s an emotional impact from hearing that information, so we want to deliver it in a gentle way. And I want the patient to become aware of what may be happening on their own. I want to create a co-discovery process.  

The general message is “We can work together to figure out what might be causing this. By understanding the cause, we can work together to determine the best course of action to protect your teeth and prevent further wear.” 

Related Course

Mastering Dental Photography: From Start to Finish

DATE: October 29 2026 @ 8:00 am - October 31 2026 @ 12:00 pm

Location: The Pankey Institute

CE HOURS: 19

Regular Tuition: $ 2995

Single Occupancy with Ensuite Private Bath (per night): $ 355

Dental photography is an indispensable tool for a high level practice. We will review camera set-up and what settings to use for each photo. All photos from diagnostic series, portraits,…

Learn More>

About Author

User Image
Lee Ann Brady DMD

Dr. Lee Ann Brady is passionate about dentistry, her family and making a difference. She is a general dentist and owns a practice in Glendale, AZ limited to restorative dentistry. Lee’s passion for dental education began as a CE junkie herself, pursuing lots of advanced continuing education focused on Restorative and Occlusion. In 2005, she became a full time resident faculty member for The Pankey Institute, and was promoted to Clinical Director in 2006. Lee joined Spear Education as Executive VP of Education in the fall of 2008 to teach and coordinate the educational curriculum. In June of 2011, she left Spear Education, founded leeannbrady.com and joined the dental practice she now owns as an associate. Today, she teaches at dental meetings and study clubs both nationally and internationally, continues to write for dental journals and her website, sits on the editorial board of the Journal of Cosmetic Dentistry, Inside Dentistry and DentalTown Magazines and is the Director of Education for The Pankey Institute.

FIND A PANKEY DENTIST OR TECHNICIAN

I AM A
I AM INTERESTED IN

VIEW COURSE CALENDAR

Facts About Zirconia from the Literature 

October 18, 2024 Christopher Mazzola, DDS

Christopher Mazzola, DDS 

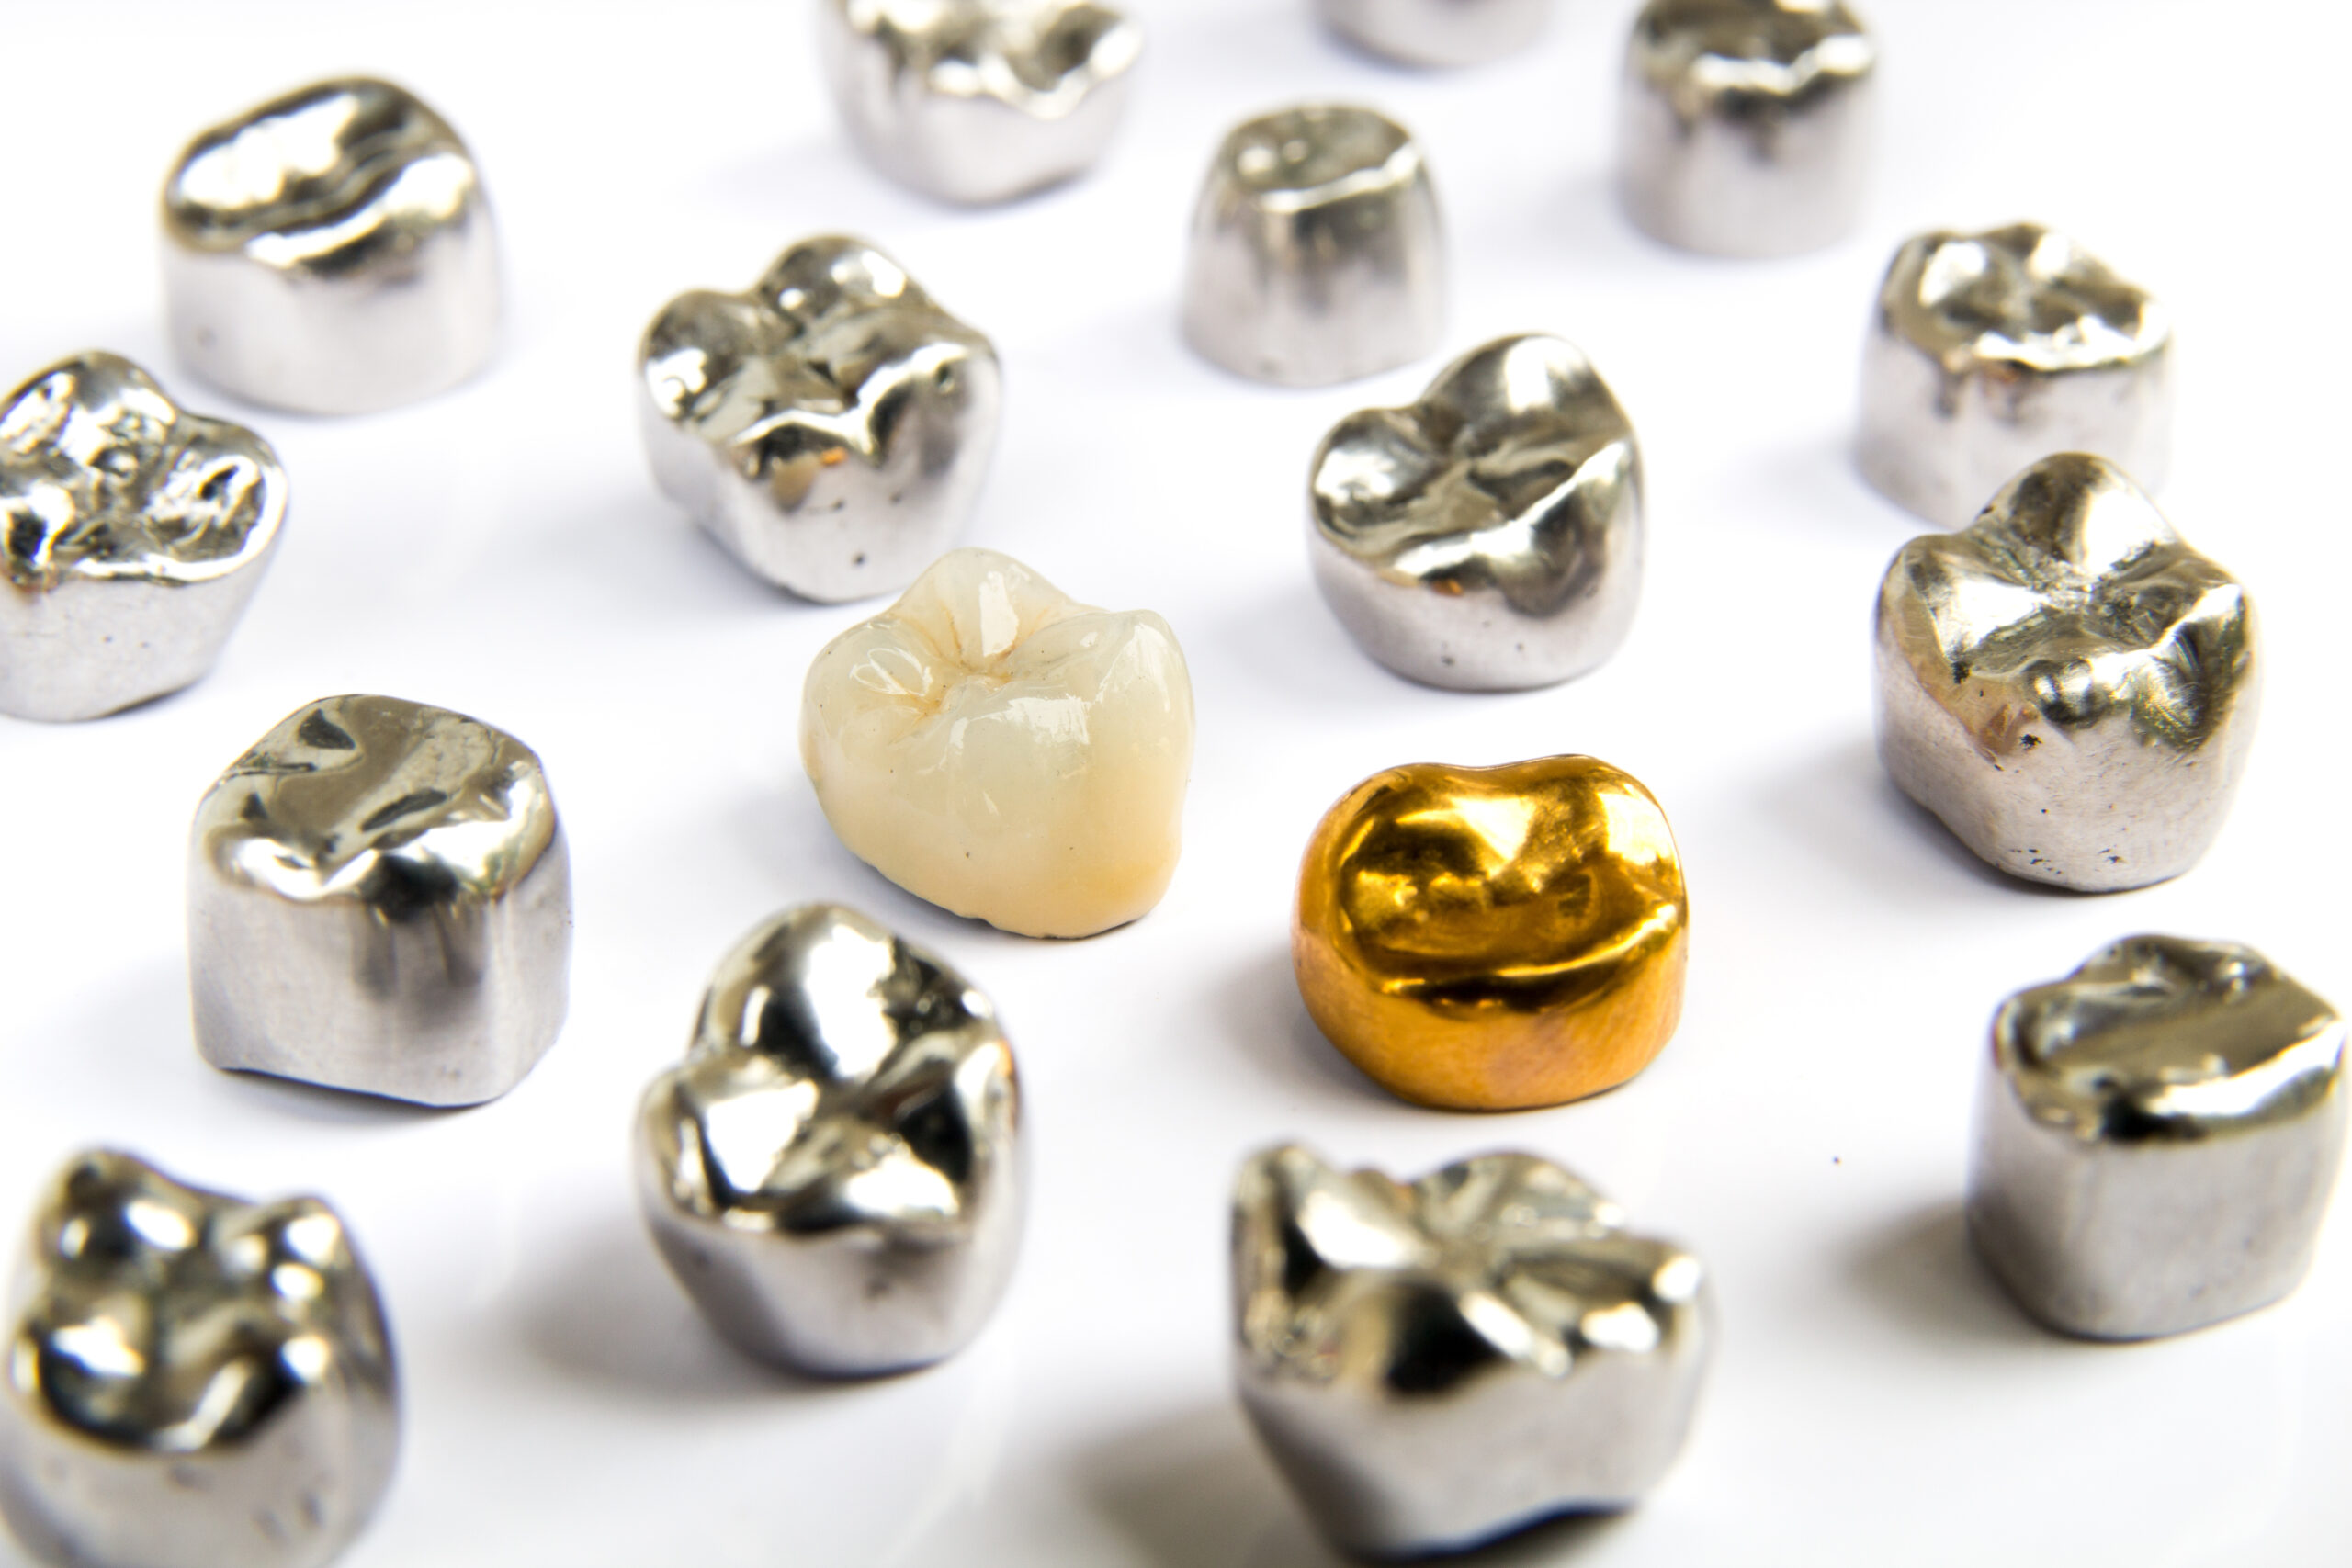
The purpose of looking at recent research data is to see how we can improve our clinical success. Different scholarly journals inform us of ways to decrease risk and hopefully increase the longevity of the services that we’re providing to our patients. In this article, I’ll summarize what I’ve learned from recent research literature about the various types of zirconia we receive from our dental laboratories and properties of zirconia that influence the quality and longevity of the dentistry we do. I found these facts fascinating from the perspective of wanting to know how to use zirconia optimally.  

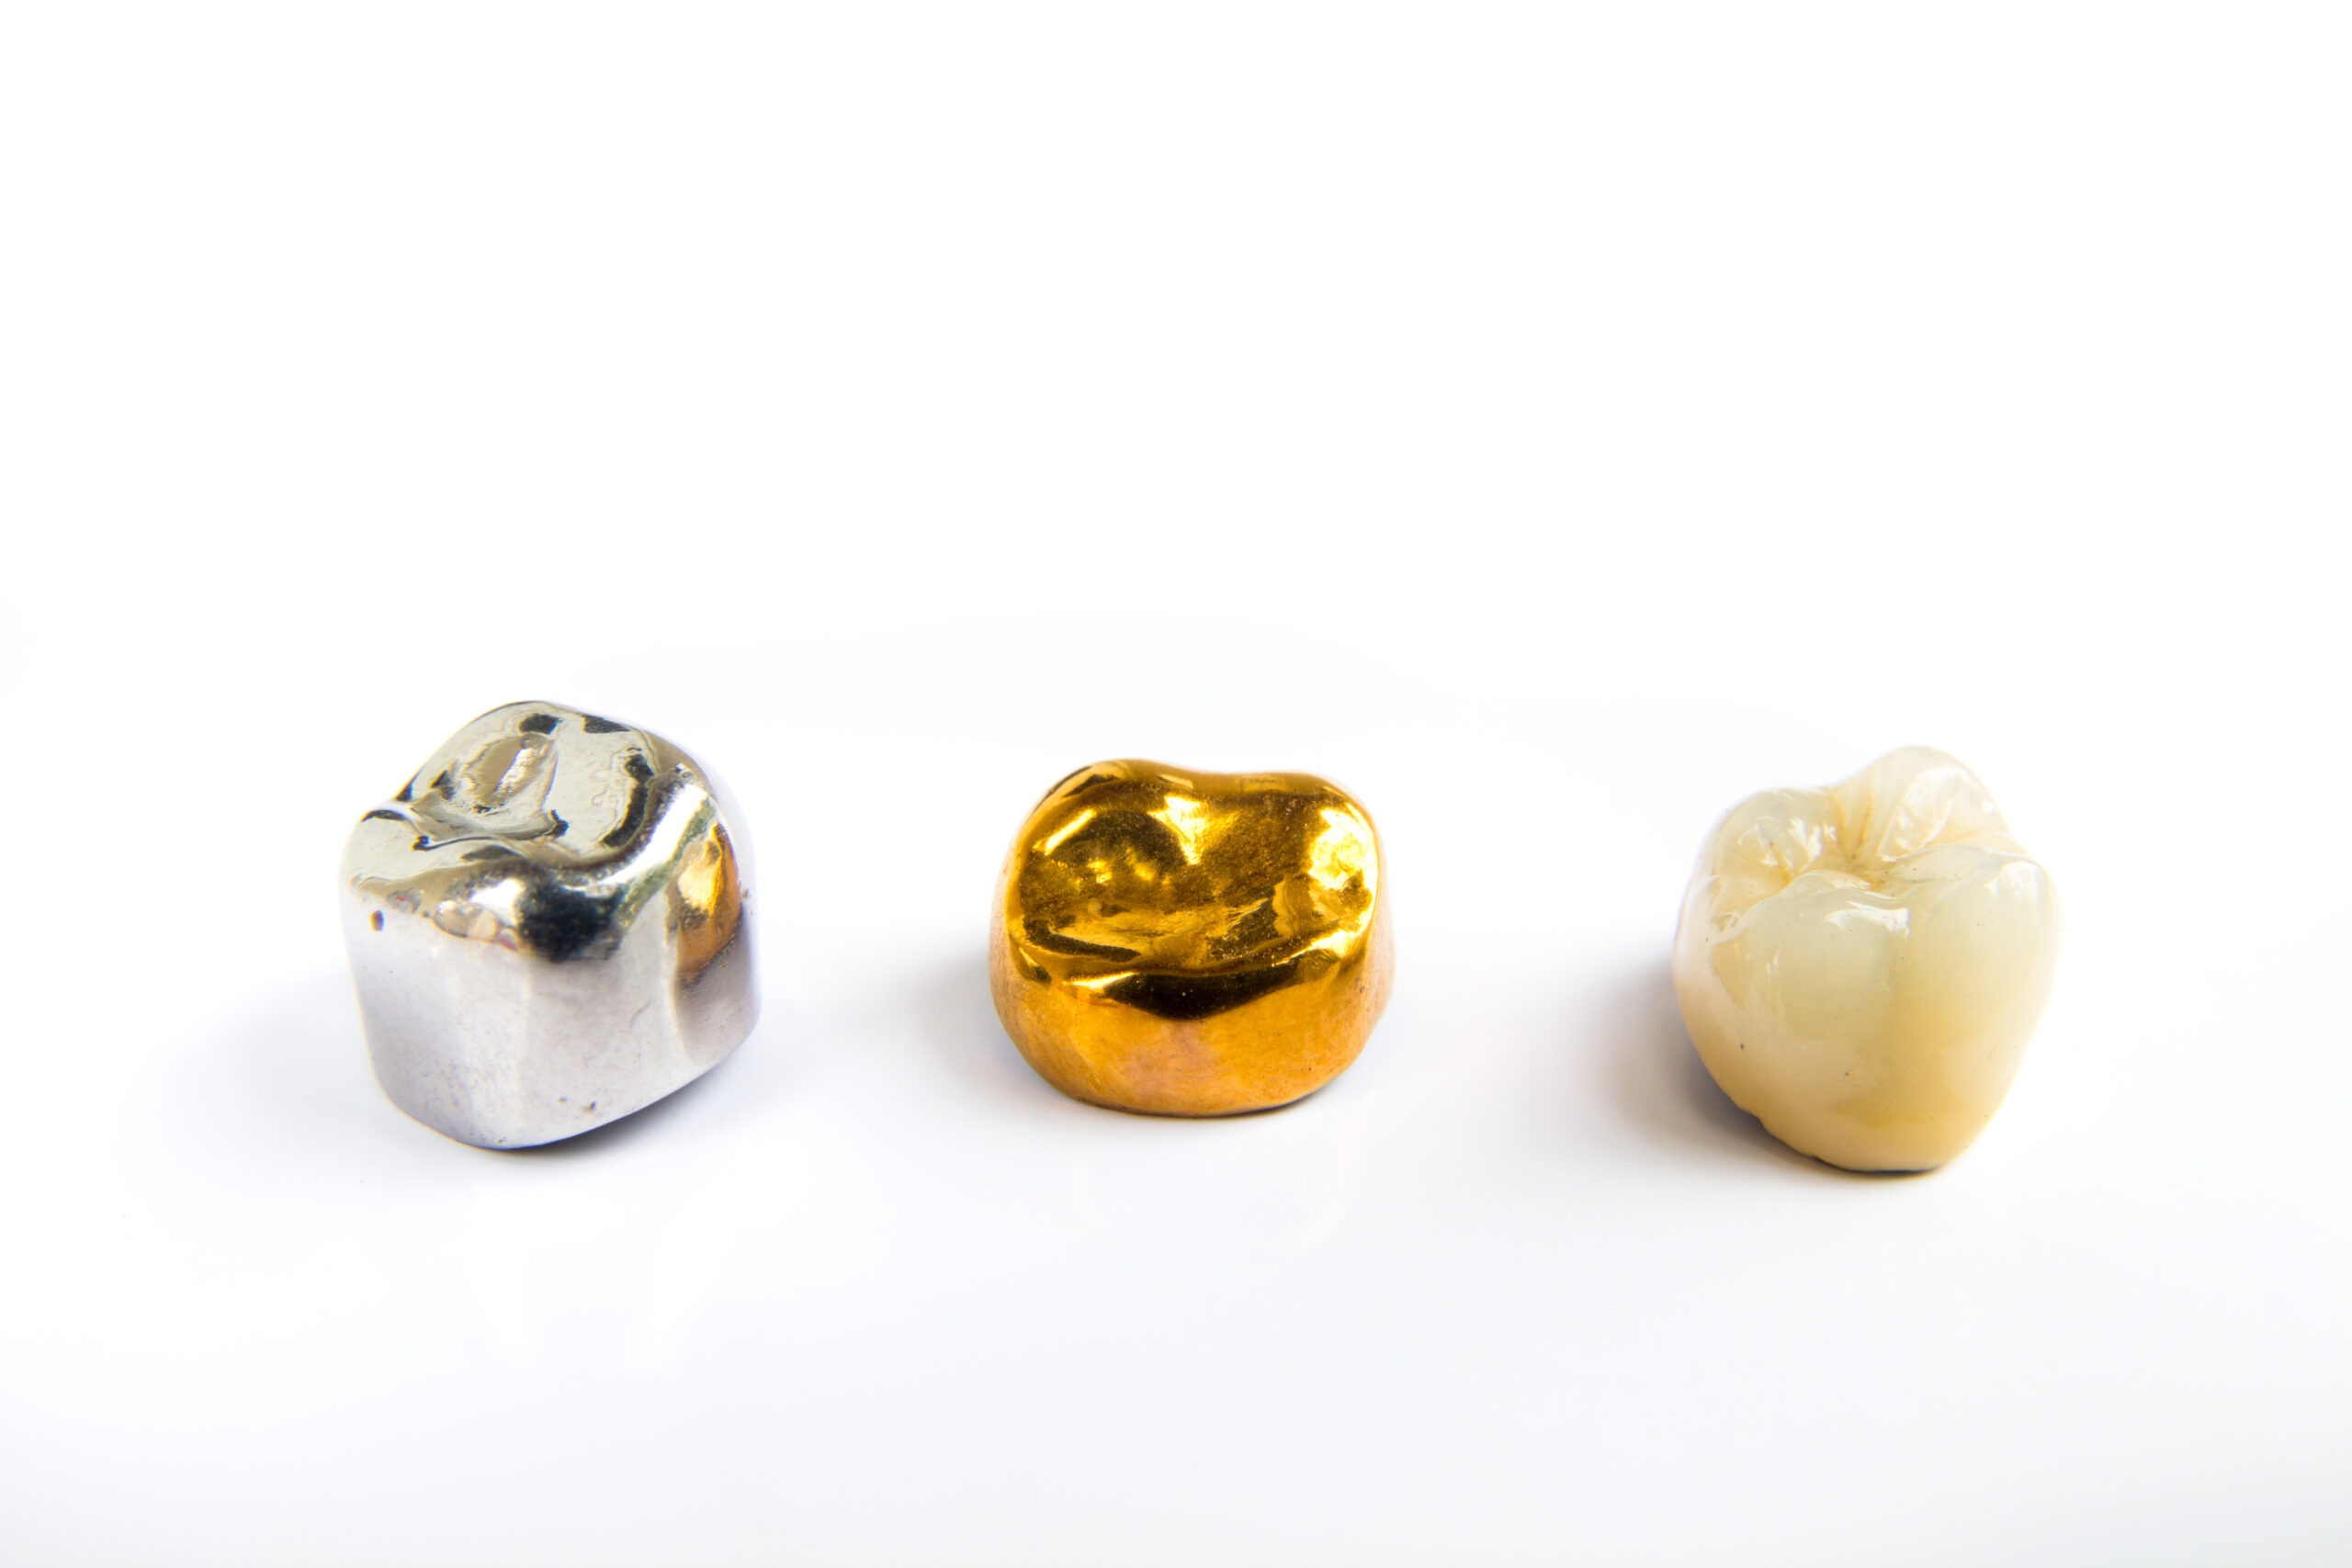
Composition: There are three primary compositions of zirconia on the market: 3y, 4y, and 5y. The Y in the composition descriptor refers to Yitria or Yttrium Oxide (Y2O3). The more Yitria the zirconia contains, the more translucent the crown will be. Adversely, the more Yitria the crown contains, the less flexural strength the crown has. The 3y zirconia can handle adjustments better than 4y and 5y in terms of both strength and optical properties. 

Color: The marketplace offers zirconia that is prestained and zirconia that is not prestained. In the case of prestained zirconia, we have about a tenth of a millimeter in reduction capability before we notice a color change. Knowing this is important when we need to adjust a restoration, so we can manage adjustments to deliver the shade of restoration our patient expects. 

Wear on Other Materials: If zirconia is rubbing against other zirconia there is less wear than if zirconia is rubbing against lithium disilicate and softer ceramics or composites. When you’re setting up an occlusion or you are looking at a hybrid denture versus a normal denture, you must take this into account. If a patient has an upper fixed-hybrid denture, zirconia is going to wear those denture teeth relatively fast. Knowing this, we can best prepare our patient for the wear that is likely to occur. 

Zirconia Removal Burs Vs. Restorative Diamond Burs: In an in vitro study, the burs that are marketed specifically for adjusting zirconia restorations did not perform better on 3y, 4y, or 5y zirconia, and they did not generate less heat. 

Note About Polishing Zirconia: When we are polishing high-strength ceramics like zirconia and lithium disilicate, we must be careful not to push too hard, and we must use a continuous cooling spray of water. Otherwise, we risk nerve damage due to thermal irritation. Also, if we generate too much heat, we will overheat the glue that bonds the fine diamond particles on the bur and are likely to render the bur useless. 


Related Course

Mastering Dental Photography: From Start to Finish

DATE: October 29 2026 @ 8:00 am - October 31 2026 @ 12:00 pm

Location: The Pankey Institute

CE HOURS: 19

Regular Tuition: $ 2995

Single Occupancy with Ensuite Private Bath (per night): $ 355

Dental photography is an indispensable tool for a high level practice. We will review camera set-up and what settings to use for each photo. All photos from diagnostic series, portraits,…

Learn More>

About Author

Default Avatar
Christopher Mazzola, DDS

FIND A PANKEY DENTIST OR TECHNICIAN

I AM A
I AM INTERESTED IN

VIEW COURSE CALENDAR

Best Day Ever 

June 14, 2024 Daren Becker DMD

By Daren Becker, DMD 

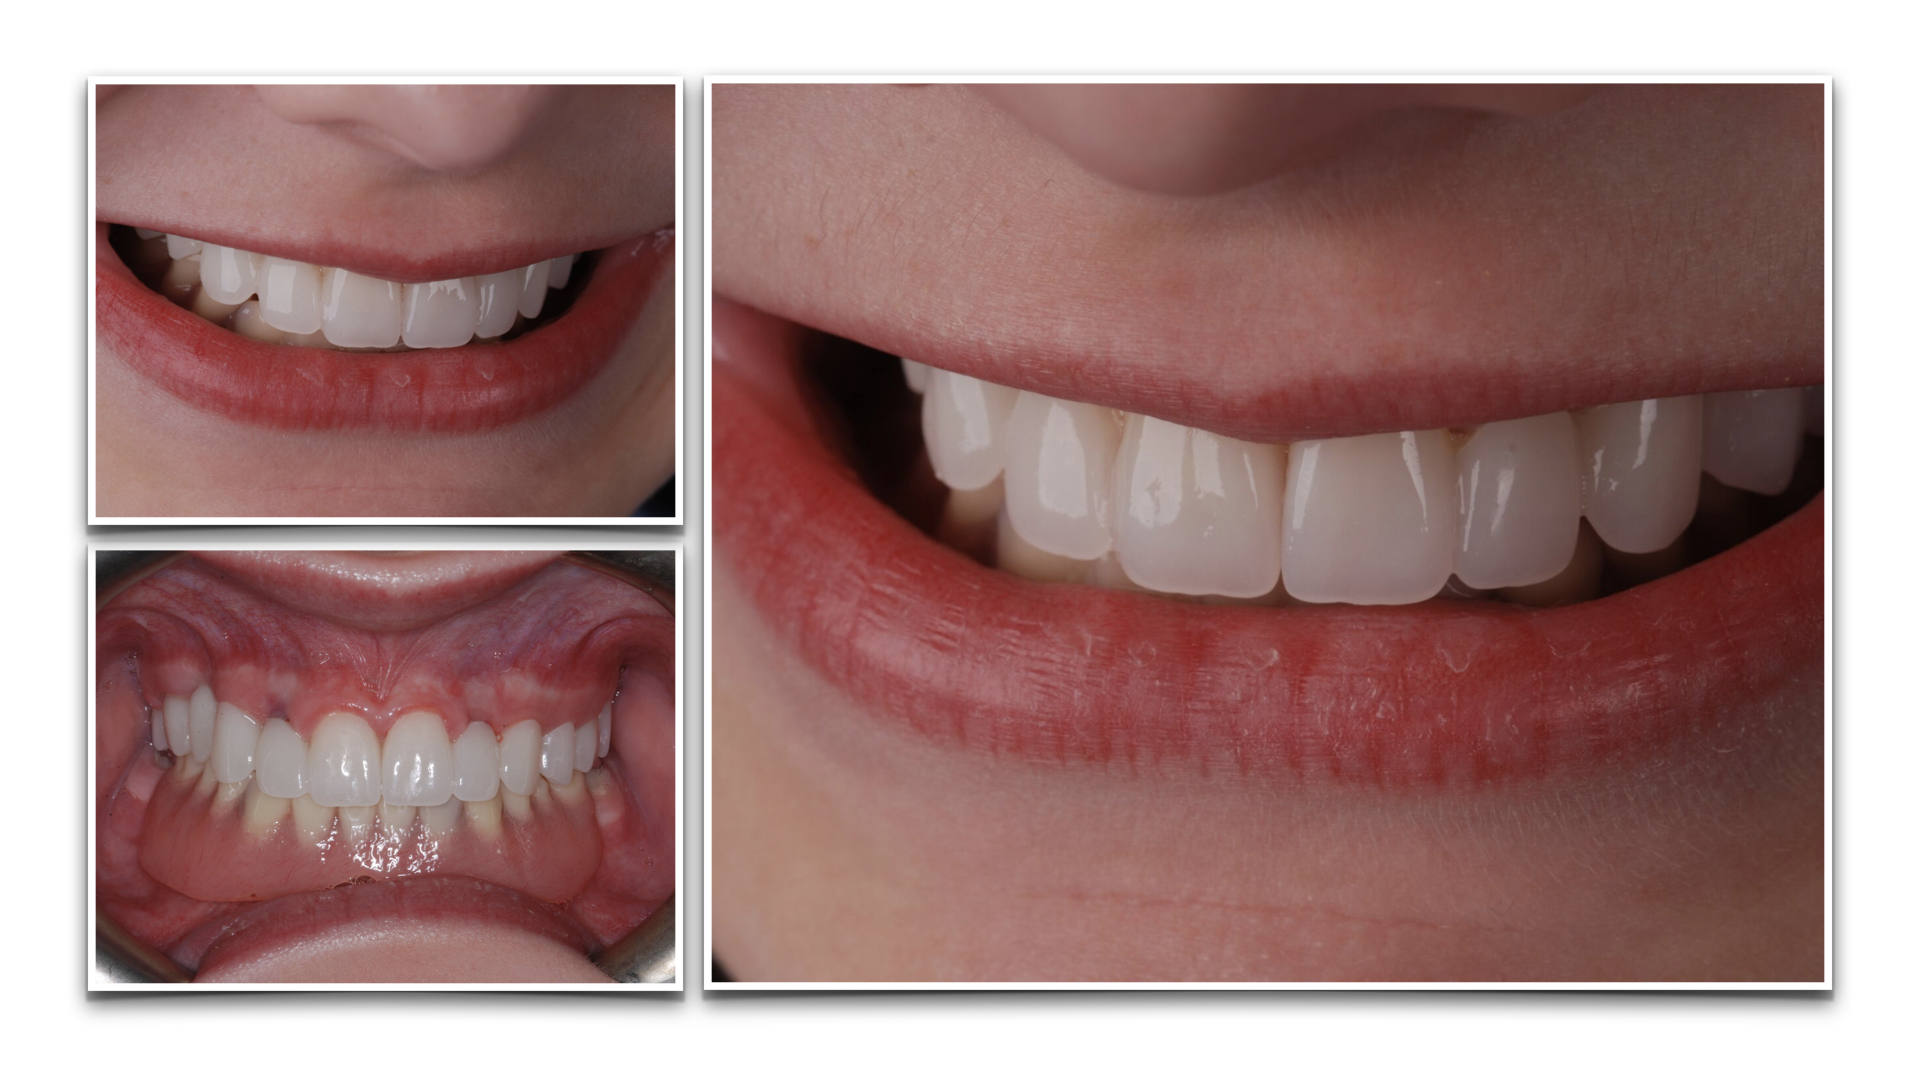
A 16-year-old girl presented with the worst case of ectodermal dysplasia I had ever seen.. She was missing all of her lower teeth except for her 12-year molars. She presented with a lower denture (made by a previous dentist) on two temporary implants in the canine position.  She had only a few maxillary teeth that were malformed; some of these were still her primary teeth.  The appearance of her smile made her look like she was a 9 year old child. 

She was embarrassed by her smile and realized she would need implants and restorative dentistry down the road. At the time, she was too young. Our hearts went out to her. 

Another dentist had recommended direct bonding, which certainly could have worked, but I thought that we could get a better aesthetic result for her with significantly less time in the chair. So, we captured preclinical digital impression scans with our iTero scanner and along with Matt Roberts at CMR Dental Lab in Idaho, we designed a digital wax-up for an improved occlusion and smile. From there, we had milled PMMA (Polymethyl Methacrylate) overlays created that we direct bonded onto the existing dentition as a long-term temporary solution. We did not need to prep any teeth, and we quickly gave her a broad beautiful smile that looked natural and age appropriate. 

She was in tears. We were in tears. Her mom and sister were in tears. It was the best day ever! 

Soon after, she got a part as an extra in a series filmed here in Georgia, and is thinking about a career in acting. Seeing her life change with simple, comfortable clinical procedures has been priceless. 

Related Course

Compromise to Co-Discovery: A Treatment Planning Journey

DATE: December 5 2024 @ 8:00 am - December 7 2024 @ 1:00 pm

Location: The Pankey Institute

CE HOURS: 21

Regular Tuition: $ 2895

Single Occupancy with Ensuite Private Bath (per night): $ 290

The Balance of Communication, Case Planning & Occlusion Dr. Melkers always brings a unique perspective to his workshops and challenges us to the way we think. At Compromise to Co-Discovery,…

Learn More>

About Author

User Image
Daren Becker DMD

Dr. Becker earned his Bachelors of Science Degree in Computer Science from American International College and Doctor of Dental Medicine from the University of Florida College of Dentistry. He practices full time in Atlanta, GA with an emphasis on comprehensive restorative, implant and aesthetic dentistry. Daren began his advanced studies at the Pankey Institute in 1998 and was invited to be a guest facilitator in 2006 and has been on the visiting faculty since 2009. In addition, in 2006 he began spending time facilitating dental students from Medical College of Georgia College of Dentistry at the Ben Massell Clinic (treating indigent patients) as an adjunct clinical faculty. In 2011 he was invited to be a part time faculty in the Graduate Prosthodontics Residency at the Center for Aesthetic and Implant Dentistry at Georgia Health Sciences University, now Georgia Regents University College of Dental Medicine (formerly Medical College of Georgia). Dr. Becker has been involved in organized dentistry and has chaired and/or served on numerous state and local committees. Currently he is a delegate to the Georgia Dental Association. He has lectured at the Academy of General Dentistry annual meeting, is a regular presenter at ITI study clubs as well as numerous other study clubs. He is a regular contributor at Red Sky Dental Seminars.

FIND A PANKEY DENTIST OR TECHNICIAN

I AM A
I AM INTERESTED IN

VIEW COURSE CALENDAR

Dental Lab Communication for a Difficult Shade

June 5, 2024 Kelley Brummett DMD

By Kelley Brummett, DMD 

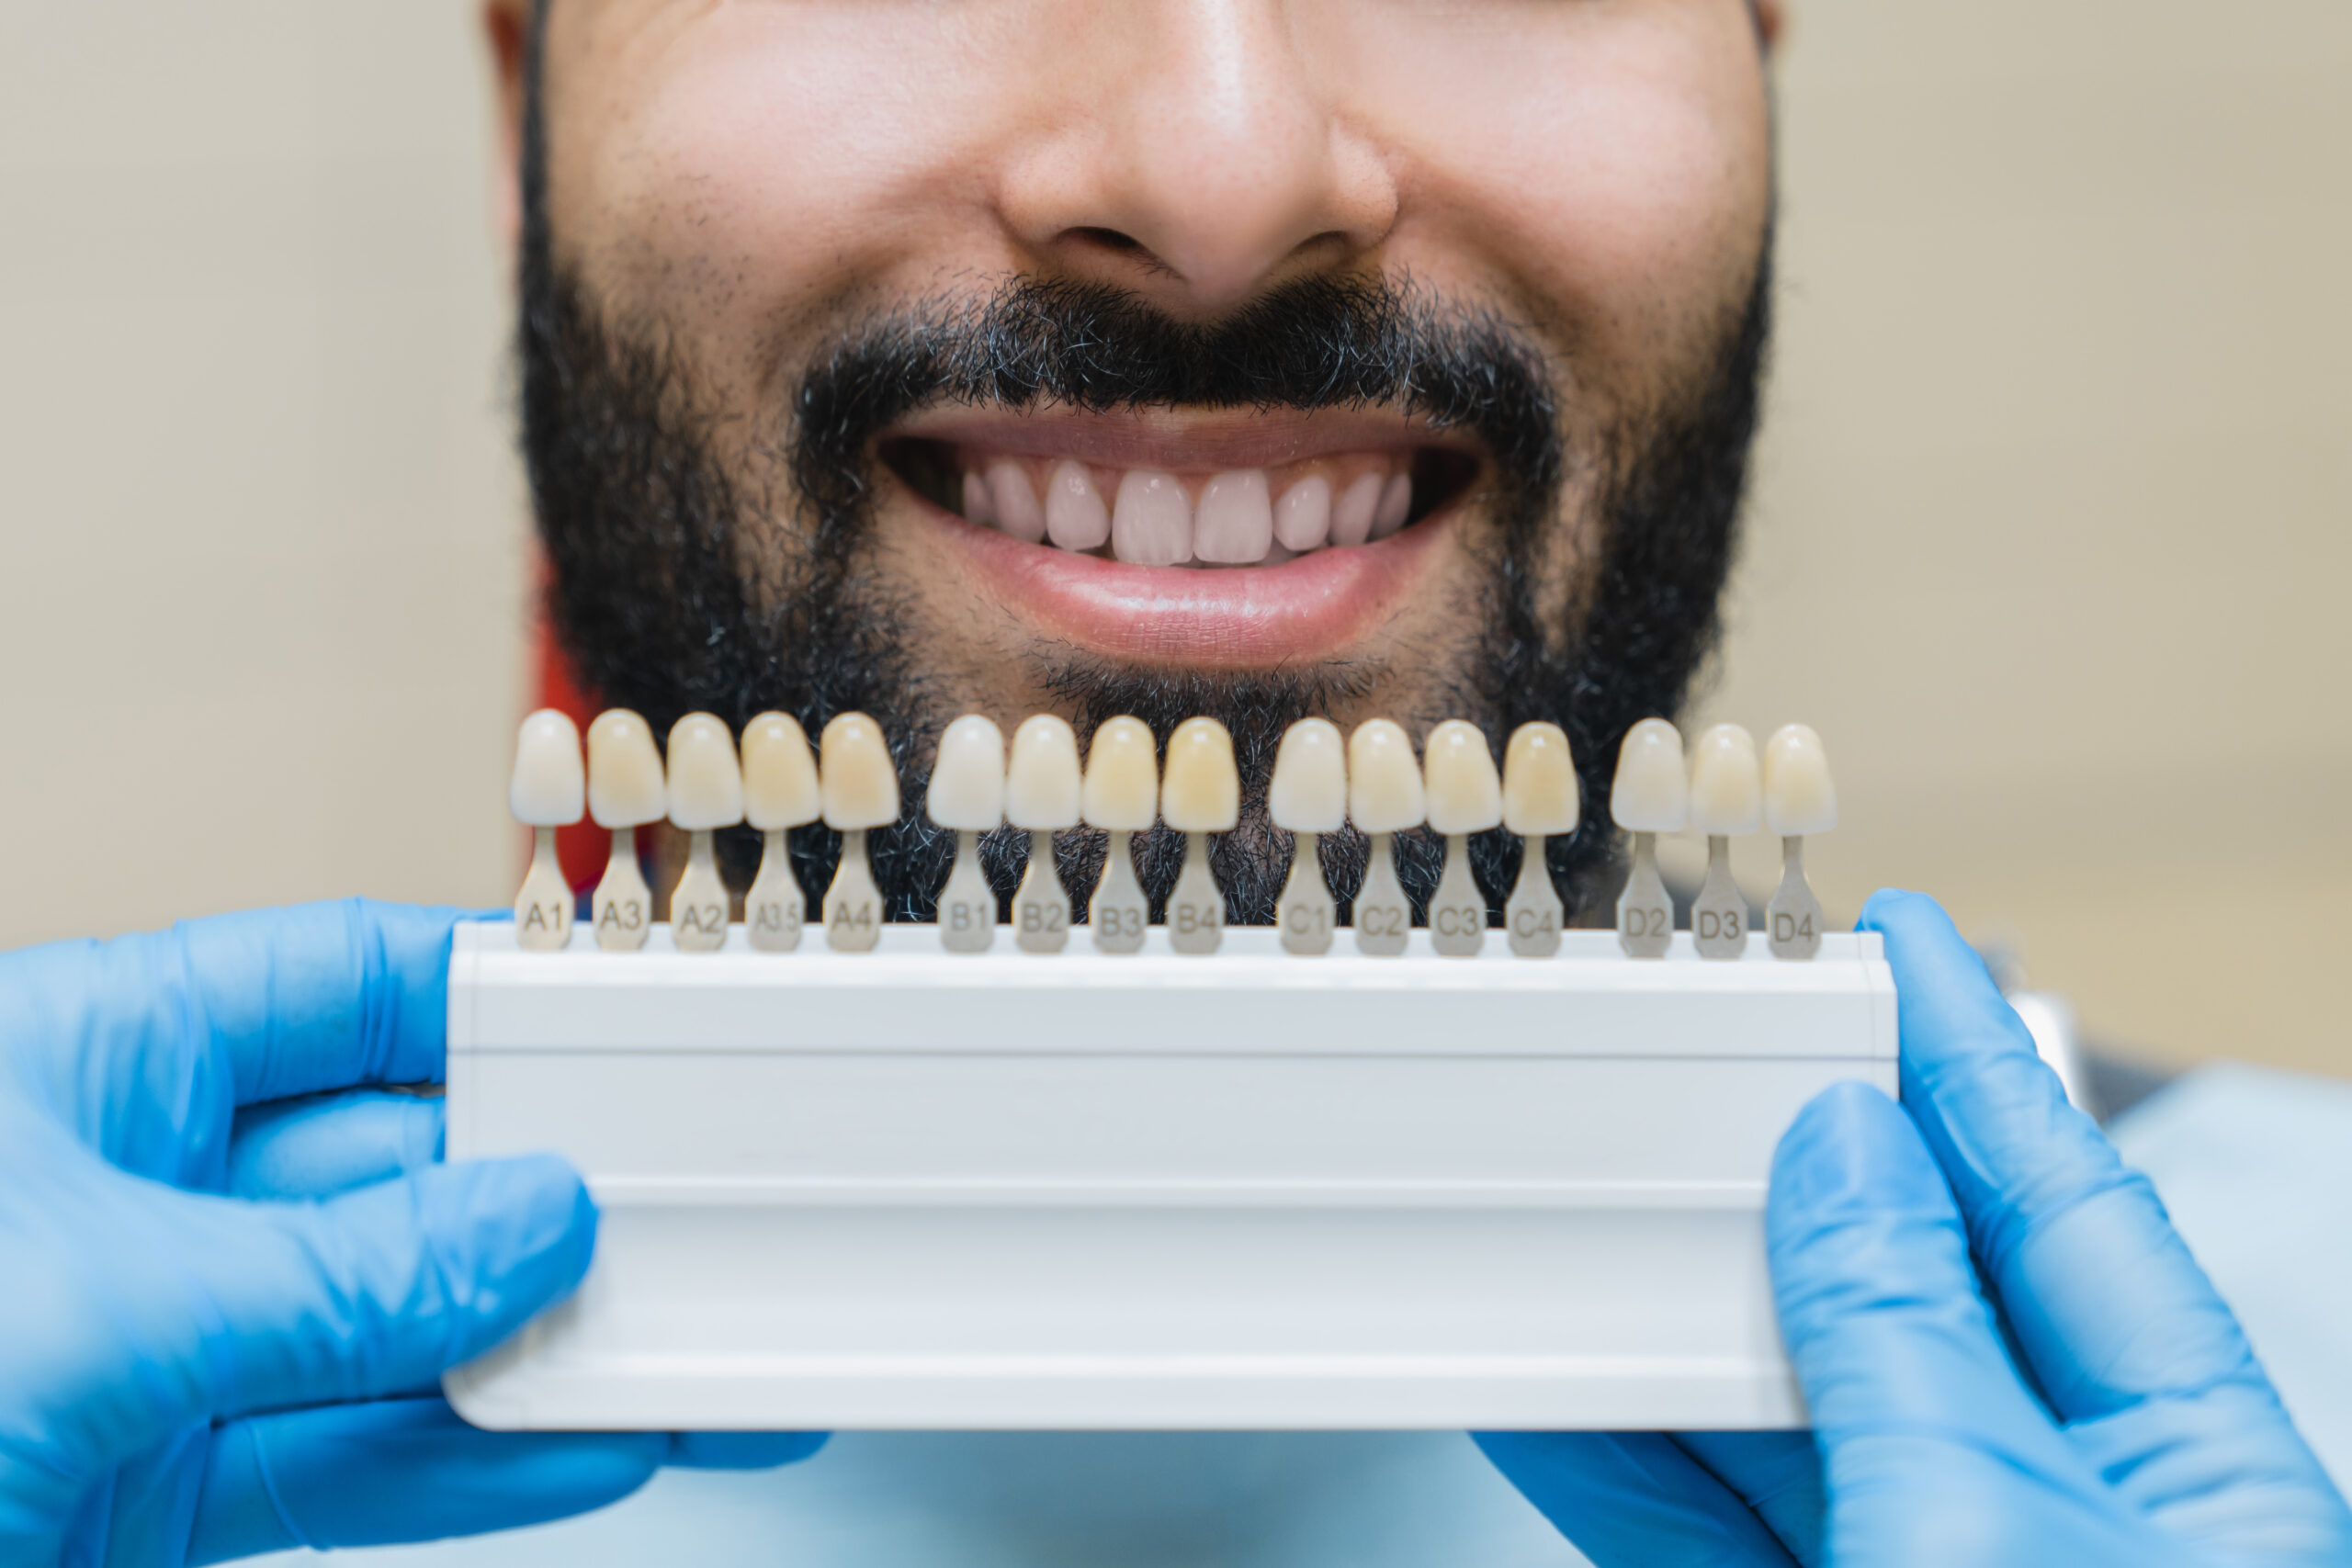
A situation occurred in my office when I was working with a patient who needed a 30-year-old PFM crown replaced on #8. I was struggling with the shade because the adjacent teeth were an in between color. What I did was take a shade photo of the brightest one, which was B1, and then I took a shade photo with A1–because those were the two shades that matched the best. They weren’t what we were looking for. So, I made a provisional out of the A1 shade and a a provisional out of the B1 shade. I took the extra time to place both of them onto the tooth and let the patient look with me and help me decide. The patient chose the A1 shade. 

After I placed the A1 provisional, we sent  photos to my lab. These photos included the first shade photos of B1 and A1 alongside the tooth, photos of the B1 and A1 provisionals, and photos of the provisional I placed on the tooth from various aesthetic views. I then talked to the lab over the phone while we viewed the photos together so they could create the right in-between shade.  

At the end of the process, my patient expressed gratitude for taking the extra steps and meeting her expectations for a beautifully blended smile. 

Related Course

Mastering Dental Photography: From Start to Finish

DATE: October 29 2026 @ 8:00 am - October 31 2026 @ 12:00 pm

Location: The Pankey Institute

CE HOURS: 19

Regular Tuition: $ 2995

Single Occupancy with Ensuite Private Bath (per night): $ 355

Dental photography is an indispensable tool for a high level practice. We will review camera set-up and what settings to use for each photo. All photos from diagnostic series, portraits,…

Learn More>

About Author

User Image
Kelley Brummett DMD

Dr. Kelley D. Brummett was born and raised in Missouri. She attended the University of Kansas on a full-ride scholarship in springboard diving and received honors for being the Big Eight Diving Champion on the 1 meter springboard in 1988 and in 1992. Dr. Kelley received her BA in communication at the University of Kansas and went on to receive her Bachelor of Science in Nursing. After practicing nursing, Dr Kelley Brummett went on to earn a degree in Dentistry at the Medical College of Georgia. She has continued her education at the Pankey Institute to further her love of learning and her pursuit to provide quality individual care. Dr. Brummett is a Clinical Instructor at Georgia Regents University and is a member of the American Academy of Cosmetic Dentistry. Dr. Brummett and her husband Darin have two children, Sarah and Sam. They have made Newnan their home for the past 9 years. In her free time, she enjoys traveling, reading and playing with her dogs. Dr. Brummett is an active member of the ADA, GDA, AGDA, and an alumni of the Pankey Institute.

FIND A PANKEY DENTIST OR TECHNICIAN

I AM A
I AM INTERESTED IN

VIEW COURSE CALENDAR

Retooling an Implant Supported Hybrid Denture 

May 20, 2024 Lee Ann Brady DMD

By Lee Ann Brady, DMD 

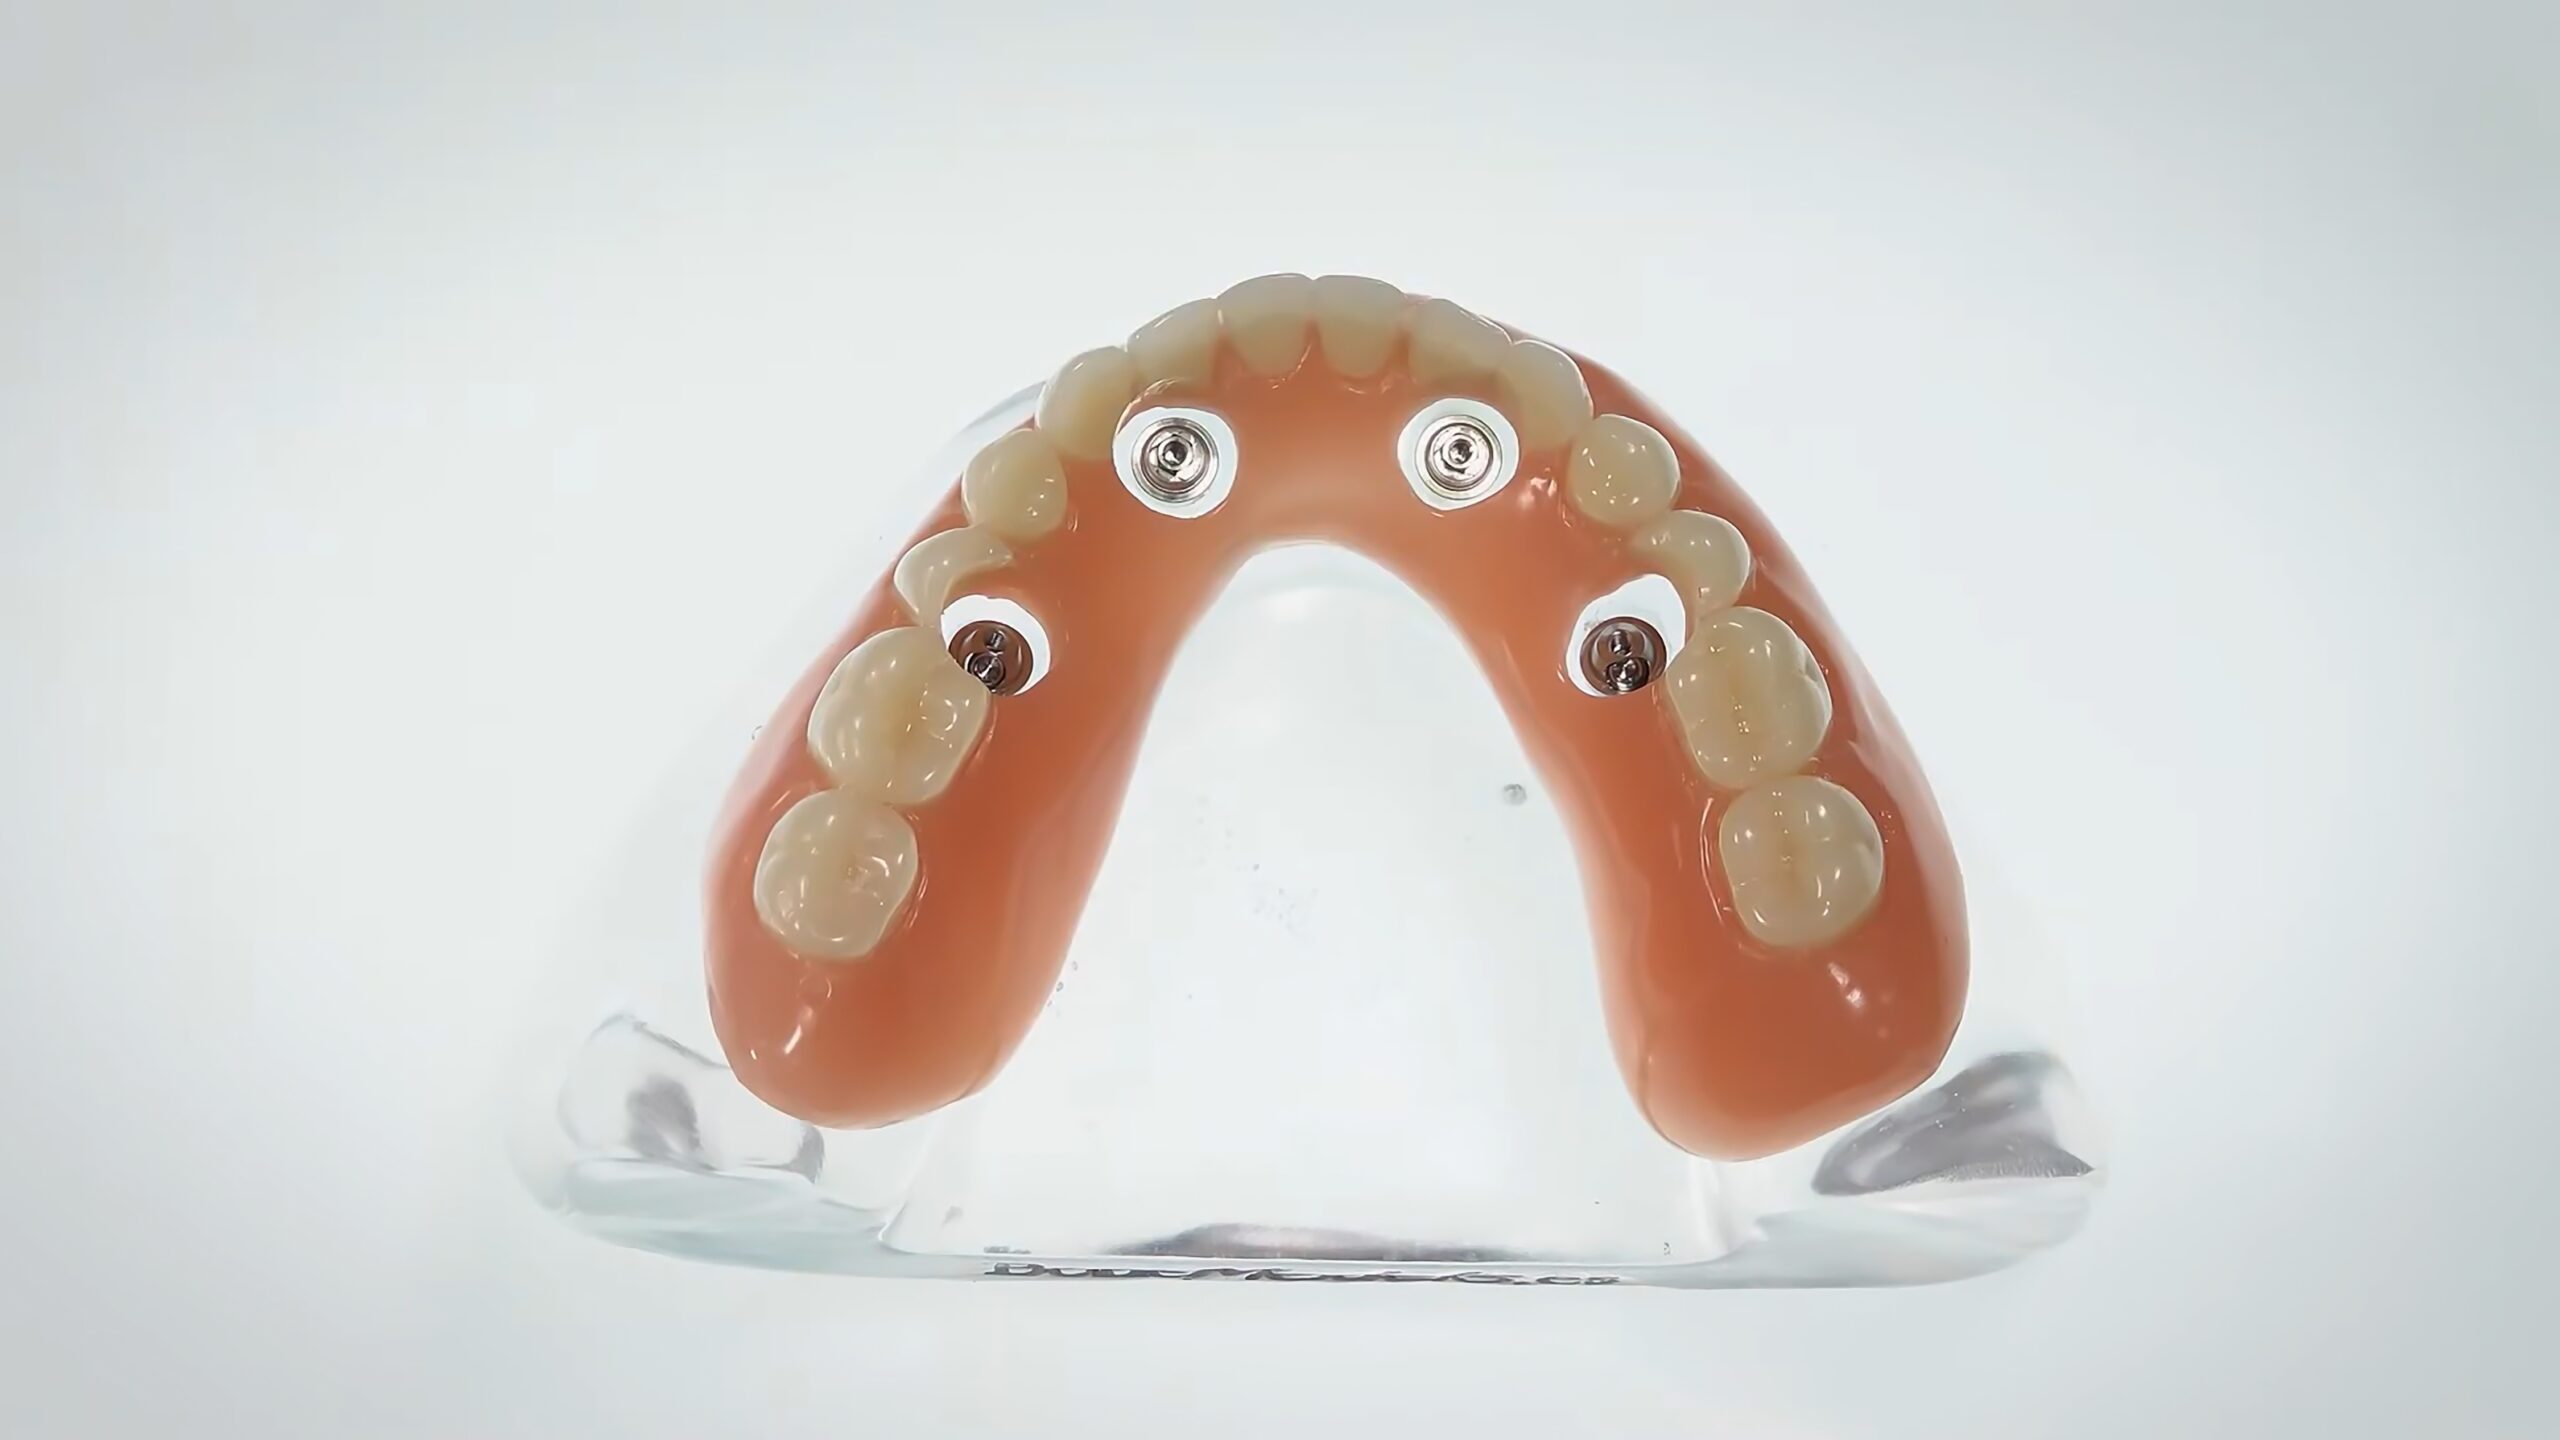
A patient chipped a tooth on her lower hybrid denture and loosened an implant screw. The denture had been placed 18 years ago, so she had an old titanium bar with denture teeth and pink acrylic. That day, I put the screw back in and smoothed out where the tooth was chipped. During this visit we had a great conversation about the future of her hybrid denture. 

I have had a similar conversation with several patients in recent months. They have the original, traditional bar retained hybrid denture that is nearing the end of its lifespan. And so, what are the options? 

  1. If the bar is in great shape, new denture teeth and a new denture base can be milled and placed over the existing titanium bar. 
  1. Alternatively, we can get rid of the bar and go to something that is all zirconia. 

If there is a preference for the first option, the first requirement is to make sure the titanium bar is in good condition. After 18 years, we would take it off and have the laboratory examine it under microscopy.  

If converting to all-zirconia and the patient has had upper and lower dentures, we must consider if one arch can be converted without converting the second arch. A zirconia arch is going to wear an opposing original denture fast if there is parafunction, and the zirconia arch is likely to fracture the opposing original prosthetic teeth. 

We have options today we can think about with our patients, but many have in their minds that when they got their hybrid dentures years ago, the dentures would last. All the time, energy, and dollars to freshen up or replace their denture is a big deal to them. Shifting their mindset from “I thought I was done investing in dentistry” to “My denture is at the end of its lifespan” is a big hurdle. So, the earlier we can start those conversations before they need to invest, the easier they can transition their minds to accept care with grace when the time comes. 

When your bar retained hybrid denture patients visit for perio maintenance and your exams, inform them of the lifespan of their denture is at most 20 years and set expectations for discussing the best available options at some point in the future.  

Related Course

Mastering Dental Photography: From Start to Finish

DATE: October 29 2026 @ 8:00 am - October 31 2026 @ 12:00 pm

Location: The Pankey Institute

CE HOURS: 19

Regular Tuition: $ 2995

Single Occupancy with Ensuite Private Bath (per night): $ 355

Dental photography is an indispensable tool for a high level practice. We will review camera set-up and what settings to use for each photo. All photos from diagnostic series, portraits,…

Learn More>

About Author

User Image
Lee Ann Brady DMD

Dr. Lee Ann Brady is passionate about dentistry, her family and making a difference. She is a general dentist and owns a practice in Glendale, AZ limited to restorative dentistry. Lee’s passion for dental education began as a CE junkie herself, pursuing lots of advanced continuing education focused on Restorative and Occlusion. In 2005, she became a full time resident faculty member for The Pankey Institute, and was promoted to Clinical Director in 2006. Lee joined Spear Education as Executive VP of Education in the fall of 2008 to teach and coordinate the educational curriculum. In June of 2011, she left Spear Education, founded leeannbrady.com and joined the dental practice she now owns as an associate. Today, she teaches at dental meetings and study clubs both nationally and internationally, continues to write for dental journals and her website, sits on the editorial board of the Journal of Cosmetic Dentistry, Inside Dentistry and DentalTown Magazines and is the Director of Education for The Pankey Institute.

FIND A PANKEY DENTIST OR TECHNICIAN

I AM A
I AM INTERESTED IN

VIEW COURSE CALENDAR

Leading Patients with Simple Questions 

May 17, 2024 David Rice DDS

By David R. Rice, DDS 

I travel a lot for speaking engagements and often ride to and from the airport using Uber. As I make small talk with the drivers, inevitably they ask what I do for a living. One day, as I shared that I was a dentist, the driver said, “I’m finally straightening my teeth with those aligners.”  

I thought, “Okay, he’s either seeing a dentist or he’s doing this thing on his own.” Either assumption would’ve potentially painted me into a corner, so instead of assuming, I asked a simple, yet leading question: “Good for you. Is your dentist happy with the progress?” 

Leading questions like that help us walk a patient down the path we want. His response was, “Wait a second, this should be done with a dentist?” 

With one question, I got to the heart of the matter. From there, I responded and asked a series of simple (and again leading) questions: “Yes, seeing a dentist helps to know if you are a good candidate to move your teeth at all. How is the health of your mouth? Are your gums healthy? Do you have any cavities?” 

Now he was thinking, “Wow, not only should I be going to the dentist but there are things that could go wrong.” 

I asked him one more simple set of questions: “Would you like to know basic things that could go wrong? Or would you like to know what might really go wrong and harm you?” He, of course, wanted to know what could harm him. 

Simple, leading questions get to the point. So, when restoring a patient, I think about the simplest questions to ask to understand what the patient understands, what the patient really wants, and why. In short, I want to know what matters most to them and connect that to the dentistry I know they need. As an example, I might ask, “Do you want to replicate mother nature when we restore that tooth, or do you want to improve upon mother nature? Would you like to discuss preventing future problems that will save you time and money or just focus on today’s problems? 

These leading, simple questions prompt a response that enables me to determine if the patient wants just a slice of pizza—say a crown, the patient wants the whole pie—an optimal smile, or the patient wants something in between. Based on that input, I know how to best have a great conversation with the patient—a conversation the patient will appreciate and through which I can earn more trust.  

Related Course

Mastering Dental Photography: From Start to Finish

DATE: October 29 2026 @ 8:00 am - October 31 2026 @ 12:00 pm

Location: The Pankey Institute

CE HOURS: 19

Regular Tuition: $ 2995

Single Occupancy with Ensuite Private Bath (per night): $ 355

Dental photography is an indispensable tool for a high level practice. We will review camera set-up and what settings to use for each photo. All photos from diagnostic series, portraits,…

Learn More>

About Author

Default Avatar
David Rice DDS

FIND A PANKEY DENTIST OR TECHNICIAN

I AM A
I AM INTERESTED IN

VIEW COURSE CALENDAR

Be Cautious with Retraction Pastes

April 24, 2024 Lee Ann Brady

Lee Ann Brady, DMD 

I’m a big fan of retraction pastes, which are aluminum-based hemostatic agents. Their attributes make them highly effective when I need them, but they are also technique sensitive. 

  • They are great for hemostasis within sixty seconds
  • For a stringent retraction, you can leave them in place for two to five minutes
  • They are so thick and viscous you can see them and easily rinse them off
  • They do not cause prep discoloration like liquid hemostatic agents do
  • They can interfere with the set of VPS or polyether impression materials but are less likely to do that than the liquids because they are so easily rinsed off

We must still be careful, though, to remove retraction paste from the sulcus. If residue is left behind, the impression material will not fully polymerize around the margin. So, while I love retraction pastes for hemostasis, I don’t use them unless I need them. I still prefer a two-cord technique using plain cord and epinephrine. When I do use a retraction paste, I am extremely methodical about rinsing the paste out of the sulcus. 

Related Course

Mastering Dental Photography: From Start to Finish

DATE: October 29 2026 @ 8:00 am - October 31 2026 @ 12:00 pm

Location: The Pankey Institute

CE HOURS: 19

Regular Tuition: $ 2995

Single Occupancy with Ensuite Private Bath (per night): $ 355

Dental photography is an indispensable tool for a high level practice. We will review camera set-up and what settings to use for each photo. All photos from diagnostic series, portraits,…

Learn More>

About Author

User Image
Lee Ann Brady

FIND A PANKEY DENTIST OR TECHNICIAN

I AM A
I AM INTERESTED IN

VIEW COURSE CALENDAR

Removing Resin from Inside a Crown 

April 19, 2024 Lee Ann Brady DMD

By Lee Ann Brady, DMD 

When a crown comes off and we are going to put it back in the mouth, we need to remove the old resin cement that is inside the crown. What is the best way to go about this? 

First, we need to know if the crown is made of zirconia or lithium disilicate. If you have a radiograph of that restoration, you can tell immediately which one of those two things it is. If you don’t, you can always attempt to X-ray it. (That’s what I do.) Alternatively, you can assume the crown is made of lithium disilicate, which is the more technique-sensitive material when it comes to removing cement. 

For crowns confirmed to be zirconia, employing 30-micron aluminum oxide air abrasion effectively clears out the old resin cement. Subsequently, re-etching the inside of the zirconia prepares it for reseating. For crowns presumed to be lithium disilicate, this approach should be avoided to prevent crack propagation. 

In the case of lithium disilicate crowns, two alternative methods can be employed: 

  1. The crown can be placed in a porcelain oven to liquefy and evaporate the old resin. However, caution must be exercised to avoid rapid heating of the hydrated ceramic that has been in the oral environment. Rapid dehydration will introduce cracks and lead to crown fracturing. 
  1. An alternative method involves using a brown silicone point in a high-speed handpiece, adjusted to lowest speed. A brown silicone point at slow speed effectively removes resin without damaging ceramic. 

How will you know when all the resin has been removed? When etching lithium disilicate, whether using red 5% hydrofluoric acid or Monobond Etch & Prime from Ivoclar Vivadent, any remaining resin will be evident because the dye sticks to it after the etching solution is rinsed off.  

Related Course

Mastering Dental Photography: From Start to Finish

DATE: October 29 2026 @ 8:00 am - October 31 2026 @ 12:00 pm

Location: The Pankey Institute

CE HOURS: 19

Regular Tuition: $ 2995

Single Occupancy with Ensuite Private Bath (per night): $ 355

Dental photography is an indispensable tool for a high level practice. We will review camera set-up and what settings to use for each photo. All photos from diagnostic series, portraits,…

Learn More>

About Author

User Image
Lee Ann Brady DMD

Dr. Lee Ann Brady is passionate about dentistry, her family and making a difference. She is a general dentist and owns a practice in Glendale, AZ limited to restorative dentistry. Lee’s passion for dental education began as a CE junkie herself, pursuing lots of advanced continuing education focused on Restorative and Occlusion. In 2005, she became a full time resident faculty member for The Pankey Institute, and was promoted to Clinical Director in 2006. Lee joined Spear Education as Executive VP of Education in the fall of 2008 to teach and coordinate the educational curriculum. In June of 2011, she left Spear Education, founded leeannbrady.com and joined the dental practice she now owns as an associate. Today, she teaches at dental meetings and study clubs both nationally and internationally, continues to write for dental journals and her website, sits on the editorial board of the Journal of Cosmetic Dentistry, Inside Dentistry and DentalTown Magazines and is the Director of Education for The Pankey Institute.

FIND A PANKEY DENTIST OR TECHNICIAN

I AM A
I AM INTERESTED IN

VIEW COURSE CALENDAR

How I Address Filling the Access Hole of a Screw-Retained Implant Crown 

April 17, 2024 Lee Ann Brady DMD

By Lee Ann Brady, DMD 

For addressing the access hole of a screw-retained implant crown, my preferred method involves applying Teflon tape over the hole followed by temporary filling material, such as Telio Inlay from Ivoclar Vivadent. 

I emphasize to patients the importance of maintaining accessibility to the screw for potential adjustments without jeopardizing the integrity of the ceramic crown. Hence, immediately after seating the crown, I ensure no adjustments are needed before doing the filling. 

Patients are scheduled for a final post-op appointment with the surgeon after the restoration is in place. If there are no issues requiring crown removal, the Teflon tape and Telio Inlay may remain indefinitely, monitored during hygiene recall appointments. As long as the temporary filling remains intact, replacement is unnecessary. 

In cases where the Telio Inlay dislodges but the Teflon tape remains intact, I inform the patient of our plan to reapply the temporary filling. However, if repeated dislodgment occurs, leading to inconvenience, we consider transitioning to a permanent filling. In such instances, fresh Teflon tape is applied, and the access hole is filled with composite that precisely matches the crown’s color. 

Even if years pass and the Telio Inlay needs replacement, I opt for a temporary filling for ease of identification if removal is necessary. Only if frequent filling replacements prove bothersome do I consider switching to a permanent filling because I prioritize easy retrievability of the screw. 

Related Course

Worn Dentition: Direct & Indirect Adhesive Management Through a Non-Invasive Approach

DATE: October 24 2025 @ 8:00 am - October 25 2025 @ 2:30 pm

Location: The Pankey Institute

CE HOURS: 15

Dentist Tuition : $ 2595

Single Occupancy with Ensuite Private Bath (per night): $ 345

Enhance Restorative Outcomes The main goal of this course is to provide, indications and protocols to diagnose and treat severe worn dentition through a new no prep approach increasing the…

Learn More>

About Author

User Image
Lee Ann Brady DMD

Dr. Lee Ann Brady is passionate about dentistry, her family and making a difference. She is a general dentist and owns a practice in Glendale, AZ limited to restorative dentistry. Lee’s passion for dental education began as a CE junkie herself, pursuing lots of advanced continuing education focused on Restorative and Occlusion. In 2005, she became a full time resident faculty member for The Pankey Institute, and was promoted to Clinical Director in 2006. Lee joined Spear Education as Executive VP of Education in the fall of 2008 to teach and coordinate the educational curriculum. In June of 2011, she left Spear Education, founded leeannbrady.com and joined the dental practice she now owns as an associate. Today, she teaches at dental meetings and study clubs both nationally and internationally, continues to write for dental journals and her website, sits on the editorial board of the Journal of Cosmetic Dentistry, Inside Dentistry and DentalTown Magazines and is the Director of Education for The Pankey Institute.

FIND A PANKEY DENTIST OR TECHNICIAN

I AM A
I AM INTERESTED IN

VIEW COURSE CALENDAR