Facts About Zirconia from the Literature 

October 18, 2024 Christopher Mazzola, DDS

Christopher Mazzola, DDS 

The purpose of looking at recent research data is to see how we can improve our clinical success. Different scholarly journals inform us of ways to decrease risk and hopefully increase the longevity of the services that we’re providing to our patients. In this article, I’ll summarize what I’ve learned from recent research literature about the various types of zirconia we receive from our dental laboratories and properties of zirconia that influence the quality and longevity of the dentistry we do. I found these facts fascinating from the perspective of wanting to know how to use zirconia optimally.  

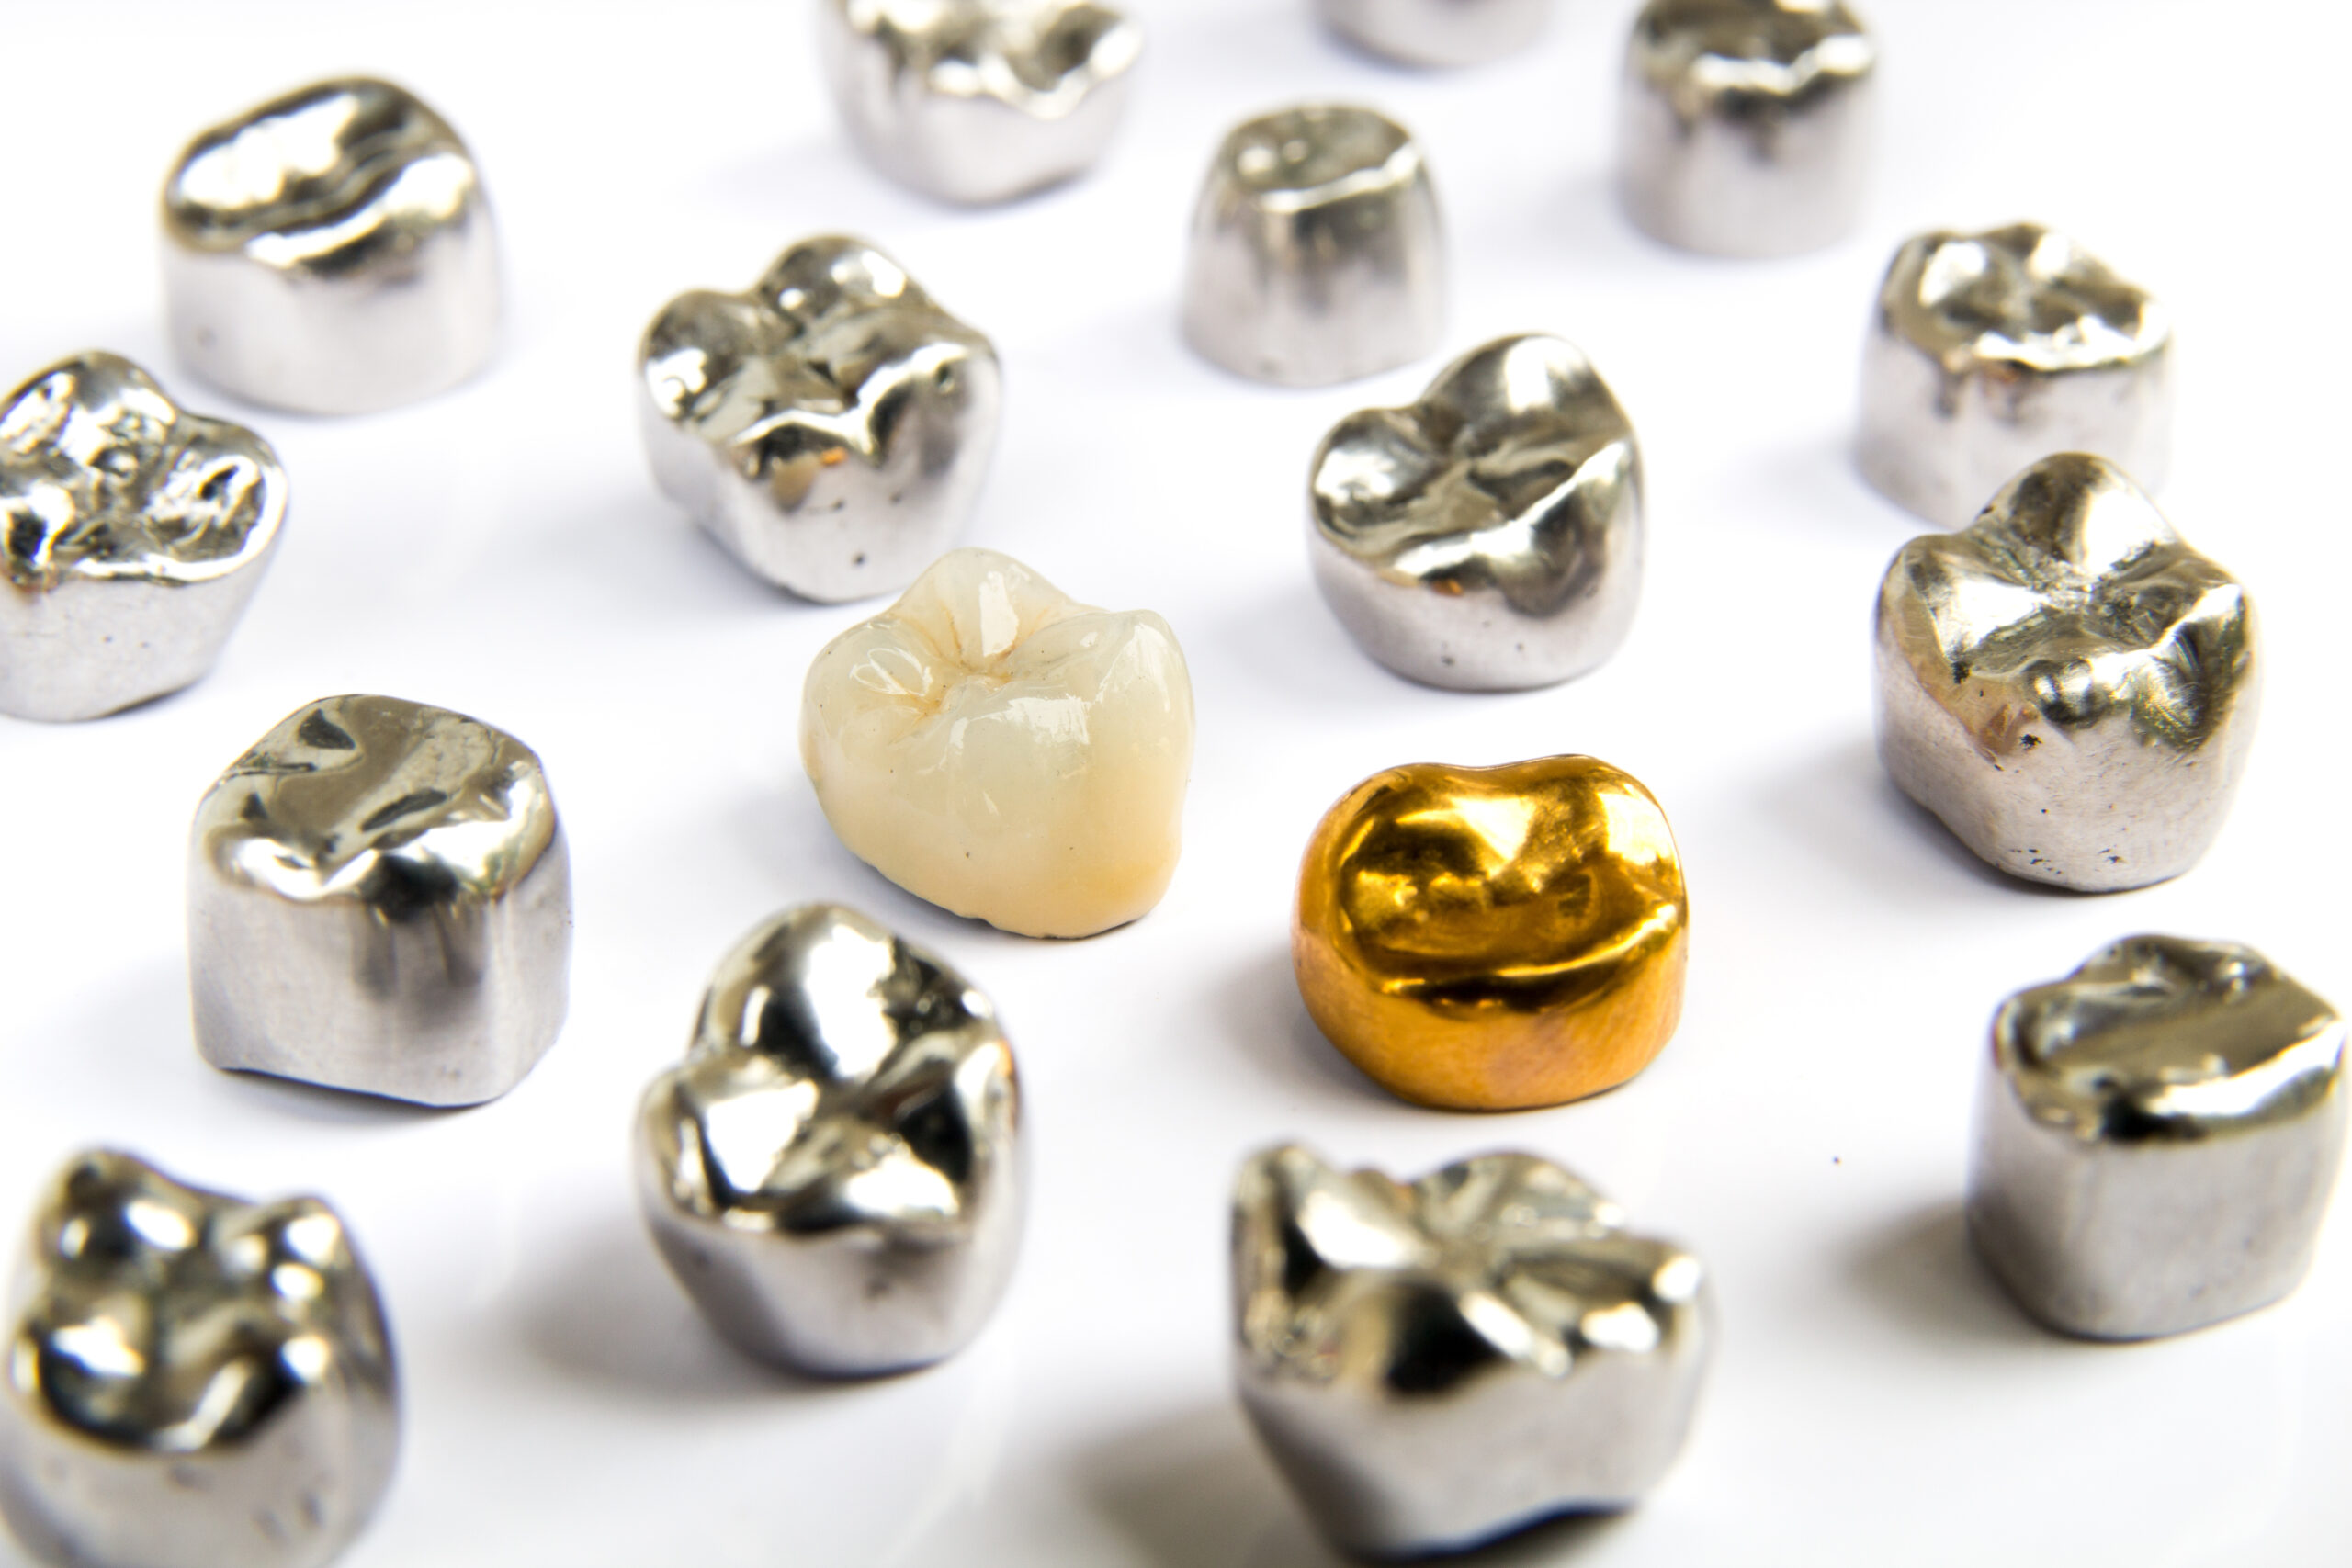
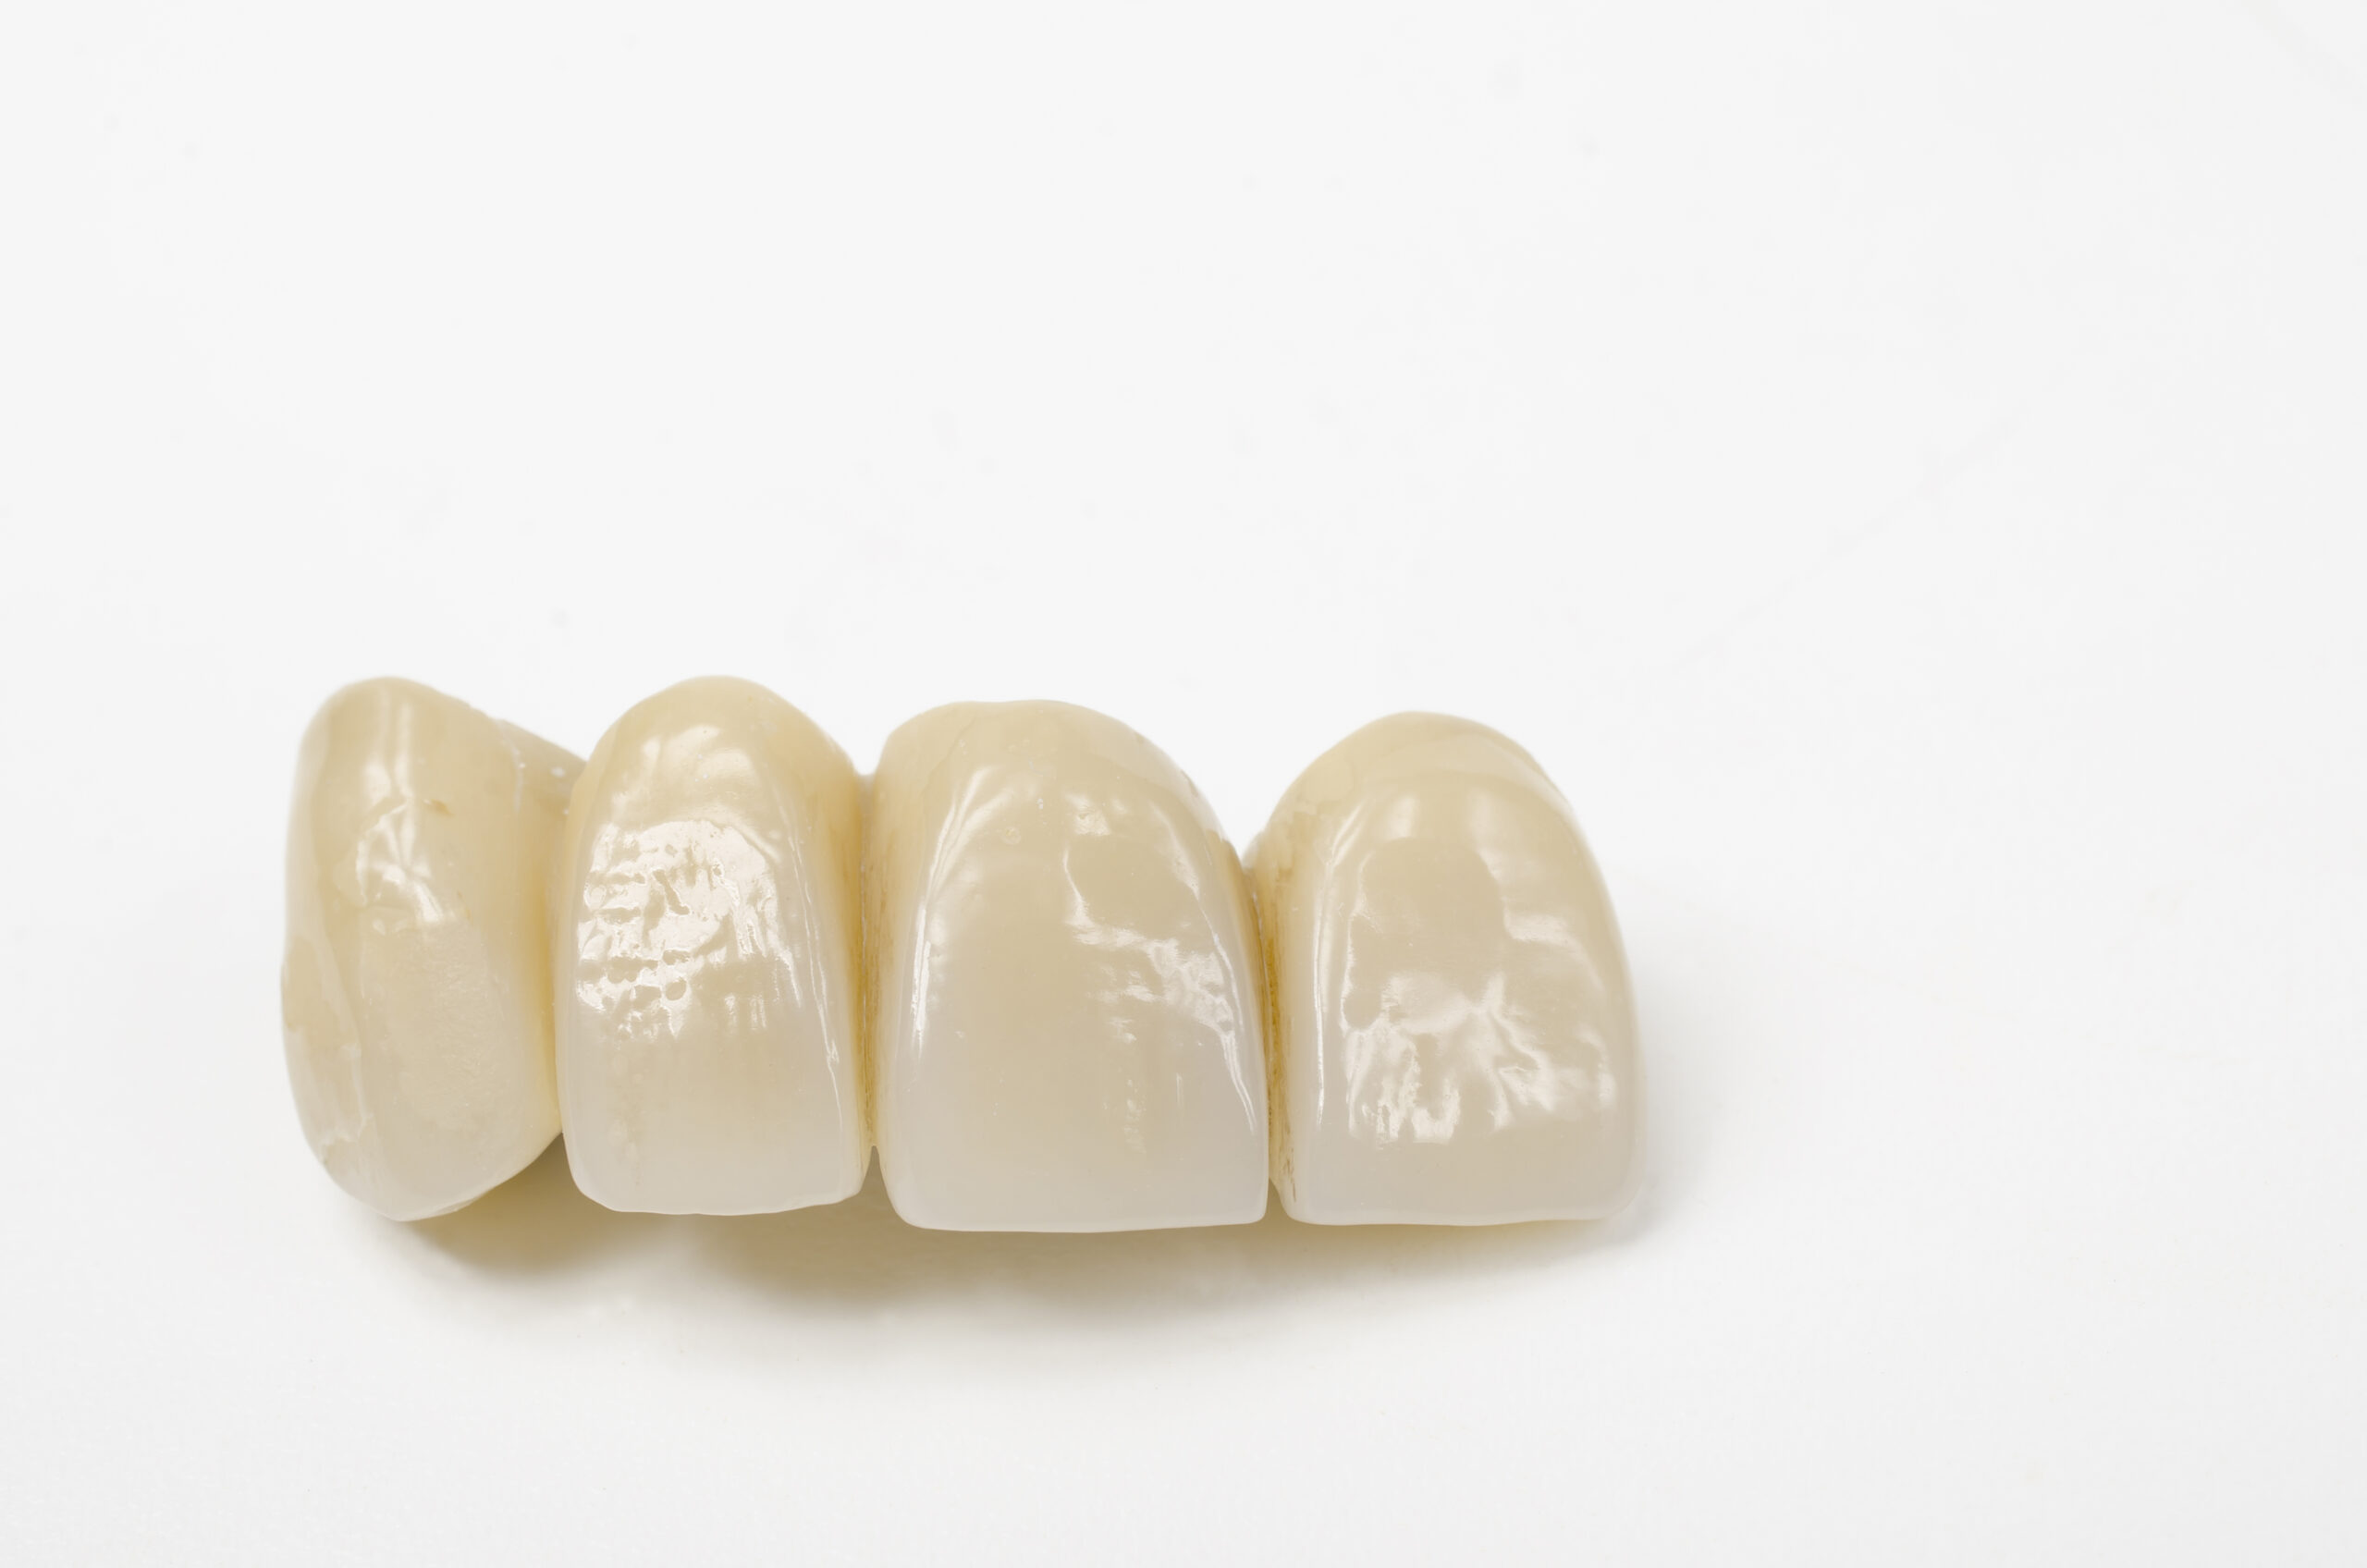
Composition: There are three primary compositions of zirconia on the market: 3y, 4y, and 5y. The Y in the composition descriptor refers to Yitria or Yttrium Oxide (Y2O3). The more Yitria the zirconia contains, the more translucent the crown will be. Adversely, the more Yitria the crown contains, the less flexural strength the crown has. The 3y zirconia can handle adjustments better than 4y and 5y in terms of both strength and optical properties. 

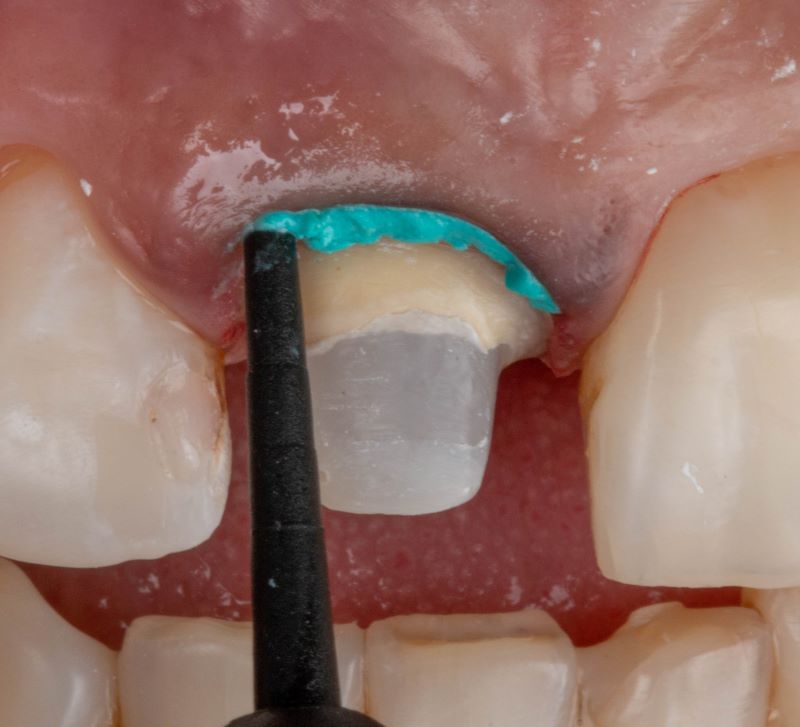
Color: The marketplace offers zirconia that is prestained and zirconia that is not prestained. In the case of prestained zirconia, we have about a tenth of a millimeter in reduction capability before we notice a color change. Knowing this is important when we need to adjust a restoration, so we can manage adjustments to deliver the shade of restoration our patient expects. 

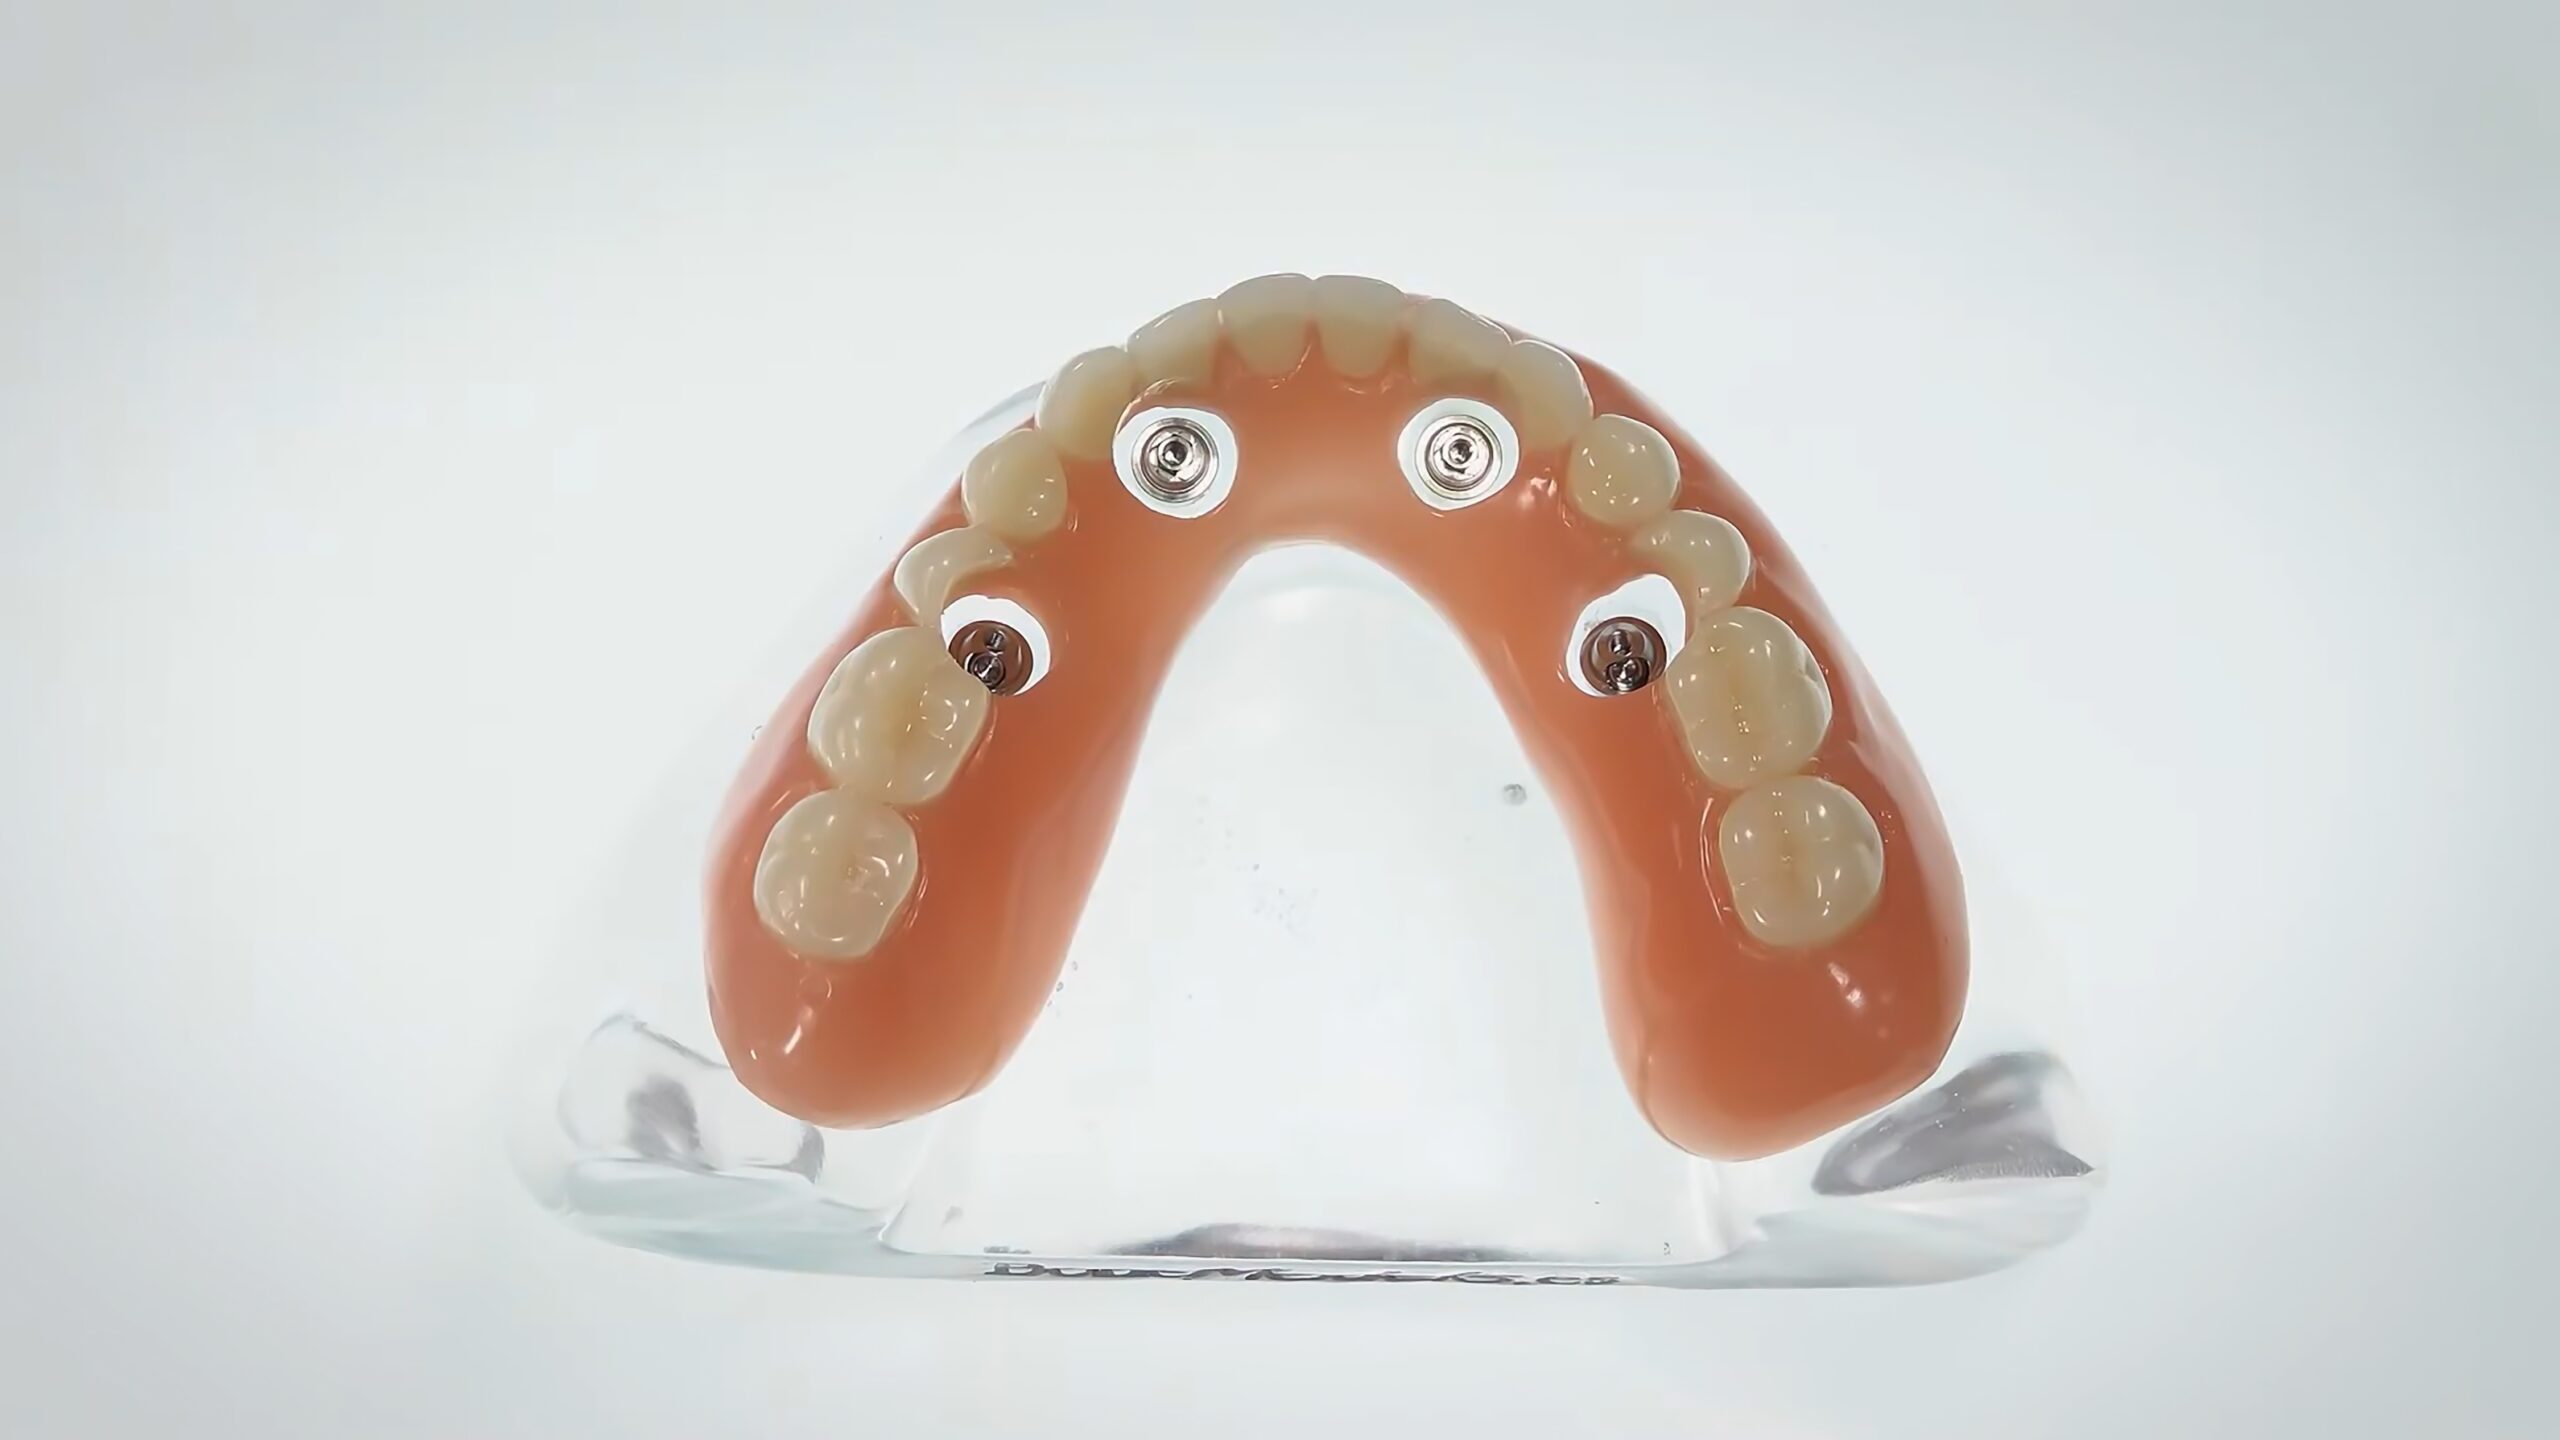
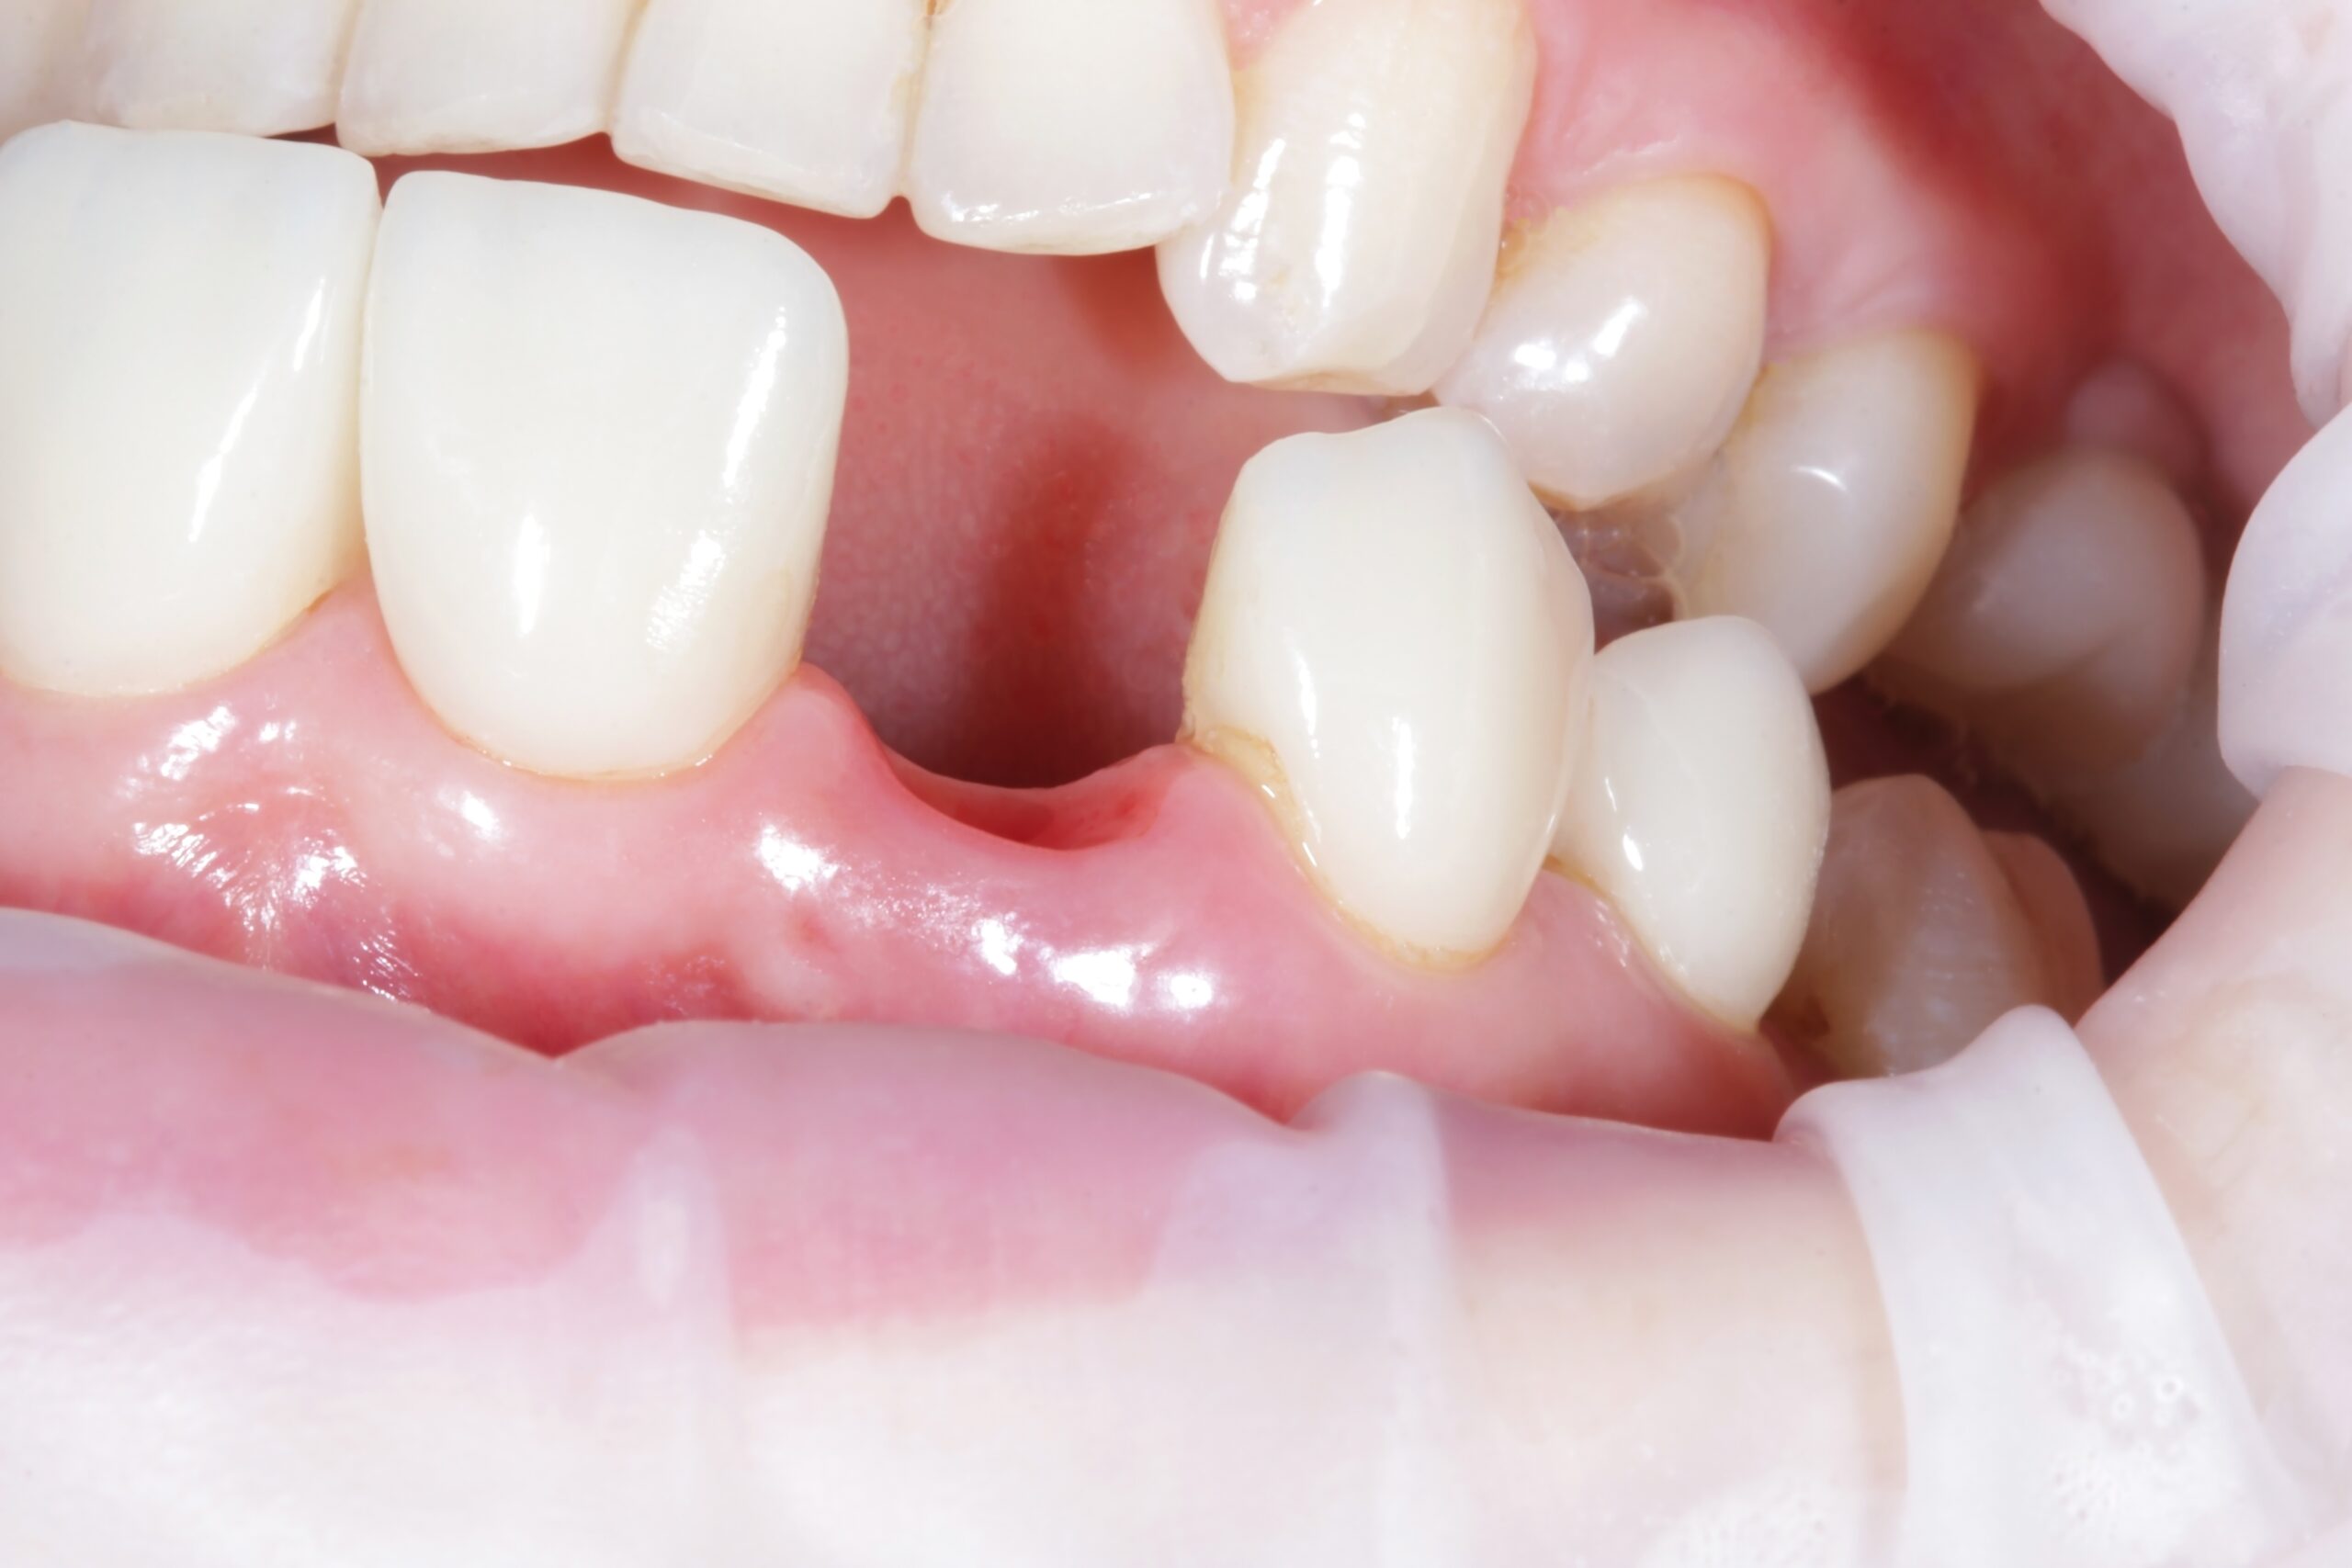
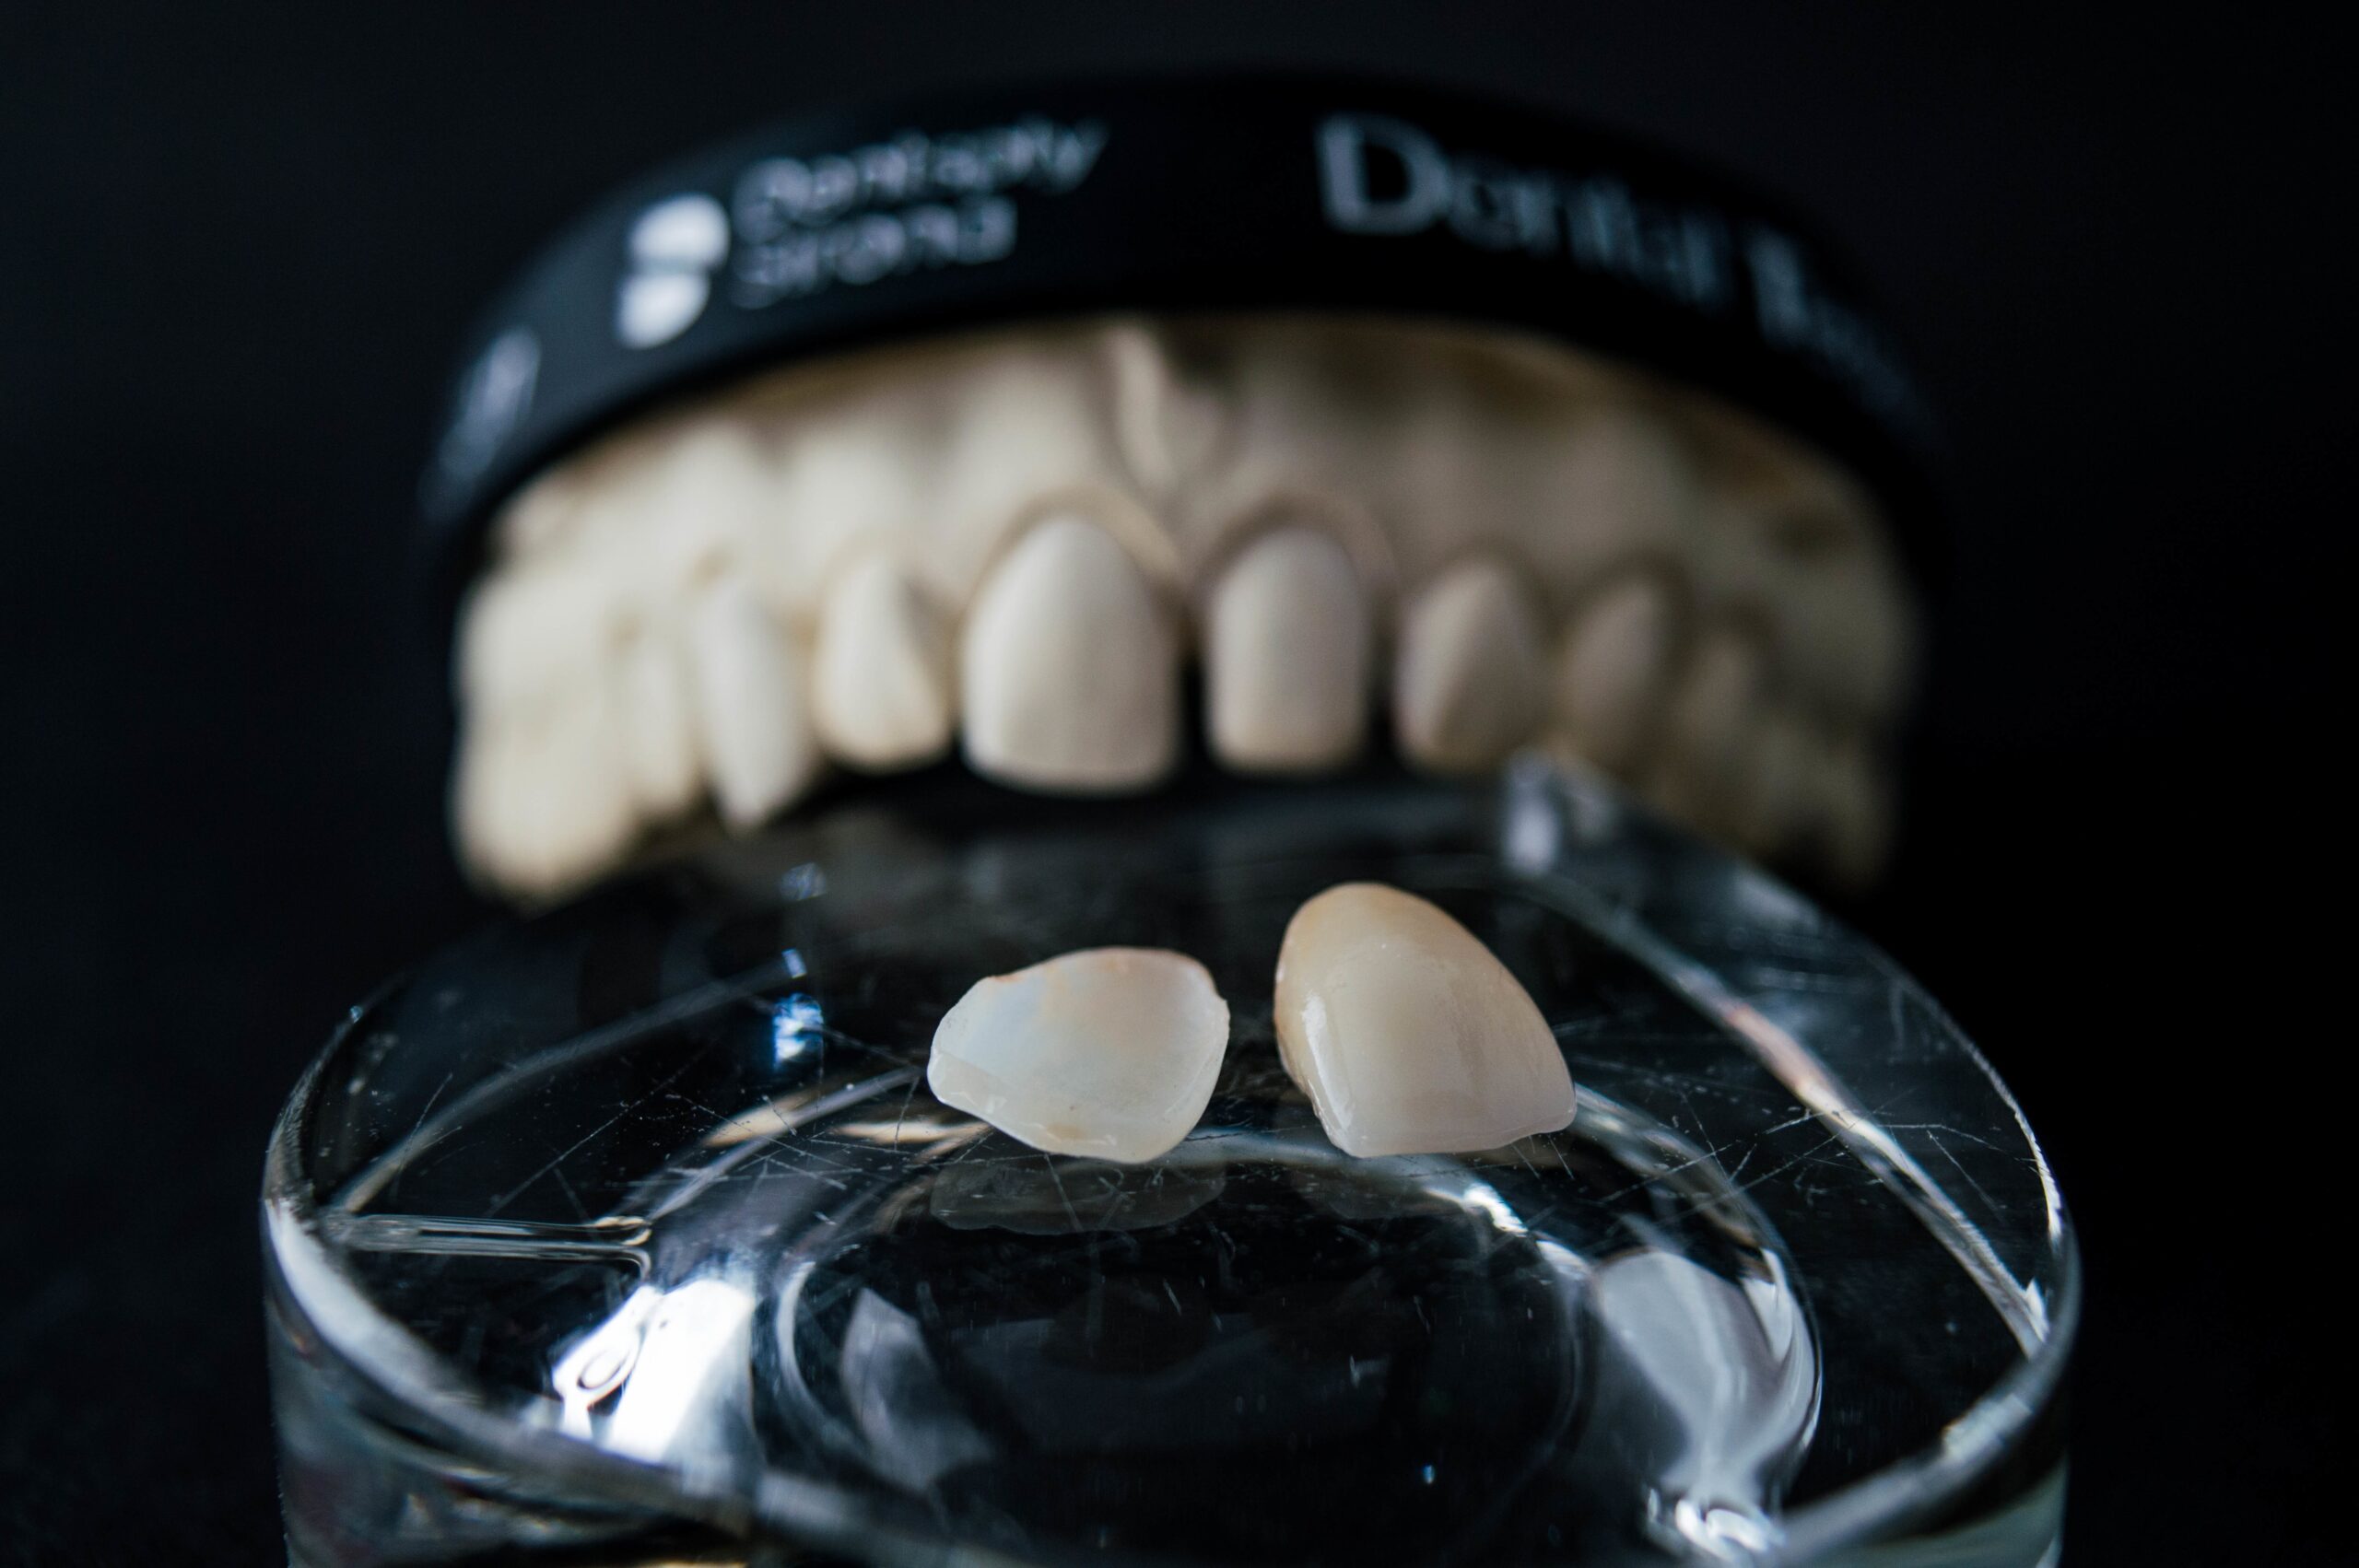
Wear on Other Materials: If zirconia is rubbing against other zirconia there is less wear than if zirconia is rubbing against lithium disilicate and softer ceramics or composites. When you’re setting up an occlusion or you are looking at a hybrid denture versus a normal denture, you must take this into account. If a patient has an upper fixed-hybrid denture, zirconia is going to wear those denture teeth relatively fast. Knowing this, we can best prepare our patient for the wear that is likely to occur. 

Zirconia Removal Burs Vs. Restorative Diamond Burs: In an in vitro study, the burs that are marketed specifically for adjusting zirconia restorations did not perform better on 3y, 4y, or 5y zirconia, and they did not generate less heat. 

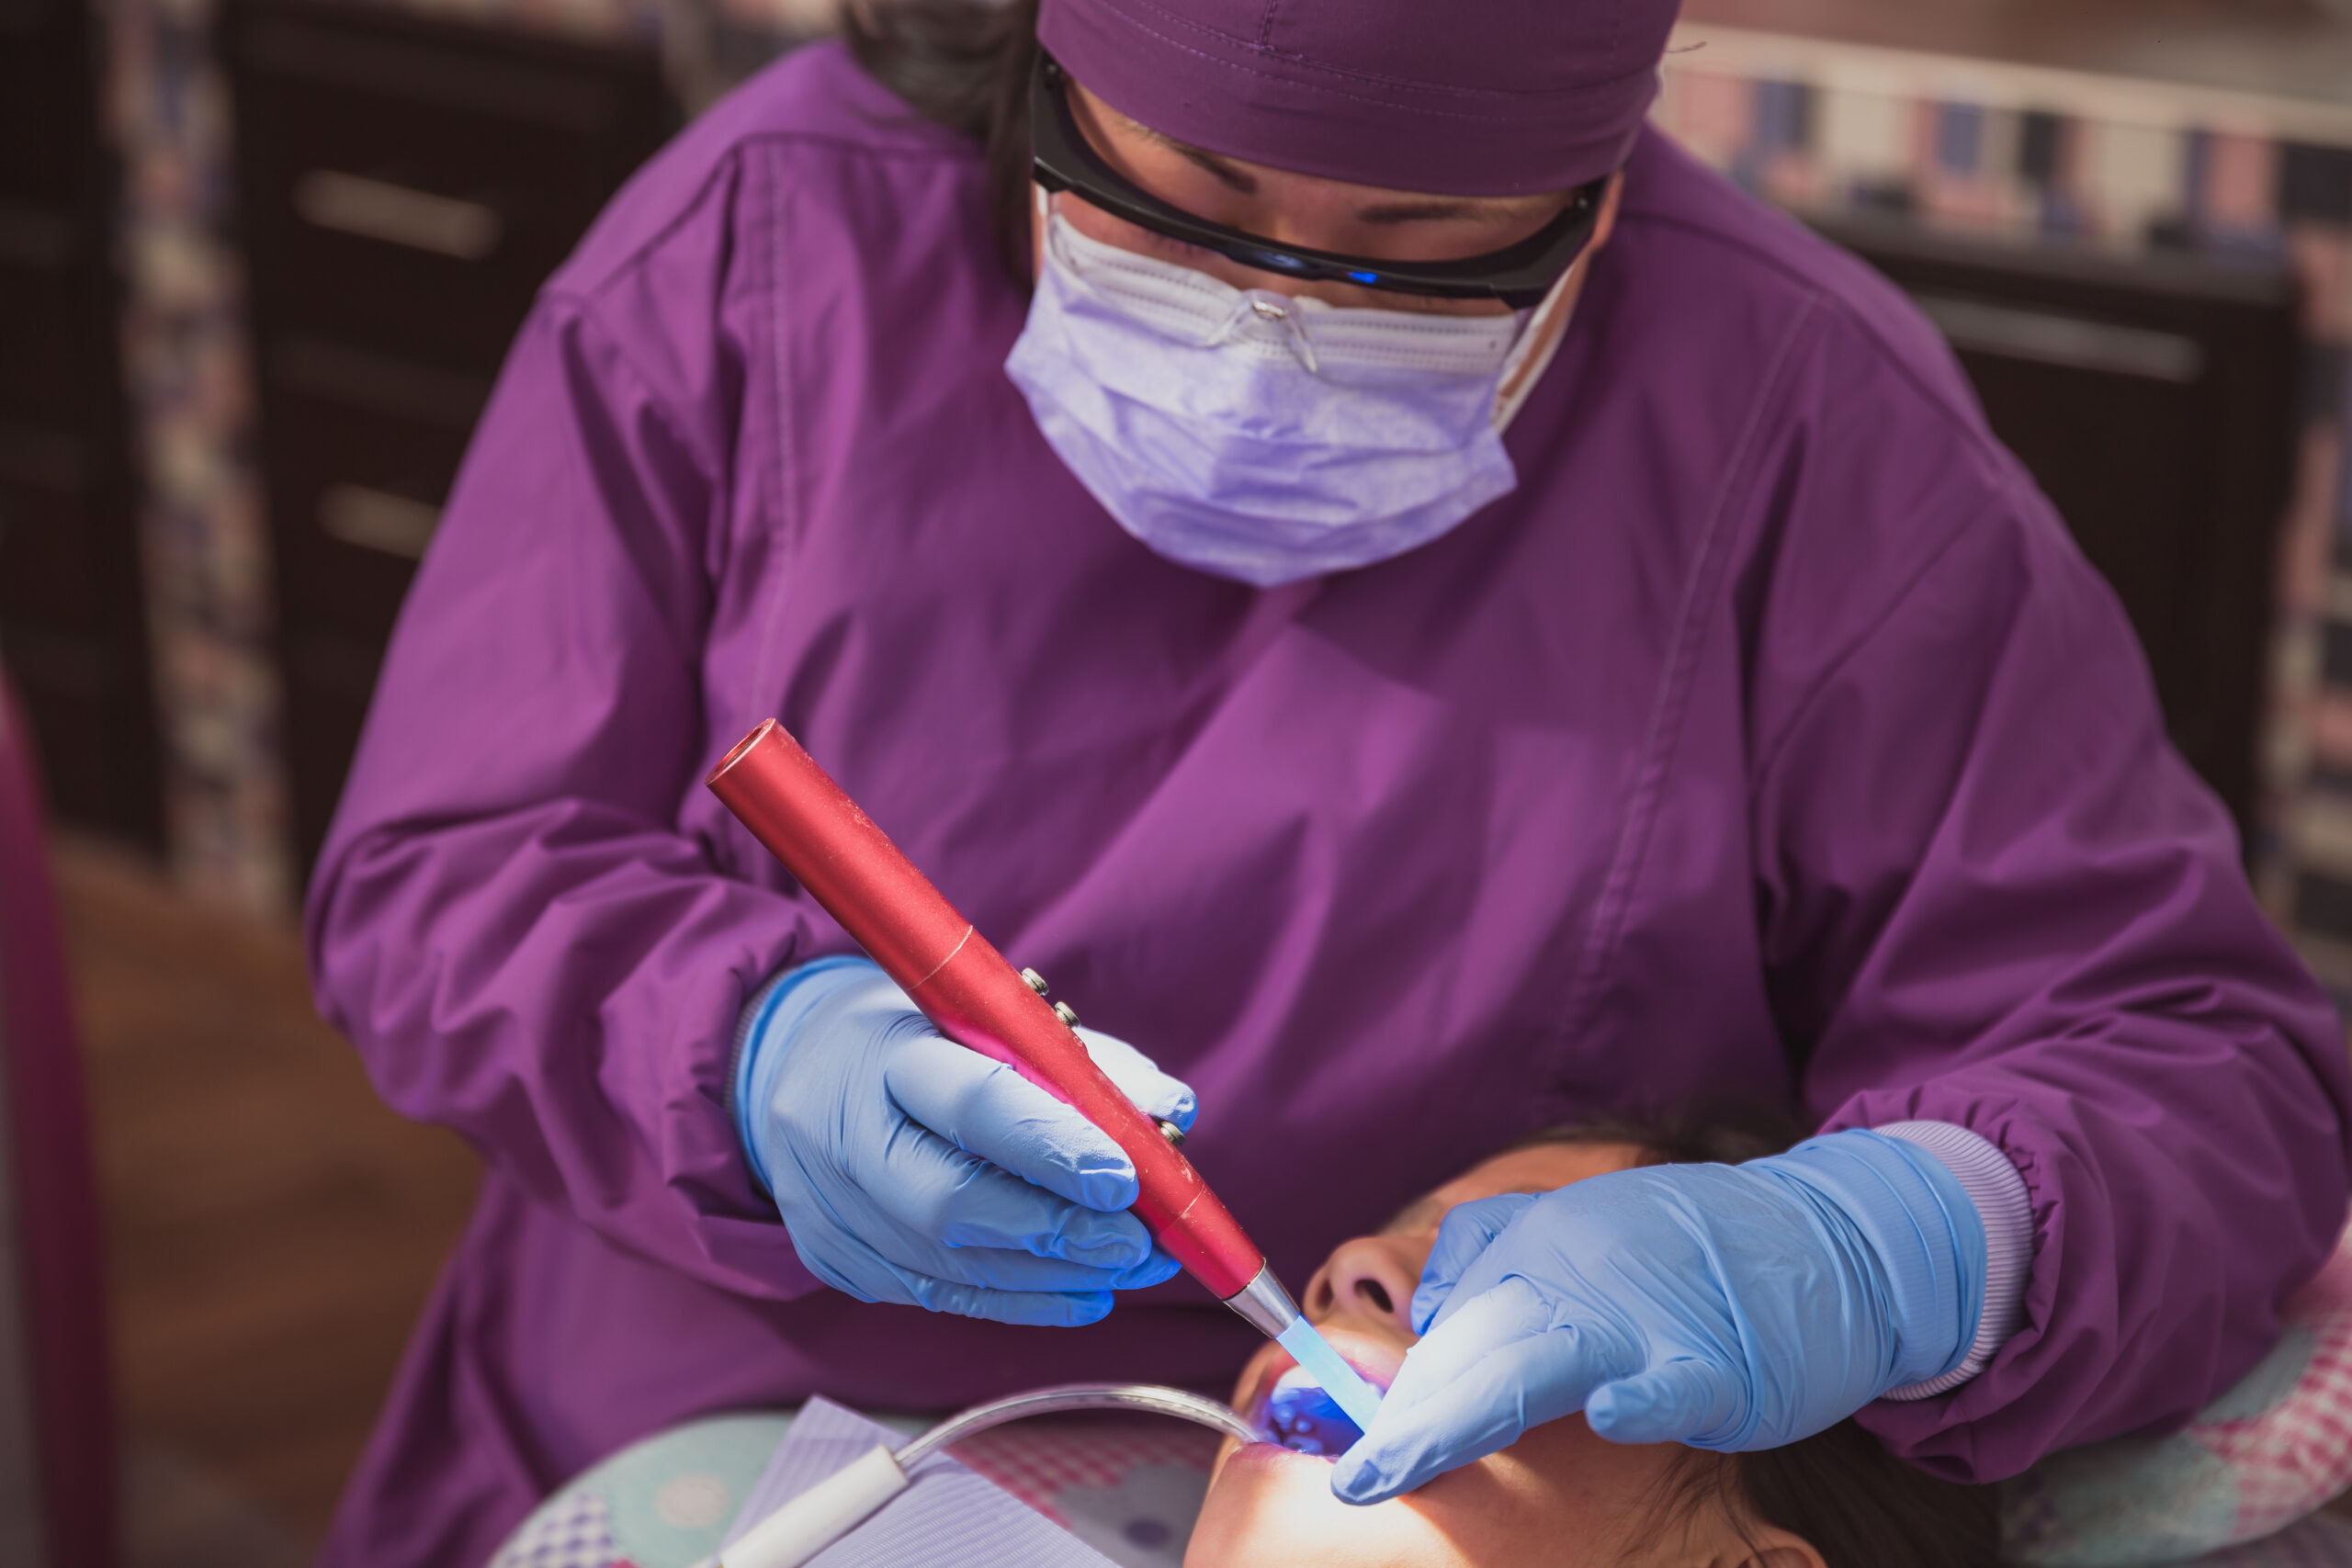
Note About Polishing Zirconia: When we are polishing high-strength ceramics like zirconia and lithium disilicate, we must be careful not to push too hard, and we must use a continuous cooling spray of water. Otherwise, we risk nerve damage due to thermal irritation. Also, if we generate too much heat, we will overheat the glue that bonds the fine diamond particles on the bur and are likely to render the bur useless. 


Related Course

Mastering Dental Photography: From Start to Finish

DATE: October 29 2026 @ 8:00 am - October 31 2026 @ 12:00 pm

Location: The Pankey Institute

CE HOURS: 19

Regular Tuition: $ 2995

Single Occupancy with Ensuite Private Bath (per night): $ 355

Dental photography is an indispensable tool for a high level practice. We will review camera set-up and what settings to use for each photo. All photos from diagnostic series, portraits,…

Learn More>

About Author

Default Avatar
Christopher Mazzola, DDS

FIND A PANKEY DENTIST OR TECHNICIAN

I AM A
I AM INTERESTED IN

VIEW COURSE CALENDAR

Making the Case for Composite Warmers 

October 12, 2024 Lee Ann Brady

By Lee Ann Brady 

Many dentists warm composite by placing it on top of the operatory light, but I wonder what the patient is thinking when you reach for it on top of the light.  

Some dentists have water heated in one of the green bowls from the lab. I wouldn’t do that either because I wouldn’t know the precise temperature and water intrusion could occur into the composite syringe or compule. 

Composite warmers are not a big expense in a dental practice. I have one in every one of our operatories. The warmers come with two interchangeable top pieces. One is designed for syringes, and one is designed for compules. They warm composite to a specific temperature. 

When you heat composite, there’s no permanent change to the chemistry. As composite is warmed, its viscosity is reduced but as soon as the composite cools, it goes right back to its original viscosity. Studies show that the reduction in viscosity results in better marginal adaptation because it is more flowable, softer for sculpting, and much easier for us to push it against the margins. We also get a greater depth of cure because composite polymerizes more effectively at reduced viscosity. This reduces the shrinkage of the material and increases the longevity of our restorations.  

Note: If you leave a composite warmer on with composite in it for days on end, the warming will evaporate some of monomer and the composite will become brittle and crumbly. So, have your assistant load the composite you plan to use for the day at the beginning of the day or at the beginning of the appointment. You can turn the warmer on when you are delivering anesthetic, and it will be warm when you are ready to use it. We’ve developed the habit of turning off the warmer at the end of each appointment. 

About Author

User Image
Lee Ann Brady

FIND A PANKEY DENTIST OR TECHNICIAN

I AM A
I AM INTERESTED IN

VIEW COURSE CALENDAR

State-of-the-Art Hygiene Therapy  

August 10, 2024 Stephen Malone DMD

By Stephen K. Malone, DMD and Michael Costa, DDS, MHS 

We all know that the instrumentation options for dental hygiene services have come a long way since the first dental hygienist scaled teeth in 1906.   Early in the 20th century, the only technology a hygienist had was a set of sharp metal instruments and a spinning brush of gritty pumice. In the 1950s, ultrasonic technology was invented which helped disrupt calculus, but hygienists still had to follow up with scalers and polishers. Similarly, since the days of first scientific articles regarding oral micro-organisms in the 1870’s, our knowledge has increased exponentially regarding the role of oral biofilm not only in oral diseases, but whole-body health.   

In 2021 our office staff attended continuing education courses with legendary periodontist, Dr. Sam Low. Dr. Low introduced our practice to new technology that would help elevate our hygiene practice by improving biofilm removal, increasing patient ownership of personal oral hygiene practices, decreasing damage to root surfaces and restorations, and providing a gentler patient experience.   

The instrumentation is provided though a unit called a Prophylaxis Master – which is a combination of two different treatment modalities.  The hygienist first uses the Airflow unit to remove soft biofilm and young calculus.  The airflow handpiece delivers a combination of water, air and fine erythritol powder to lift and suction away the biofilm as well as stains.  Once the biofilm, young calculus and surface stains are removed, the hygienist moves to the integrated Piezo scaler to gently emulsify the remaining calculus. There are several different tips for both units to access deep pockets and implant surfaces safely. 

Scientific research has demonstrated this system is the gentlest and most efficient way to eliminate bacteria around cosmetic work and titanium implants, on enamel and root surfaces, and even on soft tissues. 

The GBT Protocol 

To get the most out of our investment, we implemented the “GBT” protocol, which is recommended by EMS, the company that manufactures the Prophylaxis Master. The 8-step GBT protocol is as follows:  

  1. Assess the teeth, gingiva, periodontal tissues, and any implants and peri-implant tissues. 
  2. Use disclosing solution to identify areas of biofilm accumulation. The color will also guide the hygienist to remove the biofilm with Airflow handpiece, after which calculus is easier to detect. 
  3. Show the patient the colored biofilm to raise awareness. Spend time educating the patient and emphasizing the importance of prevention. 
  4. Removal of biofilm, early calculus and stains with the Airflow. Airflow Plus powder is safe to use on teeth, root surfaces, gums, tongue, and palate. It can also be used to clean dental implants, restorations, orthodontic appliances, and clear aligners. 
  5. Use Airflow Plus powder with the Perioflow® nozzle to remove biofilm in >4 to 9mm pockets, root furcations, and on implants. 
  6. Remove the remaining calculus, using the minimally invasive EMS PIEZON® PS instrument supra and subgingivally in up to 10mm pockets and clean >10mm pockets with a mini curette. Use the EMS PIEZON® PI MAX instrument around implants up to 3mm subgingivally and on restorations. 
  7. After checking to make sure all biofilm and calculus has been removed, diagnosing for caries, and applying fluoride for a fresh and smooth feeling. 
  8. Schedule the patient’s recall visit based on risk assessment. 

What Our Patients Love About It  

  • Patients trust the thoroughness of the therapy because they can see the disclosed biofilm before it is removed and its absence after it is removed.  
  • The therapy is more comfortable than traditional methods. The water is warmed, and there is minimal root surface sensitivity compared to traditional hand and ultrasonic instrumentation.  
  • This technology gently reaches into places where traditional instruments couldn’t remove stains and tartar.  
  • The education patients receive from our hygienists highlights the value of the therapy.  
  • We have found that this is a superior stain and calculus removing technology.  
  • The erythritol powder that is mixed with warm water is pleasant tasting.  

 What Our Hygienists Love About It  

  • Less hand instrumentation means less body fatigue.  
  • There is superior stain removal and visual evidence that the biofilm is completely removed.  
  • Patients don’t complain about sensitivity or “poking.”  

 What Doctors Love About It 

  • Patients are happier.  
  • Hygienists are happier.  
  • It eliminates patient complaints about hygienists who are either “too aggressive” or “not aggressive enough” with instrumentation.  
  • It prevents damage to cosmetic and implant restorations, as well as root and enamel surfaces.  

Note: We are not paid to promote EMS or Guided Biofilm Therapy. We honestly think this is the best way we can efficiently, comfortably, and thoroughly provide the comprehensive care our patients deserve—and we thought we should share our great experience 

Related Course

Mastering Dental Photography: From Start to Finish

DATE: October 29 2026 @ 8:00 am - October 31 2026 @ 12:00 pm

Location: The Pankey Institute

CE HOURS: 19

Regular Tuition: $ 2995

Single Occupancy with Ensuite Private Bath (per night): $ 355

Dental photography is an indispensable tool for a high level practice. We will review camera set-up and what settings to use for each photo. All photos from diagnostic series, portraits,…

Learn More>

About Author

User Image
Stephen Malone DMD

Dr. Stephen Malone received his Doctorate of Dental Medicine Degree from the University of Louisville in 1994 and has practiced dentistry in Knoxville for nearly 20 years. He participates in multiple dental study clubs and professional organizations, where he has taken a leadership role. Among the continuing education programs he has attended, The Pankey Institute for Advanced Dental Education is noteworthy. He was the youngest dentist to earn the status of Pankey Scholar at this world-renowned post-doctoral educational institution, and he is now a member of its Visiting Faculty.

FIND A PANKEY DENTIST OR TECHNICIAN

I AM A
I AM INTERESTED IN

VIEW COURSE CALENDAR

Retooling an Implant Supported Hybrid Denture 

May 20, 2024 Lee Ann Brady DMD

By Lee Ann Brady, DMD 

A patient chipped a tooth on her lower hybrid denture and loosened an implant screw. The denture had been placed 18 years ago, so she had an old titanium bar with denture teeth and pink acrylic. That day, I put the screw back in and smoothed out where the tooth was chipped. During this visit we had a great conversation about the future of her hybrid denture. 

I have had a similar conversation with several patients in recent months. They have the original, traditional bar retained hybrid denture that is nearing the end of its lifespan. And so, what are the options? 

  1. If the bar is in great shape, new denture teeth and a new denture base can be milled and placed over the existing titanium bar. 
  1. Alternatively, we can get rid of the bar and go to something that is all zirconia. 

If there is a preference for the first option, the first requirement is to make sure the titanium bar is in good condition. After 18 years, we would take it off and have the laboratory examine it under microscopy.  

If converting to all-zirconia and the patient has had upper and lower dentures, we must consider if one arch can be converted without converting the second arch. A zirconia arch is going to wear an opposing original denture fast if there is parafunction, and the zirconia arch is likely to fracture the opposing original prosthetic teeth. 

We have options today we can think about with our patients, but many have in their minds that when they got their hybrid dentures years ago, the dentures would last. All the time, energy, and dollars to freshen up or replace their denture is a big deal to them. Shifting their mindset from “I thought I was done investing in dentistry” to “My denture is at the end of its lifespan” is a big hurdle. So, the earlier we can start those conversations before they need to invest, the easier they can transition their minds to accept care with grace when the time comes. 

When your bar retained hybrid denture patients visit for perio maintenance and your exams, inform them of the lifespan of their denture is at most 20 years and set expectations for discussing the best available options at some point in the future.  

Related Course

Mastering Dental Photography: From Start to Finish

DATE: October 29 2026 @ 8:00 am - October 31 2026 @ 12:00 pm

Location: The Pankey Institute

CE HOURS: 19

Regular Tuition: $ 2995

Single Occupancy with Ensuite Private Bath (per night): $ 355

Dental photography is an indispensable tool for a high level practice. We will review camera set-up and what settings to use for each photo. All photos from diagnostic series, portraits,…

Learn More>

About Author

User Image
Lee Ann Brady DMD

Dr. Lee Ann Brady is passionate about dentistry, her family and making a difference. She is a general dentist and owns a practice in Glendale, AZ limited to restorative dentistry. Lee’s passion for dental education began as a CE junkie herself, pursuing lots of advanced continuing education focused on Restorative and Occlusion. In 2005, she became a full time resident faculty member for The Pankey Institute, and was promoted to Clinical Director in 2006. Lee joined Spear Education as Executive VP of Education in the fall of 2008 to teach and coordinate the educational curriculum. In June of 2011, she left Spear Education, founded leeannbrady.com and joined the dental practice she now owns as an associate. Today, she teaches at dental meetings and study clubs both nationally and internationally, continues to write for dental journals and her website, sits on the editorial board of the Journal of Cosmetic Dentistry, Inside Dentistry and DentalTown Magazines and is the Director of Education for The Pankey Institute.

FIND A PANKEY DENTIST OR TECHNICIAN

I AM A
I AM INTERESTED IN

VIEW COURSE CALENDAR

Be Cautious with Retraction Pastes

April 24, 2024 Lee Ann Brady

Lee Ann Brady, DMD 

I’m a big fan of retraction pastes, which are aluminum-based hemostatic agents. Their attributes make them highly effective when I need them, but they are also technique sensitive. 

  • They are great for hemostasis within sixty seconds
  • For a stringent retraction, you can leave them in place for two to five minutes
  • They are so thick and viscous you can see them and easily rinse them off
  • They do not cause prep discoloration like liquid hemostatic agents do
  • They can interfere with the set of VPS or polyether impression materials but are less likely to do that than the liquids because they are so easily rinsed off

We must still be careful, though, to remove retraction paste from the sulcus. If residue is left behind, the impression material will not fully polymerize around the margin. So, while I love retraction pastes for hemostasis, I don’t use them unless I need them. I still prefer a two-cord technique using plain cord and epinephrine. When I do use a retraction paste, I am extremely methodical about rinsing the paste out of the sulcus. 

Related Course

Mastering Dental Photography: From Start to Finish

DATE: October 29 2026 @ 8:00 am - October 31 2026 @ 12:00 pm

Location: The Pankey Institute

CE HOURS: 19

Regular Tuition: $ 2995

Single Occupancy with Ensuite Private Bath (per night): $ 355

Dental photography is an indispensable tool for a high level practice. We will review camera set-up and what settings to use for each photo. All photos from diagnostic series, portraits,…

Learn More>

About Author

User Image
Lee Ann Brady

FIND A PANKEY DENTIST OR TECHNICIAN

I AM A
I AM INTERESTED IN

VIEW COURSE CALENDAR

Removing Resin from Inside a Crown 

April 19, 2024 Lee Ann Brady DMD

By Lee Ann Brady, DMD 

When a crown comes off and we are going to put it back in the mouth, we need to remove the old resin cement that is inside the crown. What is the best way to go about this? 

First, we need to know if the crown is made of zirconia or lithium disilicate. If you have a radiograph of that restoration, you can tell immediately which one of those two things it is. If you don’t, you can always attempt to X-ray it. (That’s what I do.) Alternatively, you can assume the crown is made of lithium disilicate, which is the more technique-sensitive material when it comes to removing cement. 

For crowns confirmed to be zirconia, employing 30-micron aluminum oxide air abrasion effectively clears out the old resin cement. Subsequently, re-etching the inside of the zirconia prepares it for reseating. For crowns presumed to be lithium disilicate, this approach should be avoided to prevent crack propagation. 

In the case of lithium disilicate crowns, two alternative methods can be employed: 

  1. The crown can be placed in a porcelain oven to liquefy and evaporate the old resin. However, caution must be exercised to avoid rapid heating of the hydrated ceramic that has been in the oral environment. Rapid dehydration will introduce cracks and lead to crown fracturing. 
  1. An alternative method involves using a brown silicone point in a high-speed handpiece, adjusted to lowest speed. A brown silicone point at slow speed effectively removes resin without damaging ceramic. 

How will you know when all the resin has been removed? When etching lithium disilicate, whether using red 5% hydrofluoric acid or Monobond Etch & Prime from Ivoclar Vivadent, any remaining resin will be evident because the dye sticks to it after the etching solution is rinsed off.  

Related Course

Mastering Dental Photography: From Start to Finish

DATE: October 29 2026 @ 8:00 am - October 31 2026 @ 12:00 pm

Location: The Pankey Institute

CE HOURS: 19

Regular Tuition: $ 2995

Single Occupancy with Ensuite Private Bath (per night): $ 355

Dental photography is an indispensable tool for a high level practice. We will review camera set-up and what settings to use for each photo. All photos from diagnostic series, portraits,…

Learn More>

About Author

User Image
Lee Ann Brady DMD

Dr. Lee Ann Brady is passionate about dentistry, her family and making a difference. She is a general dentist and owns a practice in Glendale, AZ limited to restorative dentistry. Lee’s passion for dental education began as a CE junkie herself, pursuing lots of advanced continuing education focused on Restorative and Occlusion. In 2005, she became a full time resident faculty member for The Pankey Institute, and was promoted to Clinical Director in 2006. Lee joined Spear Education as Executive VP of Education in the fall of 2008 to teach and coordinate the educational curriculum. In June of 2011, she left Spear Education, founded leeannbrady.com and joined the dental practice she now owns as an associate. Today, she teaches at dental meetings and study clubs both nationally and internationally, continues to write for dental journals and her website, sits on the editorial board of the Journal of Cosmetic Dentistry, Inside Dentistry and DentalTown Magazines and is the Director of Education for The Pankey Institute.

FIND A PANKEY DENTIST OR TECHNICIAN

I AM A
I AM INTERESTED IN

VIEW COURSE CALENDAR

How I Address Filling the Access Hole of a Screw-Retained Implant Crown 

April 17, 2024 Lee Ann Brady DMD

By Lee Ann Brady, DMD 

For addressing the access hole of a screw-retained implant crown, my preferred method involves applying Teflon tape over the hole followed by temporary filling material, such as Telio Inlay from Ivoclar Vivadent. 

I emphasize to patients the importance of maintaining accessibility to the screw for potential adjustments without jeopardizing the integrity of the ceramic crown. Hence, immediately after seating the crown, I ensure no adjustments are needed before doing the filling. 

Patients are scheduled for a final post-op appointment with the surgeon after the restoration is in place. If there are no issues requiring crown removal, the Teflon tape and Telio Inlay may remain indefinitely, monitored during hygiene recall appointments. As long as the temporary filling remains intact, replacement is unnecessary. 

In cases where the Telio Inlay dislodges but the Teflon tape remains intact, I inform the patient of our plan to reapply the temporary filling. However, if repeated dislodgment occurs, leading to inconvenience, we consider transitioning to a permanent filling. In such instances, fresh Teflon tape is applied, and the access hole is filled with composite that precisely matches the crown’s color. 

Even if years pass and the Telio Inlay needs replacement, I opt for a temporary filling for ease of identification if removal is necessary. Only if frequent filling replacements prove bothersome do I consider switching to a permanent filling because I prioritize easy retrievability of the screw. 

Related Course

E4: Posterior Reconstruction and Completing the Comprehensive Treatment Sequence

DATE: February 27 2025 @ 8:00 am - March 3 2025 @ 2:30 pm

Location: The Pankey Institute

CE HOURS: 44

Dentist Tuition: $ 7400

Single Occupancy with Ensuite Private Bath (per night): $ 345

THIS COURSE IS SOLD OUT The purpose of this course is to help you develop mastery with complex cases involving advanced restorative procedures, precise sequencing and interdisciplinary coordination. Building on…

Learn More>

About Author

User Image
Lee Ann Brady DMD

Dr. Lee Ann Brady is passionate about dentistry, her family and making a difference. She is a general dentist and owns a practice in Glendale, AZ limited to restorative dentistry. Lee’s passion for dental education began as a CE junkie herself, pursuing lots of advanced continuing education focused on Restorative and Occlusion. In 2005, she became a full time resident faculty member for The Pankey Institute, and was promoted to Clinical Director in 2006. Lee joined Spear Education as Executive VP of Education in the fall of 2008 to teach and coordinate the educational curriculum. In June of 2011, she left Spear Education, founded leeannbrady.com and joined the dental practice she now owns as an associate. Today, she teaches at dental meetings and study clubs both nationally and internationally, continues to write for dental journals and her website, sits on the editorial board of the Journal of Cosmetic Dentistry, Inside Dentistry and DentalTown Magazines and is the Director of Education for The Pankey Institute.

FIND A PANKEY DENTIST OR TECHNICIAN

I AM A
I AM INTERESTED IN

VIEW COURSE CALENDAR

Dental Care While Wearing an Essix Retainer 

April 15, 2024 Lee Ann Brady

By Lee Ann Brady, DMD 

One of the most common ways that we temporize a patient who is having maxillary anterior implant dentistry is with an Essix retainer. Some patients will wear it 24 hours a day and others for less. Hopefully they are taking it out to rinse, brush, and floss, but the reality is they are wearing a removable device that covers all of the tooth surfaces for a lot of hours every day, and we’re increasing their risk of caries, decalcification, and gingivitis. 

In addition to discussing the normal oral hygiene to be done at home, in our practice, we typically dispense a product like Clinpro 5000 from 3M or MI Paste from GC America. These are high calcium and fluoride products that provide fluoride treatments inside the Essex retainer. 

  • If a patient is sleeping in the Essix, the instructions are to brush and floss the teeth and then use a toothbrush to spread a little bit of Clinpro or MI Paste on the inside of the retainer before going to sleep. 
  •  If they are not wearing the Essix during sleep, the instructions are the same but to wear the Essix for up to an hour every evening before removing it to go to sleep. 

If the patient’s caries risk is high, I prefer using 10% carbamide peroxide gel instead of Clinpro or MI Paste. This is the active ingredient we us in perio trays to help prevent gingivitis. This is also the means by which patients can whiten their teeth while wearing an Essix retainer. 

To prevent damage to the Essix, instruct patients to rinse it with cold water and, when not wearing it, to store it in the provided container.  

Related Course

Mastering Dental Photography: From Start to Finish

DATE: October 29 2026 @ 8:00 am - October 31 2026 @ 12:00 pm

Location: The Pankey Institute

CE HOURS: 19

Regular Tuition: $ 2995

Single Occupancy with Ensuite Private Bath (per night): $ 355

Dental photography is an indispensable tool for a high level practice. We will review camera set-up and what settings to use for each photo. All photos from diagnostic series, portraits,…

Learn More>

About Author

User Image
Lee Ann Brady

FIND A PANKEY DENTIST OR TECHNICIAN

I AM A
I AM INTERESTED IN

VIEW COURSE CALENDAR

Are Your Temporaries a Practice Builder or Simply Temporary? 

April 10, 2024 Gary DeWood, DDS

Gary M. DeWood, DDS, MS 

Many dentists believe that provisional restorations don’t really matter. After all, they are not really a stand-in for the final restoration. I would respectfully disagree. I am a proponent of creating functional, durable, and highly esthetic provisional restorations, every time. They have the potential to impact your dental practice a lot more than you might think. Whether you print them, form them, or free-hand them, a GREAT temporary is a great billboard for your practice. 

  1. Make the provisional as Esthetic as the final restoration.

I contend that the more your provisionals look like what you are hoping for when you seat the final restorations, the more people will talk about them, AND you. 

I was able to build a referral restorative practice by creating provisionals that made patients want to come to my practice and specialists want to send people. For much of our career, almost the entire team of the oral surgery office we worked with, and many of the team members from the other specialty practices we worked with, were our patients in Pemberville, Ohio. 

Front teeth or back teeth, when you make them look like teeth, people will like it and they will show and tell other people. “This is just the temporary?!” was not an uncommon question or exclamation from our patients.  

  1. A GREAT guide makes a GREAT provisional restoration.

Your wax-up** cast/model serves as your vision, as your preparation guide fabrication device, and as your provisional former. When the preparation is appropriately reduced for the material selected, the temporary can mimic the restoration. 

** The wax-up might be created with wax then duplicated with impression material and stone to create a cast, or it might be scanned to be duplicated with resin and printed or milled to create a model. 

  1. 3. Use that provisional to highlight the talents of your team members.

You might LOVE to make those provisionals, but if your assistant is equally excited when it comes to recreating nature for the patient to appreciate, then it could be an opportunity for patients to see that your assistant does much more than set-up, clean up, and hand you an instrument. My dental partner, Cheryl, (who is also my wife) and I actively sought out things that could help our patients experience our team as much more than our helpers. 

As we all know, dental assistants are an integral and vital part of what the practice is and are a powerful force in how and why patients ask for dentistry. Assistants who fabricate provisionals have an opportunity to be seen differently, and we were always looking for ways to create partnership with them in our treatment. 

  1. 4. Take pictures of them.

Photographs of the temporary will make it easier for the lab to design the outcome. They will be able to see what you are thinking, able to visualize what you want, AND maybe even more importantly, see what you do not want. With anterior provisionals, I have frequently noted to my ceramist, “Please put the incisal edge in exactly this position vertically and horizontally in the face, then use your artistry to create the tooth that belongs in the face you see in the photographs of the patient before, prepared, and temporized.” 

There were many times when the technician was able to see and create effects that I might have not recognized as being “just the thing that would make these teeth extraordinary.” And don’t forget to show the patient the photograph. 

  1. 5. Love the material you make the temporary with.

The better the provisional material is at holding tooth position and functional contact, the less adjustment we’re going to have, so using a high-quality material is important. There are a lot of them out there. I like bis-acryl materials that polymerize with a hard surface, have little or no oxygen inhibited layer, and can be polished easily. The polish is more about feeling smooth than about the shine. Ask you patients how their provisional tooth “feels” when you are done, so they sing your praises. 

  1. 6. Use high-quality core material.

When you use a good core material the prep will be smoother, making it easier to fabricate nice provisionals. Ideal prep form goes a long way toward better provisionals. 

  1. ASK your patient to tell people.

As noted above, when you can elicit an emotional response about the awesomeness of your provisional, ask the patient to tell other people, “….and this is just the TEMPORARY!” 

Related Course

Mastering Dental Photography: From Start to Finish

DATE: October 29 2026 @ 8:00 am - October 31 2026 @ 12:00 pm

Location: The Pankey Institute

CE HOURS: 19

Regular Tuition: $ 2995

Single Occupancy with Ensuite Private Bath (per night): $ 355

Dental photography is an indispensable tool for a high level practice. We will review camera set-up and what settings to use for each photo. All photos from diagnostic series, portraits,…

Learn More>

About Author

User Image
Gary DeWood, DDS

FIND A PANKEY DENTIST OR TECHNICIAN

I AM A
I AM INTERESTED IN

VIEW COURSE CALENDAR

Using Glycerin with Resin-Based Temporary Dental Cements 

April 1, 2024 Kelley Brummett DMD

Kelley Brummett, DMD 

Resin-based temporary cements are wonderful due to their translucency and their ease of cleanup after light curing. My favorite is TempoCem from DMG.  

To prevent resin-based temporary cement from bonding to the newly placed composite, some dentists apply Vaseline on the prep before placing the provisional. 

Instead of Vaseline, I use glycerin. We keep glycerin in a little syringe in the room, and we put just a smidge in a little dapping dish so I can coat the top of the prep with it. Since beginning to use glycerin, I have not had difficulty retrieving bonded provisionals. 

If your provisionals come off, just get a new and stronger temporary cement. No! I am just kidding! If the provisional comes loose, it is often because you do not have enough space, so excursive interferences are high. When this happens, I engage with the patient in checking their occlusion, and continue to work out the determinants of their occlusion.  

Figuring these things out while the patient is in a provisional that is retrievable due to the ease of the temporary cement used, helps me continue to make progress on their occlusion before moving forward with the final restoration.  

It is not a failure of cement; it is a growth opportunity for discovery and patient engagement! 

Related Course

Mastering Dental Photography: From Start to Finish

DATE: October 29 2026 @ 8:00 am - October 31 2026 @ 12:00 pm

Location: The Pankey Institute

CE HOURS: 19

Regular Tuition: $ 2995

Single Occupancy with Ensuite Private Bath (per night): $ 355

Dental photography is an indispensable tool for a high level practice. We will review camera set-up and what settings to use for each photo. All photos from diagnostic series, portraits,…

Learn More>

About Author

User Image
Kelley Brummett DMD

Dr. Kelley D. Brummett was born and raised in Missouri. She attended the University of Kansas on a full-ride scholarship in springboard diving and received honors for being the Big Eight Diving Champion on the 1 meter springboard in 1988 and in 1992. Dr. Kelley received her BA in communication at the University of Kansas and went on to receive her Bachelor of Science in Nursing. After practicing nursing, Dr Kelley Brummett went on to earn a degree in Dentistry at the Medical College of Georgia. She has continued her education at the Pankey Institute to further her love of learning and her pursuit to provide quality individual care. Dr. Brummett is a Clinical Instructor at Georgia Regents University and is a member of the American Academy of Cosmetic Dentistry. Dr. Brummett and her husband Darin have two children, Sarah and Sam. They have made Newnan their home for the past 9 years. In her free time, she enjoys traveling, reading and playing with her dogs. Dr. Brummett is an active member of the ADA, GDA, AGDA, and an alumni of the Pankey Institute.

FIND A PANKEY DENTIST OR TECHNICIAN

I AM A
I AM INTERESTED IN

VIEW COURSE CALENDAR