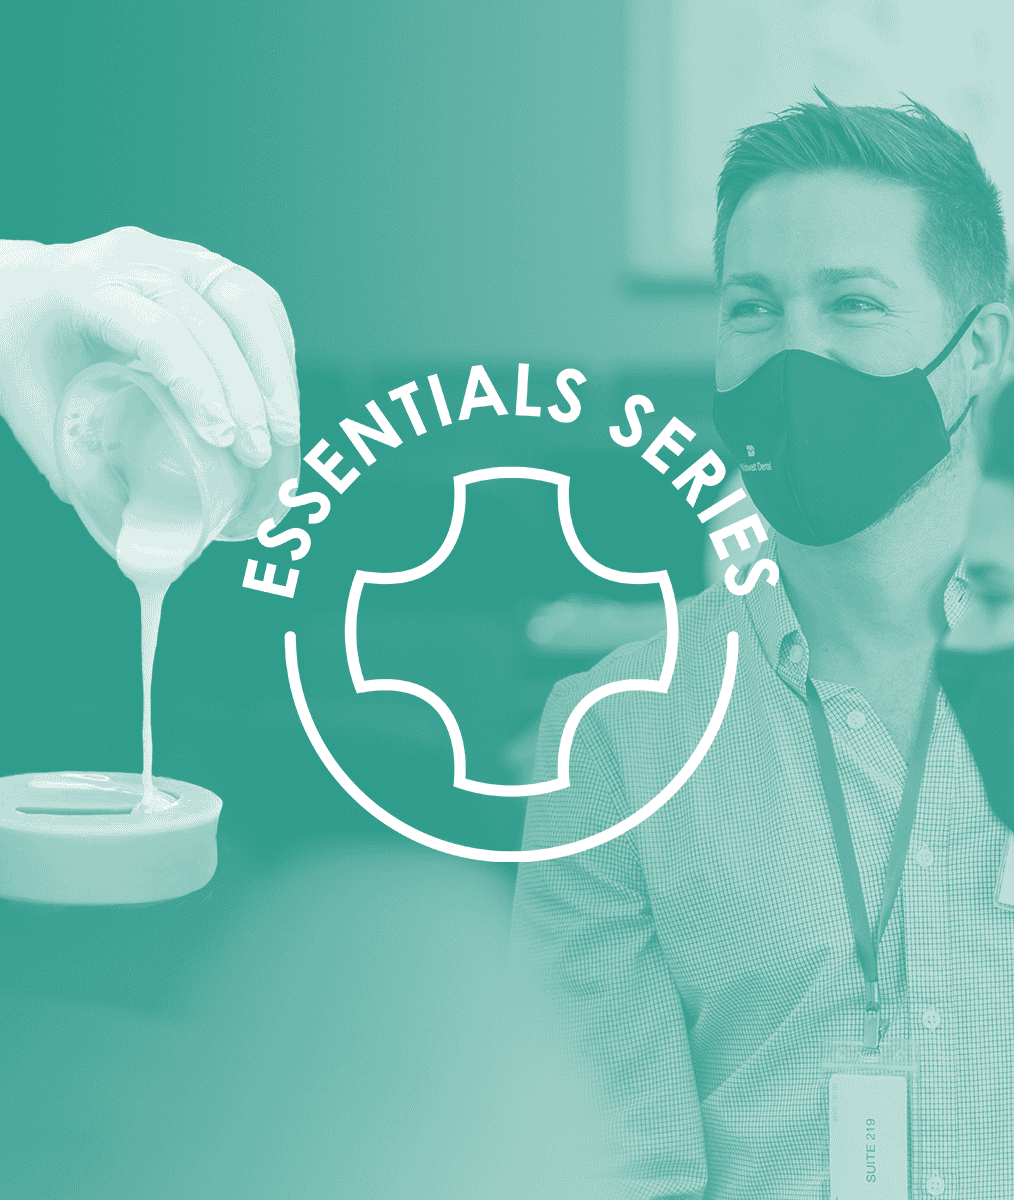
“Provisional” Versus “Temporary” 

April 12, 2024 Kelley Brummett DMD

Kelley Brummett, DMD 

After you do a crown preparation, do you tell your patients that you’re going to make them a temporary or a provisional?  

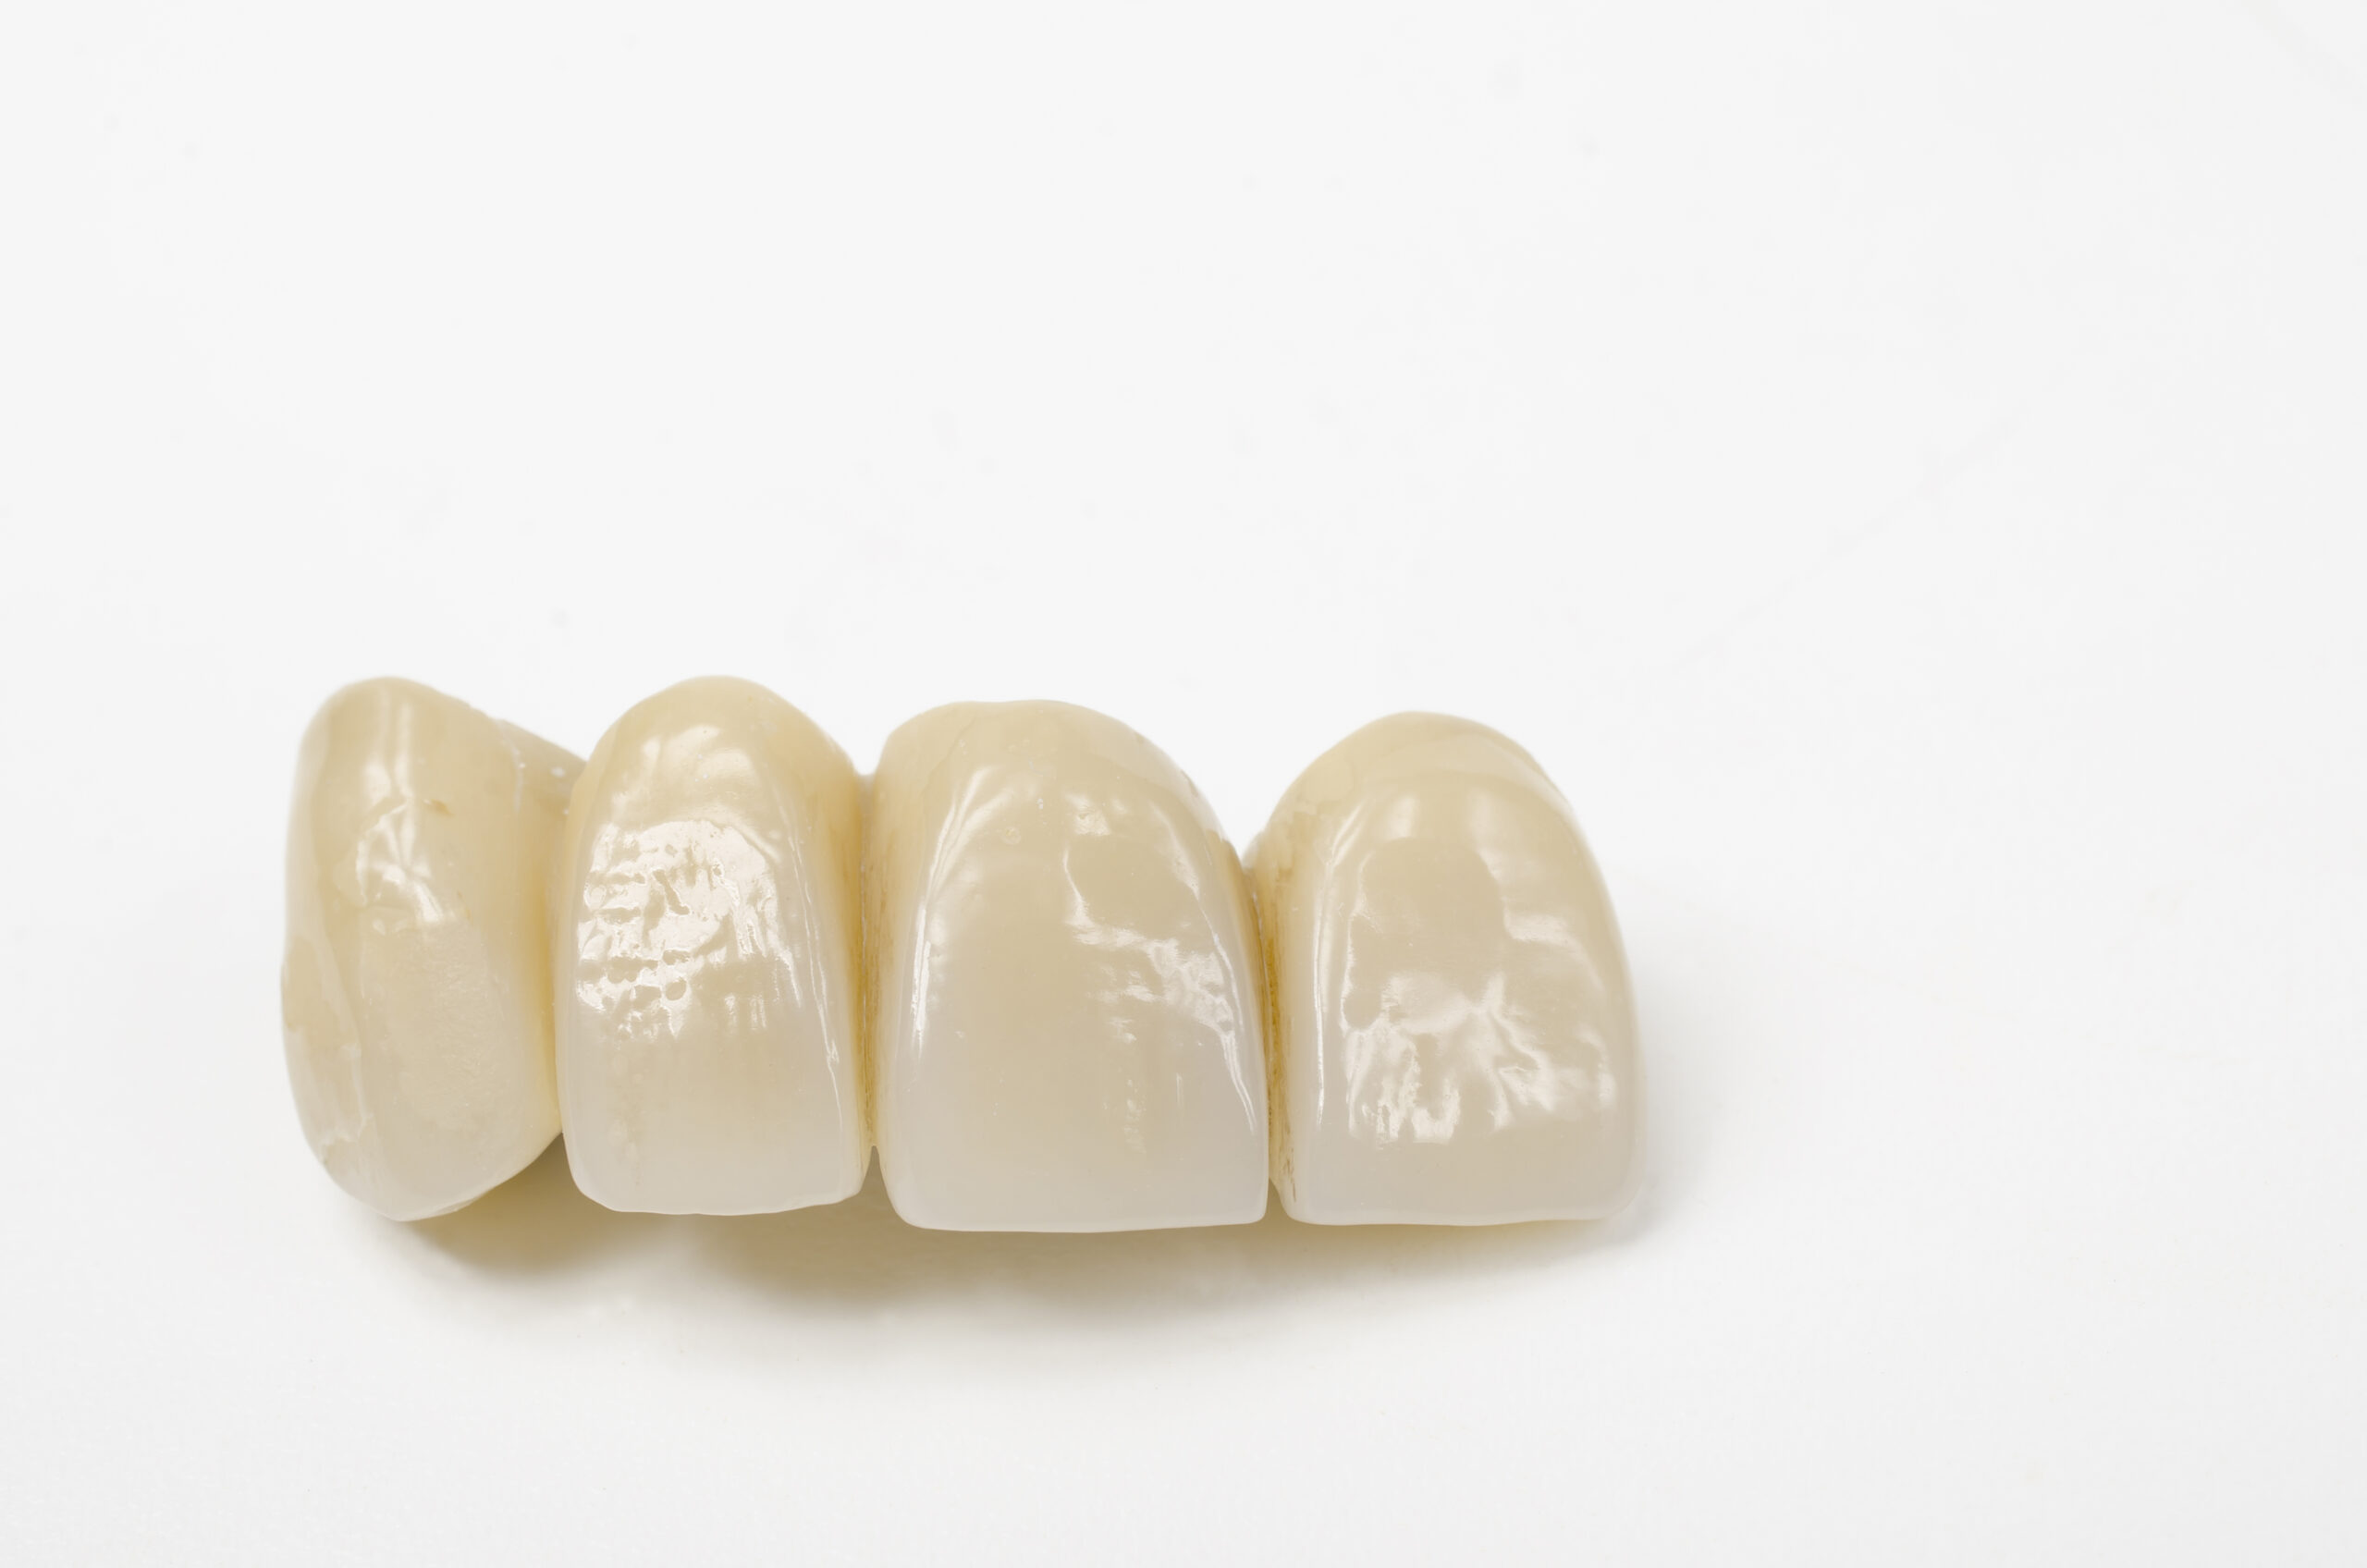
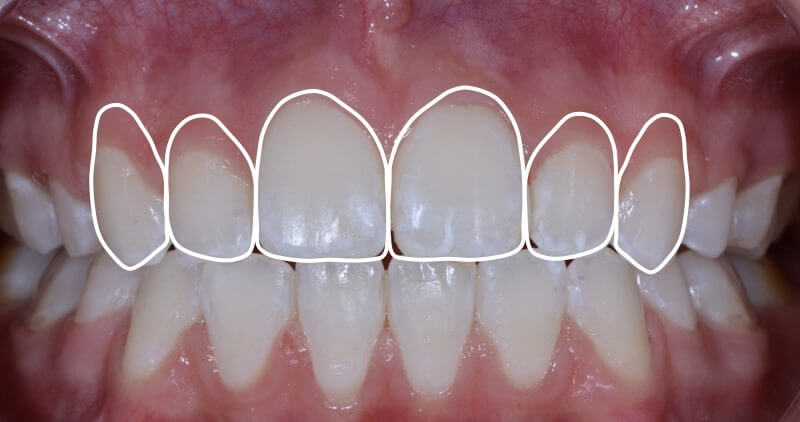
Provisionals are more than temporary restorations. They are part of a process. They’re the dress rehearsal to the final outcome. They are the prototypes for the final restorations.  

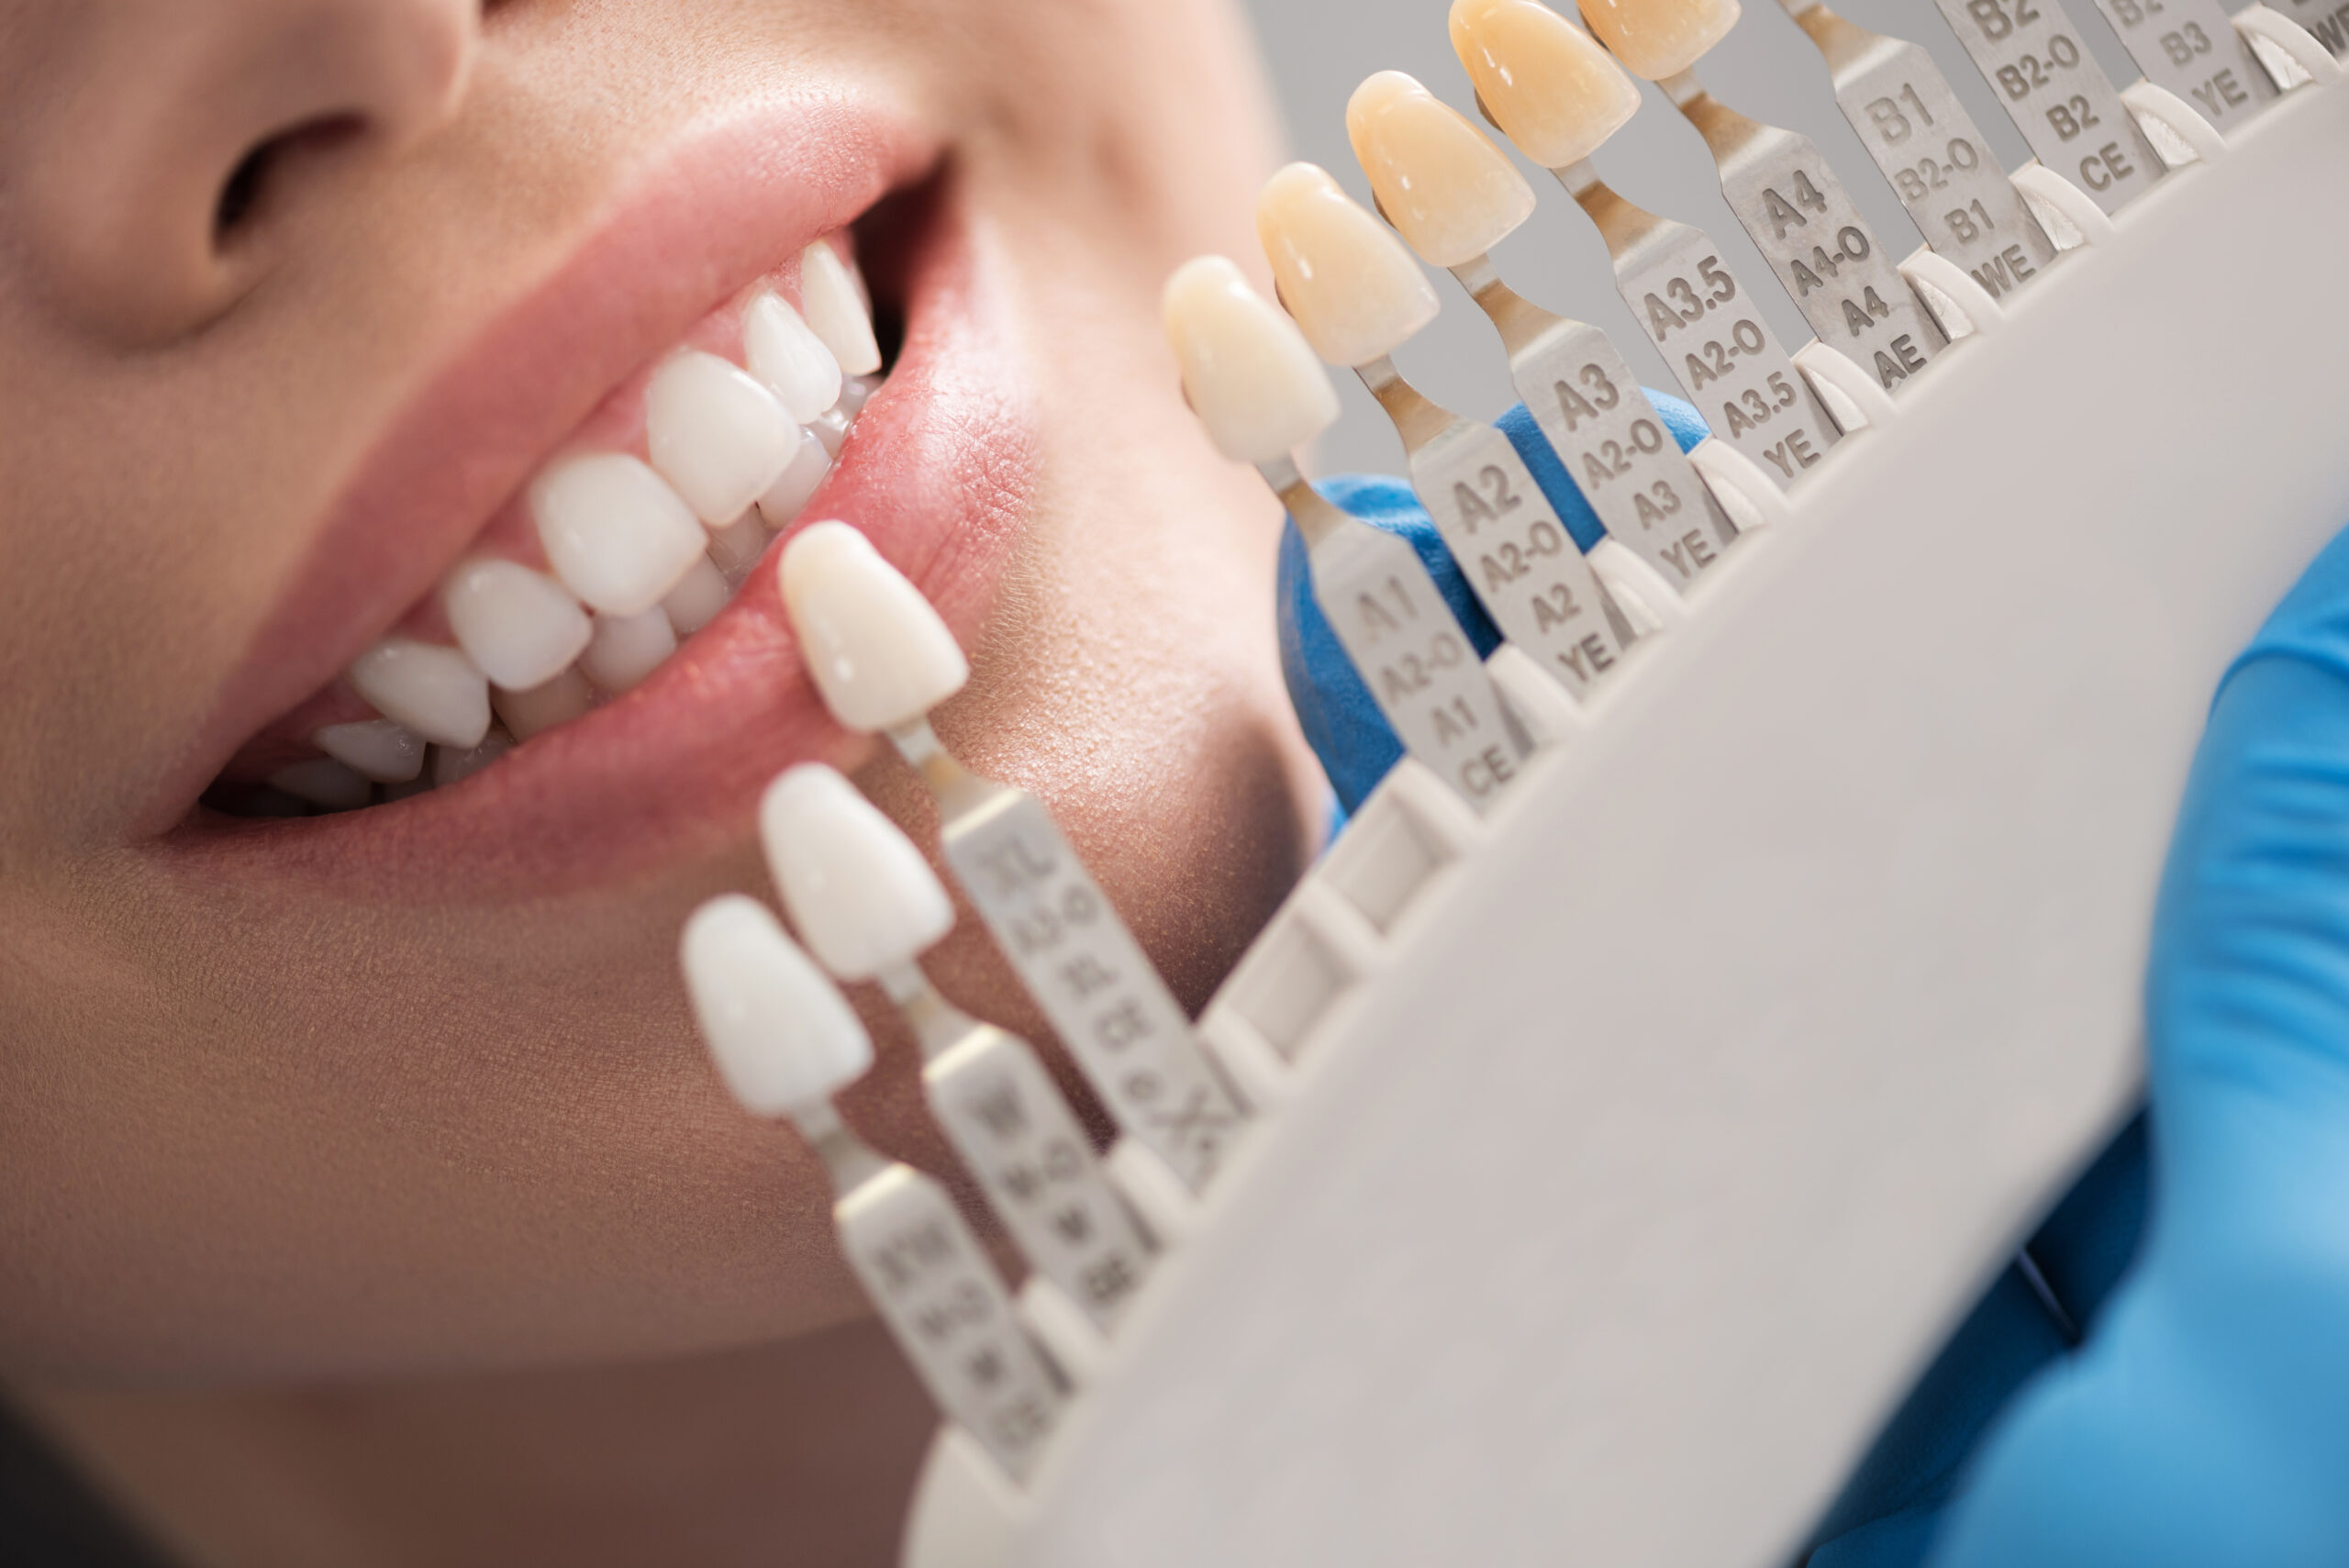
The “provisional” process is an opportunity to gain trust with the patient while modifying the length of teeth, the shape, or the color. It is also a way to communicate with the patient how their functional and parafunctional findings may have contributed to the destruction of their teeth. 

As the patient comes back to have their bite checked and to talk about what they like and don’t like, we are building trust. We’re involving them in understanding what they feel and think. We’re listening to improve their conditions. 

I’ve had patients who were fearful about moving forward with extensive treatment because they couldn’t envision the transition from the prep appointment to the final. What would those temporaries look like? What would they feel like? How would they function?  

So, when I am discussing a case with a patient, provisionals are all part of one treatment fee. We talk about the prep process, the provisional process, the lab process, and the final seating process—all as one process for which there is a fee. We discuss how the provisionals will guide us in optimizing the lab plan to achieve the desired comfort, function, and aesthetics.  

Whether it’s a single tooth or whether it’s multiple, I encourage you to help the patient understand that what you are providing in the interim between a preparation and a seat of a restoration is called a “provisional.” 

A provisional protects the underlying tooth structure. It keeps tissue in place. It helps the patient feel confident. It allows us to understand what might be going on functionally. It helps us communicate better with the lab. It’s more than a temporary restoration. It’s a guide on our journey toward predictable and appreciated relationship-based dentistry. 

Related Course

Clear Aligner Therapy: Enhance Restorative Outcomes & Patient Health

DATE: May 23 2024 @ 8:00 pm - May 23 2024 @ 9:00 pm

Location: Online

CE HOURS: 1

Course Description: Review the digital workflow as part of the comprehensive exam and health screening during periodic exams. We will discuss the benefits of clear aligner therapy prior to restorative care.  Also the…

Learn More>

About Author

User Image
Kelley Brummett DMD

Dr. Kelley D. Brummett was born and raised in Missouri. She attended the University of Kansas on a full-ride scholarship in springboard diving and received honors for being the Big Eight Diving Champion on the 1 meter springboard in 1988 and in 1992. Dr. Kelley received her BA in communication at the University of Kansas and went on to receive her Bachelor of Science in Nursing. After practicing nursing, Dr Kelley Brummett went on to earn a degree in Dentistry at the Medical College of Georgia. She has continued her education at the Pankey Institute to further her love of learning and her pursuit to provide quality individual care. Dr. Brummett is a Clinical Instructor at Georgia Regents University and is a member of the American Academy of Cosmetic Dentistry. Dr. Brummett and her husband Darin have two children, Sarah and Sam. They have made Newnan their home for the past 9 years. In her free time, she enjoys traveling, reading and playing with her dogs. Dr. Brummett is an active member of the ADA, GDA, AGDA, and an alumni of the Pankey Institute.

FIND A PANKEY DENTIST OR TECHNICIAN

I AM A
I AM INTERESTED IN

VIEW COURSE CALENDAR

Are Your Temporaries a Practice Builder or Simply Temporary? 

April 10, 2024 Gary DeWood, DDS

Gary M. DeWood, DDS, MS 

Many dentists believe that provisional restorations don’t really matter. After all, they are not really a stand-in for the final restoration. I would respectfully disagree. I am a proponent of creating functional, durable, and highly esthetic provisional restorations, every time. They have the potential to impact your dental practice a lot more than you might think. Whether you print them, form them, or free-hand them, a GREAT temporary is a great billboard for your practice. 

  1. Make the provisional as Esthetic as the final restoration.

I contend that the more your provisionals look like what you are hoping for when you seat the final restorations, the more people will talk about them, AND you. 

I was able to build a referral restorative practice by creating provisionals that made patients want to come to my practice and specialists want to send people. For much of our career, almost the entire team of the oral surgery office we worked with, and many of the team members from the other specialty practices we worked with, were our patients in Pemberville, Ohio. 

Front teeth or back teeth, when you make them look like teeth, people will like it and they will show and tell other people. “This is just the temporary?!” was not an uncommon question or exclamation from our patients.  

  1. A GREAT guide makes a GREAT provisional restoration.

Your wax-up** cast/model serves as your vision, as your preparation guide fabrication device, and as your provisional former. When the preparation is appropriately reduced for the material selected, the temporary can mimic the restoration. 

** The wax-up might be created with wax then duplicated with impression material and stone to create a cast, or it might be scanned to be duplicated with resin and printed or milled to create a model. 

  1. 3. Use that provisional to highlight the talents of your team members.

You might LOVE to make those provisionals, but if your assistant is equally excited when it comes to recreating nature for the patient to appreciate, then it could be an opportunity for patients to see that your assistant does much more than set-up, clean up, and hand you an instrument. My dental partner, Cheryl, (who is also my wife) and I actively sought out things that could help our patients experience our team as much more than our helpers. 

As we all know, dental assistants are an integral and vital part of what the practice is and are a powerful force in how and why patients ask for dentistry. Assistants who fabricate provisionals have an opportunity to be seen differently, and we were always looking for ways to create partnership with them in our treatment. 

  1. 4. Take pictures of them.

Photographs of the temporary will make it easier for the lab to design the outcome. They will be able to see what you are thinking, able to visualize what you want, AND maybe even more importantly, see what you do not want. With anterior provisionals, I have frequently noted to my ceramist, “Please put the incisal edge in exactly this position vertically and horizontally in the face, then use your artistry to create the tooth that belongs in the face you see in the photographs of the patient before, prepared, and temporized.” 

There were many times when the technician was able to see and create effects that I might have not recognized as being “just the thing that would make these teeth extraordinary.” And don’t forget to show the patient the photograph. 

  1. 5. Love the material you make the temporary with.

The better the provisional material is at holding tooth position and functional contact, the less adjustment we’re going to have, so using a high-quality material is important. There are a lot of them out there. I like bis-acryl materials that polymerize with a hard surface, have little or no oxygen inhibited layer, and can be polished easily. The polish is more about feeling smooth than about the shine. Ask you patients how their provisional tooth “feels” when you are done, so they sing your praises. 

  1. 6. Use high-quality core material.

When you use a good core material the prep will be smoother, making it easier to fabricate nice provisionals. Ideal prep form goes a long way toward better provisionals. 

  1. ASK your patient to tell people.

As noted above, when you can elicit an emotional response about the awesomeness of your provisional, ask the patient to tell other people, “….and this is just the TEMPORARY!” 

Related Course

Clear Aligner Therapy: Enhance Restorative Outcomes & Patient Health

DATE: May 23 2024 @ 8:00 pm - May 23 2024 @ 9:00 pm

Location: Online

CE HOURS: 1

Course Description: Review the digital workflow as part of the comprehensive exam and health screening during periodic exams. We will discuss the benefits of clear aligner therapy prior to restorative care.  Also the…

Learn More>

About Author

User Image
Gary DeWood, DDS

FIND A PANKEY DENTIST OR TECHNICIAN

I AM A
I AM INTERESTED IN

VIEW COURSE CALENDAR

A Tip for Matching the Color of Cement Between an Implant Abutment and Crown

March 8, 2024 Lee Ann Brady

Trying to match the color of the cement between the abutment and the dental implant crown in the anterior can be very frustrating. Here’s a trick that works well for me. 

A while back I was struggling to match the color of the cement between the abutment and an anterior implant crown. I always try-in the abutment and the crown and try to confirm the shade before they are put together. We do this because the laboratory can’t redo the shade once they’ve bonded the crown and the abutment for screw retention without trying to separate the cement, which is difficult. 

Over the years, it was a challenge to replicate the opacity of the cement used to connect the titanium abutment and ceramic crown. I’ve tried using some of the opaquest try-in paste on the market. 

In the case I referred to above, we thought we had it. My lab cemented it together and I put it in. I could see the opacity of the cement through the restoration. So, we had to take it apart and try again. My laboratory technician shared with me a trick that he had learned from one of his other dentist clients. And that was to simply go to CVS, Costco, or Target and buy good old fashioned liquid white out.  

Now, I put a very tiny amount of whiteout on a micro brush and paint it on the inside of the labial surface of the crown on the intaglio surface. Then, I use a bit of translucent try-in paste to seat the crown. 

The whiteout works well because it is basically titanium dioxide and water with preservatives—the same white compound that is in super white sunscreens. In my opinion, it is relatively safe to use, and I can see what the implant will look like when the pieces are cemented together. 

Related Course

Clear Aligner Therapy: Enhance Restorative Outcomes & Patient Health

DATE: May 23 2024 @ 8:00 pm - May 23 2024 @ 9:00 pm

Location: Online

CE HOURS: 1

Course Description: Review the digital workflow as part of the comprehensive exam and health screening during periodic exams. We will discuss the benefits of clear aligner therapy prior to restorative care.  Also the…

Learn More>

About Author

User Image
Lee Ann Brady

FIND A PANKEY DENTIST OR TECHNICIAN

I AM A
I AM INTERESTED IN

VIEW COURSE CALENDAR

Why Use an Essix Retainer Versus a Flipper During Dental Implant Therapy

February 16, 2024 Lee Ann Brady DMD

Why Use an Essix Retainer Versus a Flipper During Dental Implant Therapy 

Lee Ann Brady, DMD 

When it comes to choosing a provisional during implant therapy in the anterior aesthetic zone, we have two removable options. One is called a “flipper.” It’s an interim partial denture composed of an acrylic base and a denture tooth. The other is an Essix retainer.  

There is no question that both options are taxing for the patient for the three to five months that the patient is edentulous and must deal with having this removable device to replace the tooth. So, I always tell my patients that they are going to have to manage the provisional for that time, but it’s worth it because, in the end, they have replaced the tooth with an implant with all the benefits of an implant versus an alternative prosthetic solution. 

In my practice, I use Essix retainers in nearly 100% of the cases. Why? Because an Essix retainer is tooth-borne. The pressure is placed on the teeth and not on the surgical site. In the case of a flipper, the prosthesis is primarily tissue-borne with a little pressure placed on the adjacent teeth. We really don’t want any pressure on the surgical site while it is healing. Pressure can induce biological problems in bone grafts and connective tissue, which affect the long-term outcome. From an aesthetic perspective, the most challenging thing about anterior implant aesthetics is replicating the size, shape, and position of the tissues of the alveolar ridge and papilla. I want to do everything I can to eliminate pressure on the healing tissue. 

In my practice, we do Essix retainers that don’t have a full solid tooth in them. Instead, we simply paint flowable on the facial so that there’s zero pressure anywhere around that surgical site after extraction, after grafting, and after implant placement.  

In addition to explaining the improved outcomes associated with using an Essix retainer, I assure my patients that the retainer will be more comfortable to wear than a denture and be easily removed by them for eating, for drinking liquids other than water that are likely to stain the retainer, for teeth cleaning, and for cleaning the prosthesis. When out in public, such as in a restaurant, patients may carefully eat while wearing the Essix retainer.  

Related Course

Worn Dentition: Direct & Indirect Adhesive Management Through a Non-Invasive Approach

DATE: October 24 2025 @ 8:00 am - October 25 2025 @ 2:30 pm

Location: The Pankey Institute

CE HOURS: 15

Dentist Tuition : $ 2595

Single Occupancy with Ensuite Private Bath (per night): $ 345

Enhance Restorative Outcomes The main goal of this course is to provide, indications and protocols to diagnose and treat severe worn dentition through a new no prep approach increasing the…

Learn More>

About Author

User Image
Lee Ann Brady DMD

Dr. Lee Ann Brady is passionate about dentistry, her family and making a difference. She is a general dentist and owns a practice in Glendale, AZ limited to restorative dentistry. Lee’s passion for dental education began as a CE junkie herself, pursuing lots of advanced continuing education focused on Restorative and Occlusion. In 2005, she became a full time resident faculty member for The Pankey Institute, and was promoted to Clinical Director in 2006. Lee joined Spear Education as Executive VP of Education in the fall of 2008 to teach and coordinate the educational curriculum. In June of 2011, she left Spear Education, founded leeannbrady.com and joined the dental practice she now owns as an associate. Today, she teaches at dental meetings and study clubs both nationally and internationally, continues to write for dental journals and her website, sits on the editorial board of the Journal of Cosmetic Dentistry, Inside Dentistry and DentalTown Magazines and is the Director of Education for The Pankey Institute.

FIND A PANKEY DENTIST OR TECHNICIAN

I AM A
I AM INTERESTED IN

VIEW COURSE CALENDAR

Planning Where The Pink Should Be

July 8, 2019 Lee Ann Brady DMD

When we identify patients, whose dental esthetics has been negatively impacted by altered passive eruption, our treatment plans are apt to include altering the gingival esthetics. One of the things we are tasked with is determining where we want the tissue to be.

We start by determining if the incisal edge is correctly positioned in the face.

For example, by looking at a lips at rest photograph and a full face image for my patient with altered passive eruption, we can see that the patient’s incisal edges are correctly positioned. If they were not properly positioned, we would next plan the position for the incisal edges.

Tooth proportion becomes the next building block in the planning puzzle. We know that beautiful anterior teeth are usually between 70-80% width to length ratio. This variability allows us to accommodate other clinical considerations, as well as patient preference. As a starting point, I begin with 75% and then look at the other parameters.

If the patient has excessive gingival display, and one of the hoped for outcomes is to minimize the amount of gingiva, we can alter the drawing to increase the length and then evaluate the esthetic result.  On the other hand, if there is excessive sulcus depth, we can place the proposed gingival margin within the confines of the sulcus and assess the esthetic result.


Patient Involvement

I create template drawings, like the one below, in Keynote on my Mac computer, but drawings also can be done in PowerPoint. I then sit down with my patient, insert a retracted teeth apart patient photo behind the drawing, and together we move the lines until the patient is happy with where the pink will be.


Once we have the final proposal, the next step is to determine the possible treatment options to gain the intended result. The information can easily be transferred to a wax-up or used to create a snap on trial smile.

How to Create and Use Templates

In Keynote or PowerPoint, take a retracted teeth apart photo of a beautiful, near perfect smile. Put it into the presentation software. Blow the image up to 200%. Using the free form drawing tool, trace the outline of the upper six anteriors. Take the photo out and save the presentation as a named template.key or template.ppt file.

When you want to do proposal drawings with your patient, open up the template, insert the patient’s photo and save the file with the patient’s name. You can copy and paste the tooth outlines onto any of the patient’s photos to propose gingival changes. If you pre-draw and save outline templates for various tooth sizes (ratios), you can quickly show options to your patient.

Related Course

The Pankey Administrative Team: Inspiring Front Office Excellence

DATE: February 6 2025 @ 8:00 am - February 7 2025 @ 2:00 pm

Location: The Pankey Institute

CE HOURS: 16

Regular Tuition: $ 2150

Single Occupancy Room with Ensuite Bath (Per Night): $ 345

The Pankey Administrative Team: Inspiring front office excellence Front office systems for a Pankey-trained dentist hold very specific differences compared to a  typical dental office.  Learning how to differentiate your…

Learn More>

About Author

User Image
Lee Ann Brady DMD

Dr. Lee Ann Brady is passionate about dentistry, her family and making a difference. She is a general dentist and owns a practice in Glendale, AZ limited to restorative dentistry. Lee’s passion for dental education began as a CE junkie herself, pursuing lots of advanced continuing education focused on Restorative and Occlusion. In 2005, she became a full time resident faculty member for The Pankey Institute, and was promoted to Clinical Director in 2006. Lee joined Spear Education as Executive VP of Education in the fall of 2008 to teach and coordinate the educational curriculum. In June of 2011, she left Spear Education, founded leeannbrady.com and joined the dental practice she now owns as an associate. Today, she teaches at dental meetings and study clubs both nationally and internationally, continues to write for dental journals and her website, sits on the editorial board of the Journal of Cosmetic Dentistry, Inside Dentistry and DentalTown Magazines and is the Director of Education for The Pankey Institute.

FIND A PANKEY DENTIST OR TECHNICIAN

I AM A
I AM INTERESTED IN

VIEW COURSE CALENDAR

Tooth Proportion Aesthetic Ratio

January 28, 2019 Lee Ann Brady DMD

One of the challenges of aesthetic dentistry is setting clear expectations for patients. The more we can use visual tools over words the easier this becomes.

Over the years I have found that looking at photos with patients, both of their teeth and of the teeth of other people whose smiles demonstrate the principles I am explaining has made patient understanding much more successful. I always ask permission to show a patient the photos of their teeth as I find sometimes they are shocked by what they see. The photos can also be used to show them the changes being proposed. Drawing shapes and lines on the images communicates the information without the risk of setting unattainable expectations, which I fear using photoshop might.

The Third Aesthetic Zone Ration

The next of the esthetic zone ratios looks at tooth proportion. Upper anterior teeth look their most esthetic when the ratio comparing width to length is between 70-80%. This proportion can be measured on a computer screen in pixels using programs like Keynote or Powerpoint.  Insert the image into a slide and trace the outline of the tooth with the freehand shape tool. Once the shape is complete click on it and hold your mouse curser over the corner. The pixels for width and length will apear and you can calculate the ratio. It is also easy to figure out this ratio by measuring on a stone model with digital calipers, or from a printed image using a ruler.

(Width/Length) * 100= Tooth Proportion Ratio

What the Ratio Means

Teeth with a ratio of less than 70% appear too tall and narrow. If it is greater then 80% the tooth appears too short and wide. If the tooth has a width to length ratio that is less than 70% or greater than 80% and we are going to treatment plan changing it we have to determine where we make the length adjustments at the incisal edge or the free gingival margin. The fist step is to determine the correct position of the incisal edge in the face using a lips at repose or rest photo. From the proposed incisal edge position we can then determine the proper position of the free gingival margin using this ration.

Some simple math can be very helpful when determining the appropriate length to correct this ratio.

  • 70%= width times 1.43
  • 75%=width times 1.33
  • 80%=width times 1.25

Related Course

E1: Aesthetic & Functional Treatment Planning

DATE: December 11 2025 @ 8:00 am - December 14 2025 @ 2:30 pm

Location: The Pankey Institute

CE HOURS: 39

Dentist Tuition: $ 6800

Single Occupancy with Ensuite Private Bath (Per Night): $ 345

Transform your experience of practicing dentistry, increase predictability, profitability and fulfillment. The Essentials Series is the Key, and Aesthetic and Functional Treatment Planning is where your journey begins.  Following a system of…

Learn More>

About Author

User Image
Lee Ann Brady DMD

Dr. Lee Ann Brady is passionate about dentistry, her family and making a difference. She is a general dentist and owns a practice in Glendale, AZ limited to restorative dentistry. Lee’s passion for dental education began as a CE junkie herself, pursuing lots of advanced continuing education focused on Restorative and Occlusion. In 2005, she became a full time resident faculty member for The Pankey Institute, and was promoted to Clinical Director in 2006. Lee joined Spear Education as Executive VP of Education in the fall of 2008 to teach and coordinate the educational curriculum. In June of 2011, she left Spear Education, founded leeannbrady.com and joined the dental practice she now owns as an associate. Today, she teaches at dental meetings and study clubs both nationally and internationally, continues to write for dental journals and her website, sits on the editorial board of the Journal of Cosmetic Dentistry, Inside Dentistry and DentalTown Magazines and is the Director of Education for The Pankey Institute.

FIND A PANKEY DENTIST OR TECHNICIAN

I AM A
I AM INTERESTED IN

VIEW COURSE CALENDAR

Anterior Segment Aesthetic Ratio

January 21, 2019 Lee Ann Brady DMD

Aesthetic Zone ratios is one of many ways to evaluate the appearance of a patients smile, and also to plan for changes that will improve overall aesthetics.

In the last article on using aesthetic zone ratios we looked at comparing the width to the height. This ratio allows us to gather data and diagnose issues like vertical maxillary excess and hypermobile lip that cause this ratio to be larger than normal.

Anterior Segment Ratio

The next of the four ratios compares the width of the total esthetic zone, all of the teeth visible between the commissures at a full smile, and the width of just the anterior segment, between the distal of the canines. The first thing to do is measure the two distances. This can be done in pixels by inserting a line over a full smile photo, or measured with a mm ruler on a printed photograph. Make sure your line is placed at the inside of the soft tissue near the commissures. The relationship to real width is irrelevant as we are going to use a ratio. We then divide the width of the anterior segment by the width of the esthetic zone and multiply by 100.

Arch Width Ratio= (Anterior Segment Width/ Esthetic Zone width) x 100

Smiles that are rated as attractive have an anterior segment width ratio between 59-75%, and the average ratio is 66%. The percentages do not have a gender or age bias which makes relying on these numbers easy. If the ration is too small or too large I start to wonder about arch space issues. Often with patients with a large midline diastema you will see this ratio be larger than 75%. In these cases or cases with inadequate space I want to make sure we use wax-ups and mock-ups to ascertain that we can meet the patients aesthetic demands without the addition of ortho to the treatment plan.

Related Course

E1: Aesthetic & Functional Treatment Planning

DATE: May 1 2025 @ 8:00 am - May 4 2025 @ 2:30 pm

Location: The Pankey Institute

CE HOURS: 39

Dentist Tuition: $ 6800

Single Occupancy with Ensuite Private Bath (Per Night): $ 345

Transform your experience of practicing dentistry, increase predictability, profitability and fulfillment. The Essentials Series is the Key, and Aesthetic and Functional Treatment Planning is where your journey begins.  Following a system of…

Learn More>

About Author

User Image
Lee Ann Brady DMD

Dr. Lee Ann Brady is passionate about dentistry, her family and making a difference. She is a general dentist and owns a practice in Glendale, AZ limited to restorative dentistry. Lee’s passion for dental education began as a CE junkie herself, pursuing lots of advanced continuing education focused on Restorative and Occlusion. In 2005, she became a full time resident faculty member for The Pankey Institute, and was promoted to Clinical Director in 2006. Lee joined Spear Education as Executive VP of Education in the fall of 2008 to teach and coordinate the educational curriculum. In June of 2011, she left Spear Education, founded leeannbrady.com and joined the dental practice she now owns as an associate. Today, she teaches at dental meetings and study clubs both nationally and internationally, continues to write for dental journals and her website, sits on the editorial board of the Journal of Cosmetic Dentistry, Inside Dentistry and DentalTown Magazines and is the Director of Education for The Pankey Institute.

FIND A PANKEY DENTIST OR TECHNICIAN

I AM A
I AM INTERESTED IN

VIEW COURSE CALENDAR

Anterior Aesthetic Zone Ratio

January 15, 2019 Lee Ann Brady DMD

There are many different ways to assess and diagnose the aesthetics of a smile. I love learning a different approach, not so I can change to it, but so I can incorporate it into what I am already doing.

I had the pleasure of attending a full day lecture by Dr. Corky Willhite on transitional Bonding. Corky is one of the dentists I respect the most when it comes to composite education, and I had not heard him teach for many years so I was really looking forward to it. With all of the great new tricks I learned about composite, what I came away with that has me most excited is the four Esthetic Zone Ratios, to analyze and improve the attractiveness of a smile.

What Are Aesthetic Zone Ratios?

Esthetic Zone Ratios is an approach to smile design, and can be used in conjunction with or as a replacement for other smile design systems. There are four aesthetic zone ratios:

  • Anterior Aesthetic Zone Ratio
  • Tooth Proportion Ratio
  • Anterior Segment Ratio
  • Central Dominance Ratio

Aesthetic Zone Ratio

The first of the four ratios compares the width and height of the esthetic zone at a full smile. The first thing you will need is a full smile photograph of the patient. I typically ask the patient to say “E” to capture this photo so I do not get their posed smile with less display. I utilize presentation software to do the analysis since the program will do the math for me. I insert the full smile photograph into a slide. I then insert two lines one from for the width from inside the upper to inside the lower lip. I then do the same thing for width taking my line from the commissures, just inside the tissue of the cheek or face. You can then get the pixels length of the two lines by placing your cursor over the end of the line and holding.

Now you are going to divide the two numbers into each other, height divided by width, then take that result times 100 and you now have a percentage. The ideal ratio is between 15-30%. If this ratio is great then 30% we can then focus on a diagnostic cause of the smile being too tall or high. This might be things like Vertical Maxillary Excess or a short upper lip. The ratio triggers me to go back and look through other photos and evaluate the face and sift tissue for diagnostic challenges. If the number is smaller then 15% we may have a long upper lip, reduced lip mobility or a short lower face.

Facial and Soft Tissue anomalies are rarely treated when we fix the teeth, but can have a significant impact on the aesthetic outcomes, and when undiagnosed can often negatively impact our dental treatment plan.

Are you routinely taking diagnostic photos with patients?

Related Course

E3: Restorative Integration of Form & Function

DATE: August 11 2024 @ 8:00 am - August 15 2024 @ 2:30 pm

Location: The Pankey Institute

CE HOURS: 41

Full Tuititon: $ 7200

night with private bath: $ 290

Understanding that “form follows function” is critical for knowing how to blend what looks good with what predictably functions well. E3 is the phase of your Essentials journey in which…

Learn More>

About Author

User Image
Lee Ann Brady DMD

Dr. Lee Ann Brady is passionate about dentistry, her family and making a difference. She is a general dentist and owns a practice in Glendale, AZ limited to restorative dentistry. Lee’s passion for dental education began as a CE junkie herself, pursuing lots of advanced continuing education focused on Restorative and Occlusion. In 2005, she became a full time resident faculty member for The Pankey Institute, and was promoted to Clinical Director in 2006. Lee joined Spear Education as Executive VP of Education in the fall of 2008 to teach and coordinate the educational curriculum. In June of 2011, she left Spear Education, founded leeannbrady.com and joined the dental practice she now owns as an associate. Today, she teaches at dental meetings and study clubs both nationally and internationally, continues to write for dental journals and her website, sits on the editorial board of the Journal of Cosmetic Dentistry, Inside Dentistry and DentalTown Magazines and is the Director of Education for The Pankey Institute.

FIND A PANKEY DENTIST OR TECHNICIAN

I AM A
I AM INTERESTED IN

VIEW COURSE CALENDAR

Utilizing Chair-side Air Abrasion

January 13, 2019 Lee Ann Brady DMD

Chair-side air abrasion has numerous advantages, especially today when we use adhesive retention so much of the time.

The advantages for many years have been outweighed by the logistic challenges. With the advent of small, lightweight, easy to use air abrasion handpieces this is no longer true. When I became aware of the etchmaster I was skeptical, but I am now a believer and use air abrasion int he operatory all day long.

The Clinical Applications

One of the first things that many of us will utilize air abrasion for is to “etch” zirconia restorations for bonding during final seating. The only way to prepare the inside of a zirconia restoration is with 30-50 micron aluminum oxide. The particle size and type is critical. The ideal pressure is 1 bar (15psi). Next on my list is to clean tooth preparations prior to bonding and cementation. To me there is no better way to assure the removal of temporary cement and prepare a tooth for maximal adhesive retention than with 30 micron aluminum oxide.

My list goes on as I have started to prepare small class one cavity preparations using small glass beads in my chair-side unit. Cleaning out the occlusal grooves prior to a sealant and etching un-prepped enamel for anterior esthetic composite margins are other uses. In addition sodium bicarbonate can be used to remove stain. Now that I have a convenient, easy to use unit, I find more and more reasons everyday.

Air Abrasion Made Easy

When I first began to experiment with air abrasion the biggest challenge was the equipment and managing the logistics.  The Etchmaster is a small 3 to 4 inch attachment that connects to either a 3 or 4 hole line on your unit. The pressure is precisely controlled, for great clinical outcomes, and it means the patients mouth is not full of powder when you are done. The powders come in pre-filled tips that slide into the top of the hand-piece. You can choose from a variety of sizes and particle types and sizes. This means no more filling a reservoir with powder, wondering if you have too little or too much. It also means not wondering what particle type and size is in the reservoir the next time you go to use the unit.

Have you explored the clinical advantages of air abrasion? How has this been beneficial in your practice?

Related Course

Worn Dentition: Direct & Indirect Adhesive Management Through a Non-Invasive Approach

DATE: November 1 2024 @ 8:00 am - November 2 2024 @ 2:30 pm

Location: The Pankey Institute

CE HOURS: 15

Dentist Tuition: $ 2495

Single Occupancy with Ensuite Private Bath (per night): $ 290

Enhance Restorative Outcomes The main goal of this course is to provide, indications and protocols to diagnose and treat severe worn dentition through a new no prep approach increasing the…

Learn More>

About Author

User Image
Lee Ann Brady DMD

Dr. Lee Ann Brady is passionate about dentistry, her family and making a difference. She is a general dentist and owns a practice in Glendale, AZ limited to restorative dentistry. Lee’s passion for dental education began as a CE junkie herself, pursuing lots of advanced continuing education focused on Restorative and Occlusion. In 2005, she became a full time resident faculty member for The Pankey Institute, and was promoted to Clinical Director in 2006. Lee joined Spear Education as Executive VP of Education in the fall of 2008 to teach and coordinate the educational curriculum. In June of 2011, she left Spear Education, founded leeannbrady.com and joined the dental practice she now owns as an associate. Today, she teaches at dental meetings and study clubs both nationally and internationally, continues to write for dental journals and her website, sits on the editorial board of the Journal of Cosmetic Dentistry, Inside Dentistry and DentalTown Magazines and is the Director of Education for The Pankey Institute.

FIND A PANKEY DENTIST OR TECHNICIAN

I AM A
I AM INTERESTED IN

VIEW COURSE CALENDAR

Panadent Dento-Facial Analyzer Technique: Level Planes

October 7, 2018 Lee Ann Brady DMD

Function and esthetics are the two primary goals of excellent treatment. Achieving them both simultaneously requires the right tools used with the best skill possible. The  Dento-Facial Analyzer is my go-to for gathering information I can use to improve the outcome of mounting a maxillary model.

In parts 1 and 2 of this series, I introduced the Dento-Facial Analyzer and began the discussion of how to capture records with it. Here, I’ll complete my overview of a solid technique:

Completing the Dento-Facial Analyzer Technique

… Ensure the Dento-Facial Analyzer is positioned level to the horizon both when looking straight on at the patient’s face from the anterior section and looking at them from the side. It should be level in both planes of space. Then, allow the bite silicone to set and have the patient hold to verify.

Remember that the main use of the Dento-Facial Analyzer is transferring three significant pieces of information. This is either intended for the laboratory or for when we mount our own models.

The first piece of information is the maxillary relationship – the distance to hinge access – which means it’s very important that the central incisors on the maxilla are seated against the plastic bite plate.

Second, we are transferring information about the occlusal plane and the incisal plane. From an incisal plane perspective, it’s crucial that the plate is level to the horizon as we look straight on at the patient once we have the analyzer in. The vertical rod on the analyzer indicates the center of the face – the facial midline – which can be given by the central philtrum of the upper lip or the center of glabella.

You should also look at how you’ve captured the record from a lateral view. This ensures the occlusal plane – the relationship of the cant from anterior to posterior teeth that exists in the patient’s face – is transferred accurately to the lab or onto the articulator. The side bar of the Dento-Facial Analyzer should be level to the horizon.

Do you use this simple and accurate tool?

For a hands-on demonstration of the Dento-Facial Analyzer from Pankey educators, learn more about our Essentials 1 course.

Related Course

E2: Occlusal Appliances & Equilibration

DATE: March 23 2025 @ 8:00 am - March 27 2025 @ 2:30 pm

Location: The Pankey Institute

CE HOURS: 44

Dentist Tuition: $ 7400

Single Occupancy with Ensuite Private Bath (per night): $ 345

What if you had one tool that increased comprehensive case acceptance, managed patients with moderate to high functional risk, verified centric relation and treated signs and symptoms of TMD? Appliance…

Learn More>

About Author

User Image
Lee Ann Brady DMD

Dr. Lee Ann Brady is passionate about dentistry, her family and making a difference. She is a general dentist and owns a practice in Glendale, AZ limited to restorative dentistry. Lee’s passion for dental education began as a CE junkie herself, pursuing lots of advanced continuing education focused on Restorative and Occlusion. In 2005, she became a full time resident faculty member for The Pankey Institute, and was promoted to Clinical Director in 2006. Lee joined Spear Education as Executive VP of Education in the fall of 2008 to teach and coordinate the educational curriculum. In June of 2011, she left Spear Education, founded leeannbrady.com and joined the dental practice she now owns as an associate. Today, she teaches at dental meetings and study clubs both nationally and internationally, continues to write for dental journals and her website, sits on the editorial board of the Journal of Cosmetic Dentistry, Inside Dentistry and DentalTown Magazines and is the Director of Education for The Pankey Institute.

FIND A PANKEY DENTIST OR TECHNICIAN

I AM A
I AM INTERESTED IN

VIEW COURSE CALENDAR