Be Cautious with Retraction Pastes

April 24, 2024 Lee Ann Brady

Lee Ann Brady, DMD 

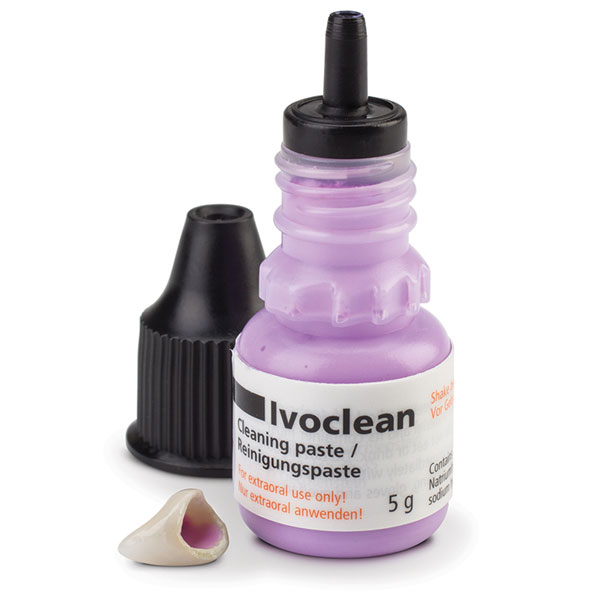
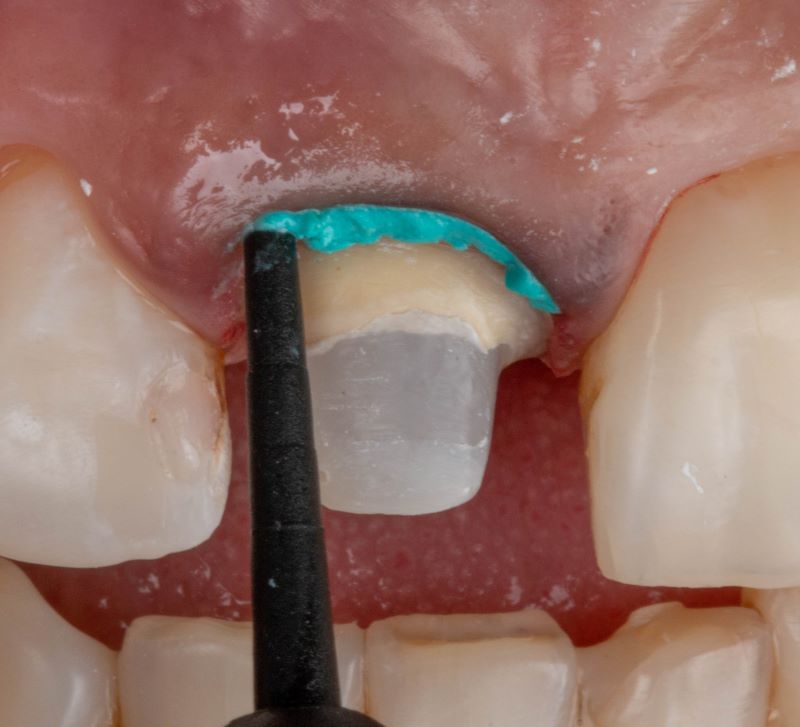
I’m a big fan of retraction pastes, which are aluminum-based hemostatic agents. Their attributes make them highly effective when I need them, but they are also technique sensitive. 

  • They are great for hemostasis within sixty seconds
  • For a stringent retraction, you can leave them in place for two to five minutes
  • They are so thick and viscous you can see them and easily rinse them off
  • They do not cause prep discoloration like liquid hemostatic agents do
  • They can interfere with the set of VPS or polyether impression materials but are less likely to do that than the liquids because they are so easily rinsed off

We must still be careful, though, to remove retraction paste from the sulcus. If residue is left behind, the impression material will not fully polymerize around the margin. So, while I love retraction pastes for hemostasis, I don’t use them unless I need them. I still prefer a two-cord technique using plain cord and epinephrine. When I do use a retraction paste, I am extremely methodical about rinsing the paste out of the sulcus. 

Related Course

Surgically Facilitated Orthodontic Therapy

DATE: October 10 2024 @ 8:00 pm - October 10 2024 @ 9:00 pm

Location: Online

CE HOURS: 1

Date: October 10, 2024 Time: 8 – 9 pm ET Speaker: George Mandelaris, DDS, MS COURSE DESCRIPION Patients seeking ideal esthetics may require a more sophisticated diagnosis and treatment plan…

Learn More>

About Author

User Image
Lee Ann Brady

FIND A PANKEY DENTIST OR TECHNICIAN

I AM A
I AM INTERESTED IN

VIEW COURSE CALENDAR

Dental Care While Wearing an Essix Retainer 

April 15, 2024 Lee Ann Brady

By Lee Ann Brady, DMD 

One of the most common ways that we temporize a patient who is having maxillary anterior implant dentistry is with an Essix retainer. Some patients will wear it 24 hours a day and others for less. Hopefully they are taking it out to rinse, brush, and floss, but the reality is they are wearing a removable device that covers all of the tooth surfaces for a lot of hours every day, and we’re increasing their risk of caries, decalcification, and gingivitis. 

In addition to discussing the normal oral hygiene to be done at home, in our practice, we typically dispense a product like Clinpro 5000 from 3M or MI Paste from GC America. These are high calcium and fluoride products that provide fluoride treatments inside the Essex retainer. 

  • If a patient is sleeping in the Essix, the instructions are to brush and floss the teeth and then use a toothbrush to spread a little bit of Clinpro or MI Paste on the inside of the retainer before going to sleep. 
  •  If they are not wearing the Essix during sleep, the instructions are the same but to wear the Essix for up to an hour every evening before removing it to go to sleep. 

If the patient’s caries risk is high, I prefer using 10% carbamide peroxide gel instead of Clinpro or MI Paste. This is the active ingredient we us in perio trays to help prevent gingivitis. This is also the means by which patients can whiten their teeth while wearing an Essix retainer. 

To prevent damage to the Essix, instruct patients to rinse it with cold water and, when not wearing it, to store it in the provided container.  

Related Course

Surgically Facilitated Orthodontic Therapy

DATE: October 10 2024 @ 8:00 pm - October 10 2024 @ 9:00 pm

Location: Online

CE HOURS: 1

Date: October 10, 2024 Time: 8 – 9 pm ET Speaker: George Mandelaris, DDS, MS COURSE DESCRIPION Patients seeking ideal esthetics may require a more sophisticated diagnosis and treatment plan…

Learn More>

About Author

User Image
Lee Ann Brady

FIND A PANKEY DENTIST OR TECHNICIAN

I AM A
I AM INTERESTED IN

VIEW COURSE CALENDAR

A Tip for Matching the Color of Cement Between an Implant Abutment and Crown

March 8, 2024 Lee Ann Brady

Trying to match the color of the cement between the abutment and the dental implant crown in the anterior can be very frustrating. Here’s a trick that works well for me. 

A while back I was struggling to match the color of the cement between the abutment and an anterior implant crown. I always try-in the abutment and the crown and try to confirm the shade before they are put together. We do this because the laboratory can’t redo the shade once they’ve bonded the crown and the abutment for screw retention without trying to separate the cement, which is difficult. 

Over the years, it was a challenge to replicate the opacity of the cement used to connect the titanium abutment and ceramic crown. I’ve tried using some of the opaquest try-in paste on the market. 

In the case I referred to above, we thought we had it. My lab cemented it together and I put it in. I could see the opacity of the cement through the restoration. So, we had to take it apart and try again. My laboratory technician shared with me a trick that he had learned from one of his other dentist clients. And that was to simply go to CVS, Costco, or Target and buy good old fashioned liquid white out.  

Now, I put a very tiny amount of whiteout on a micro brush and paint it on the inside of the labial surface of the crown on the intaglio surface. Then, I use a bit of translucent try-in paste to seat the crown. 

The whiteout works well because it is basically titanium dioxide and water with preservatives—the same white compound that is in super white sunscreens. In my opinion, it is relatively safe to use, and I can see what the implant will look like when the pieces are cemented together. 

Related Course

Surgically Facilitated Orthodontic Therapy

DATE: October 10 2024 @ 8:00 pm - October 10 2024 @ 9:00 pm

Location: Online

CE HOURS: 1

Date: October 10, 2024 Time: 8 – 9 pm ET Speaker: George Mandelaris, DDS, MS COURSE DESCRIPION Patients seeking ideal esthetics may require a more sophisticated diagnosis and treatment plan…

Learn More>

About Author

User Image
Lee Ann Brady

FIND A PANKEY DENTIST OR TECHNICIAN

I AM A
I AM INTERESTED IN

VIEW COURSE CALENDAR

How Ivoclean Works 

March 1, 2024 Lee Ann Brady

How Ivoclean Works 

Lee Ann Brady, DMD 

Saliva on the inside of restoration surfaces greatly reduces the bond strength between the porcelain and the cement but during the intraoral try-in process, it is inevitable that there will be saliva contamination. 

Most dentists I know use Ivoclean from Ivoclar to clean their indirect restorations after try-in. It is an incredible material for removing saliva and other contaminants that the restoration is exposed to during the intraoral try-in process.  

We trust Ivoclean to fully remove resin or traditional cements, as well as saliva and red blood cells to produce a super pristine surface.  

Did you ever wonder how Ivoclean works to get rid of saliva and all the other debris that gets on the inside of a ceramic restoration or metal base?  

Intraoral contaminants contain lots of phosphates. Ivoclean contains suspended zirconia particles that have an affinity for phosphates. The zirconia particles pull towards them the phosphate-laden particles, so when you rinse off the Ivoclean, the intraoral debris is rinsed away leaving a clean surface. 

Note: We don’t want to expose zirconia restorations to something that contains phosphates or includes phosphoric on the label because there is a strong attraction at an elemental level between zirconia and phosphate particles. To neutralize the ionic bond between saliva phosphates and zirconia, we need an alkaline solution such as potassium hydroxide (KOH). This is the active ingredient in products such as ZirClean from BISCO. 

Related Course

Surgically Facilitated Orthodontic Therapy

DATE: October 10 2024 @ 8:00 pm - October 10 2024 @ 9:00 pm

Location: Online

CE HOURS: 1

Date: October 10, 2024 Time: 8 – 9 pm ET Speaker: George Mandelaris, DDS, MS COURSE DESCRIPION Patients seeking ideal esthetics may require a more sophisticated diagnosis and treatment plan…

Learn More>

About Author

User Image
Lee Ann Brady

FIND A PANKEY DENTIST OR TECHNICIAN

I AM A
I AM INTERESTED IN

VIEW COURSE CALENDAR

Caring for a Dental Leaf Gauge

February 21, 2024 Lee Ann Brady

Caring for a Dental Leaf Gauge 

Lee Ann Brady, DMD 

In the Pankey Essentials courses, we use dental leaf gauges to train dentists in how to feel for the first point of occlusal contact, as a method for occlusal deprogramming, and as a tool for articulating models on an articulator in centric relation. Dental leaf gauges not only assist us in diagnosis and treatment planning but also in enabling our patients to discover the nature of their occlusion as we help them understand how malocclusion can manifest in TMD symptoms, parafunction, tooth damage, and more. 

In our Essentials 1 course, I am sometimes asked how to take care of leaf gauges, so I thought I would share my answer.  

Although they don’t last forever, dental leaf gauges do last a long time and you can autoclave them between uses. When you sterilize them, the leaves become sticky, so I separate them like a hand of cards before putting the gauge in the autoclave bag and separate them again when I take them out of the bag just before going to the mouth. 

Over time, with use, a leaf gauge will start to look a little beat up. I’m looking at one now. The Teflon screw that holds it together has turned color from going through the autoclave. I can see some ink stains from Madame Butterfly silk. It’s at the point where I think it looks too grungy to keep using. Although it might continue functioning for quite some time, I’m going to toss it and use a new one. After all, they are relatively low cost with a high return on investment.  

I’ve never seen a dental leaf gauge break after many trips through the autoclave. I tested cold sterilizing one and discovered the chemistry in the ultrasonic cleaner started to make the leaves brittle and they came out stickier than when autoclaved. So, my preference (and the protocol in my practice) is to bag them and put them through the autoclave. 

Related Course

TMD & Orofacial Pain: Managing Complex Patients

DATE: January 29 2025 @ 8:00 am - February 2 2025 @ 1:00 pm

Location: The Pankey Institute

CE HOURS: 37

Dentist Tuition: $ 7200

Single Occupancy with Ensuite Private Bath (per night): $ 345

THIS COURSE IS SOLD OUT TMD patients present with a wide range of concerns and symptoms from tension headaches and muscle challenges to significant joint inflammation and breakdown. Accurate thorough…

Learn More>

About Author

User Image
Lee Ann Brady

FIND A PANKEY DENTIST OR TECHNICIAN

I AM A
I AM INTERESTED IN

VIEW COURSE CALENDAR

Restorative Notes on Bonding to Sclerotic Dentin and Removing All-Ceramic Crowns

February 7, 2024 Lee Ann Brady

Restorative Notes on Bonding to Sclerotic Dentin and Removing All-Ceramic Crowns 

By Lee Ann Brady, DMD 

Bonding to Sclerotic Dentin 

Bonding to sclerotic dentin is difficult, if not close to impossible. If the lion’s share of the tooth’s surface is sclerotic, you may not have the longevity that you’re hoping for. I’m specifically thinking of some lower anterior restorative cases I’ve seen over the years, where the veneers just haven’t held up and we’ve had to go to full coverage. 

I don’t trust some of the self-etching adhesives to result in a strong bond on sclerotic dentin, even the newer ones in the eighth generation. Fortunately, one thing we don’t need to worry about is sensitivity because the dental tubules are closed. Since I’m not worried about sensitivity, I can apply the same techniques I would with enamel with the intent of improving the probability of a strong bond. I can do a light prep, get rid of the sclerotic surface, and etch it with phosphoric acid for 25 or 30 seconds. Alternatively, I can use 30- to 50-micron aluminum oxide in an abrasion unit.  

Removing All-Ceramic Crowns 

Removing dental crowns can be a delicate and time-consuming procedure. In a world of so many different materials, it’s helpful to have an idea of which bur to use and how long removing the crown could take. One of the biggest challenges is determining whether a crown is a lithium disilicate or zirconia restoration. The radiograph and visual inspection will give us clues but afterwards, we must go through a process to understand what may be involved. 

Our First Clue: Zirconia looks like metal on a radiograph, and lithium disilicate looks radiolucent like natural tooth structure.   

Our Second Clue: If the crown is partial coverage, it’s much more likely to be bonded and I plan to prep down the entire restoration.  

Lithium disilicate restorations are often easier to cut through or section but they could be bonded and impossible to remove in pieces. Even if we can cut four pieces, we may have extensive prepping to do.  

On the other hand, zirconia can be harder to cut through, especially the 3y or 4y variety. But at least once you get to the cement layer, you can normally break it into pieces and remove them instead of having to extensively prep the entire tooth.  

If the restoration is full coverage, I can easily remove it in sections. In this case, I attempt to make my cuts all the way from buccal to lingual across the occlusal surface without bothering to stop. At this stage, I can pick up a crown remover and apply some general pressure to crack it off. If the crown is not budging at all, I assume it is bonded to the tooth, and the next thing I do is pick up a big flat-top diamond to do my occlusal reduction as if I were prepping a natural tooth. Once all the occlusal is off the glass, the pieces on the buccal, lingual, and interproximal fall off. 


Related Course

Surgically Facilitated Orthodontic Therapy

DATE: October 10 2024 @ 8:00 pm - October 10 2024 @ 9:00 pm

Location: Online

CE HOURS: 1

Date: October 10, 2024 Time: 8 – 9 pm ET Speaker: George Mandelaris, DDS, MS COURSE DESCRIPION Patients seeking ideal esthetics may require a more sophisticated diagnosis and treatment plan…

Learn More>

About Author

User Image
Lee Ann Brady

FIND A PANKEY DENTIST OR TECHNICIAN

I AM A
I AM INTERESTED IN

VIEW COURSE CALENDAR