Best Day Ever 

June 14, 2024 Daren Becker DMD

By Daren Becker, DMD 

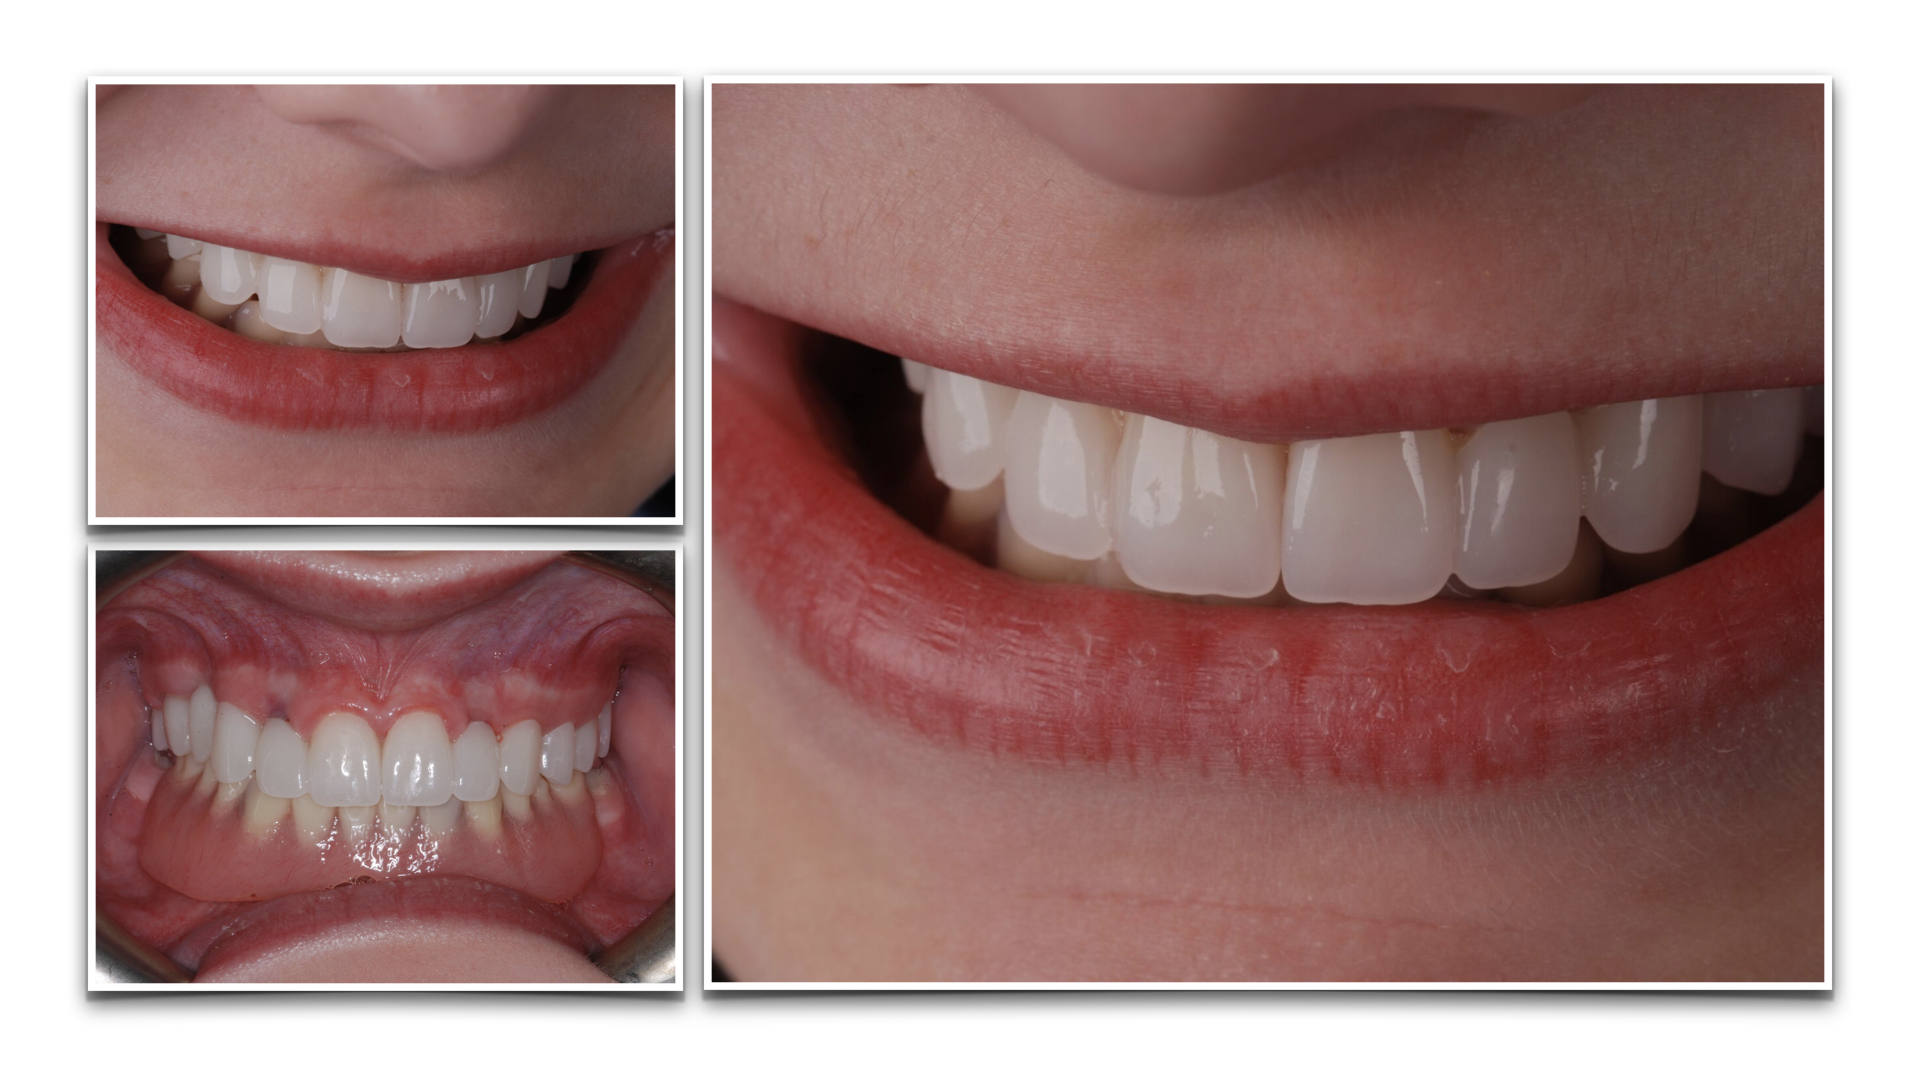
A 16-year-old girl presented with the worst case of ectodermal dysplasia I had ever seen.. She was missing all of her lower teeth except for her 12-year molars. She presented with a lower denture (made by a previous dentist) on two temporary implants in the canine position.  She had only a few maxillary teeth that were malformed; some of these were still her primary teeth.  The appearance of her smile made her look like she was a 9 year old child. 

She was embarrassed by her smile and realized she would need implants and restorative dentistry down the road. At the time, she was too young. Our hearts went out to her. 

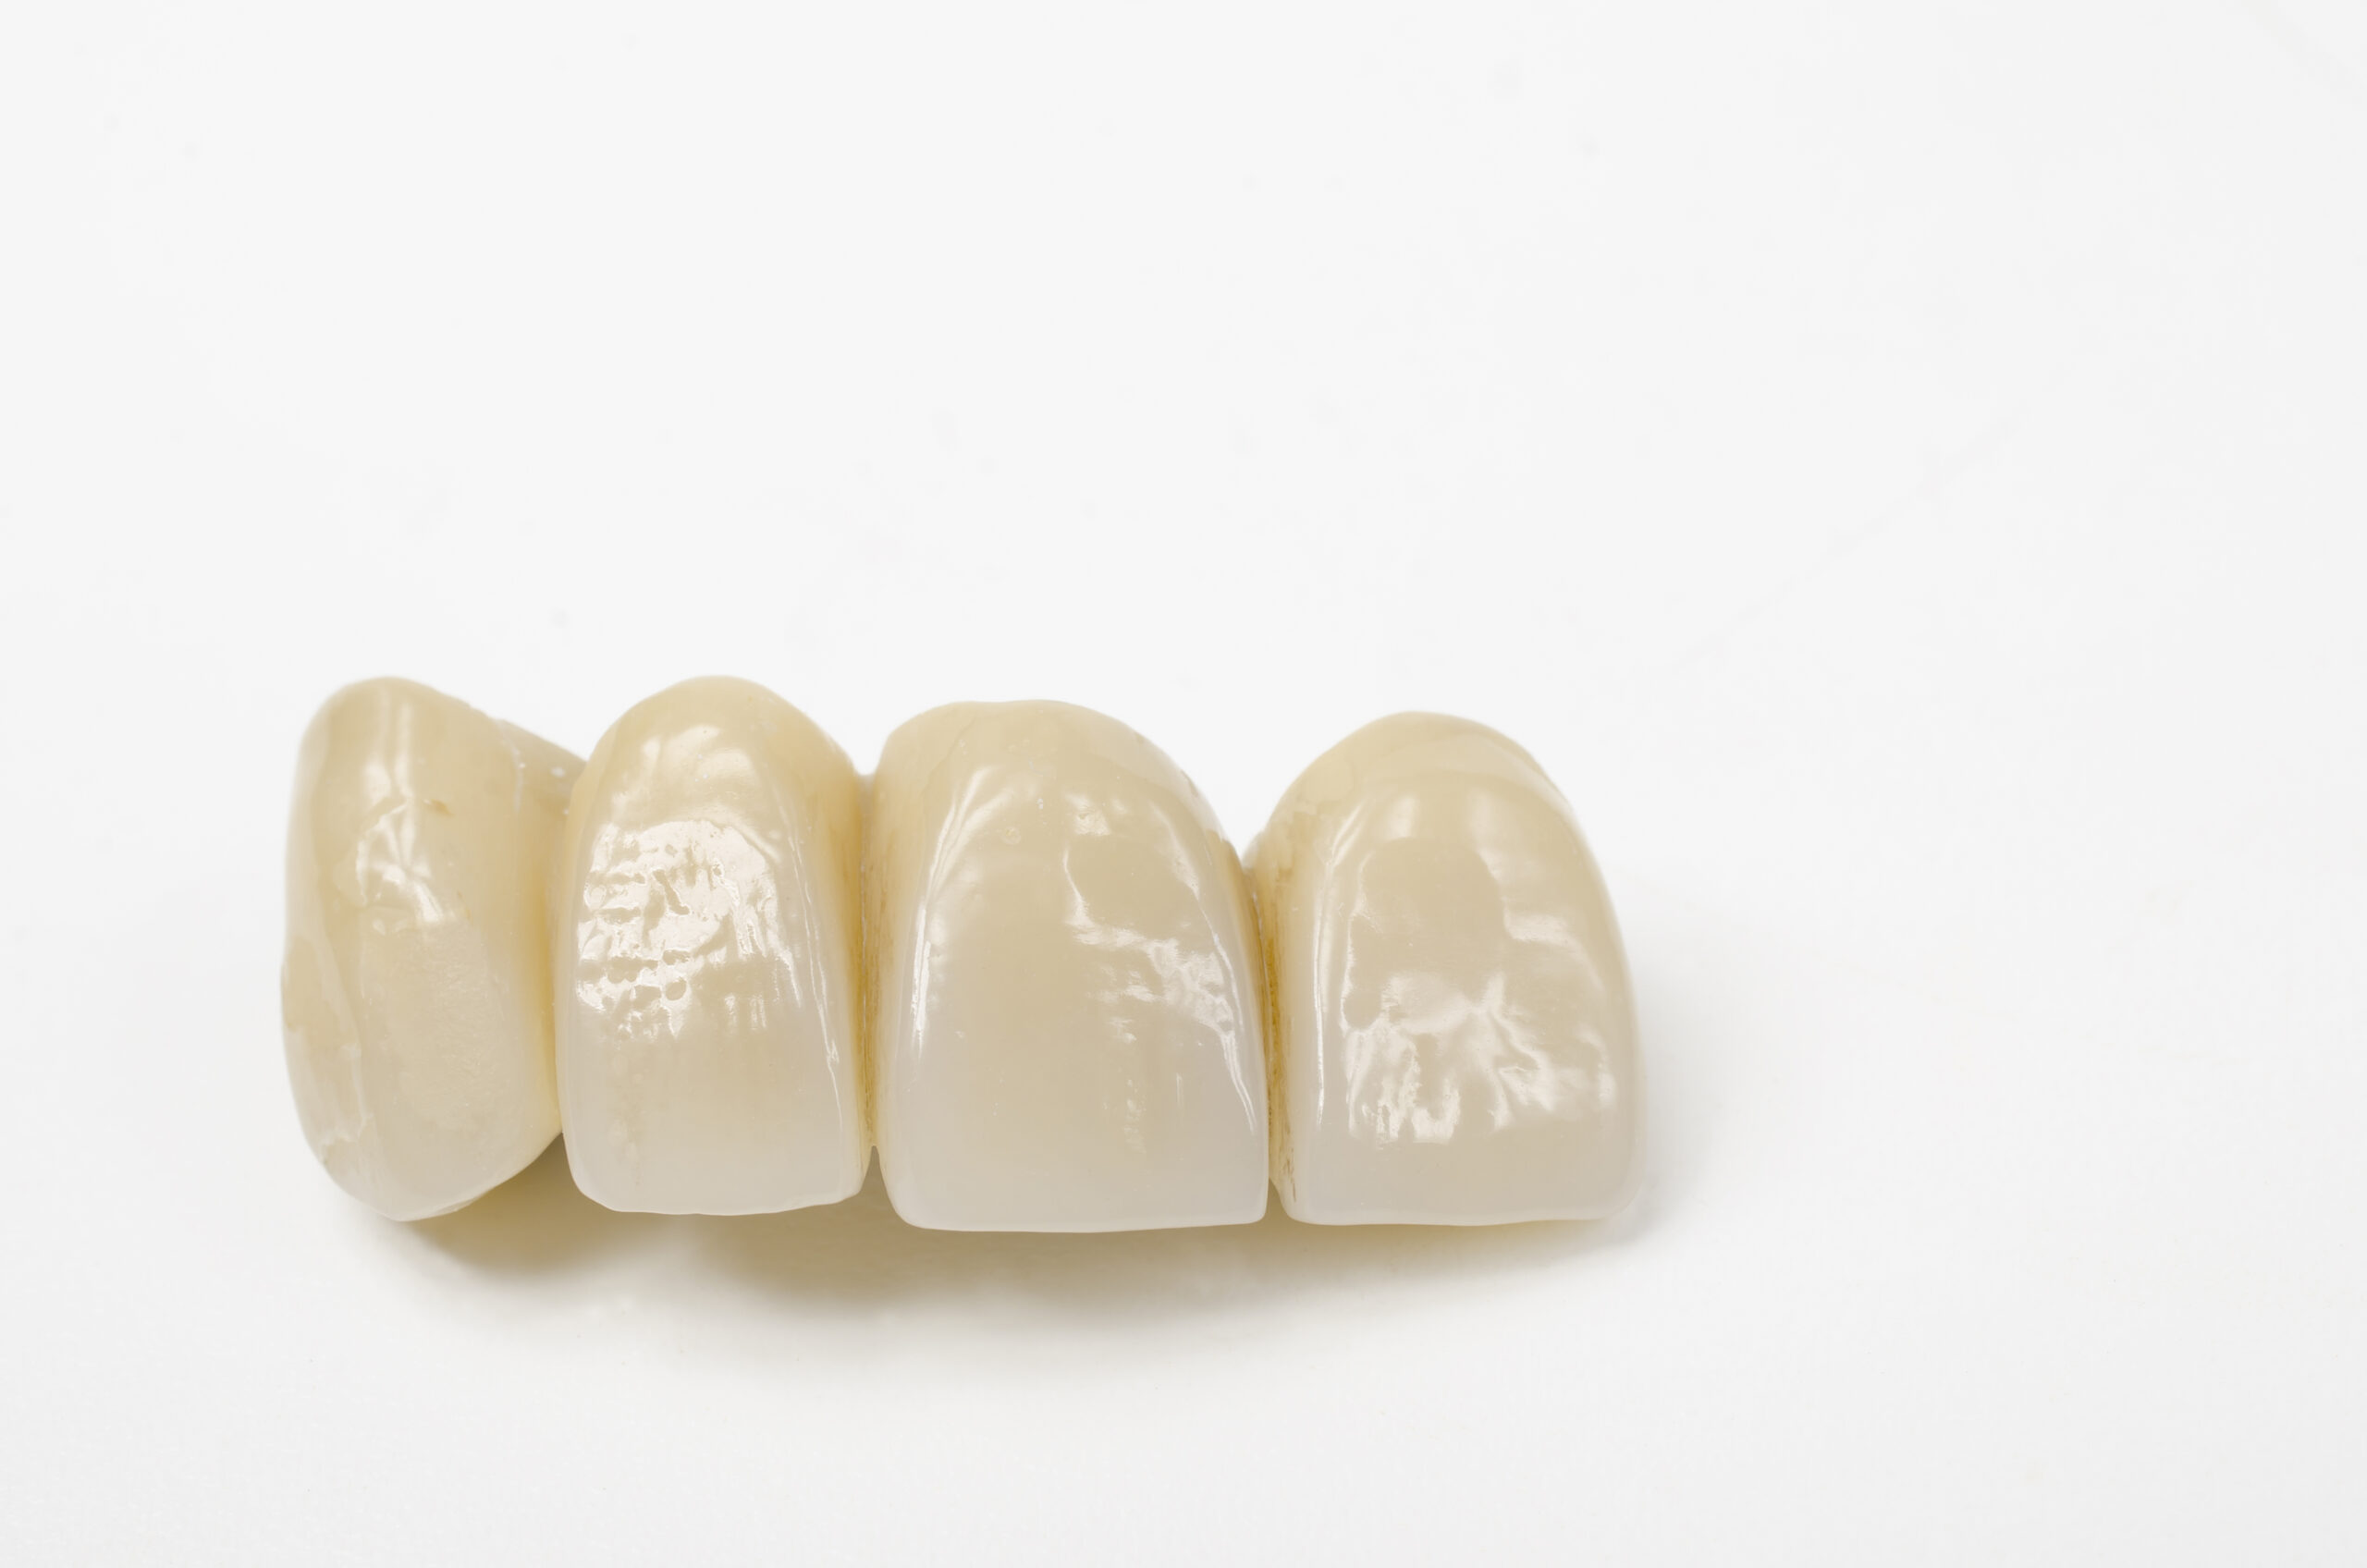
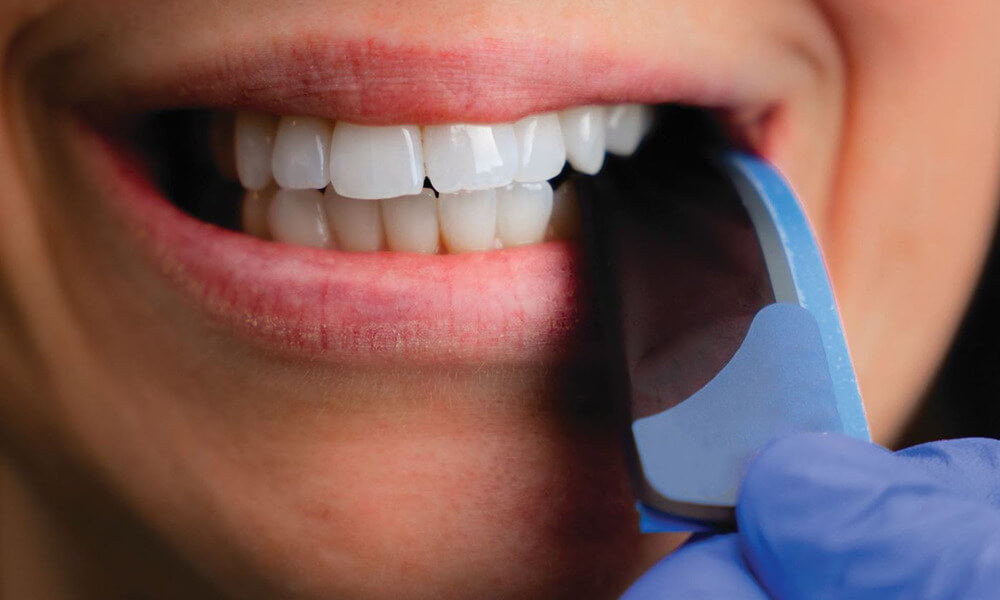
Another dentist had recommended direct bonding, which certainly could have worked, but I thought that we could get a better aesthetic result for her with significantly less time in the chair. So, we captured preclinical digital impression scans with our iTero scanner and along with Matt Roberts at CMR Dental Lab in Idaho, we designed a digital wax-up for an improved occlusion and smile. From there, we had milled PMMA (Polymethyl Methacrylate) overlays created that we direct bonded onto the existing dentition as a long-term temporary solution. We did not need to prep any teeth, and we quickly gave her a broad beautiful smile that looked natural and age appropriate. 

She was in tears. We were in tears. Her mom and sister were in tears. It was the best day ever! 

Soon after, she got a part as an extra in a series filmed here in Georgia, and is thinking about a career in acting. Seeing her life change with simple, comfortable clinical procedures has been priceless. 

Related Course

Masters’ Week

DATE: June 2 2025 @ 8:00 am - June 5 2025 @ 2:00 pm

Location: The Pankey Institute

CE HOURS: 27

Dentist Tuition: $ 8500

Single Occupancy with Ensuite Private Bath (per night): $ 345

Master Your Skills Masters’ Week is a unique learning experience each and every year where we bring together a group of talented speakers to share on a range of topics….

Learn More>

About Author

User Image
Daren Becker DMD

Dr. Becker earned his Bachelors of Science Degree in Computer Science from American International College and Doctor of Dental Medicine from the University of Florida College of Dentistry. He practices full time in Atlanta, GA with an emphasis on comprehensive restorative, implant and aesthetic dentistry. Daren began his advanced studies at the Pankey Institute in 1998 and was invited to be a guest facilitator in 2006 and has been on the visiting faculty since 2009. In addition, in 2006 he began spending time facilitating dental students from Medical College of Georgia College of Dentistry at the Ben Massell Clinic (treating indigent patients) as an adjunct clinical faculty. In 2011 he was invited to be a part time faculty in the Graduate Prosthodontics Residency at the Center for Aesthetic and Implant Dentistry at Georgia Health Sciences University, now Georgia Regents University College of Dental Medicine (formerly Medical College of Georgia). Dr. Becker has been involved in organized dentistry and has chaired and/or served on numerous state and local committees. Currently he is a delegate to the Georgia Dental Association. He has lectured at the Academy of General Dentistry annual meeting, is a regular presenter at ITI study clubs as well as numerous other study clubs. He is a regular contributor at Red Sky Dental Seminars.

FIND A PANKEY DENTIST OR TECHNICIAN

I AM A
I AM INTERESTED IN

VIEW COURSE CALENDAR

Retooling an Implant Supported Hybrid Denture 

May 20, 2024 Lee Ann Brady DMD

By Lee Ann Brady, DMD 

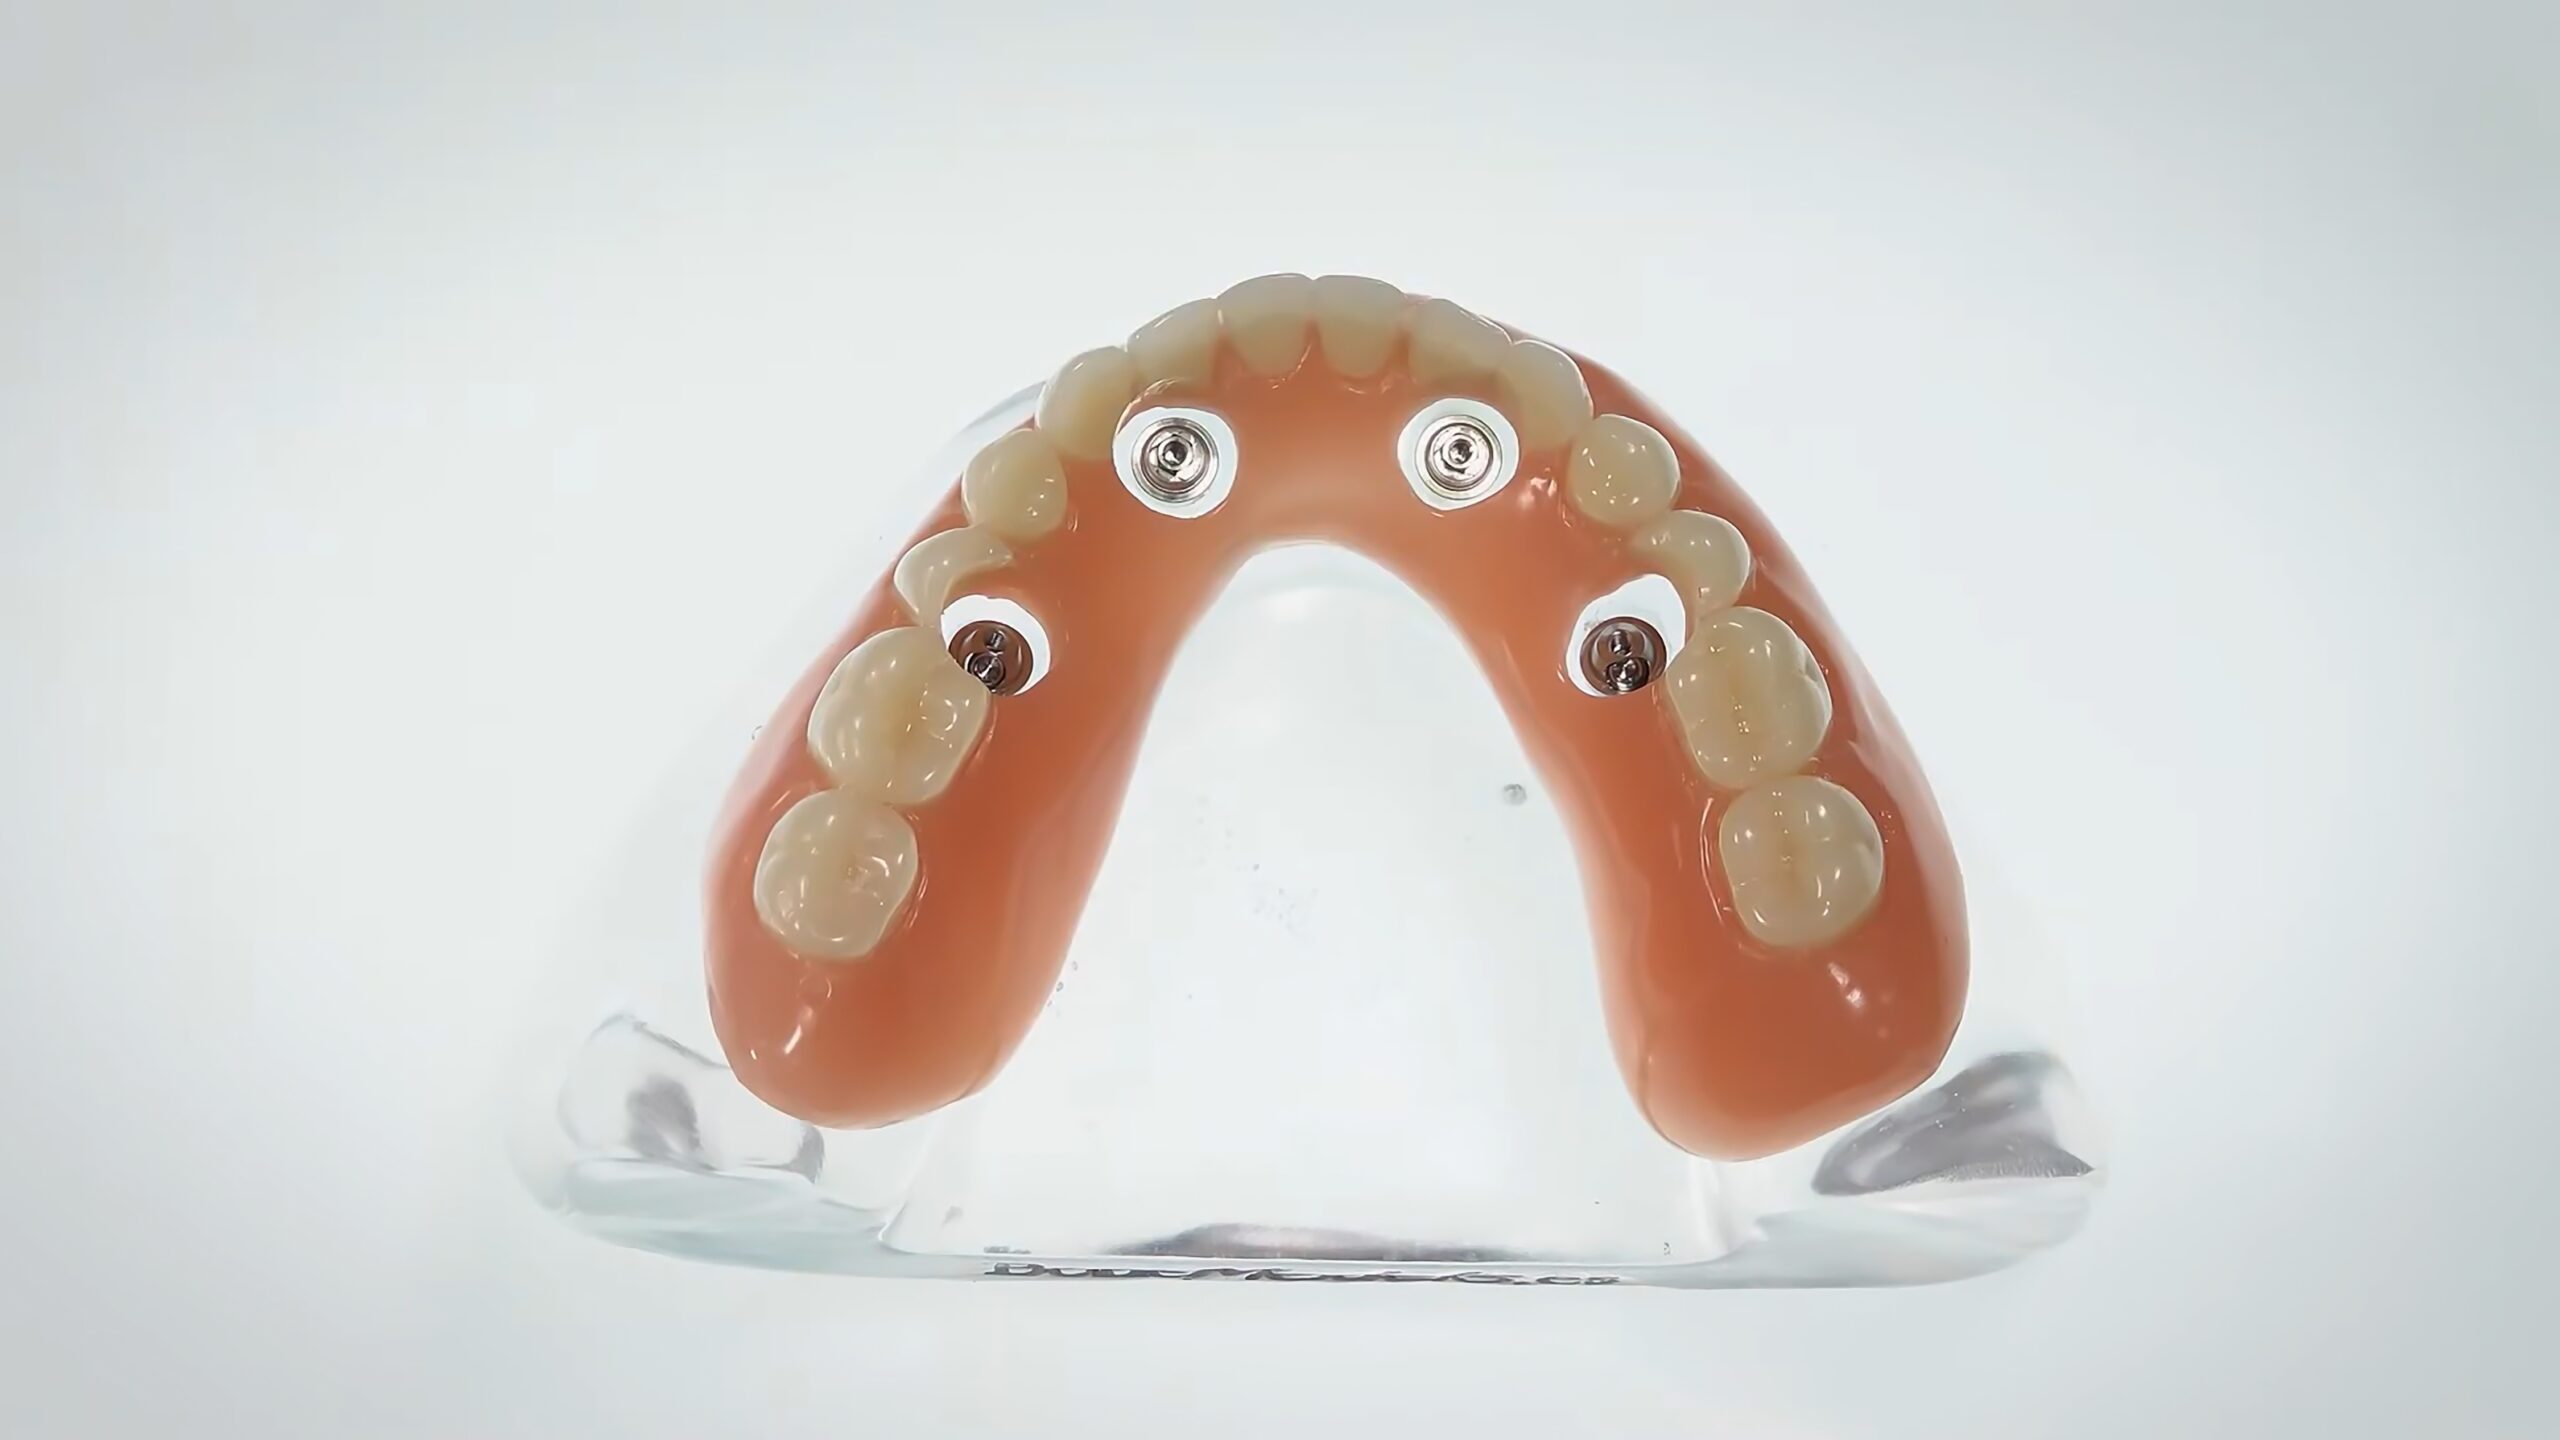
A patient chipped a tooth on her lower hybrid denture and loosened an implant screw. The denture had been placed 18 years ago, so she had an old titanium bar with denture teeth and pink acrylic. That day, I put the screw back in and smoothed out where the tooth was chipped. During this visit we had a great conversation about the future of her hybrid denture. 

I have had a similar conversation with several patients in recent months. They have the original, traditional bar retained hybrid denture that is nearing the end of its lifespan. And so, what are the options? 

  1. If the bar is in great shape, new denture teeth and a new denture base can be milled and placed over the existing titanium bar. 
  1. Alternatively, we can get rid of the bar and go to something that is all zirconia. 

If there is a preference for the first option, the first requirement is to make sure the titanium bar is in good condition. After 18 years, we would take it off and have the laboratory examine it under microscopy.  

If converting to all-zirconia and the patient has had upper and lower dentures, we must consider if one arch can be converted without converting the second arch. A zirconia arch is going to wear an opposing original denture fast if there is parafunction, and the zirconia arch is likely to fracture the opposing original prosthetic teeth. 

We have options today we can think about with our patients, but many have in their minds that when they got their hybrid dentures years ago, the dentures would last. All the time, energy, and dollars to freshen up or replace their denture is a big deal to them. Shifting their mindset from “I thought I was done investing in dentistry” to “My denture is at the end of its lifespan” is a big hurdle. So, the earlier we can start those conversations before they need to invest, the easier they can transition their minds to accept care with grace when the time comes. 

When your bar retained hybrid denture patients visit for perio maintenance and your exams, inform them of the lifespan of their denture is at most 20 years and set expectations for discussing the best available options at some point in the future.  

Related Course

Integrative Dental Medicine: Creating Healthier Patients & Practices

DATE: June 27 2025 @ 8:00 am - June 28 2025 @ 4:00 pm

Location: The Pankey Institute

CE HOURS: 16

Regular Tuition: $ 2995

Single Occupancy with Ensuite Private Bath (per night): $ 345

We face a severe health crisis, that is a much larger pandemic than Covid-19! Our western lifestyle affects periodontal & periapical oral disease, vascular disease, breathing disordered sleep, GERD, dental…

Learn More>

About Author

User Image
Lee Ann Brady DMD

Dr. Lee Ann Brady is passionate about dentistry, her family and making a difference. She is a general dentist and owns a practice in Glendale, AZ limited to restorative dentistry. Lee’s passion for dental education began as a CE junkie herself, pursuing lots of advanced continuing education focused on Restorative and Occlusion. In 2005, she became a full time resident faculty member for The Pankey Institute, and was promoted to Clinical Director in 2006. Lee joined Spear Education as Executive VP of Education in the fall of 2008 to teach and coordinate the educational curriculum. In June of 2011, she left Spear Education, founded leeannbrady.com and joined the dental practice she now owns as an associate. Today, she teaches at dental meetings and study clubs both nationally and internationally, continues to write for dental journals and her website, sits on the editorial board of the Journal of Cosmetic Dentistry, Inside Dentistry and DentalTown Magazines and is the Director of Education for The Pankey Institute.

FIND A PANKEY DENTIST OR TECHNICIAN

I AM A
I AM INTERESTED IN

VIEW COURSE CALENDAR

Are Your Temporaries a Practice Builder or Simply Temporary? 

April 10, 2024 Gary DeWood, DDS

Gary M. DeWood, DDS, MS 

Many dentists believe that provisional restorations don’t really matter. After all, they are not really a stand-in for the final restoration. I would respectfully disagree. I am a proponent of creating functional, durable, and highly esthetic provisional restorations, every time. They have the potential to impact your dental practice a lot more than you might think. Whether you print them, form them, or free-hand them, a GREAT temporary is a great billboard for your practice. 

  1. Make the provisional as Esthetic as the final restoration.

I contend that the more your provisionals look like what you are hoping for when you seat the final restorations, the more people will talk about them, AND you. 

I was able to build a referral restorative practice by creating provisionals that made patients want to come to my practice and specialists want to send people. For much of our career, almost the entire team of the oral surgery office we worked with, and many of the team members from the other specialty practices we worked with, were our patients in Pemberville, Ohio. 

Front teeth or back teeth, when you make them look like teeth, people will like it and they will show and tell other people. “This is just the temporary?!” was not an uncommon question or exclamation from our patients.  

  1. A GREAT guide makes a GREAT provisional restoration.

Your wax-up** cast/model serves as your vision, as your preparation guide fabrication device, and as your provisional former. When the preparation is appropriately reduced for the material selected, the temporary can mimic the restoration. 

** The wax-up might be created with wax then duplicated with impression material and stone to create a cast, or it might be scanned to be duplicated with resin and printed or milled to create a model. 

  1. 3. Use that provisional to highlight the talents of your team members.

You might LOVE to make those provisionals, but if your assistant is equally excited when it comes to recreating nature for the patient to appreciate, then it could be an opportunity for patients to see that your assistant does much more than set-up, clean up, and hand you an instrument. My dental partner, Cheryl, (who is also my wife) and I actively sought out things that could help our patients experience our team as much more than our helpers. 

As we all know, dental assistants are an integral and vital part of what the practice is and are a powerful force in how and why patients ask for dentistry. Assistants who fabricate provisionals have an opportunity to be seen differently, and we were always looking for ways to create partnership with them in our treatment. 

  1. 4. Take pictures of them.

Photographs of the temporary will make it easier for the lab to design the outcome. They will be able to see what you are thinking, able to visualize what you want, AND maybe even more importantly, see what you do not want. With anterior provisionals, I have frequently noted to my ceramist, “Please put the incisal edge in exactly this position vertically and horizontally in the face, then use your artistry to create the tooth that belongs in the face you see in the photographs of the patient before, prepared, and temporized.” 

There were many times when the technician was able to see and create effects that I might have not recognized as being “just the thing that would make these teeth extraordinary.” And don’t forget to show the patient the photograph. 

  1. 5. Love the material you make the temporary with.

The better the provisional material is at holding tooth position and functional contact, the less adjustment we’re going to have, so using a high-quality material is important. There are a lot of them out there. I like bis-acryl materials that polymerize with a hard surface, have little or no oxygen inhibited layer, and can be polished easily. The polish is more about feeling smooth than about the shine. Ask you patients how their provisional tooth “feels” when you are done, so they sing your praises. 

  1. 6. Use high-quality core material.

When you use a good core material the prep will be smoother, making it easier to fabricate nice provisionals. Ideal prep form goes a long way toward better provisionals. 

  1. ASK your patient to tell people.

As noted above, when you can elicit an emotional response about the awesomeness of your provisional, ask the patient to tell other people, “….and this is just the TEMPORARY!” 

Related Course

Integrative Dental Medicine: Creating Healthier Patients & Practices

DATE: June 27 2025 @ 8:00 am - June 28 2025 @ 4:00 pm

Location: The Pankey Institute

CE HOURS: 16

Regular Tuition: $ 2995

Single Occupancy with Ensuite Private Bath (per night): $ 345

We face a severe health crisis, that is a much larger pandemic than Covid-19! Our western lifestyle affects periodontal & periapical oral disease, vascular disease, breathing disordered sleep, GERD, dental…

Learn More>

About Author

User Image
Gary DeWood, DDS

FIND A PANKEY DENTIST OR TECHNICIAN

I AM A
I AM INTERESTED IN

VIEW COURSE CALENDAR

How Ivoclean Works 

March 1, 2024 Lee Ann Brady

How Ivoclean Works 

Lee Ann Brady, DMD 

Saliva on the inside of restoration surfaces greatly reduces the bond strength between the porcelain and the cement but during the intraoral try-in process, it is inevitable that there will be saliva contamination. 

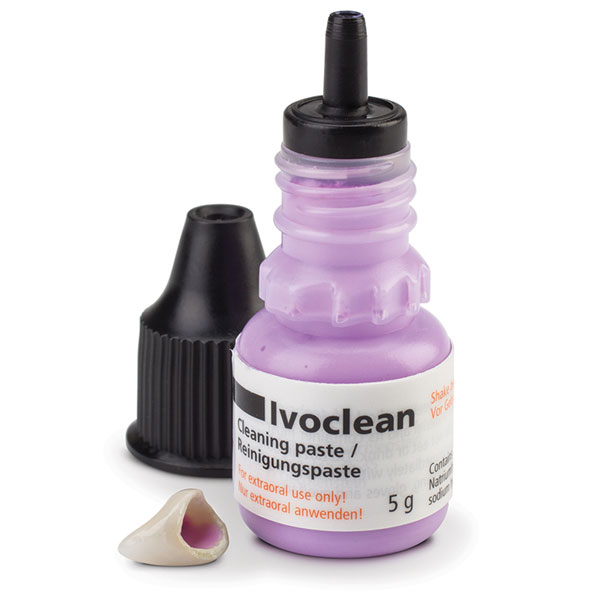
Most dentists I know use Ivoclean from Ivoclar to clean their indirect restorations after try-in. It is an incredible material for removing saliva and other contaminants that the restoration is exposed to during the intraoral try-in process.  

We trust Ivoclean to fully remove resin or traditional cements, as well as saliva and red blood cells to produce a super pristine surface.  

Did you ever wonder how Ivoclean works to get rid of saliva and all the other debris that gets on the inside of a ceramic restoration or metal base?  

Intraoral contaminants contain lots of phosphates. Ivoclean contains suspended zirconia particles that have an affinity for phosphates. The zirconia particles pull towards them the phosphate-laden particles, so when you rinse off the Ivoclean, the intraoral debris is rinsed away leaving a clean surface. 

Note: We don’t want to expose zirconia restorations to something that contains phosphates or includes phosphoric on the label because there is a strong attraction at an elemental level between zirconia and phosphate particles. To neutralize the ionic bond between saliva phosphates and zirconia, we need an alkaline solution such as potassium hydroxide (KOH). This is the active ingredient in products such as ZirClean from BISCO. 

Related Course

Surgically Facilitated Orthodontic Therapy

DATE: October 10 2024 @ 8:00 pm - October 10 2024 @ 9:00 pm

Location: Online

CE HOURS: 1

Date: October 10, 2024 Time: 8 – 9 pm ET Speaker: George Mandelaris, DDS, MS COURSE DESCRIPION Patients seeking ideal esthetics may require a more sophisticated diagnosis and treatment plan…

Learn More>

About Author

User Image
Lee Ann Brady

FIND A PANKEY DENTIST OR TECHNICIAN

I AM A
I AM INTERESTED IN

VIEW COURSE CALENDAR

Why Use a Dental Microscope? 

August 14, 2023 Michelle Lee DDS

We have a buffet of restorative materials to choose from today. Accurate preparations are fulfilling the promise of digital design and precision-based dentistry to deliver the highest level of restorative treatment with efficiency. The microscope has changed the way I personally approach dentistry, and it has heightened my passion for precision dentistry.

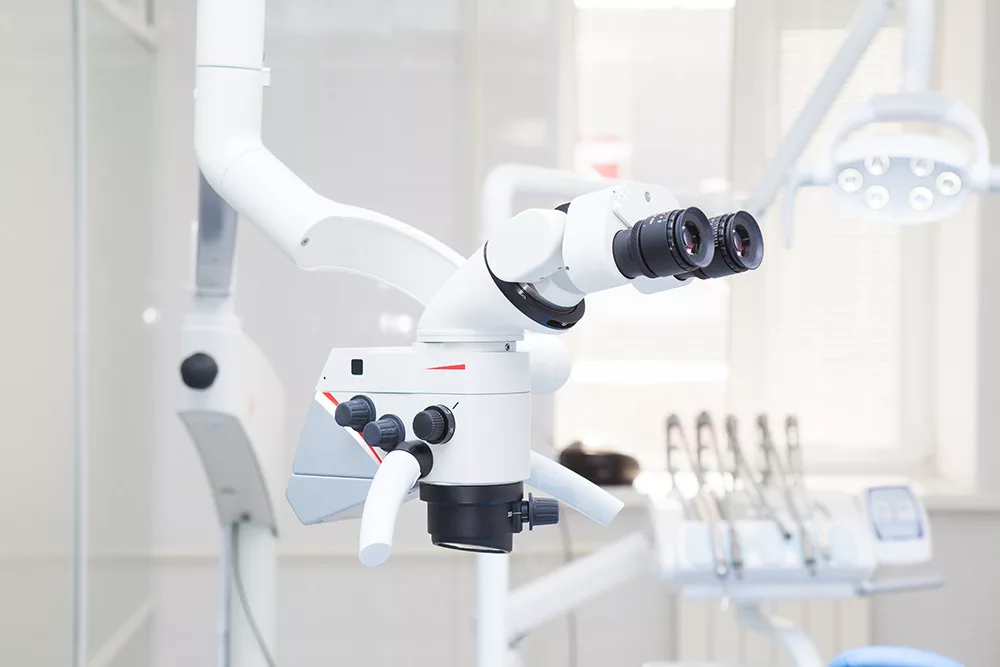
The world of dental microscopy has opened my eyes to see and know more. The microscope has allowed me to improve my dentistry through ergonomics, improved illumination, and magnification. I am astonished and, at the same time, feel humbled to be able to see detail and precision at such a high level of magnification.

An Opportunity to Teach Propelled Me

My introduction to using a dental microscope began five years ago through the University of Pennsylvania Dental School where I was invited to teach a novel program introducing the idea of restorative dentistry with the utilization of dental microscopes. The purpose of the program was to introduce concepts of precision-based dentistry in our ever-changing digital dental world. We wanted our students to appreciate the value of details and how marginal gaps and adaptation can be improved with a higher level of thinking and training.

Not owning a microscope at the time, I agreed to explore this idea and accepted the position. I trained, calibrated, and practiced with the dental students to quickly see the value. Within a few short months, I had integrated dental microscopy into my dental practice.

Does the Microscope Replace Loupes?

Other dentists, who have not adopted dental microscopy, often ask me, “What does the microscope replace in your practice, and does it replace your loupes?” The answer is simple. Using a dental microscope doesn’t necessarily replace loupes but higher magnification increases proficiency and precision. I often prepare with my loupes and finish my preparations under higher magnification to improve smoothness, adaptation, and finish lines.

The viewing capabilities of the microscopes provide a range of higher magnification beyond some loupes with no eye muscle strain. Under dental microscopy, I can magnify my viewing field from 4X power to 10X power and sometimes as high as 25X power.

The Microscope Has Changed How I Practice

Utilizing a dental microscope has changed how I practice dentistry, improved my overall health in ergonomics, and is now an invaluable part of my practice as I strive to serve my patients with higher-level dentistry.

Using the microscope, I routinely minimize marginal gaps in my preparations to increase the longevity of restorations for my patients.

The completely upright binocular, parallel vision provides less strain to my posture, my neck, and head position.

My patients can view what I see with the microscope and gain an elevated understanding. Together we can partner better in making collaborative decisions to improve their dental health in the best way possible.

Why I Use a Dental Microscope

I am of the belief that when we see better, we can do better. I want to do my best for my patients. The dental microscope provides an elevated level of magnification, illumination, ergonomics, and patient education so I can deliver the highest care. After adapting to its usage and experiencing its benefits, I recommend it highly to other dentists. If you have access to one to try it–and put in the effort to learn how to use it, I think you’ll rapidly want one of your own.


Discover more on how to build a thriving dental practice with The Essentials Series at Pankey. This comprehensive 4-part course starts with Essentials 1, diving deep into the core principles that will transform your approach to patient care and practice management. 

Related Course

Tried and True Benefits From Crown Lengthening

DATE: November 14 2024 @ 8:00 pm - November 14 2024 @ 9:00 pm

Location: Online

CE HOURS: 1

Date: November 14, 2024 Time: 8 – 9 pm ET Speakers: James Kohner, DDS Description: Frustrated by a cusp fractured below the gingiva, or prepping too far sub-gingivally? This lecture…

Learn More>

About Author

User Image
Michelle Lee DDS

Dr. Michelle Lee is very proud to provide all aspects of general, family, and cosmetic dentistry to the Fleetwood and Berks county areas. Dr. Lee is a 2004 graduate of the University of Pennsylvania School of Dental Medicine and completed a one-year General Practice Residency program at Abington Memorial Hospital. Dr. Lee continues to keep herself abreast of dental advancements and takes hundreds and hundreds of hours of advanced dental education from the Pankey Institute and other courses for advanced dental training. She also maintains a faculty and advisor position at the Pankey Institute. Professionally, Dr. Lee is member of the Academy of General Dentistry, American Dental Association, Pennsylvania Dental Association, and serves on a committee of the American Equilibration Society. She also volunteers to treat pediatric patients through her local dental society.

FIND A PANKEY DENTIST OR TECHNICIAN

I AM A
I AM INTERESTED IN

VIEW COURSE CALENDAR

Changing VDO and Correcting Resultant Lisps

May 16, 2022 Lee Ann Brady DMD

Many times, we need to increase the vertical dimension of occlusion (VDO) to put teeth where they should be esthetically and restore teeth that are severely worn from attrition or erosion. If you are concerned that changing VDO will cause joint or muscle pain, put your mind at rest. My experience is that it won’t. If you are concerned it will cause pain, put that thought aside too. My experience is that it won’t.

We want to change the vertical dimension only as much as we needed to accomplish the esthetic and functional goals of the case. That will minimize the effect changing VDO may have phonetics.

Phonetics May Be a Challenge

Vertical dimension has impact on two phonetic sounds in particular—F, S and V. F and V are similar. When we say them, we touch the edge of our upper central incisors just on wet-dry line on the inside of our lower lip. Saying F and V has to do with mandibular lip position, and the patient learns to adjust that position when VDO is changed. In my experience, they adjust to this in two to four weeks. They learn to accommodate a new mandibular position that touches the lower lip more gently.

S is a totally different sound. People say S in one of three different ways.

  1. Some people make the sound S by making a small air space that’s between their upper and lower incisors edge to edge.
  2. Some people make the sound S by making that same small air space but with their lower incisal edges just lingual to their upper incisal edges.
  3. Some people make the sound S by making that same small air space but with their lower incisal edges just labial to their upper incisal edges. And those are our Class 3 occlusion patients.

The air space needs to be a precise amount of distance. If you have too little space, the patient lisps. If you have too much space, the patient spits or sprays saliva. Neither of which the patient is happy about. If the patient is totally edentulous, the patient may adapt to the new VDO of their prostheses, but patients rarely adapt to correct their pronunciation of S if they have a new VDO on natural teeth. This means we need to be careful about altering VDO.

The only way to test if a patient will have a lisp or other phonetic challenge is to test the VDO with provisionals, not with a removable bite splint.

Correcting Lisps Created by Anterior Restoration

How much air space do patients need to pronounce S without a challenge? They need about 100 microns to not lisp or spray saliva. To correct for too large or too small a space, I learned the following trick I hope you find helpful.

Madam Butterfly Silk is about 94 microns thick. I have the patient sit up and hold the silk between their upper and lower incisors with a Miller forceps. While the articulator silk is between the teeth, I have the patient count from 60 to 70. As they count the entire series of numbers, they relax into the process and red ink is transferred to their incisal edges if the space is smaller than 94 microns. If we see red marks, including on the canines, we need to increase the air space. My experience is that it takes four to six passes with the articulator silk and patient counting from 60 to 70 to adjust the airspace sufficiently. As you are doing this, the patient experiences the positive benefit of the lisp going away. I then tell the patient to go home and “observe how you sound. Ask others how you sound. We may need to do a little more refinement.”

If the patient lisps edge to edge, I shorten the lower incisal edges because upper incisors are esthetic. If the patient says S with the lower incisors lingual and they have red marks on their lower lingual and on their upper labial, I pick the upper or lower incisors and make adjustments where they are structurally and esthetically least impactful. If they are Class 3 and say S with their lower incisors, labial to their upper incisors, I always adjust the lingual marks on the lower incisors.

Related Course

Surgically Facilitated Orthodontic Therapy

DATE: October 10 2024 @ 8:00 pm - October 10 2024 @ 9:00 pm

Location: Online

CE HOURS: 1

Date: October 10, 2024 Time: 8 – 9 pm ET Speaker: George Mandelaris, DDS, MS COURSE DESCRIPION Patients seeking ideal esthetics may require a more sophisticated diagnosis and treatment plan…

Learn More>

About Author

User Image
Lee Ann Brady DMD

Dr. Lee Ann Brady is passionate about dentistry, her family and making a difference. She is a general dentist and owns a practice in Glendale, AZ limited to restorative dentistry. Lee’s passion for dental education began as a CE junkie herself, pursuing lots of advanced continuing education focused on Restorative and Occlusion. In 2005, she became a full time resident faculty member for The Pankey Institute, and was promoted to Clinical Director in 2006. Lee joined Spear Education as Executive VP of Education in the fall of 2008 to teach and coordinate the educational curriculum. In June of 2011, she left Spear Education, founded leeannbrady.com and joined the dental practice she now owns as an associate. Today, she teaches at dental meetings and study clubs both nationally and internationally, continues to write for dental journals and her website, sits on the editorial board of the Journal of Cosmetic Dentistry, Inside Dentistry and DentalTown Magazines and is the Director of Education for The Pankey Institute.

FIND A PANKEY DENTIST OR TECHNICIAN

I AM A
I AM INTERESTED IN

VIEW COURSE CALENDAR

Using Air Abrasion for Composite Repair

March 28, 2022 Lee Ann Brady DMD

A while ago, I had the opportunity to repair a small bubble in an old composite restoration, and I got to thinking you might like to know how I use air abrasion to do this type of repair.

I don’t know how many times you see this, but I frequently see small holes in old composite restorations. In many cases, the margins look good. Everything looks good about the restoration except where there was an air bubble when the composite was placed and now there is a little hole on the occlusal surface. Food can get trapped and staining can occur in the hole, but the hole doesn’t descend into the tooth. And sometimes I see a little gap on the margin of an old composite with staining or early decay. In both cases, I don’t want to remove the entire restoration.

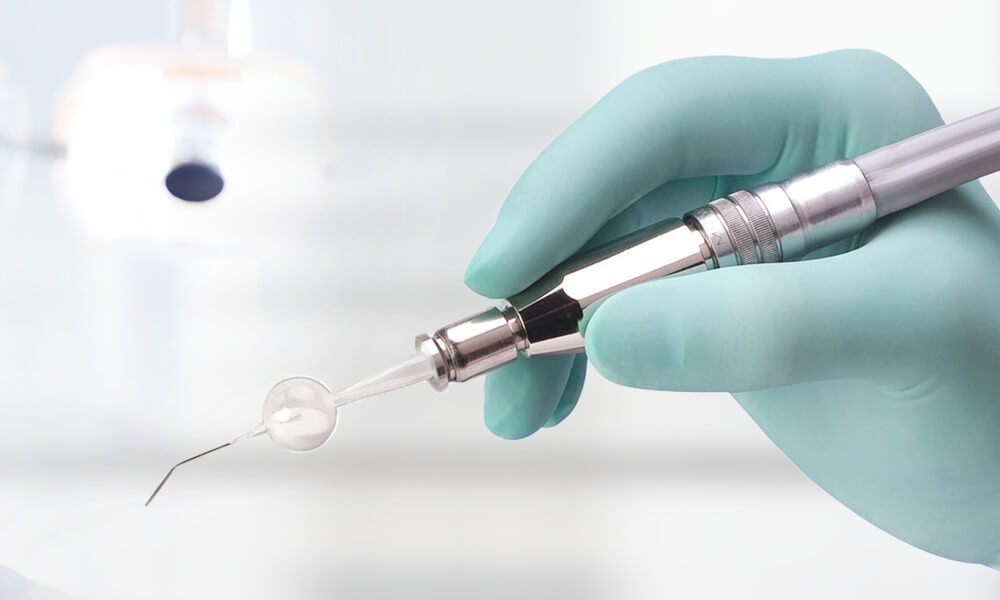
I use a lot of air abrasion in my practice, and in particular, I find it is wonderful for repairing old composite. I have the EtchMaster® from Groman. It’s a little handpiece that is super easy and convenient. It makes using air abrasion chairside something you will want to do every day.

Use 50-micron aluminum oxide air abrasion to clean out the stain, etch the old composite, and etch the tooth. If any tooth structure is to be etched, this air abrasion is a replacement for phosphoric acid. So, in one easy step, you have prepped the tooth and the composite. A plus of this technique is that local anesthetic is not needed if the hole does not extend into the tooth.

Now you can go in and use your dentin adhesive and replace your repair composite. Today, dentin adhesives contain MDP or PMMA which is the chemistry we need for the new composite to bond to the old composite. If I were to repair a composite restoration with a handpiece and a burr, I would not get the same bonded interface between the new resin and the old resin.

For both ease, patient comfort, and the best bond, I choose to treat previously polymerized resin with air abrasion and then some sort of resin that contains either MDP or PMMA.

Related Course

E2: Occlusal Appliances & Equilibration

DATE: October 20 2024 @ 8:00 am - October 24 2024 @ 2:30 pm

Location: The Pankey Institute

CE HOURS: 44

Dentist Tuition: $ 7200

night with private bath: $ 290

THIS COURSE IS SOLD OUT What if you had one tool that increased comprehensive case acceptance, managed patients with moderate to high functional risk, verified centric relation and treated signs…

Learn More>

About Author

User Image
Lee Ann Brady DMD

Dr. Lee Ann Brady is passionate about dentistry, her family and making a difference. She is a general dentist and owns a practice in Glendale, AZ limited to restorative dentistry. Lee’s passion for dental education began as a CE junkie herself, pursuing lots of advanced continuing education focused on Restorative and Occlusion. In 2005, she became a full time resident faculty member for The Pankey Institute, and was promoted to Clinical Director in 2006. Lee joined Spear Education as Executive VP of Education in the fall of 2008 to teach and coordinate the educational curriculum. In June of 2011, she left Spear Education, founded leeannbrady.com and joined the dental practice she now owns as an associate. Today, she teaches at dental meetings and study clubs both nationally and internationally, continues to write for dental journals and her website, sits on the editorial board of the Journal of Cosmetic Dentistry, Inside Dentistry and DentalTown Magazines and is the Director of Education for The Pankey Institute.

FIND A PANKEY DENTIST OR TECHNICIAN

I AM A
I AM INTERESTED IN

VIEW COURSE CALENDAR

4 Questions You Should Be Able to Answer To Improve Your Success With Indirect Bonded Anterior Restorations

August 16, 2021 Abdi Sameni

Restorations are the foundation of a thriving dental practice because they keep you challenged and motivated while ensuring patient satisfaction. Indirect bonded anterior restorations provide patients with functional and aesthetic solutions to improve their smiles.

But “veneers” are more complicated than they seem when you see the finished product: bonded anterior restorations.

Before you decide on the type of restoration you are going to offer your patients in the anterior region, here are four questions you should be asking to get the most from your restorative process:

  1. Can indirect bonded anterior restorations strengthen worn-down, eroded, or chipped teeth?
  2. Should teeth be whitened before they are veneered?
  3. Should endodontically treated teeth be veneered?
  4. Are crowns stronger than veneers?

If you are hungry for more guidance on indirect bonded anterior restorations, check out my upcoming course at Pankey Online. On Friday, August 20th, 2021, from 2-4 pm ET, I will be hosting a live, 2-hour virtual course, “Indirect Bonded Anterior Restorations.” You can easily register for my course, which provides 2 CE credits, at Pankey Online.

Join me as we discuss useful concepts like three-dimensional functional and esthetic mock-ups, provisional fabrication, preparation design for adhesive restorations, and more. See you there!

Related Course

E1: Aesthetic & Functional Treatment Planning

DATE: October 3 2024 @ 8:00 am - October 6 2024 @ 2:30 pm

Location: The Pankey Institute

CE HOURS: 39

Dentist Tuition: $ 6500

Single Occupancy Room with Ensuite Bath (Per Night): $ 290

THIS COURSE IS SOLD OUT Transform your experience of practicing dentistry, increase predictability, profitability and fulfillment. The Essentials Series is the Key, and Aesthetic and Functional Treatment Planning is where your journey…

Learn More>

About Author

User Image
Abdi Sameni

Dr. Abdi Sameni, Clinical Associate Professor of Dentistry at Herman Ostrow School of Dentistry of USC, is the founder and developer of the “International Restorative Dentistry Symposium, Los Angeles.” He is a former faculty for the “esthetic selective” and the former director of the USC Advanced Esthetic Dentistry Continuum for the portion relating to indirect porcelain veneers. Dr. Sameni lectures nationally and internationally. He is a member of The American College of Dentists, OKU National Dental Honor Society and the Pierre Fauchard Academy. Dr. Sameni maintains a practice limited to restorative dentistry in West Los Angeles, California and the 2020 Pankey Institute webinar he presented on interdisciplinary treatment planning can be viewed here on YouTube.

FIND A PANKEY DENTIST OR TECHNICIAN

I AM A
I AM INTERESTED IN

VIEW COURSE CALENDAR

SpeedCEM Plus: Techniques for Self-Adhesive Cementation

April 21, 2020 Lee Ann Brady DMD

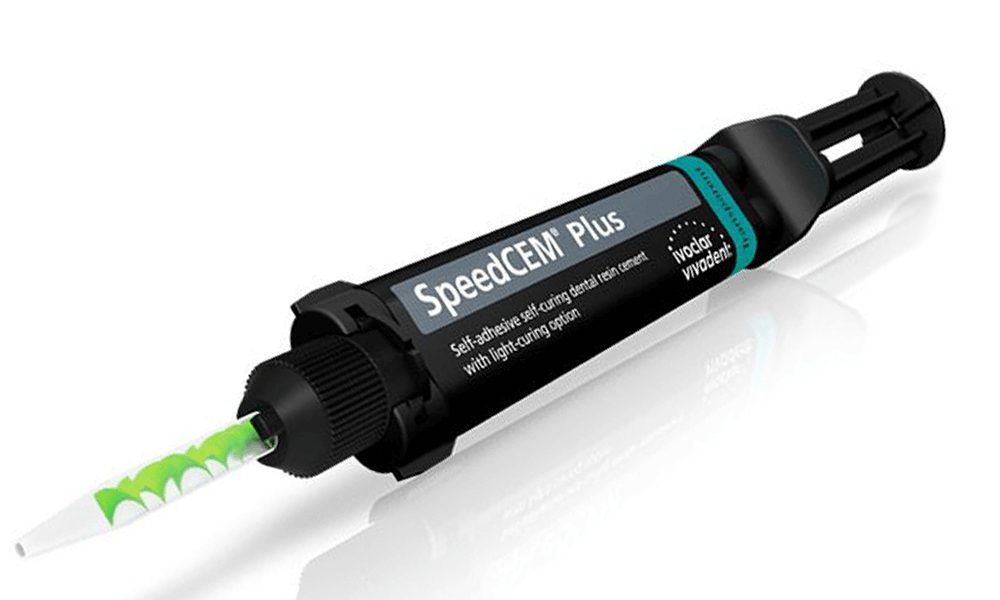
SpeedCEM Plus is dual-cure self-adhesive resin cement from Ivoclar that has been designed to be used with restorations that have inherent mechanical retention. It can be used for most materials – all-metal restorations, zirconia oxide ceramics, or something in the lithium disilicate category. The material will fully pull MRIs on its own, but it can also be light-cured. It has great esthetics, low technique sensitivity from the standpoint of using the material, and great bond strength. It is easily cleaned up. 

Prepping the Internal Surface of the Restoration 

Oxide-based ceramic restorations are etched with air abrasion. Your laboratory can do this, or you can use between 30 and 50-micron aluminum oxide to air abrade the intaglio of the restoration. Confirm with your lab if they are going to be doing this. 

The internal surface of lithium disilicate based restorations is etched using chemistry. You can use hydrochloric acid at 5% for no more than 20 seconds, or you can use an Ivoclar Vivadent product called Monobond Etch & Prime for 60 seconds 

If you try in the restoration after it has been etched, as I like to do, then the restoration will need to be cleaned again before it is bonded. For this cleaning purpose, I use Ivoclar Vivadent’s IvocleanIt’s a phosphate-free restorative cleaning material that can be used on metal, oxide-based ceramic materials, and on lithium disilicate materials. I simply vigorously shake the bottle and apply Ivoclean for 20 to 30 seconds, rinse the restoration and dry it. I recommend using a clean air source for drying such as an Adec airline on your unit. 

If you are going to use metal ceramics or lithium disilicate, you now need to condition the inside of the restorative material. I use the product Monobond Plus, which is appropriate for all kinds of materials.  

If you are working with zirconia or an oxide-based ceramic, one of the advantages of SpeedCEM Plus is you do not have to do anything to the inside of the restoration other than the air abrasion and cleaning because the chemistry in the SpeedCEM Plus will prime or condition the inside of the zirconia restoration.  

Prepping the Prepared Tooth 

With SpeedCEM Plus, we do not need to do anything to the tooth prior to cementation other than cleaning the tooth. I like to clean the prepared tooth with light air abrasion and apply a 2% chlorhexidine solution to the prep and clean the tooth with a bristle brush in a slow-speed handpiece. 

SpeedCEM Plus Application & Cure 

After cleaning the prep, you can load the restoration with SpeedCEM Plus and seat the restorationSpeedCEM Plus comes with a mixing tip through which you express the adhesive.  

You now have two choices. You can hold the restoration in place with firm pressure and allow it to go to its self-cure mode which intraorally takes approximately 3 minutes. Alternatively, you can use your curing light to speed up the process.  

After I seat the restoration, I like to check the margins with an explore to make sure I have not had a mis-seat and then I pick up my curing light and, at a distance of 1 to 10 mm, I cure for one second at each line angle. We call this the quarter technique… mesial buccal one second, distal buccal one second, mesial lingual one second and distal lingual one second. I can now quickly go in and clean up all excess cement, making sure I get excess cement out of the interproximals. It’s important to cure on the line angles, not just buccal and lingual, or you will leave a lot of material that doesn’t reach the gel phase interproximally.     

Once all the excess material is cleaned off, I cover all of the margins with an oxygen barrierand I do a 20-second cure on each of the four line angles using the quarter technique. The patient is good to go once you check the occlusion. 

Notes 

  • SpeedCEM Plus comes in three shades 
  • It is designed to be capped in the refrigerator. Never remove the used mixing tip and put a new empty tip on as this would leave the base and catalyst at the ends of the barrel exposed to air. You can either replace the used mixing tip with the original manufacturer’s cap or leave the used mixing tip on and disinfect it just like you wipe your light-curing unit. I recommend you do the latter, as it decreases the risk of contaminating the resin and initiating the self-cure process in the barrel. 
  • Because the material is so versatile, you also can use it for placing your posts. 

Related Course

The Pankey Assistant’s Experience

DATE: June 12 2025 @ 12:00 pm - June 14 2025 @ 7:00 pm

Location: The Pankey Institute

CE HOURS: 17

Regular Tuition: $ 2050

Single Occupancy Room with Ensuite Bath (Per Night): $ 345

This “can’t miss” course will empower Dental Assistants to bring their skills to excellence! During this dynamic hands-on course, led by Pankey clinical team member, Sandra Caicedo, participants will learn…

Learn More>

About Author

User Image
Lee Ann Brady DMD

Dr. Lee Ann Brady is passionate about dentistry, her family and making a difference. She is a general dentist and owns a practice in Glendale, AZ limited to restorative dentistry. Lee’s passion for dental education began as a CE junkie herself, pursuing lots of advanced continuing education focused on Restorative and Occlusion. In 2005, she became a full time resident faculty member for The Pankey Institute, and was promoted to Clinical Director in 2006. Lee joined Spear Education as Executive VP of Education in the fall of 2008 to teach and coordinate the educational curriculum. In June of 2011, she left Spear Education, founded leeannbrady.com and joined the dental practice she now owns as an associate. Today, she teaches at dental meetings and study clubs both nationally and internationally, continues to write for dental journals and her website, sits on the editorial board of the Journal of Cosmetic Dentistry, Inside Dentistry and DentalTown Magazines and is the Director of Education for The Pankey Institute.

FIND A PANKEY DENTIST OR TECHNICIAN

I AM A
I AM INTERESTED IN

VIEW COURSE CALENDAR

LuxaCrown in Clinical Practice

March 9, 2020 Lee Ann Brady DMD

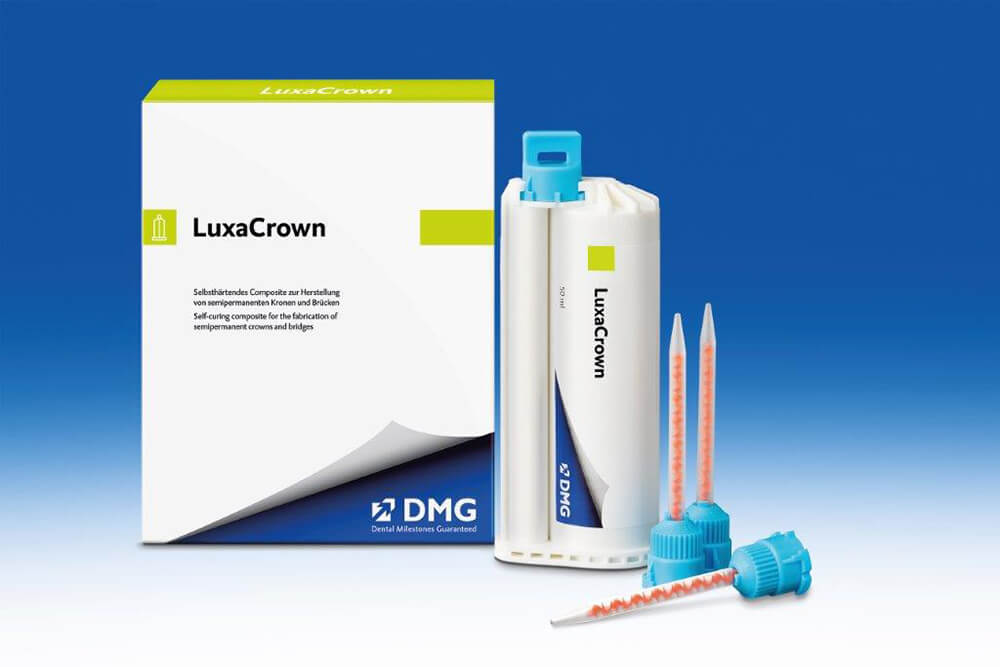
LuxaCrown is a new material that was released by DMG America last year. LuxaCrown is a dual cure composite material that comes in a convenient chair-side cartridge. Because it has the physical properties of composite, it is much stronger and longer lasting than bisacryl provisional material. The manufacturer says it can last in the oral environment up to five years, maybe longer. It is stainresistant and color stable, so you can leave it in the mouth for long periods without concern that the color will change. I though it would be helpful to share the situations in which I now use LuxaCrown instead of a bisacryl material for provisionals. 

Multi-Unit Restorations 

In my own practice, I don’t use LuxaCrown for single crown preps where the provisional will be in the mouth for a couple of weeks, perhaps a month, or a little more. But, the strength of LuxaCrown and the color stability of this new composite material make it what I consider to be an incredible new clinical tool in my practice to provisionalize multiple units where there is pontic space. With LuxaCrown, I no longer need to reinforce the pontic with Ribbond or orthodontic wire. I don’t have to do anything to make sure we don’t get fracture at the connectors, because the material is strong enough and durable enough it to hold up, even long term.  

Anterior Veneers 

The other situation in which I use LuxaCrown routinely is with my shrink wrapped provisionals for anterior veneers. The strength of the material makes it more durable in a partial coverage anterior setting. And the color stability is appealing because the veneer may be in provisional for two months or three months, depending on how long it takes us to get patient approved provisionals for shape and contour that the patient really loves. Not having to worry about the color changing over time has been a huge bonus.  

Anterior Onlays 

Another situation in which I am using LuxaCrown is for partial coverage onlays in the posterior. So often we experience bisacryl onlay provisionals popping off the teeth, but LuxaCrown provisionals stay where you put them.    

Phased Dentistry 

And, I use LuxaCrown whenever I am phasing dentistry…when I am doing what I call “interim restorations” and the provisional restorations will be in the mouth multiple months before the patient receives ceramic restorations. Perhaps, the patient will be in provisionals six to 24 months while they go through orthodontics and we do final restorations in quadrants or even sextants of the mouth. Patients don’t mind having LuxaCrown in their mouths for long periods, because in addition to its stability, it polishes pristinely smooth and is glossy.   

Related Course

E1: Aesthetic & Functional Treatment Planning at the Chicago Midwinter Dental Meeting

DATE: February 20 2025 @ 7:00 am - February 22 2025 @ 8:00 pm

Location: Chicago Midwinter Meeting

CE HOURS:

Transform your experience of practicing dentistry, increase predictability, profitability and fulfillment. The Essentials Series is the Key, and Aesthetic and Functional Treatment Planning is where your journey begins.  Following a system of…

Learn More>

About Author

User Image
Lee Ann Brady DMD

Dr. Lee Ann Brady is passionate about dentistry, her family and making a difference. She is a general dentist and owns a practice in Glendale, AZ limited to restorative dentistry. Lee’s passion for dental education began as a CE junkie herself, pursuing lots of advanced continuing education focused on Restorative and Occlusion. In 2005, she became a full time resident faculty member for The Pankey Institute, and was promoted to Clinical Director in 2006. Lee joined Spear Education as Executive VP of Education in the fall of 2008 to teach and coordinate the educational curriculum. In June of 2011, she left Spear Education, founded leeannbrady.com and joined the dental practice she now owns as an associate. Today, she teaches at dental meetings and study clubs both nationally and internationally, continues to write for dental journals and her website, sits on the editorial board of the Journal of Cosmetic Dentistry, Inside Dentistry and DentalTown Magazines and is the Director of Education for The Pankey Institute.

FIND A PANKEY DENTIST OR TECHNICIAN

I AM A
I AM INTERESTED IN

VIEW COURSE CALENDAR