Best Day Ever 

June 14, 2024 Daren Becker DMD

By Daren Becker, DMD 

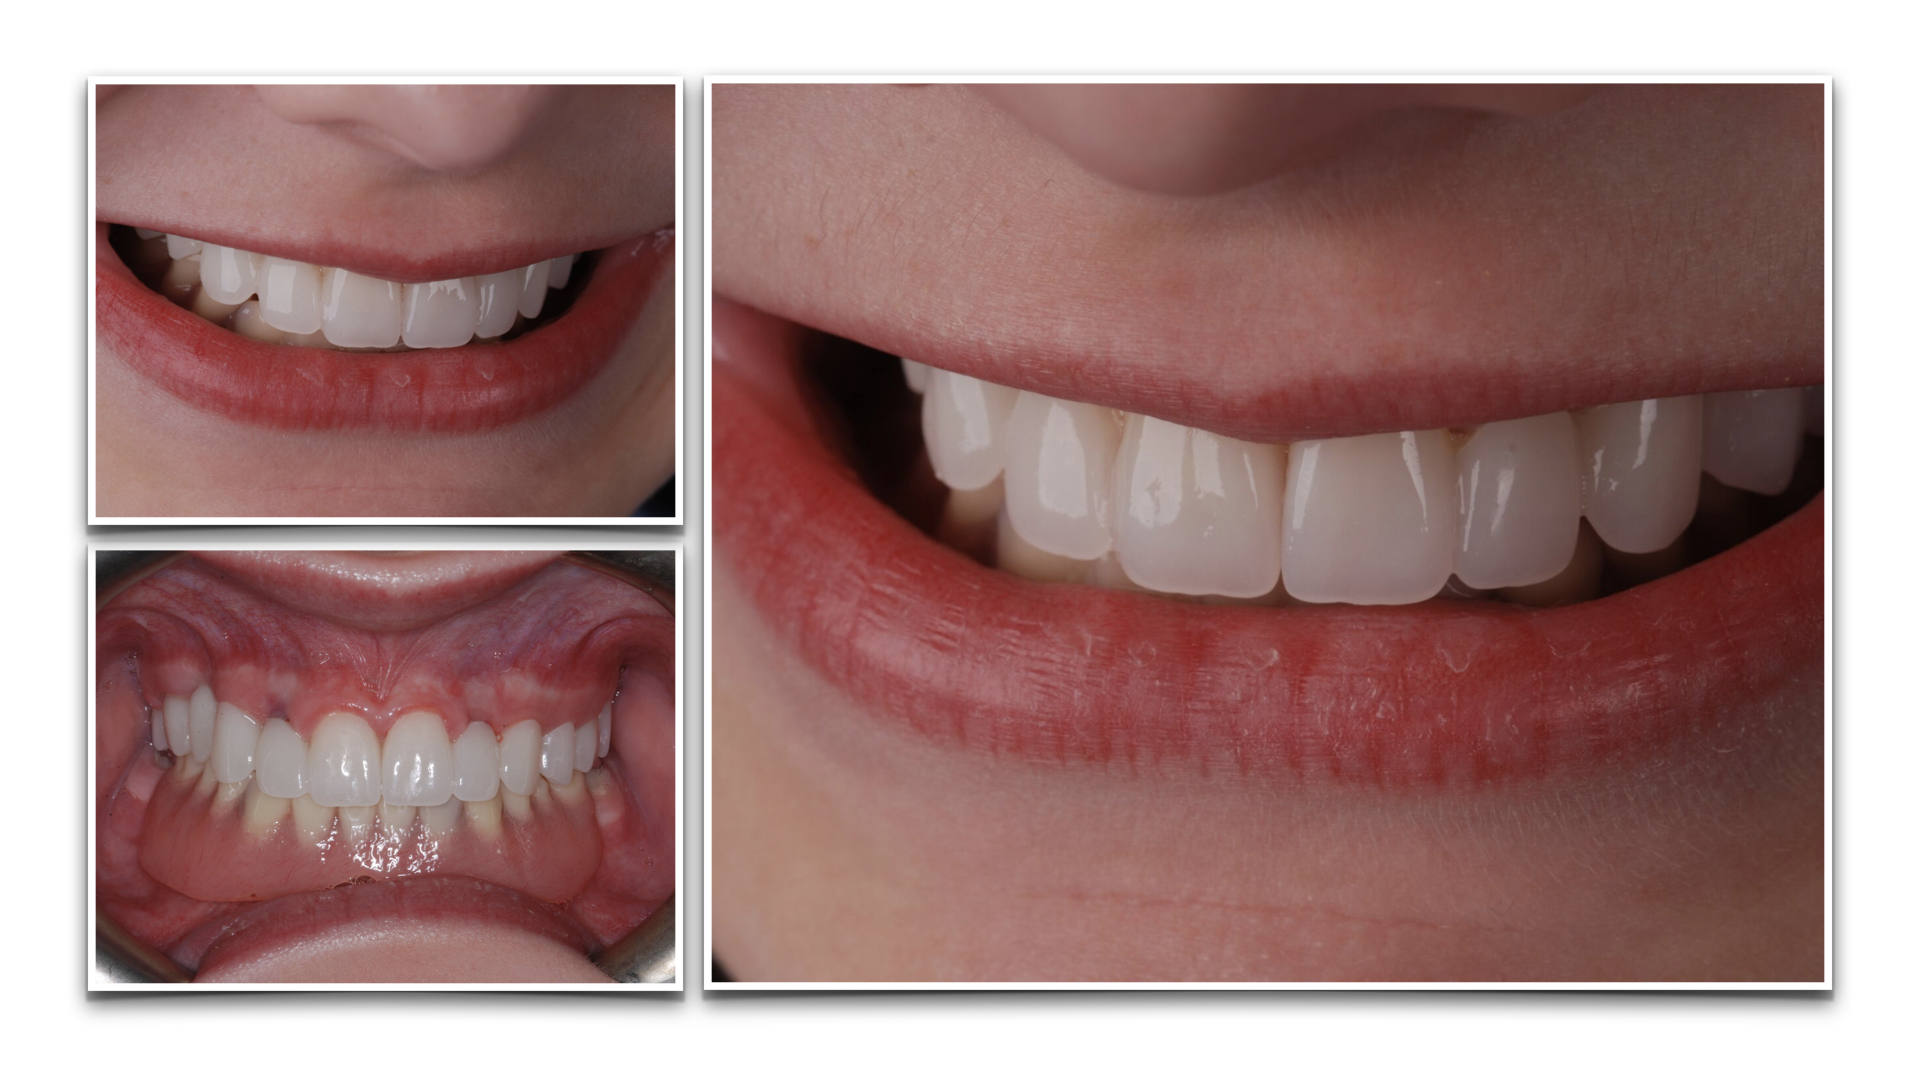
A 16-year-old girl presented with the worst case of ectodermal dysplasia I had ever seen.. She was missing all of her lower teeth except for her 12-year molars. She presented with a lower denture (made by a previous dentist) on two temporary implants in the canine position.  She had only a few maxillary teeth that were malformed; some of these were still her primary teeth.  The appearance of her smile made her look like she was a 9 year old child. 

She was embarrassed by her smile and realized she would need implants and restorative dentistry down the road. At the time, she was too young. Our hearts went out to her. 

Another dentist had recommended direct bonding, which certainly could have worked, but I thought that we could get a better aesthetic result for her with significantly less time in the chair. So, we captured preclinical digital impression scans with our iTero scanner and along with Matt Roberts at CMR Dental Lab in Idaho, we designed a digital wax-up for an improved occlusion and smile. From there, we had milled PMMA (Polymethyl Methacrylate) overlays created that we direct bonded onto the existing dentition as a long-term temporary solution. We did not need to prep any teeth, and we quickly gave her a broad beautiful smile that looked natural and age appropriate. 

She was in tears. We were in tears. Her mom and sister were in tears. It was the best day ever! 

Soon after, she got a part as an extra in a series filmed here in Georgia, and is thinking about a career in acting. Seeing her life change with simple, comfortable clinical procedures has been priceless. 

Related Course

Direct Composite: Predictable, Easy and Beautiful

DATE: October 25 2024 @ 8:00 am - October 26 2024 @ 4:00 pm

Location: The Pankey Institute

CE HOURS: 14

Regular Tuition: $ 2195

Single Occupancy with Ensuite Private Bath (per night): $ 290

Achieving Predictable and Stunning Anterior Results Direct composite is something we do every day in our practices. Yet, they can sometimes be frustrating when we don’t get a tight contact…

Learn More>
About Author

User Image
Daren Becker DMD

Dr. Becker earned his Bachelors of Science Degree in Computer Science from American International College and Doctor of Dental Medicine from the University of Florida College of Dentistry. He practices full time in Atlanta, GA with an emphasis on comprehensive restorative, implant and aesthetic dentistry. Daren began his advanced studies at the Pankey Institute in 1998 and was invited to be a guest facilitator in 2006 and has been on the visiting faculty since 2009. In addition, in 2006 he began spending time facilitating dental students from Medical College of Georgia College of Dentistry at the Ben Massell Clinic (treating indigent patients) as an adjunct clinical faculty. In 2011 he was invited to be a part time faculty in the Graduate Prosthodontics Residency at the Center for Aesthetic and Implant Dentistry at Georgia Health Sciences University, now Georgia Regents University College of Dental Medicine (formerly Medical College of Georgia). Dr. Becker has been involved in organized dentistry and has chaired and/or served on numerous state and local committees. Currently he is a delegate to the Georgia Dental Association. He has lectured at the Academy of General Dentistry annual meeting, is a regular presenter at ITI study clubs as well as numerous other study clubs. He is a regular contributor at Red Sky Dental Seminars.

FIND A PANKEY DENTIST OR TECHNICIAN

I AM A
I AM INTERESTED IN

VIEW COURSE CALENDAR

Dental Lab Communication for a Difficult Shade

June 5, 2024 Kelley Brummett DMD

By Kelley Brummett, DMD 

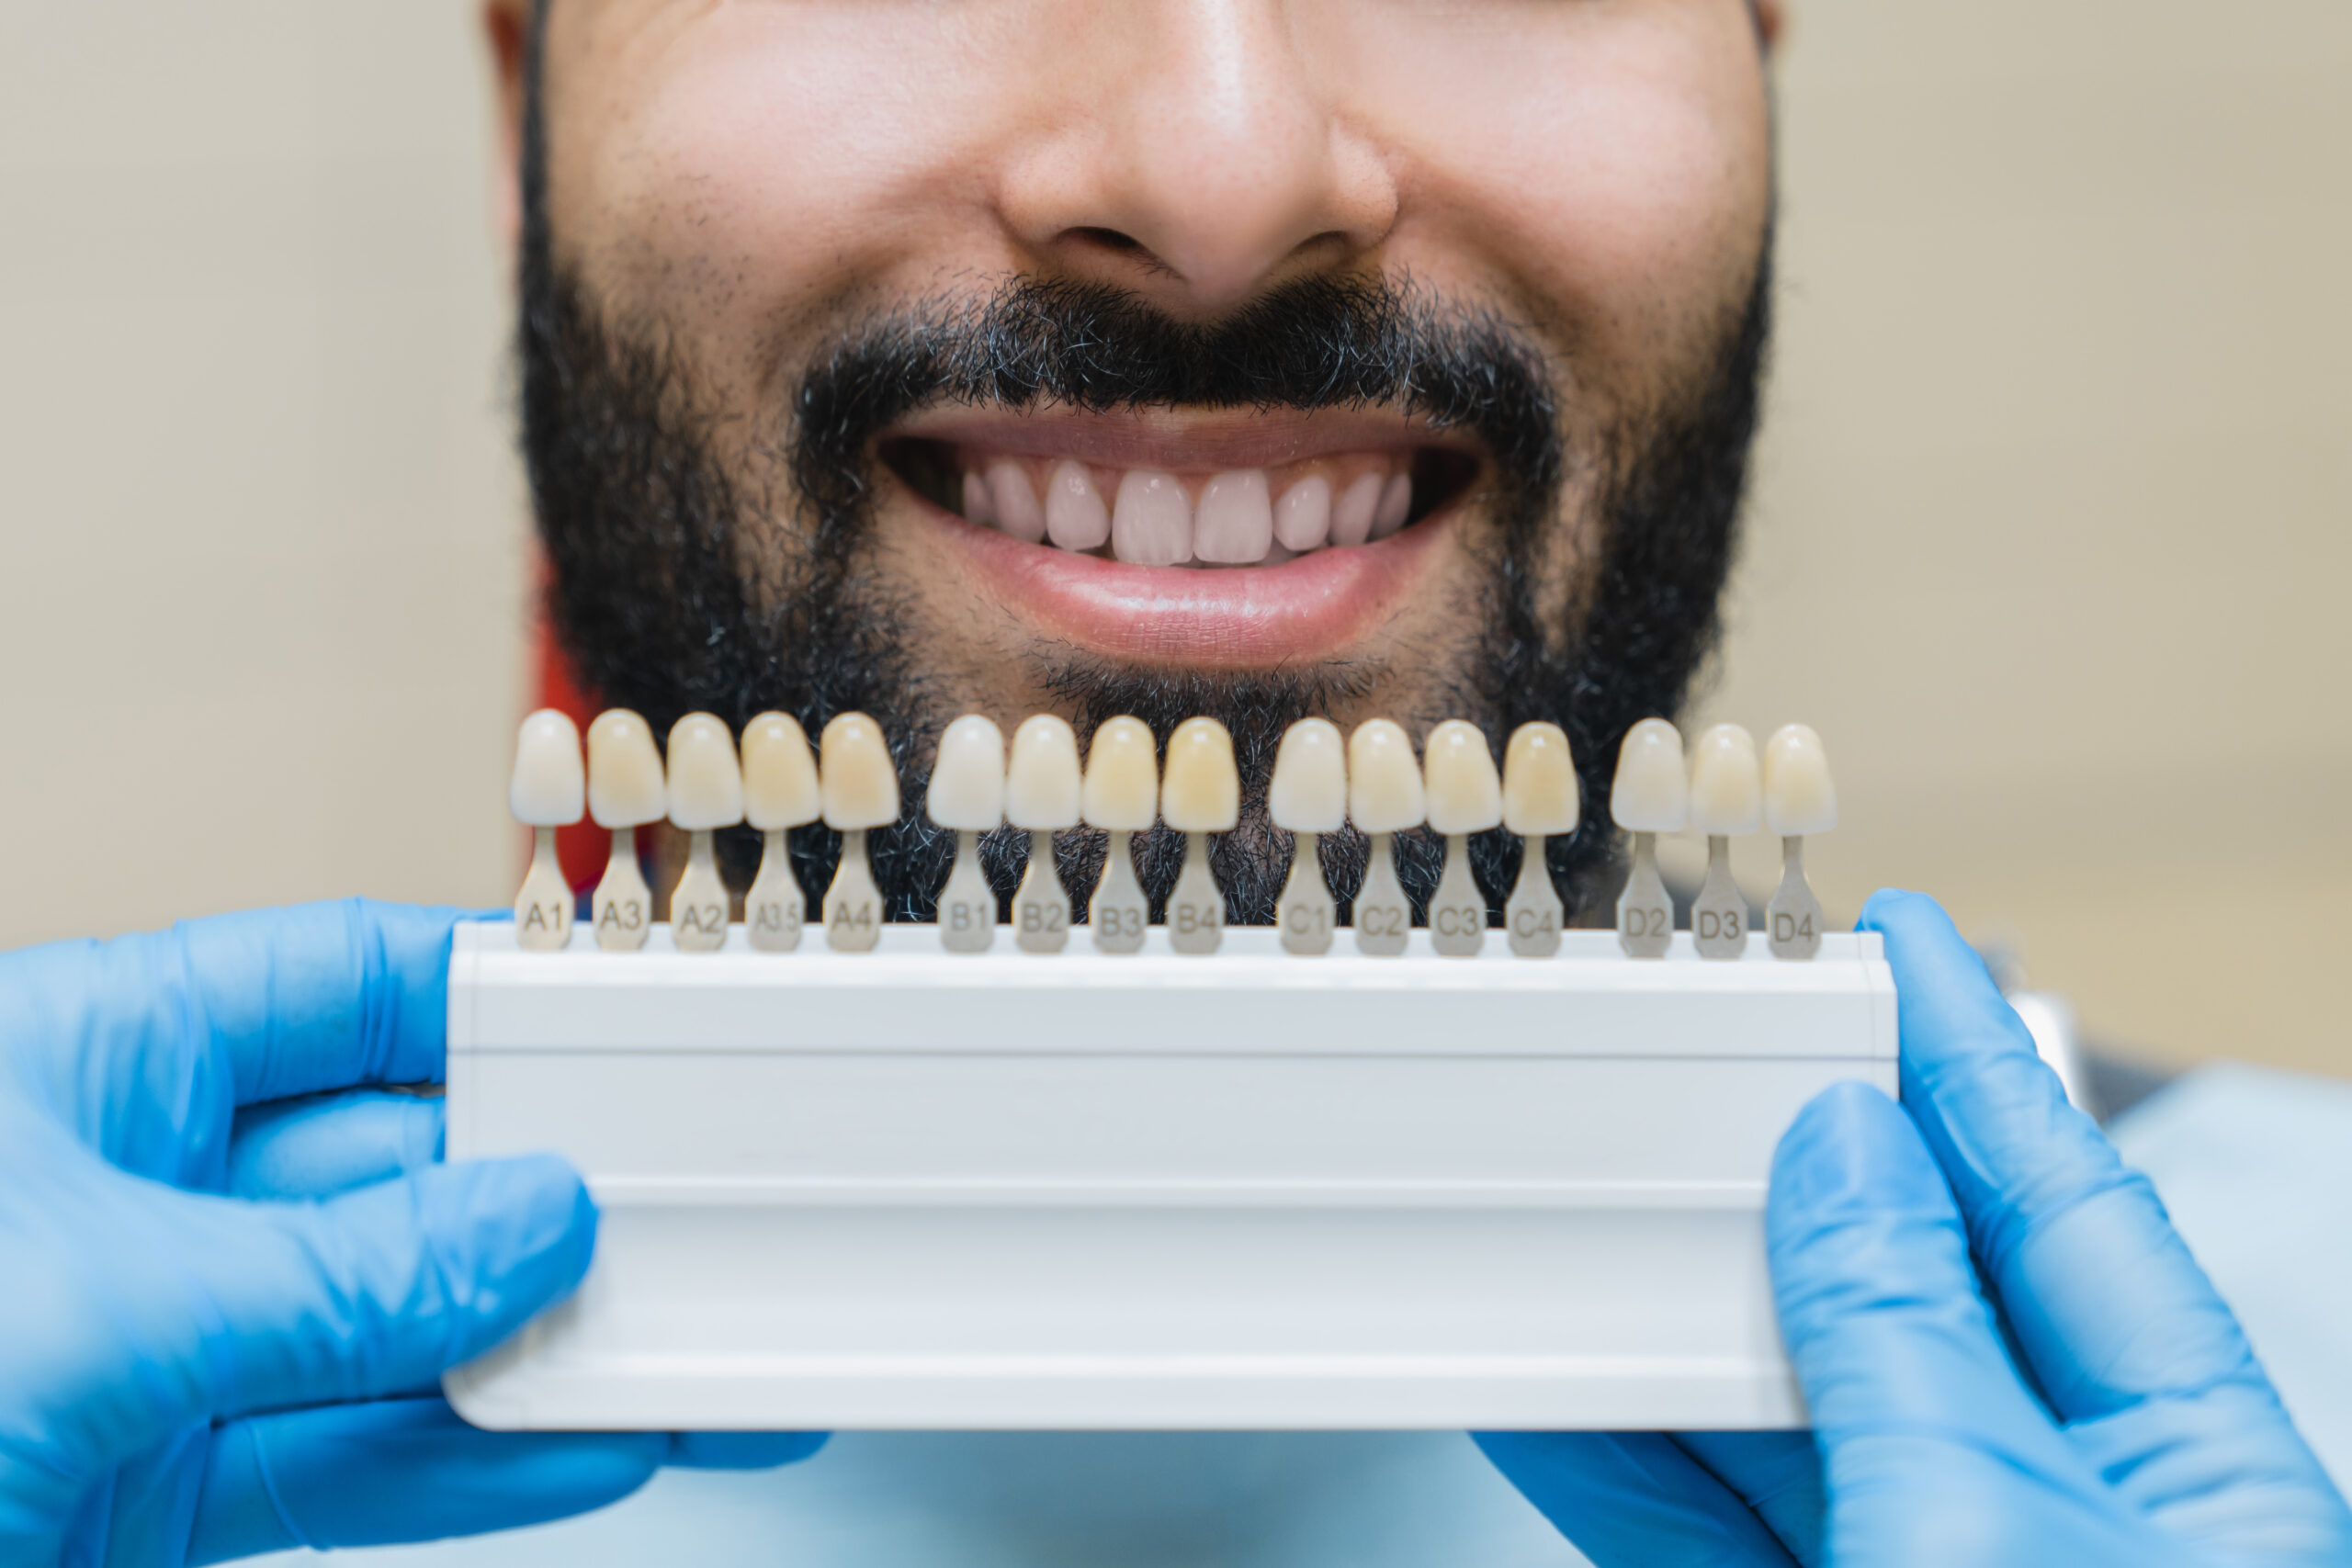
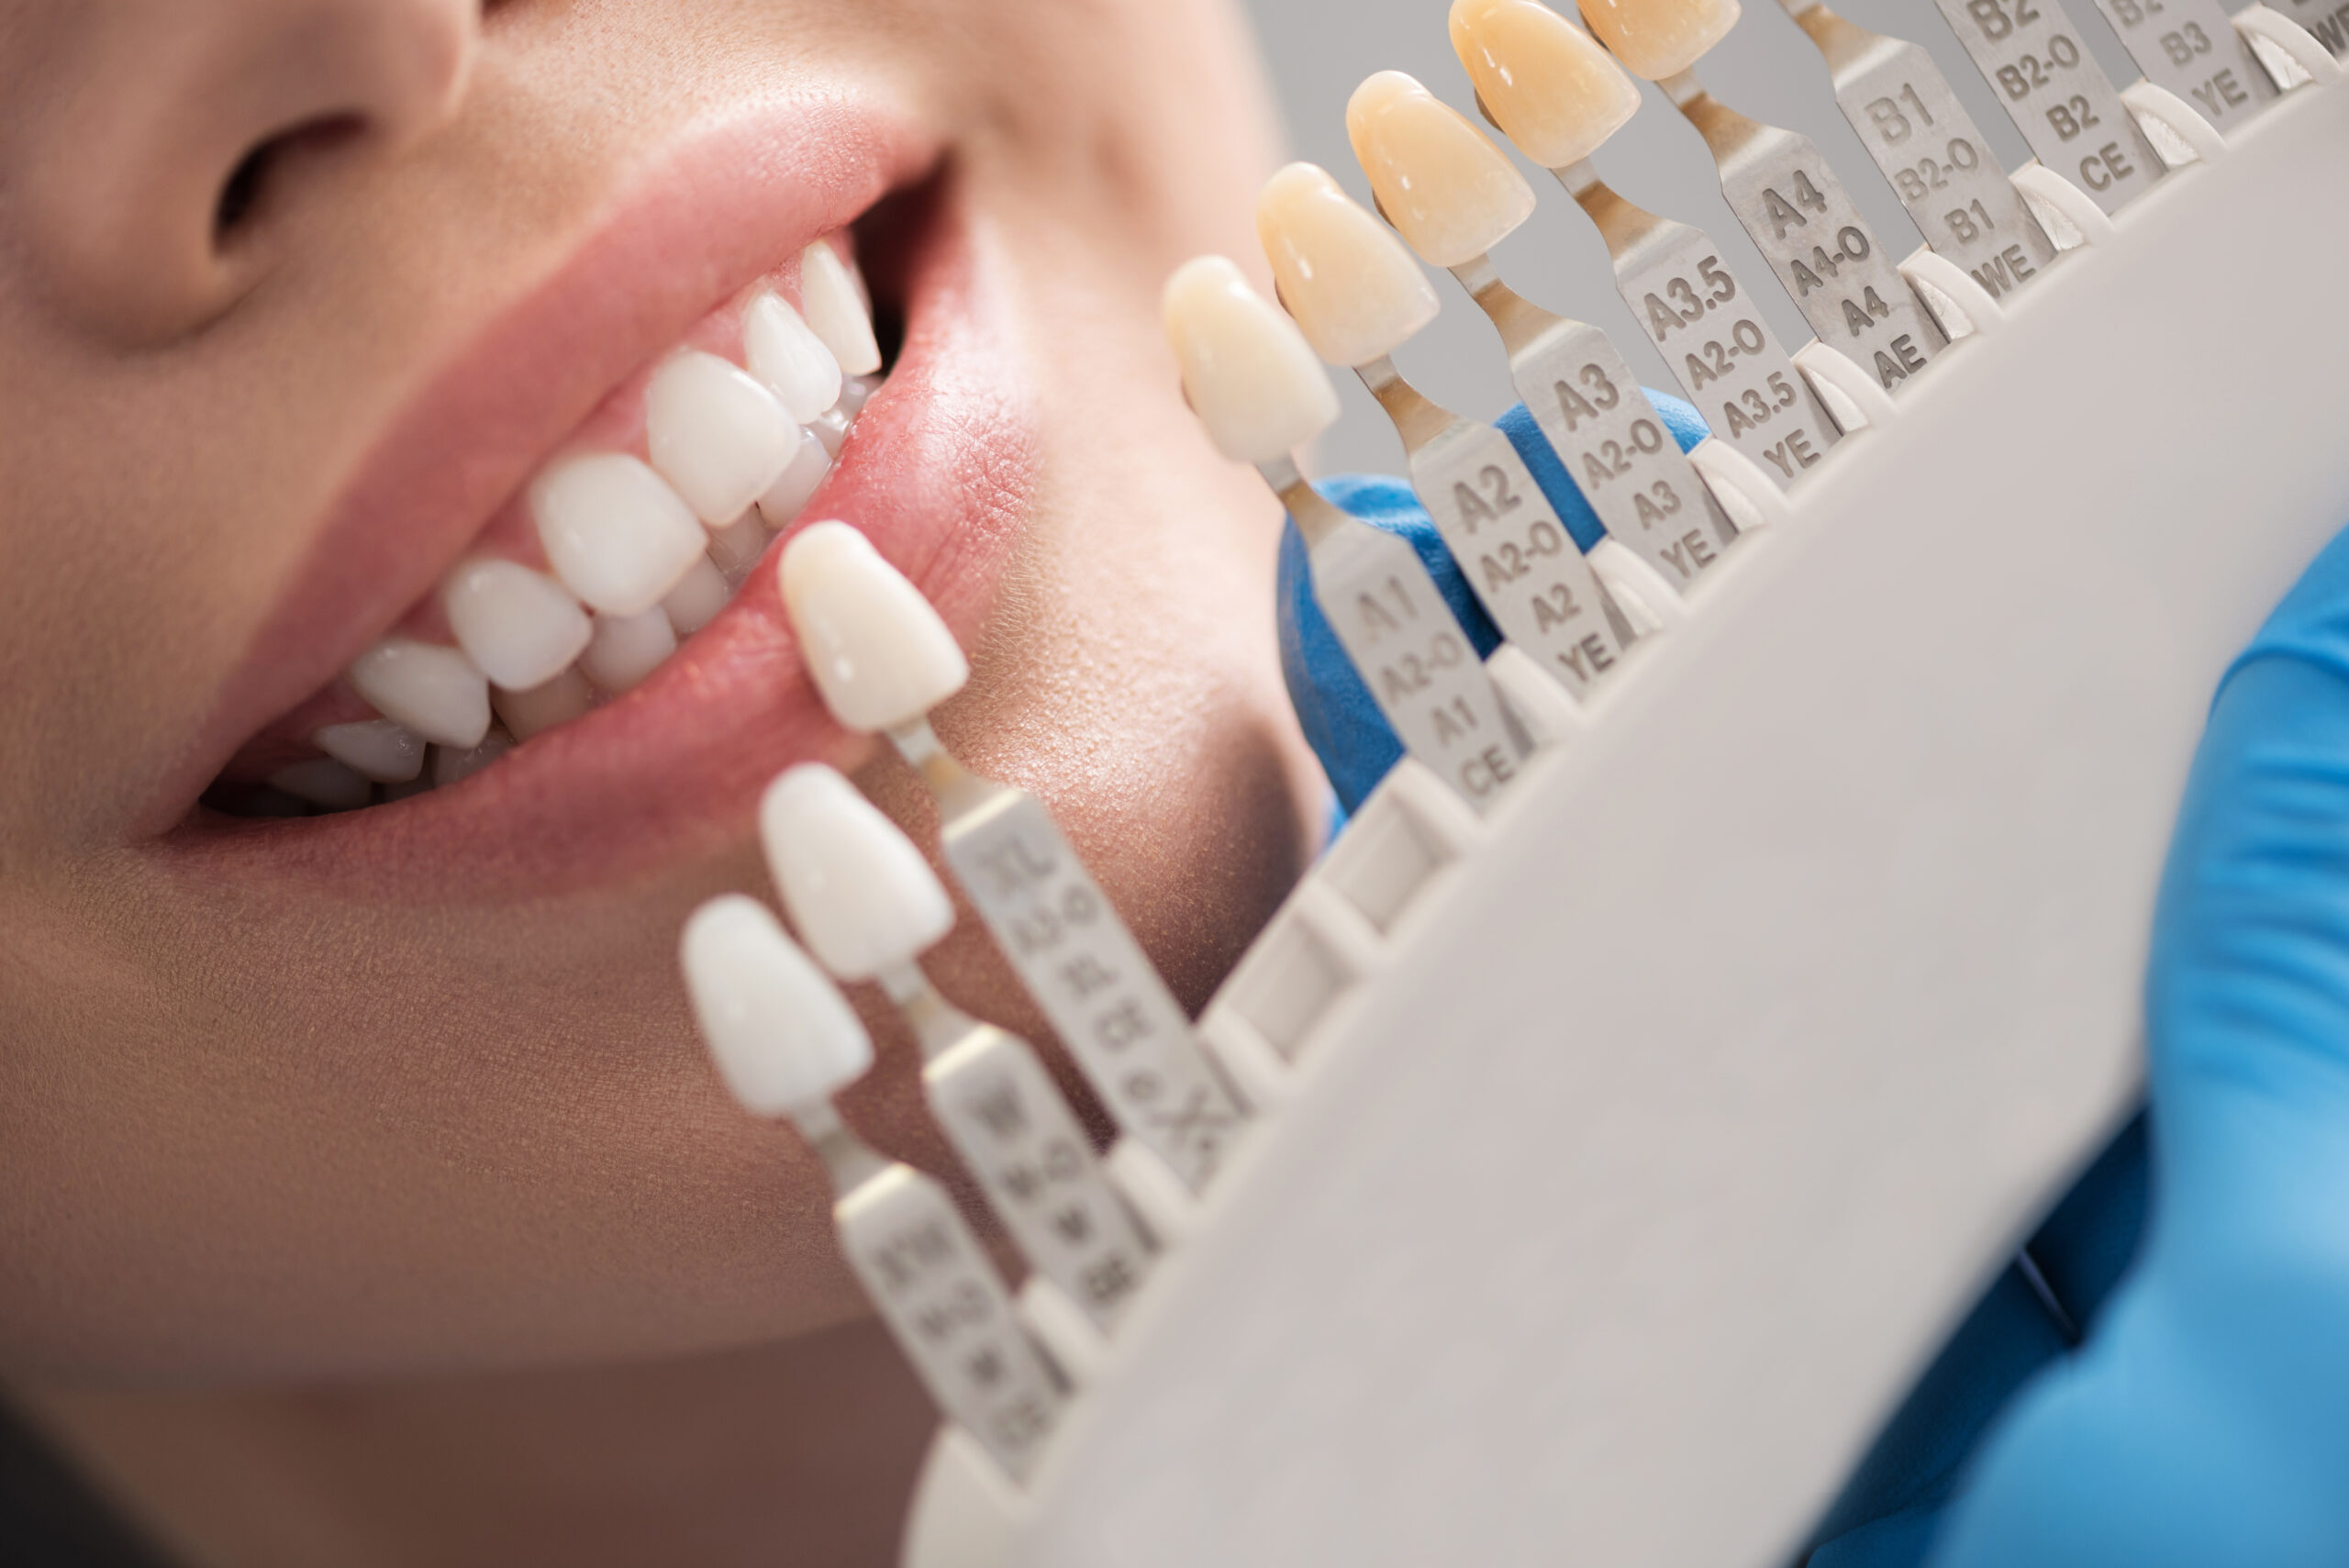
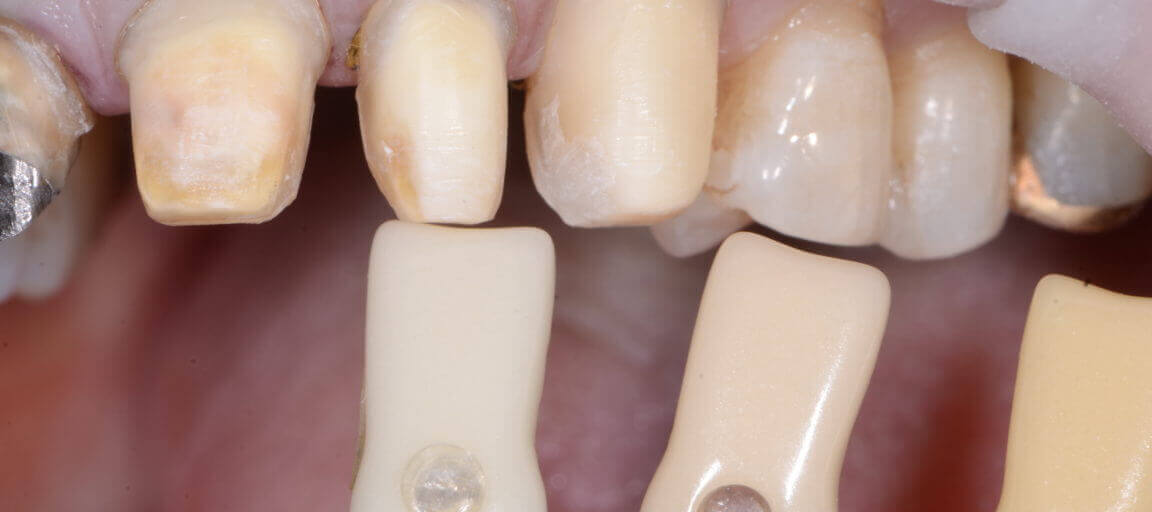
A situation occurred in my office when I was working with a patient who needed a 30-year-old PFM crown replaced on #8. I was struggling with the shade because the adjacent teeth were an in between color. What I did was take a shade photo of the brightest one, which was B1, and then I took a shade photo with A1–because those were the two shades that matched the best. They weren’t what we were looking for. So, I made a provisional out of the A1 shade and a a provisional out of the B1 shade. I took the extra time to place both of them onto the tooth and let the patient look with me and help me decide. The patient chose the A1 shade. 

After I placed the A1 provisional, we sent  photos to my lab. These photos included the first shade photos of B1 and A1 alongside the tooth, photos of the B1 and A1 provisionals, and photos of the provisional I placed on the tooth from various aesthetic views. I then talked to the lab over the phone while we viewed the photos together so they could create the right in-between shade.  

At the end of the process, my patient expressed gratitude for taking the extra steps and meeting her expectations for a beautifully blended smile. 

Related Course

Surgically Facilitated Orthodontic Therapy

DATE: October 10 2024 @ 8:00 pm - October 10 2024 @ 9:00 pm

Location: Online

CE HOURS: 1

Date: October 10, 2024 Time: 8 – 9 pm ET Speaker: George Mandelaris, DDS, MS COURSE DESCRIPION Patients seeking ideal esthetics may require a more sophisticated diagnosis and treatment plan…

Learn More>

About Author

User Image
Kelley Brummett DMD

Dr. Kelley D. Brummett was born and raised in Missouri. She attended the University of Kansas on a full-ride scholarship in springboard diving and received honors for being the Big Eight Diving Champion on the 1 meter springboard in 1988 and in 1992. Dr. Kelley received her BA in communication at the University of Kansas and went on to receive her Bachelor of Science in Nursing. After practicing nursing, Dr Kelley Brummett went on to earn a degree in Dentistry at the Medical College of Georgia. She has continued her education at the Pankey Institute to further her love of learning and her pursuit to provide quality individual care. Dr. Brummett is a Clinical Instructor at Georgia Regents University and is a member of the American Academy of Cosmetic Dentistry. Dr. Brummett and her husband Darin have two children, Sarah and Sam. They have made Newnan their home for the past 9 years. In her free time, she enjoys traveling, reading and playing with her dogs. Dr. Brummett is an active member of the ADA, GDA, AGDA, and an alumni of the Pankey Institute.

FIND A PANKEY DENTIST OR TECHNICIAN

I AM A
I AM INTERESTED IN

VIEW COURSE CALENDAR

A Tip for Matching the Color of Cement Between an Implant Abutment and Crown

March 8, 2024 Lee Ann Brady

Trying to match the color of the cement between the abutment and the dental implant crown in the anterior can be very frustrating. Here’s a trick that works well for me. 

A while back I was struggling to match the color of the cement between the abutment and an anterior implant crown. I always try-in the abutment and the crown and try to confirm the shade before they are put together. We do this because the laboratory can’t redo the shade once they’ve bonded the crown and the abutment for screw retention without trying to separate the cement, which is difficult. 

Over the years, it was a challenge to replicate the opacity of the cement used to connect the titanium abutment and ceramic crown. I’ve tried using some of the opaquest try-in paste on the market. 

In the case I referred to above, we thought we had it. My lab cemented it together and I put it in. I could see the opacity of the cement through the restoration. So, we had to take it apart and try again. My laboratory technician shared with me a trick that he had learned from one of his other dentist clients. And that was to simply go to CVS, Costco, or Target and buy good old fashioned liquid white out.  

Now, I put a very tiny amount of whiteout on a micro brush and paint it on the inside of the labial surface of the crown on the intaglio surface. Then, I use a bit of translucent try-in paste to seat the crown. 

The whiteout works well because it is basically titanium dioxide and water with preservatives—the same white compound that is in super white sunscreens. In my opinion, it is relatively safe to use, and I can see what the implant will look like when the pieces are cemented together. 

Related Course

Surgically Facilitated Orthodontic Therapy

DATE: October 10 2024 @ 8:00 pm - October 10 2024 @ 9:00 pm

Location: Online

CE HOURS: 1

Date: October 10, 2024 Time: 8 – 9 pm ET Speaker: George Mandelaris, DDS, MS COURSE DESCRIPION Patients seeking ideal esthetics may require a more sophisticated diagnosis and treatment plan…

Learn More>

About Author

User Image
Lee Ann Brady

FIND A PANKEY DENTIST OR TECHNICIAN

I AM A
I AM INTERESTED IN

VIEW COURSE CALENDAR

Why Use an Essix Retainer Versus a Flipper During Dental Implant Therapy

February 16, 2024 Lee Ann Brady DMD

Why Use an Essix Retainer Versus a Flipper During Dental Implant Therapy 

Lee Ann Brady, DMD 

When it comes to choosing a provisional during implant therapy in the anterior aesthetic zone, we have two removable options. One is called a “flipper.” It’s an interim partial denture composed of an acrylic base and a denture tooth. The other is an Essix retainer.  

There is no question that both options are taxing for the patient for the three to five months that the patient is edentulous and must deal with having this removable device to replace the tooth. So, I always tell my patients that they are going to have to manage the provisional for that time, but it’s worth it because, in the end, they have replaced the tooth with an implant with all the benefits of an implant versus an alternative prosthetic solution. 

In my practice, I use Essix retainers in nearly 100% of the cases. Why? Because an Essix retainer is tooth-borne. The pressure is placed on the teeth and not on the surgical site. In the case of a flipper, the prosthesis is primarily tissue-borne with a little pressure placed on the adjacent teeth. We really don’t want any pressure on the surgical site while it is healing. Pressure can induce biological problems in bone grafts and connective tissue, which affect the long-term outcome. From an aesthetic perspective, the most challenging thing about anterior implant aesthetics is replicating the size, shape, and position of the tissues of the alveolar ridge and papilla. I want to do everything I can to eliminate pressure on the healing tissue. 

In my practice, we do Essix retainers that don’t have a full solid tooth in them. Instead, we simply paint flowable on the facial so that there’s zero pressure anywhere around that surgical site after extraction, after grafting, and after implant placement.  

In addition to explaining the improved outcomes associated with using an Essix retainer, I assure my patients that the retainer will be more comfortable to wear than a denture and be easily removed by them for eating, for drinking liquids other than water that are likely to stain the retainer, for teeth cleaning, and for cleaning the prosthesis. When out in public, such as in a restaurant, patients may carefully eat while wearing the Essix retainer.  

Related Course

Surgically Facilitated Orthodontic Therapy

DATE: October 10 2024 @ 8:00 pm - October 10 2024 @ 9:00 pm

Location: Online

CE HOURS: 1

Date: October 10, 2024 Time: 8 – 9 pm ET Speaker: George Mandelaris, DDS, MS COURSE DESCRIPION Patients seeking ideal esthetics may require a more sophisticated diagnosis and treatment plan…

Learn More>

About Author

User Image
Lee Ann Brady DMD

Dr. Lee Ann Brady is passionate about dentistry, her family and making a difference. She is a general dentist and owns a practice in Glendale, AZ limited to restorative dentistry. Lee’s passion for dental education began as a CE junkie herself, pursuing lots of advanced continuing education focused on Restorative and Occlusion. In 2005, she became a full time resident faculty member for The Pankey Institute, and was promoted to Clinical Director in 2006. Lee joined Spear Education as Executive VP of Education in the fall of 2008 to teach and coordinate the educational curriculum. In June of 2011, she left Spear Education, founded leeannbrady.com and joined the dental practice she now owns as an associate. Today, she teaches at dental meetings and study clubs both nationally and internationally, continues to write for dental journals and her website, sits on the editorial board of the Journal of Cosmetic Dentistry, Inside Dentistry and DentalTown Magazines and is the Director of Education for The Pankey Institute.

FIND A PANKEY DENTIST OR TECHNICIAN

I AM A
I AM INTERESTED IN

VIEW COURSE CALENDAR

Why Do Prepared Teeth Discolor?

December 23, 2022 Lee Ann Brady DMD

If the color of a prepared tooth darkens between the time you prepare it and the restoration is seated, the aesthetics of the final restoration can be impaired. This frustrating situation can be eliminated by knowing the causes of discoloration and what to do when planning treatment and prepping the tooth.

There are two processes that cause prepared teeth to discolor to a darker shade:
  1. Pulpal necrosis
  2. Chemical interaction between liquid vasoconstrictors and bacteria in the dentin tubules

Note that both processes can continue to further darken dentin weeks to months after you have seated the restoration. For more predictable aesthetic results, I learned some time ago to do the following.

Assess pulpal vitality first.

I am highly cautious when planning significant restorative treatment such as crown and bridge. Before prepping teeth, I review CBCT radiographs to make sure there are no pulpal health issues that need to be treated first. Like most dentists, I do not have CBCT imaging in my own practice, but I do have access to CBCT imaging via a collaborative relationship with a nearby specialist.

Use retraction paste instead of liquid vasoconstrictors for hemostasis.

Because the chemistry in liquid-viscosity vasoconstrictors can interact with bacteria in the dentin tubules to darken the dentin, I use retraction paste when I need hemostasis.

For me, these two seemingly simple steps are important ones when seeking optimal aesthetic results.

Related Course

E1: Aesthetic & Functional Treatment Planning

DATE: December 11 2025 @ 8:00 am - December 14 2025 @ 2:30 pm

Location: The Pankey Institute

CE HOURS: 39

Dentist Tuition: $ 6800

Single Occupancy with Ensuite Private Bath (Per Night): $ 345

Transform your experience of practicing dentistry, increase predictability, profitability and fulfillment. The Essentials Series is the Key, and Aesthetic and Functional Treatment Planning is where your journey begins.  Following a system of…

Learn More>

About Author

User Image
Lee Ann Brady DMD

Dr. Lee Ann Brady is passionate about dentistry, her family and making a difference. She is a general dentist and owns a practice in Glendale, AZ limited to restorative dentistry. Lee’s passion for dental education began as a CE junkie herself, pursuing lots of advanced continuing education focused on Restorative and Occlusion. In 2005, she became a full time resident faculty member for The Pankey Institute, and was promoted to Clinical Director in 2006. Lee joined Spear Education as Executive VP of Education in the fall of 2008 to teach and coordinate the educational curriculum. In June of 2011, she left Spear Education, founded leeannbrady.com and joined the dental practice she now owns as an associate. Today, she teaches at dental meetings and study clubs both nationally and internationally, continues to write for dental journals and her website, sits on the editorial board of the Journal of Cosmetic Dentistry, Inside Dentistry and DentalTown Magazines and is the Director of Education for The Pankey Institute.

FIND A PANKEY DENTIST OR TECHNICIAN

I AM A
I AM INTERESTED IN

VIEW COURSE CALENDAR

Orthodontic Setups – A Great Planning Tool

June 18, 2021 Lee Ann Brady DMD

The more complex the dental treatment plan gets, the more challenging the process becomes. Adding in interdisciplinary care with multiple specialists adds another layer of complexity. We need to clearly plan our sections, and clearly communicate the outcomes we hope for from the other providers.

The Challenges

One of the challenges has been communicating to my orthodontist my visual for the results. The other challenge has been how to visualize tooth movement to optimize my restorative. What has helped me tremendously is doing an ortho setup as well as a restorative wax-up.

My Process

This is a process I use when planning complex cases involving orthodontic and restorative that has helped create clear expectations for everyone.

  1. I start my aesthetic treatment planning by drawing white shapes and lines on photographs of the teeth to determine the desired tooth proportions and gingival aesthetics. I’ve blogged about this before in these two articles: Tooth Proportion Aesthetic Ratio and Where the Pink Should Be. I also draw lines on photographs to determine the Anterior Segment Aesthetic Ratio.
  2. When a complex restorative case involves orthodontics, I want a clear sense from my white lines of where I want the teeth moved so I can optimize my restorative. I will send a set of preoperative models to the laboratory and ask them to do an ortho setup. Multiple copies of the ortho setup allow us to move the teeth and do a restorative wax-up on the moved teeth. Once I examine the wax-up I decide if the teeth look the way I visualized they would. Do they have the right length to width ratios? Do they have all gingival margins in the right positions? If I were to just do a carved restorative wax-up, I wouldn’t understand if the tooth movement is helpful. If you are not familiar with ortho setups, I recommend reading this article from 2012.
  3. Once I have the teeth positioned in an ortho model the way I think will be best for my restorative, I send my orthodontist the model to communicate exactly where I want the teeth moved. The orthodontist provides feedback on what will be involved to get those movements. Based on that, I can balance the risks and benefits of alternative treatment plans and discuss with the orthodontist whether restorative treatment should occur at the very end of orthodontics or be done in phases during orthodontic treatment.

Related Course

E1: Aesthetic & Functional Treatment Planning at the Chicago Midwinter Dental Meeting

DATE: February 20 2025 @ 7:00 am - February 22 2025 @ 8:00 pm

Location: Chicago Midwinter Meeting

CE HOURS:

Transform your experience of practicing dentistry, increase predictability, profitability and fulfillment. The Essentials Series is the Key, and Aesthetic and Functional Treatment Planning is where your journey begins.  Following a system of…

Learn More>

About Author

User Image
Lee Ann Brady DMD

Dr. Lee Ann Brady is passionate about dentistry, her family and making a difference. She is a general dentist and owns a practice in Glendale, AZ limited to restorative dentistry. Lee’s passion for dental education began as a CE junkie herself, pursuing lots of advanced continuing education focused on Restorative and Occlusion. In 2005, she became a full time resident faculty member for The Pankey Institute, and was promoted to Clinical Director in 2006. Lee joined Spear Education as Executive VP of Education in the fall of 2008 to teach and coordinate the educational curriculum. In June of 2011, she left Spear Education, founded leeannbrady.com and joined the dental practice she now owns as an associate. Today, she teaches at dental meetings and study clubs both nationally and internationally, continues to write for dental journals and her website, sits on the editorial board of the Journal of Cosmetic Dentistry, Inside Dentistry and DentalTown Magazines and is the Director of Education for The Pankey Institute.

FIND A PANKEY DENTIST OR TECHNICIAN

I AM A
I AM INTERESTED IN

VIEW COURSE CALENDAR

My Exam to Treatment Planning Structure

May 21, 2021 Lee Ann Brady DMD

Before I come up with a treatment plan, I always do certain things in a certain order. That structure has allowed me to feel confident that I can treatment plan any case that walks into my office. That structure, or process, affects how I approach my exam, make my diagnosis, and ultimately make my treatment plan.

The process begins by looking at the following five areas during the patient exam. I gather information in each of these areas in the following order:

  1. The patient parameters of the case
  2. The aesthetic parameters of the case
  3. The functional parameters of the case
  4. The restorative parameters of the case
  5. The biologic parameters of the case

The first area I look at is the patient. What is the patient interested in? What are the patient’s circumstances, temperament, and dental health objectives? What is the patient’s current understanding of their dental health? How does that compare to my perception of their dental health? After answering these questions, I then move on to the four technical areas.

The first technical area I look at is the aesthetics of the teeth, gingiva, skeletal structure, and face. I then look at function, including the jaw joints, muscles, occlusion, and airway. The third area I look at is the restorative parameters of tooth structure, missing teeth, and the restorative materials and restorative techniques previously used in the mouth. And finally, I look at the biologic parameters, including caries, periodontal, and endo.

When I do my examination, I want information gathered in all five of these areas. When I sit down to do my exam diagnosis and treatment planning, I have all of that information in front of me and I’m going to always consider the five areas in the same order as I proceed with diagnosis and begin treatment planning.

When I plan the stages of treatment that will occur, the treatment sequence is in the order that is most appropriate for the case. For example, if the patient has a biologic health condition, perhaps, the need for a root canal or significant perio inflammation, I’m going to treat that condition at the front end of the treatment sequence, and not in the order in which I gathered information and reviewed it. The most appropriate treatment sequence will be the order in which I need to do restorative procedures to most predictably achieve the total best outcome.

Although my “structured approach” may not be the same as yours, I thought sharing mine with you could be of benefit to you. By establishing a process in which you gather and consider information in all five areas (Patient, Aesthetics, Function, Restorative, and Biologic), you will have all the information you need to consistently do diagnosis and treatment planning with efficiency and confidence.

For more information on this topic, I encourage you to take Treatment Planning and Case Presentation with me on June 11th – June 12th. This is a phenomenal way to solidify your knowledge and spend two days in sunny Key Biscayne, FL.

Related Course

E1: Aesthetic & Functional Treatment Planning

DATE: July 17 2025 @ 8:00 am - July 20 2025 @ 2:30 pm

Location: The Pankey Institute

CE HOURS: 39

Dentist Tuition: $ 6800

Single Occupancy with Ensuite Private Bath (Per Night): $ 345

Transform your experience of practicing dentistry, increase predictability, profitability and fulfillment. The Essentials Series is the Key, and Aesthetic and Functional Treatment Planning is where your journey begins.  Following a system of…

Learn More>

About Author

User Image
Lee Ann Brady DMD

Dr. Lee Ann Brady is passionate about dentistry, her family and making a difference. She is a general dentist and owns a practice in Glendale, AZ limited to restorative dentistry. Lee’s passion for dental education began as a CE junkie herself, pursuing lots of advanced continuing education focused on Restorative and Occlusion. In 2005, she became a full time resident faculty member for The Pankey Institute, and was promoted to Clinical Director in 2006. Lee joined Spear Education as Executive VP of Education in the fall of 2008 to teach and coordinate the educational curriculum. In June of 2011, she left Spear Education, founded leeannbrady.com and joined the dental practice she now owns as an associate. Today, she teaches at dental meetings and study clubs both nationally and internationally, continues to write for dental journals and her website, sits on the editorial board of the Journal of Cosmetic Dentistry, Inside Dentistry and DentalTown Magazines and is the Director of Education for The Pankey Institute.

FIND A PANKEY DENTIST OR TECHNICIAN

I AM A
I AM INTERESTED IN

VIEW COURSE CALENDAR

Anterior Segment Aesthetic Ratio

January 21, 2019 Lee Ann Brady DMD

Aesthetic Zone ratios is one of many ways to evaluate the appearance of a patients smile, and also to plan for changes that will improve overall aesthetics.

In the last article on using aesthetic zone ratios we looked at comparing the width to the height. This ratio allows us to gather data and diagnose issues like vertical maxillary excess and hypermobile lip that cause this ratio to be larger than normal.

Anterior Segment Ratio

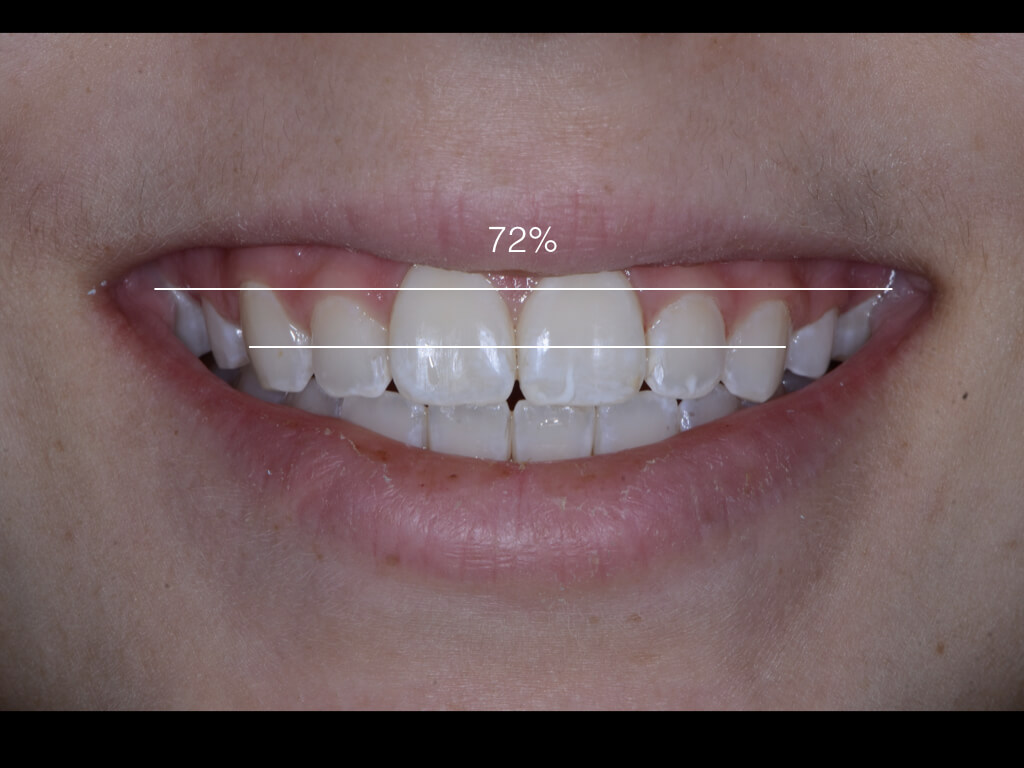
The next of the four ratios compares the width of the total esthetic zone, all of the teeth visible between the commissures at a full smile, and the width of just the anterior segment, between the distal of the canines. The first thing to do is measure the two distances. This can be done in pixels by inserting a line over a full smile photo, or measured with a mm ruler on a printed photograph. Make sure your line is placed at the inside of the soft tissue near the commissures. The relationship to real width is irrelevant as we are going to use a ratio. We then divide the width of the anterior segment by the width of the esthetic zone and multiply by 100.

Arch Width Ratio= (Anterior Segment Width/ Esthetic Zone width) x 100

Smiles that are rated as attractive have an anterior segment width ratio between 59-75%, and the average ratio is 66%. The percentages do not have a gender or age bias which makes relying on these numbers easy. If the ration is too small or too large I start to wonder about arch space issues. Often with patients with a large midline diastema you will see this ratio be larger than 75%. In these cases or cases with inadequate space I want to make sure we use wax-ups and mock-ups to ascertain that we can meet the patients aesthetic demands without the addition of ortho to the treatment plan.

Related Course

E1: Aesthetic & Functional Treatment Planning

DATE: October 3 2024 @ 8:00 am - October 6 2024 @ 2:30 pm

Location: The Pankey Institute

CE HOURS: 39

Dentist Tuition: $ 6500

Single Occupancy Room with Ensuite Bath (Per Night): $ 290

THIS COURSE IS SOLD OUT Transform your experience of practicing dentistry, increase predictability, profitability and fulfillment. The Essentials Series is the Key, and Aesthetic and Functional Treatment Planning is where your journey…

Learn More>

About Author

User Image
Lee Ann Brady DMD

Dr. Lee Ann Brady is passionate about dentistry, her family and making a difference. She is a general dentist and owns a practice in Glendale, AZ limited to restorative dentistry. Lee’s passion for dental education began as a CE junkie herself, pursuing lots of advanced continuing education focused on Restorative and Occlusion. In 2005, she became a full time resident faculty member for The Pankey Institute, and was promoted to Clinical Director in 2006. Lee joined Spear Education as Executive VP of Education in the fall of 2008 to teach and coordinate the educational curriculum. In June of 2011, she left Spear Education, founded leeannbrady.com and joined the dental practice she now owns as an associate. Today, she teaches at dental meetings and study clubs both nationally and internationally, continues to write for dental journals and her website, sits on the editorial board of the Journal of Cosmetic Dentistry, Inside Dentistry and DentalTown Magazines and is the Director of Education for The Pankey Institute.

FIND A PANKEY DENTIST OR TECHNICIAN

I AM A
I AM INTERESTED IN

VIEW COURSE CALENDAR

Anterior Aesthetic Zone Ratio

January 15, 2019 Lee Ann Brady DMD

There are many different ways to assess and diagnose the aesthetics of a smile. I love learning a different approach, not so I can change to it, but so I can incorporate it into what I am already doing.

I had the pleasure of attending a full day lecture by Dr. Corky Willhite on transitional Bonding. Corky is one of the dentists I respect the most when it comes to composite education, and I had not heard him teach for many years so I was really looking forward to it. With all of the great new tricks I learned about composite, what I came away with that has me most excited is the four Esthetic Zone Ratios, to analyze and improve the attractiveness of a smile.

What Are Aesthetic Zone Ratios?

Esthetic Zone Ratios is an approach to smile design, and can be used in conjunction with or as a replacement for other smile design systems. There are four aesthetic zone ratios:

  • Anterior Aesthetic Zone Ratio
  • Tooth Proportion Ratio
  • Anterior Segment Ratio
  • Central Dominance Ratio

Aesthetic Zone Ratio

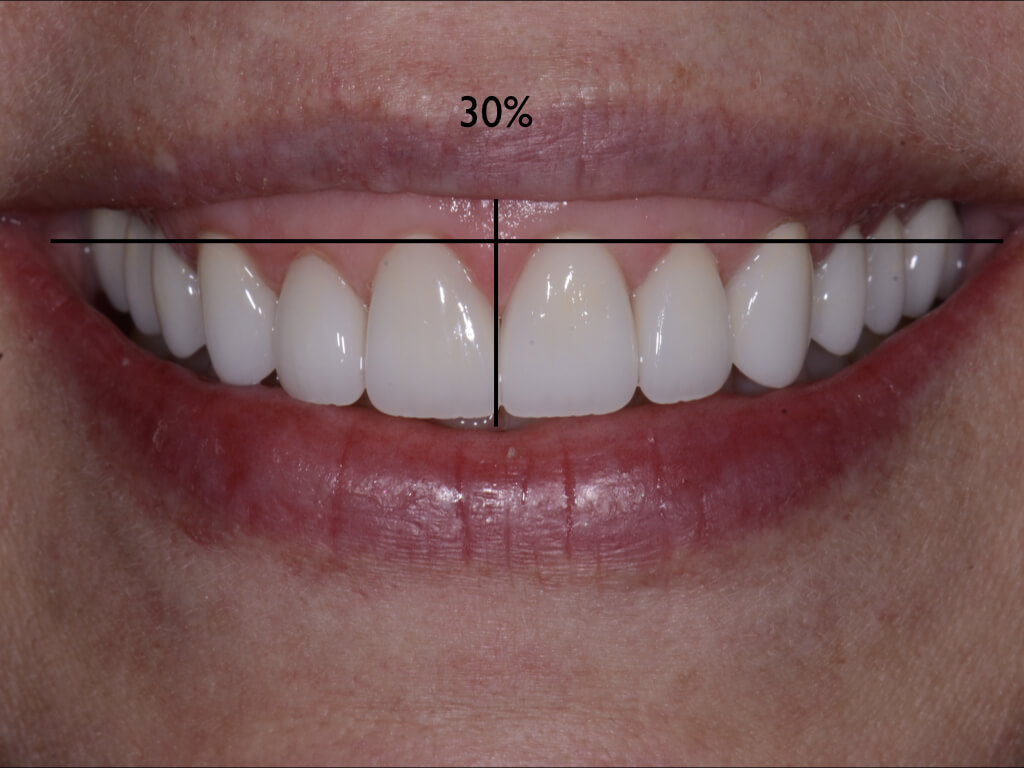
The first of the four ratios compares the width and height of the esthetic zone at a full smile. The first thing you will need is a full smile photograph of the patient. I typically ask the patient to say “E” to capture this photo so I do not get their posed smile with less display. I utilize presentation software to do the analysis since the program will do the math for me. I insert the full smile photograph into a slide. I then insert two lines one from for the width from inside the upper to inside the lower lip. I then do the same thing for width taking my line from the commissures, just inside the tissue of the cheek or face. You can then get the pixels length of the two lines by placing your cursor over the end of the line and holding.

Now you are going to divide the two numbers into each other, height divided by width, then take that result times 100 and you now have a percentage. The ideal ratio is between 15-30%. If this ratio is great then 30% we can then focus on a diagnostic cause of the smile being too tall or high. This might be things like Vertical Maxillary Excess or a short upper lip. The ratio triggers me to go back and look through other photos and evaluate the face and sift tissue for diagnostic challenges. If the number is smaller then 15% we may have a long upper lip, reduced lip mobility or a short lower face.

Facial and Soft Tissue anomalies are rarely treated when we fix the teeth, but can have a significant impact on the aesthetic outcomes, and when undiagnosed can often negatively impact our dental treatment plan.

Are you routinely taking diagnostic photos with patients?

Related Course

E1: Aesthetic & Functional Treatment Planning

DATE: October 3 2024 @ 8:00 am - October 6 2024 @ 2:30 pm

Location: The Pankey Institute

CE HOURS: 39

Dentist Tuition: $ 6500

Single Occupancy Room with Ensuite Bath (Per Night): $ 290

THIS COURSE IS SOLD OUT Transform your experience of practicing dentistry, increase predictability, profitability and fulfillment. The Essentials Series is the Key, and Aesthetic and Functional Treatment Planning is where your journey…

Learn More>

About Author

User Image
Lee Ann Brady DMD

Dr. Lee Ann Brady is passionate about dentistry, her family and making a difference. She is a general dentist and owns a practice in Glendale, AZ limited to restorative dentistry. Lee’s passion for dental education began as a CE junkie herself, pursuing lots of advanced continuing education focused on Restorative and Occlusion. In 2005, she became a full time resident faculty member for The Pankey Institute, and was promoted to Clinical Director in 2006. Lee joined Spear Education as Executive VP of Education in the fall of 2008 to teach and coordinate the educational curriculum. In June of 2011, she left Spear Education, founded leeannbrady.com and joined the dental practice she now owns as an associate. Today, she teaches at dental meetings and study clubs both nationally and internationally, continues to write for dental journals and her website, sits on the editorial board of the Journal of Cosmetic Dentistry, Inside Dentistry and DentalTown Magazines and is the Director of Education for The Pankey Institute.

FIND A PANKEY DENTIST OR TECHNICIAN

I AM A
I AM INTERESTED IN

VIEW COURSE CALENDAR

Panadent Dento-Facial Analyzer Technique: Level Planes

October 7, 2018 Lee Ann Brady DMD

Function and esthetics are the two primary goals of excellent treatment. Achieving them both simultaneously requires the right tools used with the best skill possible. The  Dento-Facial Analyzer is my go-to for gathering information I can use to improve the outcome of mounting a maxillary model.

In parts 1 and 2 of this series, I introduced the Dento-Facial Analyzer and began the discussion of how to capture records with it. Here, I’ll complete my overview of a solid technique:

Completing the Dento-Facial Analyzer Technique

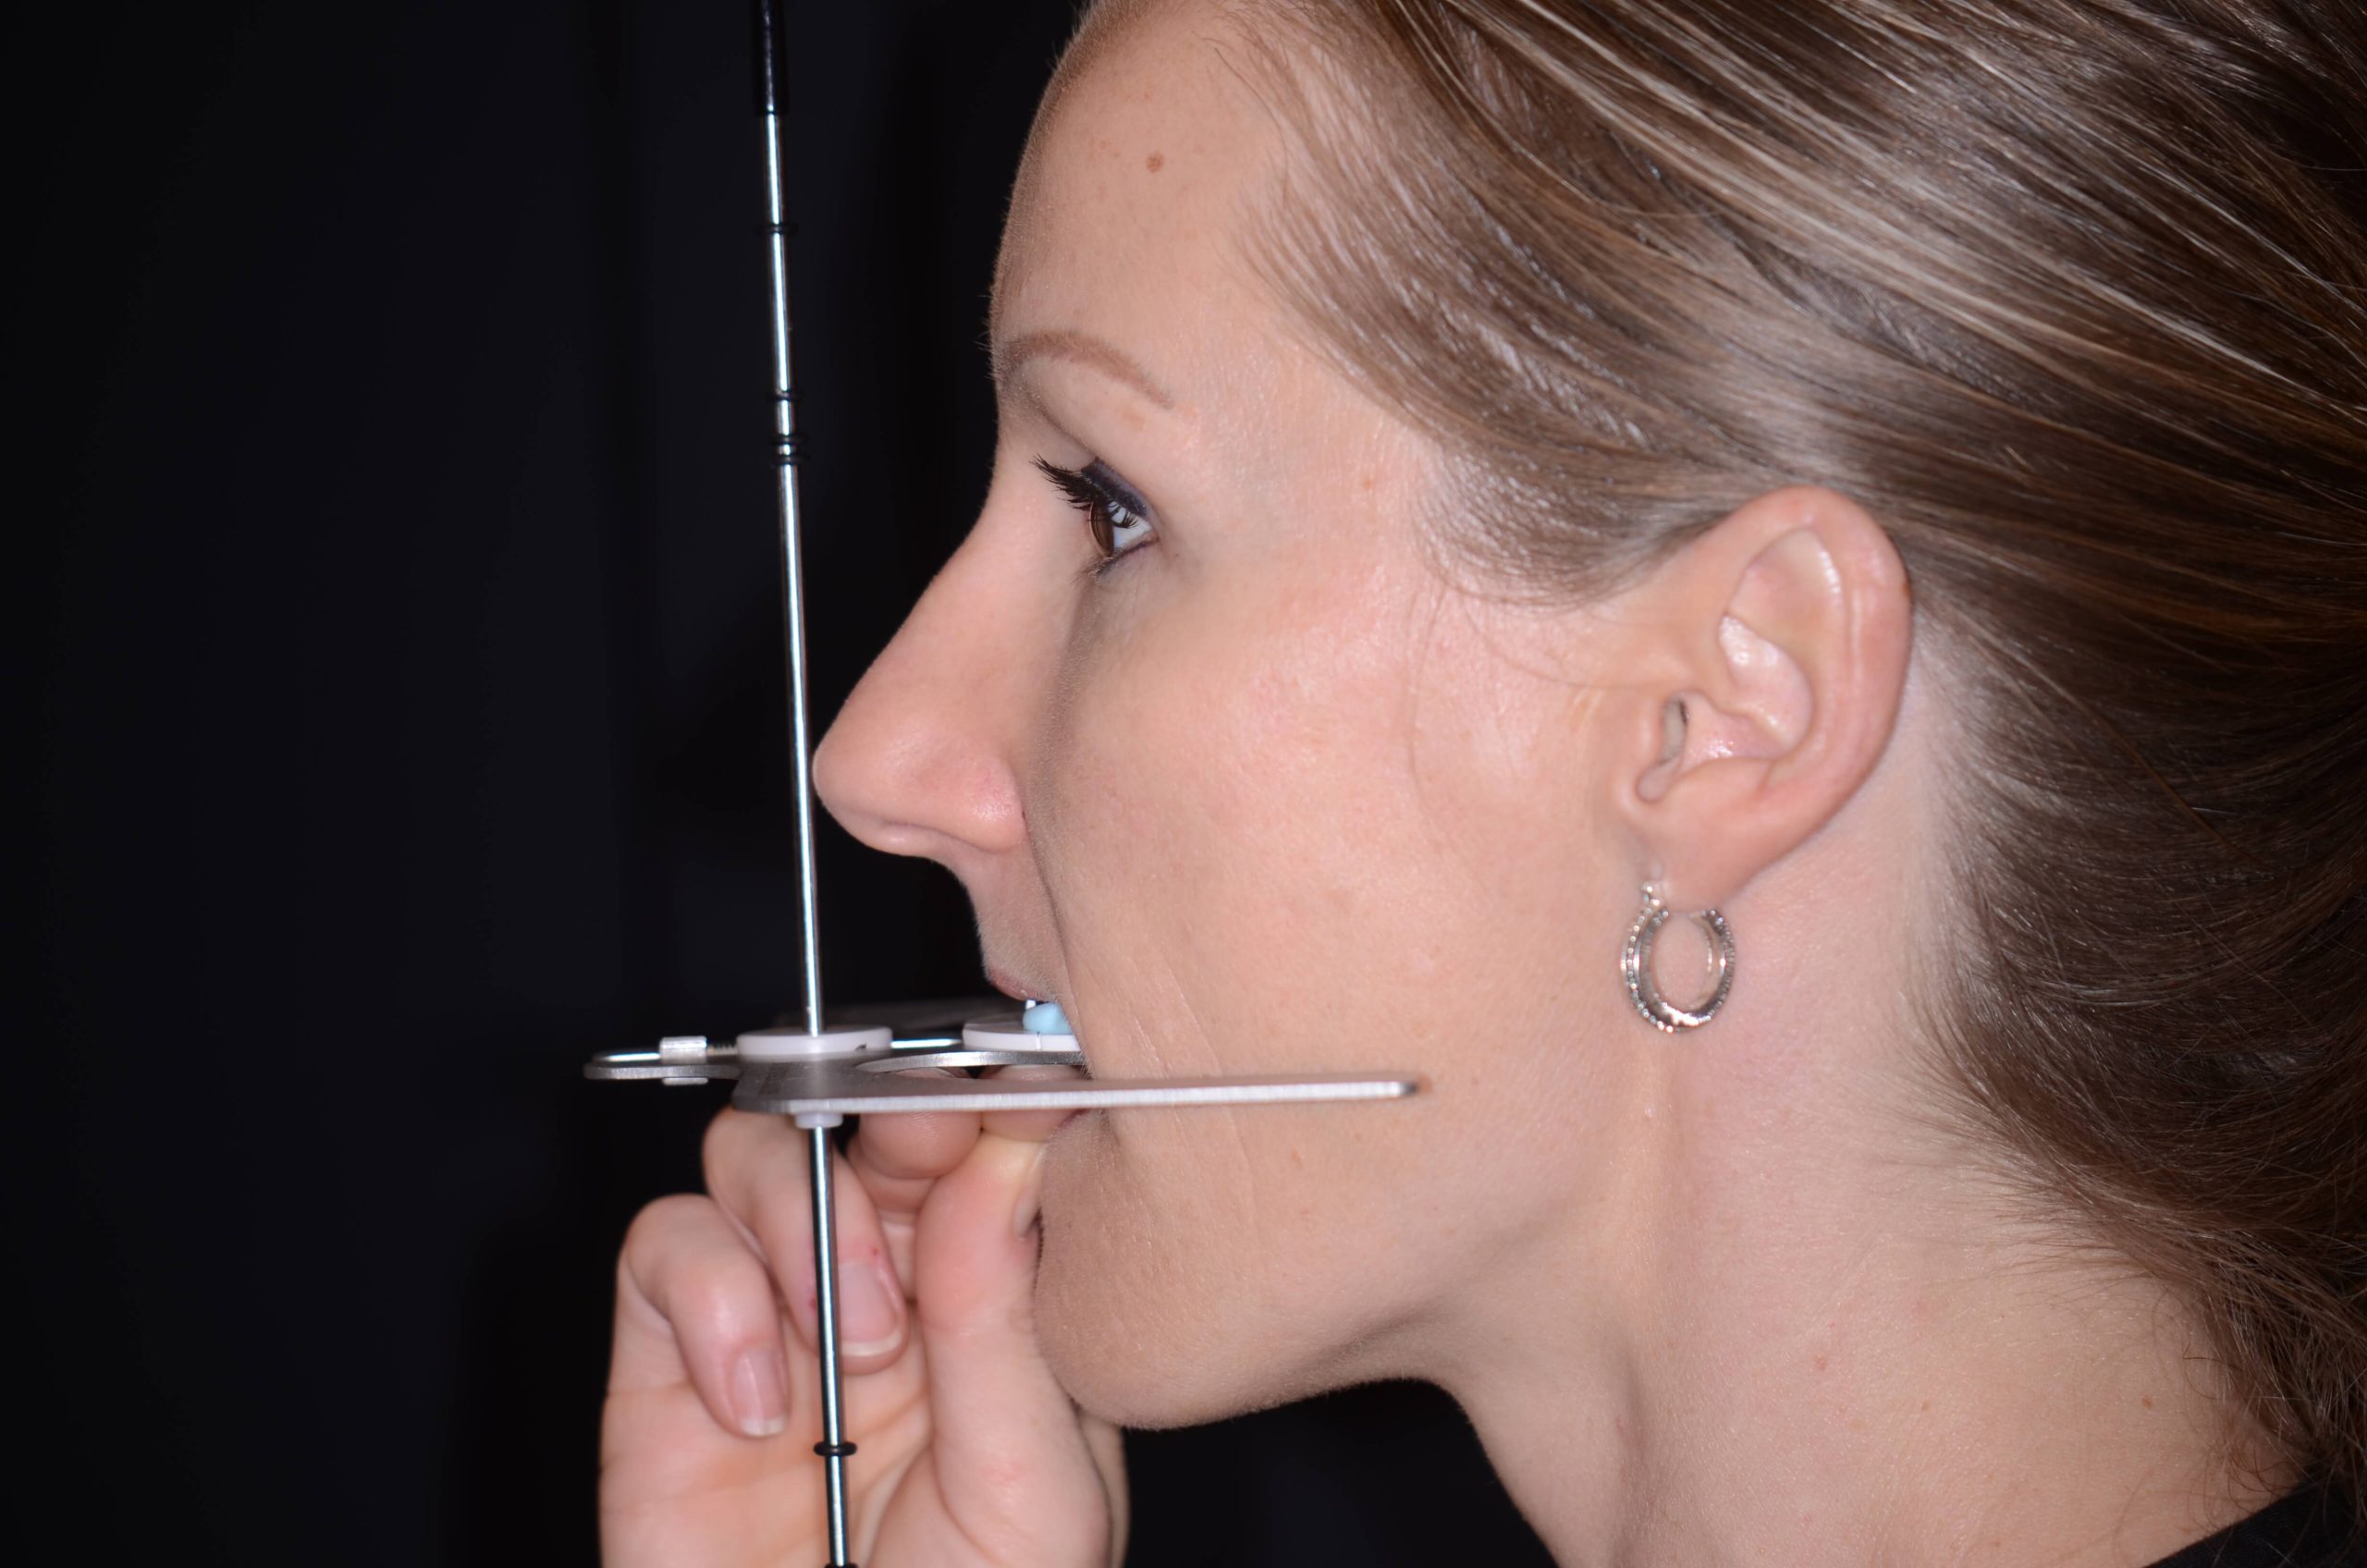
… Ensure the Dento-Facial Analyzer is positioned level to the horizon both when looking straight on at the patient’s face from the anterior section and looking at them from the side. It should be level in both planes of space. Then, allow the bite silicone to set and have the patient hold to verify.

Remember that the main use of the Dento-Facial Analyzer is transferring three significant pieces of information. This is either intended for the laboratory or for when we mount our own models.

The first piece of information is the maxillary relationship – the distance to hinge access – which means it’s very important that the central incisors on the maxilla are seated against the plastic bite plate.

Second, we are transferring information about the occlusal plane and the incisal plane. From an incisal plane perspective, it’s crucial that the plate is level to the horizon as we look straight on at the patient once we have the analyzer in. The vertical rod on the analyzer indicates the center of the face – the facial midline – which can be given by the central philtrum of the upper lip or the center of glabella.

You should also look at how you’ve captured the record from a lateral view. This ensures the occlusal plane – the relationship of the cant from anterior to posterior teeth that exists in the patient’s face – is transferred accurately to the lab or onto the articulator. The side bar of the Dento-Facial Analyzer should be level to the horizon.

Do you use this simple and accurate tool?

For a hands-on demonstration of the Dento-Facial Analyzer from Pankey educators, learn more about our Essentials 1 course.

Related Course

Worn Dentition: Direct & Indirect Adhesive Management Through a Non-Invasive Approach

DATE: November 1 2024 @ 8:00 am - November 2 2024 @ 2:30 pm

Location: The Pankey Institute

CE HOURS: 15

Dentist Tuition: $ 2495

Single Occupancy with Ensuite Private Bath (per night): $ 290

Enhance Restorative Outcomes The main goal of this course is to provide, indications and protocols to diagnose and treat severe worn dentition through a new no prep approach increasing the…

Learn More>

About Author

User Image
Lee Ann Brady DMD

Dr. Lee Ann Brady is passionate about dentistry, her family and making a difference. She is a general dentist and owns a practice in Glendale, AZ limited to restorative dentistry. Lee’s passion for dental education began as a CE junkie herself, pursuing lots of advanced continuing education focused on Restorative and Occlusion. In 2005, she became a full time resident faculty member for The Pankey Institute, and was promoted to Clinical Director in 2006. Lee joined Spear Education as Executive VP of Education in the fall of 2008 to teach and coordinate the educational curriculum. In June of 2011, she left Spear Education, founded leeannbrady.com and joined the dental practice she now owns as an associate. Today, she teaches at dental meetings and study clubs both nationally and internationally, continues to write for dental journals and her website, sits on the editorial board of the Journal of Cosmetic Dentistry, Inside Dentistry and DentalTown Magazines and is the Director of Education for The Pankey Institute.

FIND A PANKEY DENTIST OR TECHNICIAN

I AM A
I AM INTERESTED IN

VIEW COURSE CALENDAR