Pankey History: The Tanner Appliance

December 7, 2017 Buzz Raymond DDS

Pankey dentists have been instrumental in changing the face of dentistry and launching inspiring innovations that advanced patient care. This post is a continuation of my first blog on the history of Dr. Henry Tanner.

Developing the Tanner Appliance

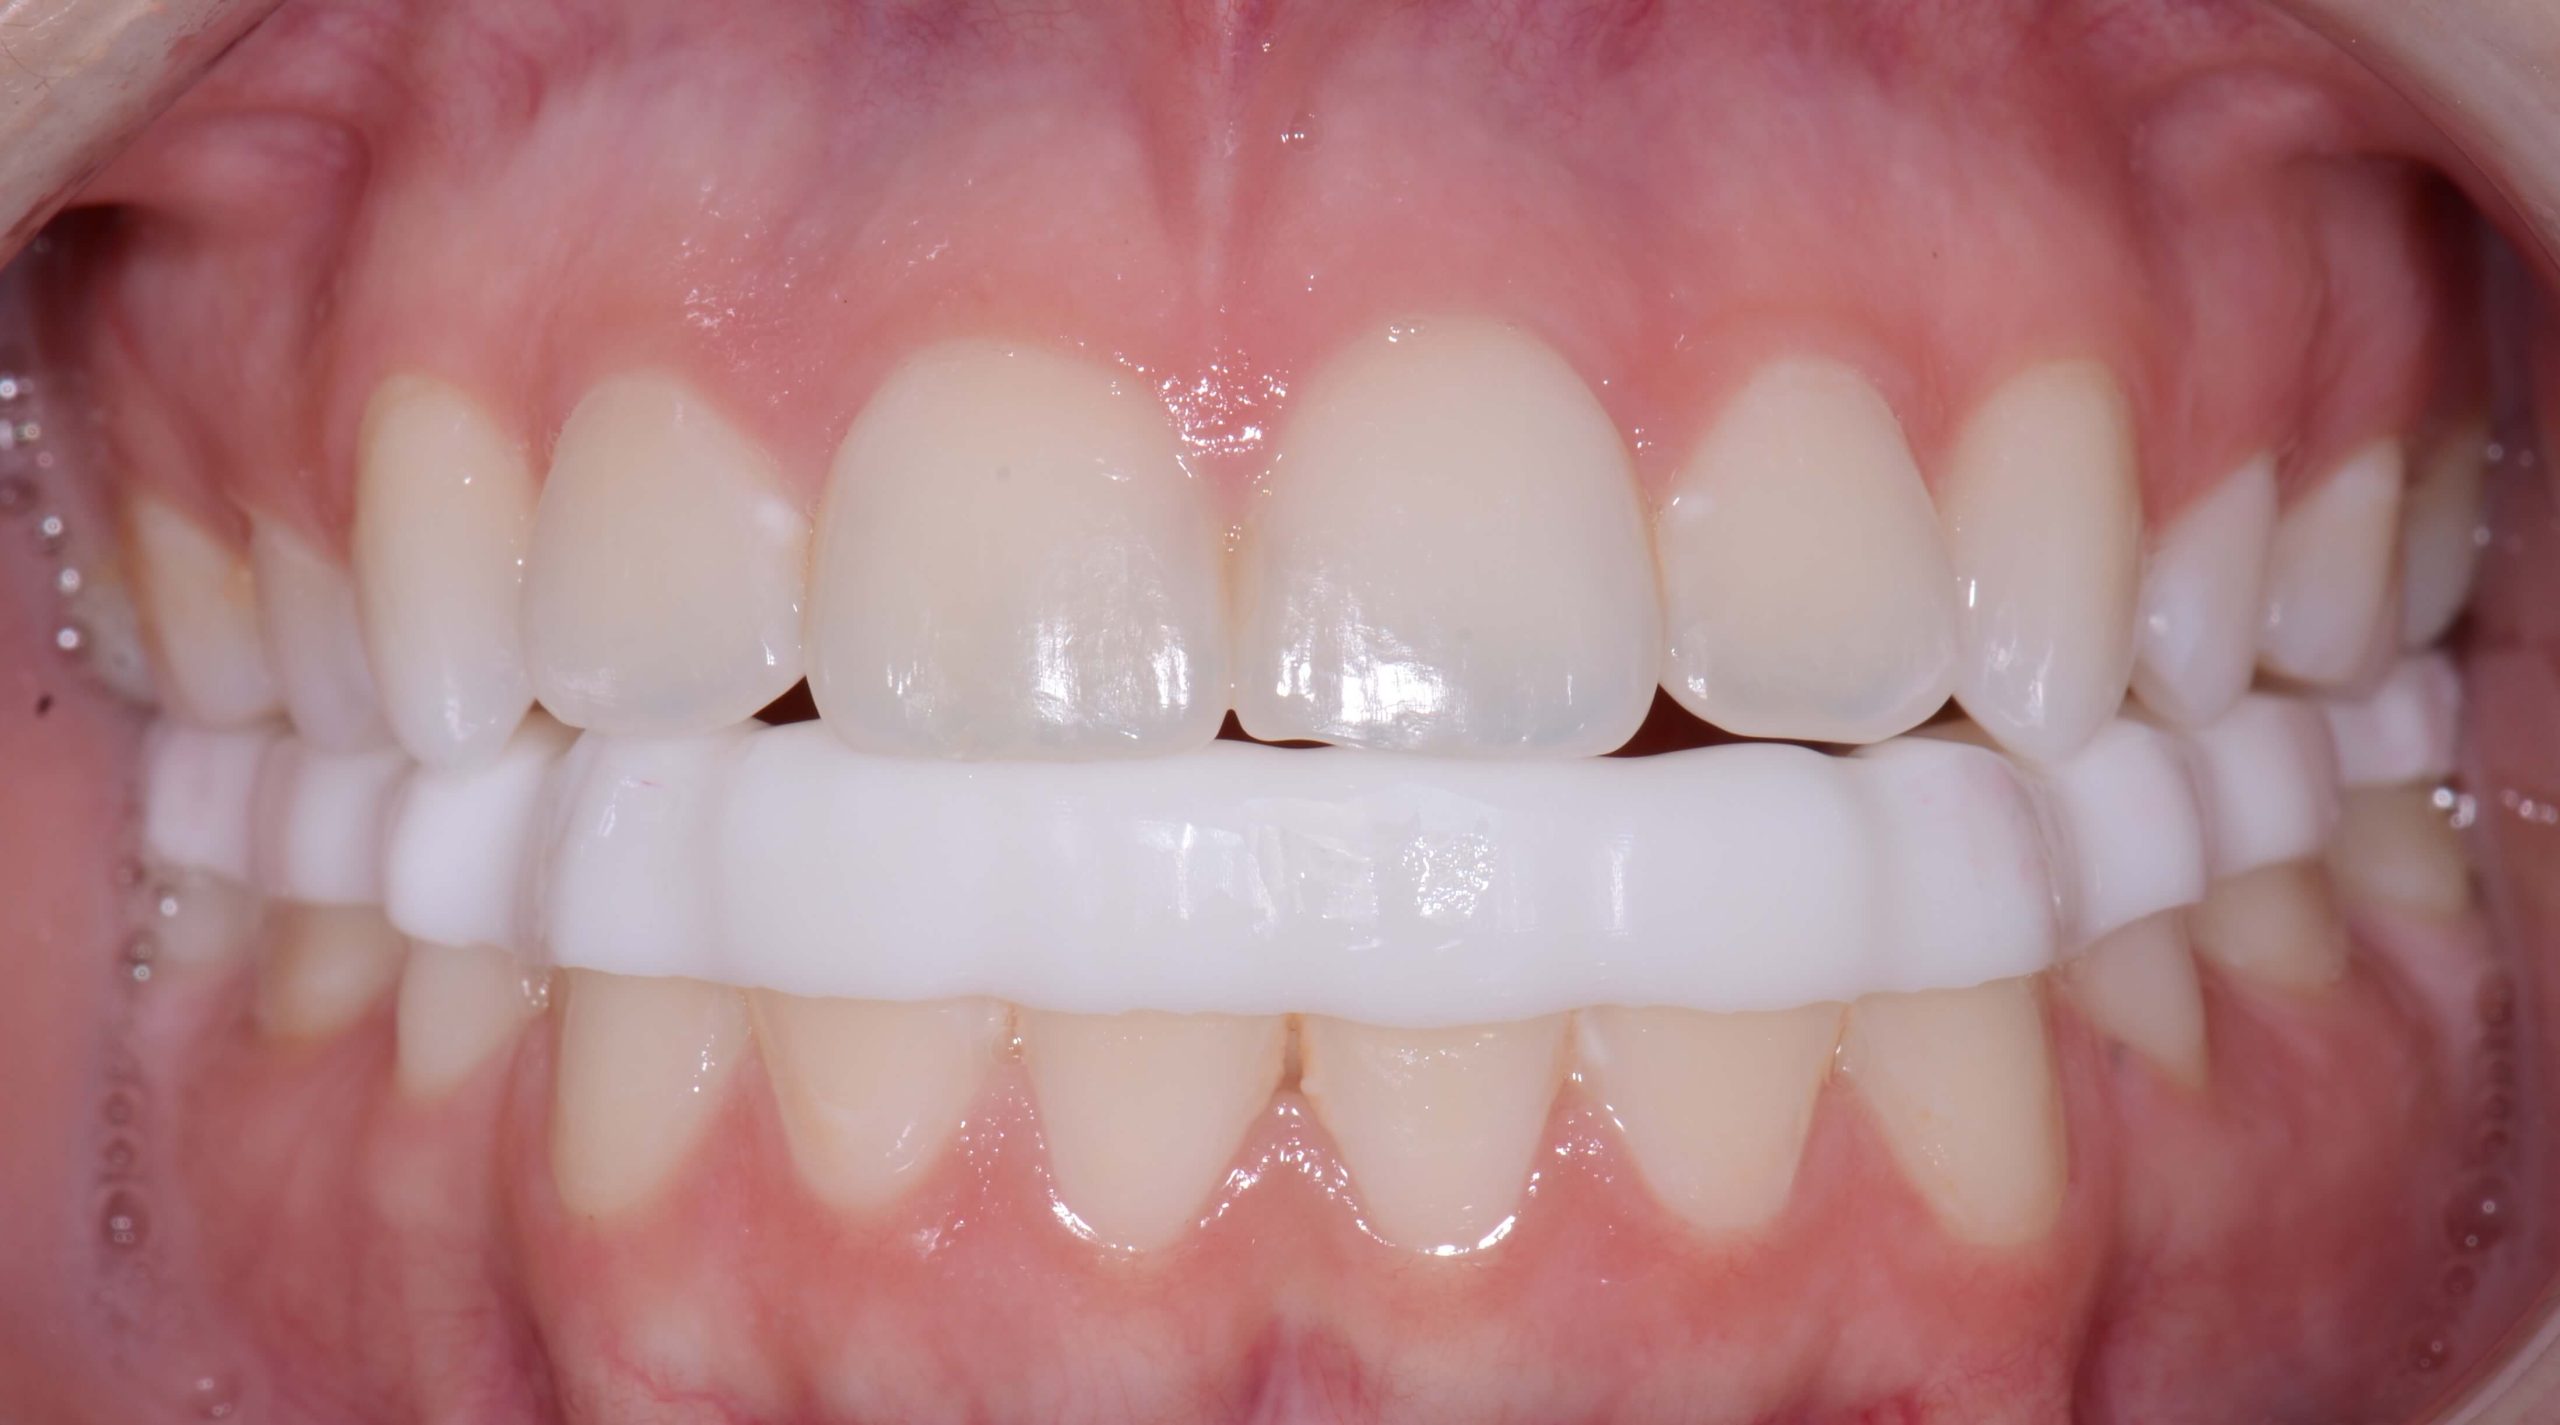
Dr. Tanner always credited Dr. Ricketts for encouraging him and giving him permission to continue learning what patients were doing with their teeth. They were both using full arch lower appliances, although at that time, Henry simply called his a nightguard. For approximately 15 years, he made that nightguard on a single lower cast and then would adjust it in the mouth.

Some years later at The Pankey Institute, under Dr. John Anderson’s leadership, Dr. Tanner introduced his appliance to Dr. Parker Mahan. Dr. Mahan had a Ph.D. in anatomy, was a full time professor at the University of Florida Dental College, and was a world renowned authority on head and neck pain.  

How Dr. Tanner Changed Dentistry

With the full support and encouragement of Drs. Anderson and Mahan, Henry started teaching about his nightguard using mounted casts. Dr. Anderson initially named it a TANG (Tanner Appliance Night Guard).  

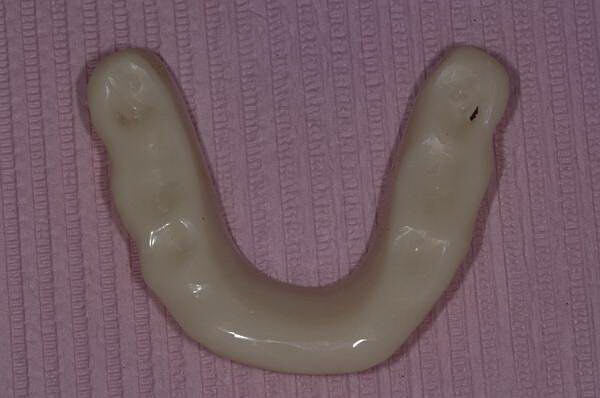
Dr. Tanner always said, “Don’t ever have anything named after you. Whenever people misuse it, then your name is attached.” Over the years, the Tanner appliance has become known as an anatomic appliance. It is extremely individualized, based on the patient’s unique joint, condyle, and tooth anatomy.

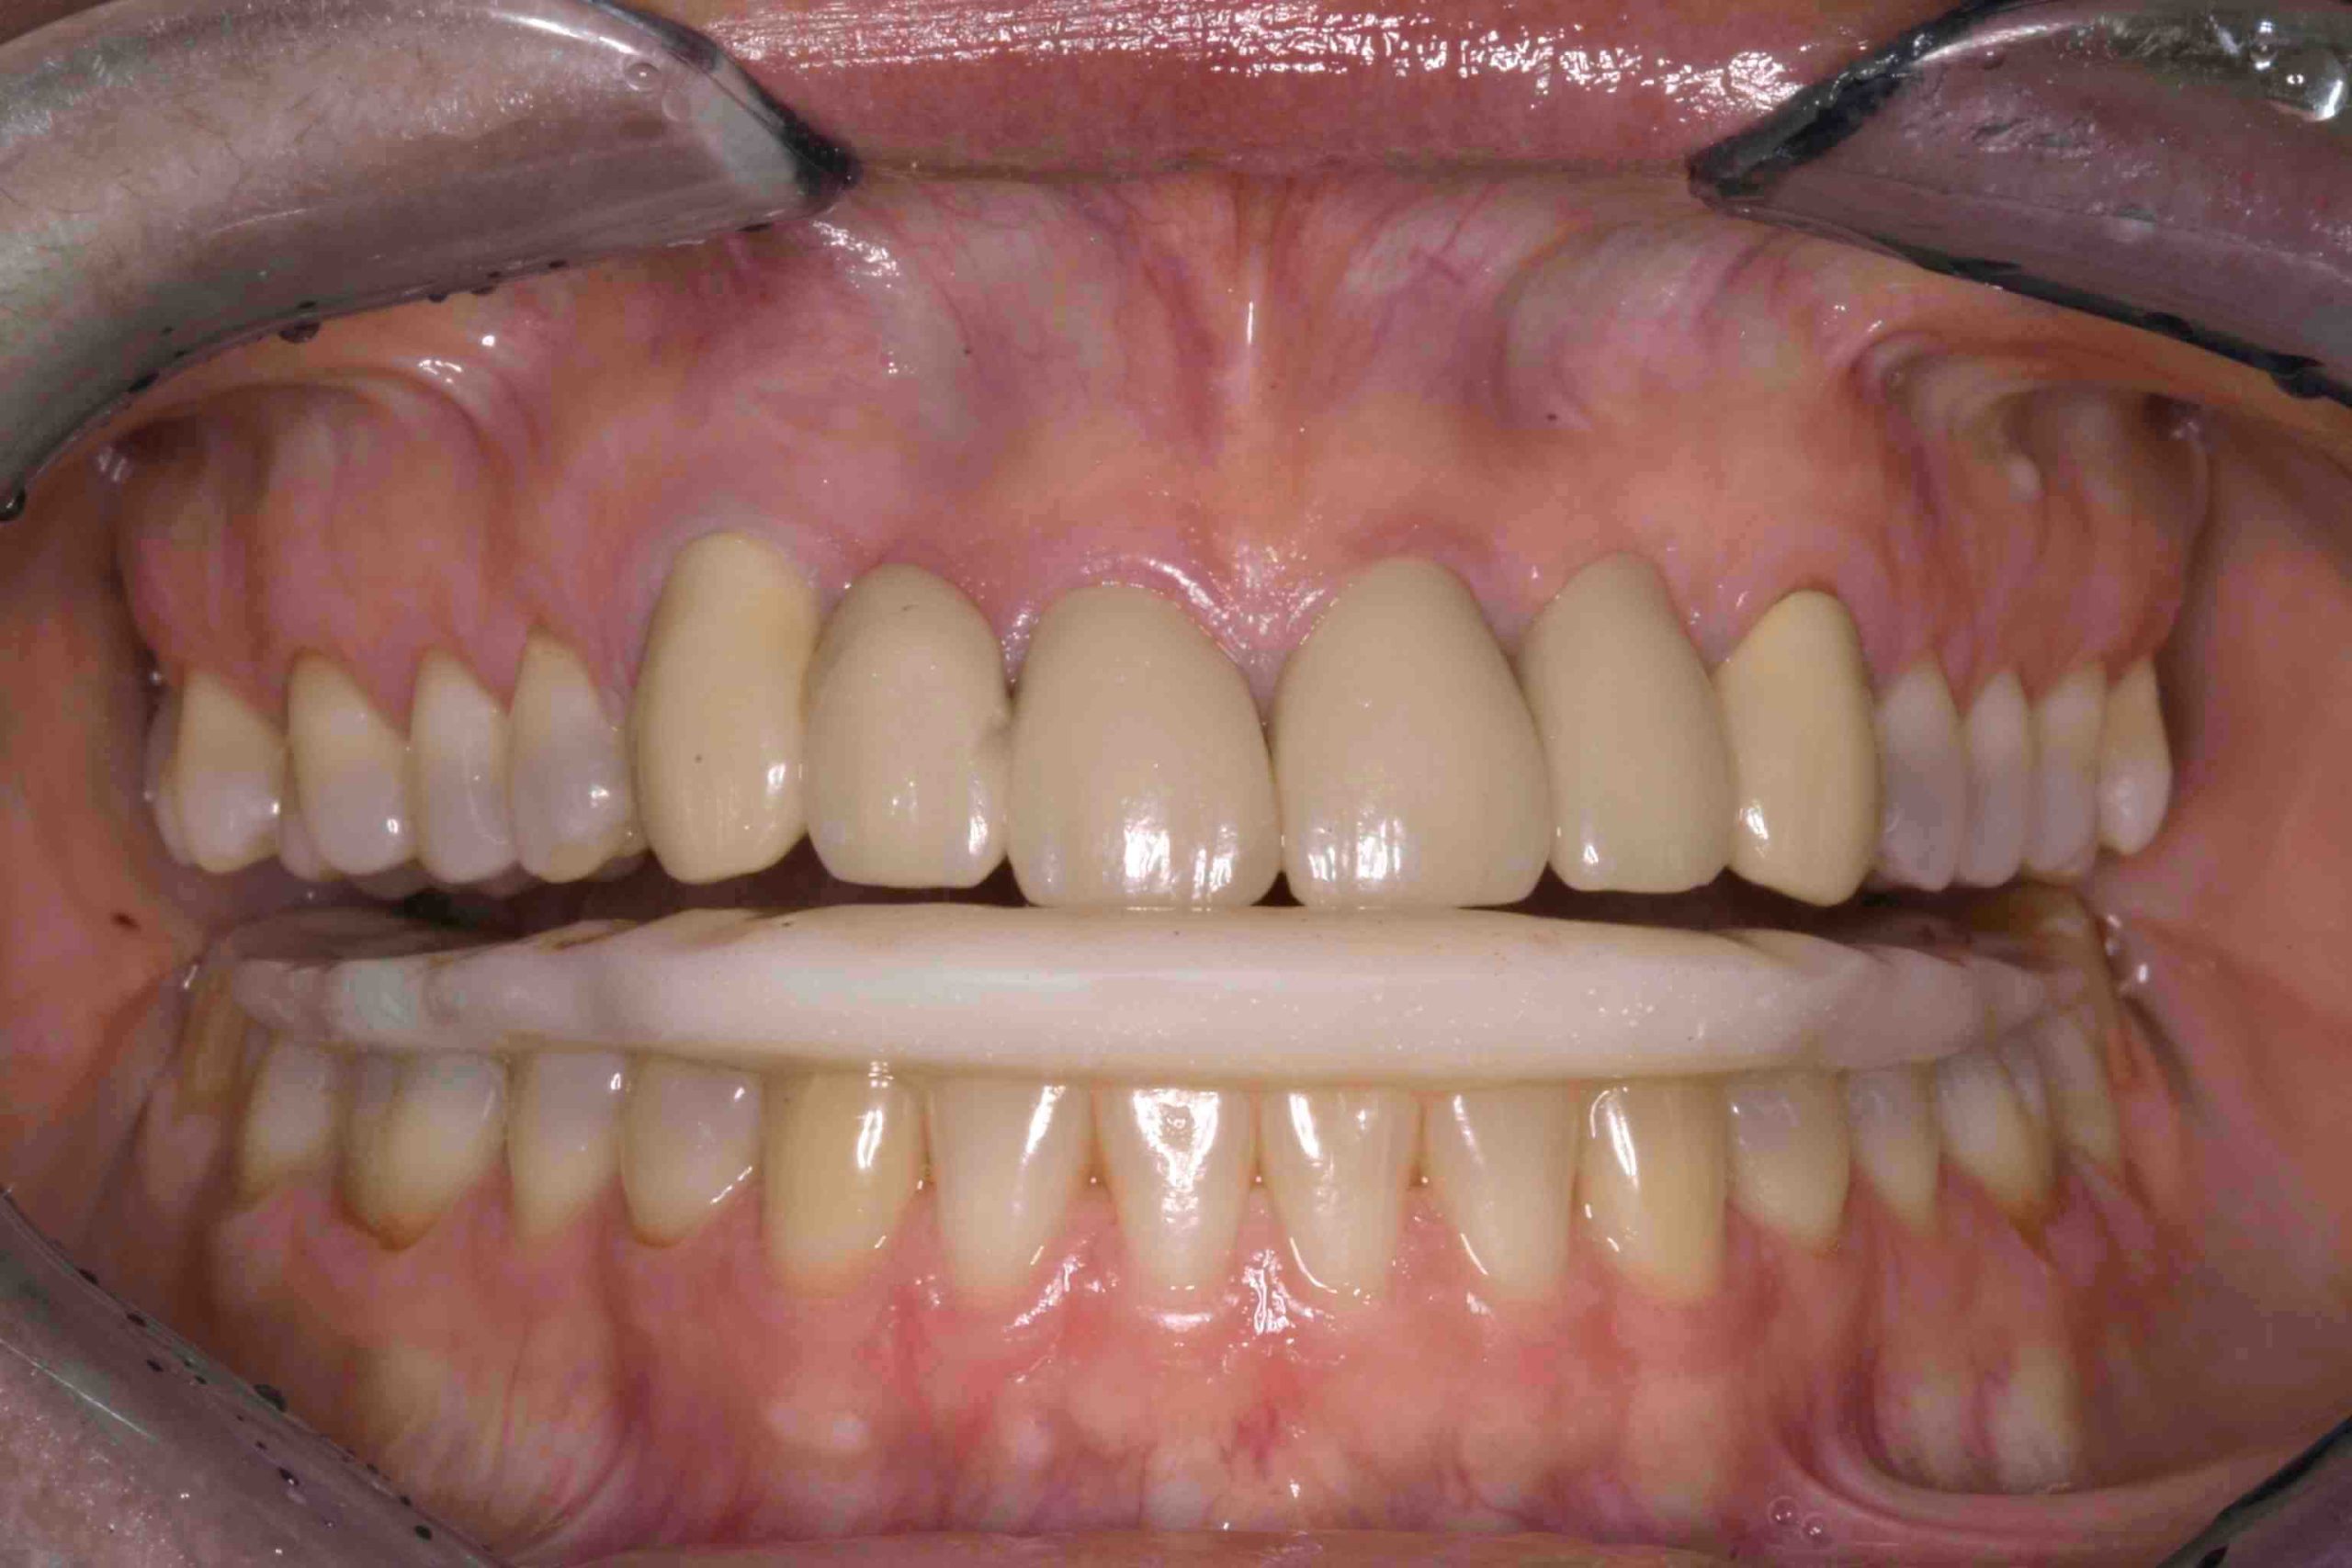
The goals are even bilateral centric relation contacts, non-interfering posteriors, and smooth anterior guidance. Dr. Tanner was always curious to see how little could be done to the person’s own unique occlusion to accomplish all those goals. Patient discovery and engagement are keys to Tanner appliance therapy.

Dr. Tanner passed away in 2003. His appliance and his life’s work live on.

Related Course

E2: Occlusal Appliances & Equilibration

DATE: July 19 2026 @ 8:00 am - July 23 2026 @ 2:30 pm

Location: The Pankey Institute

CE HOURS: 44

Dentist Tuition: $ 7500

Single Occupancy with Ensuite Private Bath (per night): $ 355

What if you had one tool that increased comprehensive case acceptance, managed patients with moderate to high functional risk, verified centric relation and treated signs and symptoms of TMD? Appliance…

Learn More>
About Author

User Image
Buzz Raymond DDS

Dr. Buzz serves patients in and around the Minneapolis and St. Paul area at his office in Golden Valley, MN. His goal is to help patients receive the treatment they need for optimal health and aesthetics. Buzz attended the Pankey Institute, and helps teach and mentor other dentists as a member of the faculty. Dr. Buzz’s mentors have included some of the finest dentists in the world. He continues to give back by mentoring and teaching dentists throughout the United States and Canada. In 2013, Dr. Buzz was given the honor of being named a Dental Hero by his peers at the Pankey Institute.

FIND A PANKEY DENTIST OR TECHNICIAN

I AM A
I AM INTERESTED IN

VIEW COURSE CALENDAR

Pankey History: Dr. Henry Tanner

December 6, 2017 Buzz Raymond DDS

Forty five years ago, in the fall of 1972, the first class at The Pankey Institute was held. It’s easy to forget how much things have changed in the world of dental continuing education. Read on for an enlightening reminder of how far dentistry has come in the last few decades … 

Pankey History: Dr. Henry Tanner

Dr. John Anderson and Dr. Loren Miller each had sold their private practices and dedicated their careers to the creation of the Institute. In 1974, Dr. Anderson asked Dr. Henry Tanner to be assistant director of education. Dr. Tanner had been head of fixed prosthodontics at USC School of Dentistry and had made several significant contributions to dentistry.  

Many years earlier, Dr. Tanner had rebuilt the occlusion of Dr. Anderson, who then described Henry as “the finest restorative dentist in the world.” Dr. Henry Tanner is most often associated with the development of the Tanner Appliance.  

Dr. Tanner vividly recalled the first time he made a lower full arch appliance for a woman who was having severe head and face pain. She and her husband went to the hospital emergency room and she was given morphine and Demerol, yet she was not having much relief.

During an emergency visit at his office, Dr. Tanner made an acrylic wafer, placed it directly in her mouth, had her touch it gently with her upper teeth, and asked her to mold it with her tongue. After the acrylic got rubbery, he took it out of her mouth, let it harden, and refined it. She was out of pain the next day.

Within weeks of that experience, Dr. Tanner met a well-recognized orthodontist, Dr. Bob Ricketts, who was taking laminagraphs (sectional x-rays) of his splint patients to monitor condylar position and bony healing in the joint.  

To be continued ...

Related Course

Mastering Business Essentials

DATE: August 7 2025 @ 8:00 am - August 9 2025 @ 12:00 pm

Location: The Pankey Institute

CE HOURS: 22

Regular Tuition: $ 3295

Single Bed with Ensuite Bath: $ 345

The Blueprint for Running a Practice with Long-Term Growth Dr. Pankey’s original philosophy encouraged dental professionals to be proficient in 3 specific areas: technical mastery, behavioral excellence and business savvy….

Learn More>

About Author

User Image
Buzz Raymond DDS

Dr. Buzz serves patients in and around the Minneapolis and St. Paul area at his office in Golden Valley, MN. His goal is to help patients receive the treatment they need for optimal health and aesthetics. Buzz attended the Pankey Institute, and helps teach and mentor other dentists as a member of the faculty. Dr. Buzz’s mentors have included some of the finest dentists in the world. He continues to give back by mentoring and teaching dentists throughout the United States and Canada. In 2013, Dr. Buzz was given the honor of being named a Dental Hero by his peers at the Pankey Institute.

FIND A PANKEY DENTIST OR TECHNICIAN

I AM A
I AM INTERESTED IN

VIEW COURSE CALENDAR

Incisal Edge Anatomy

November 30, 2017 Lee Ann Brady DMD

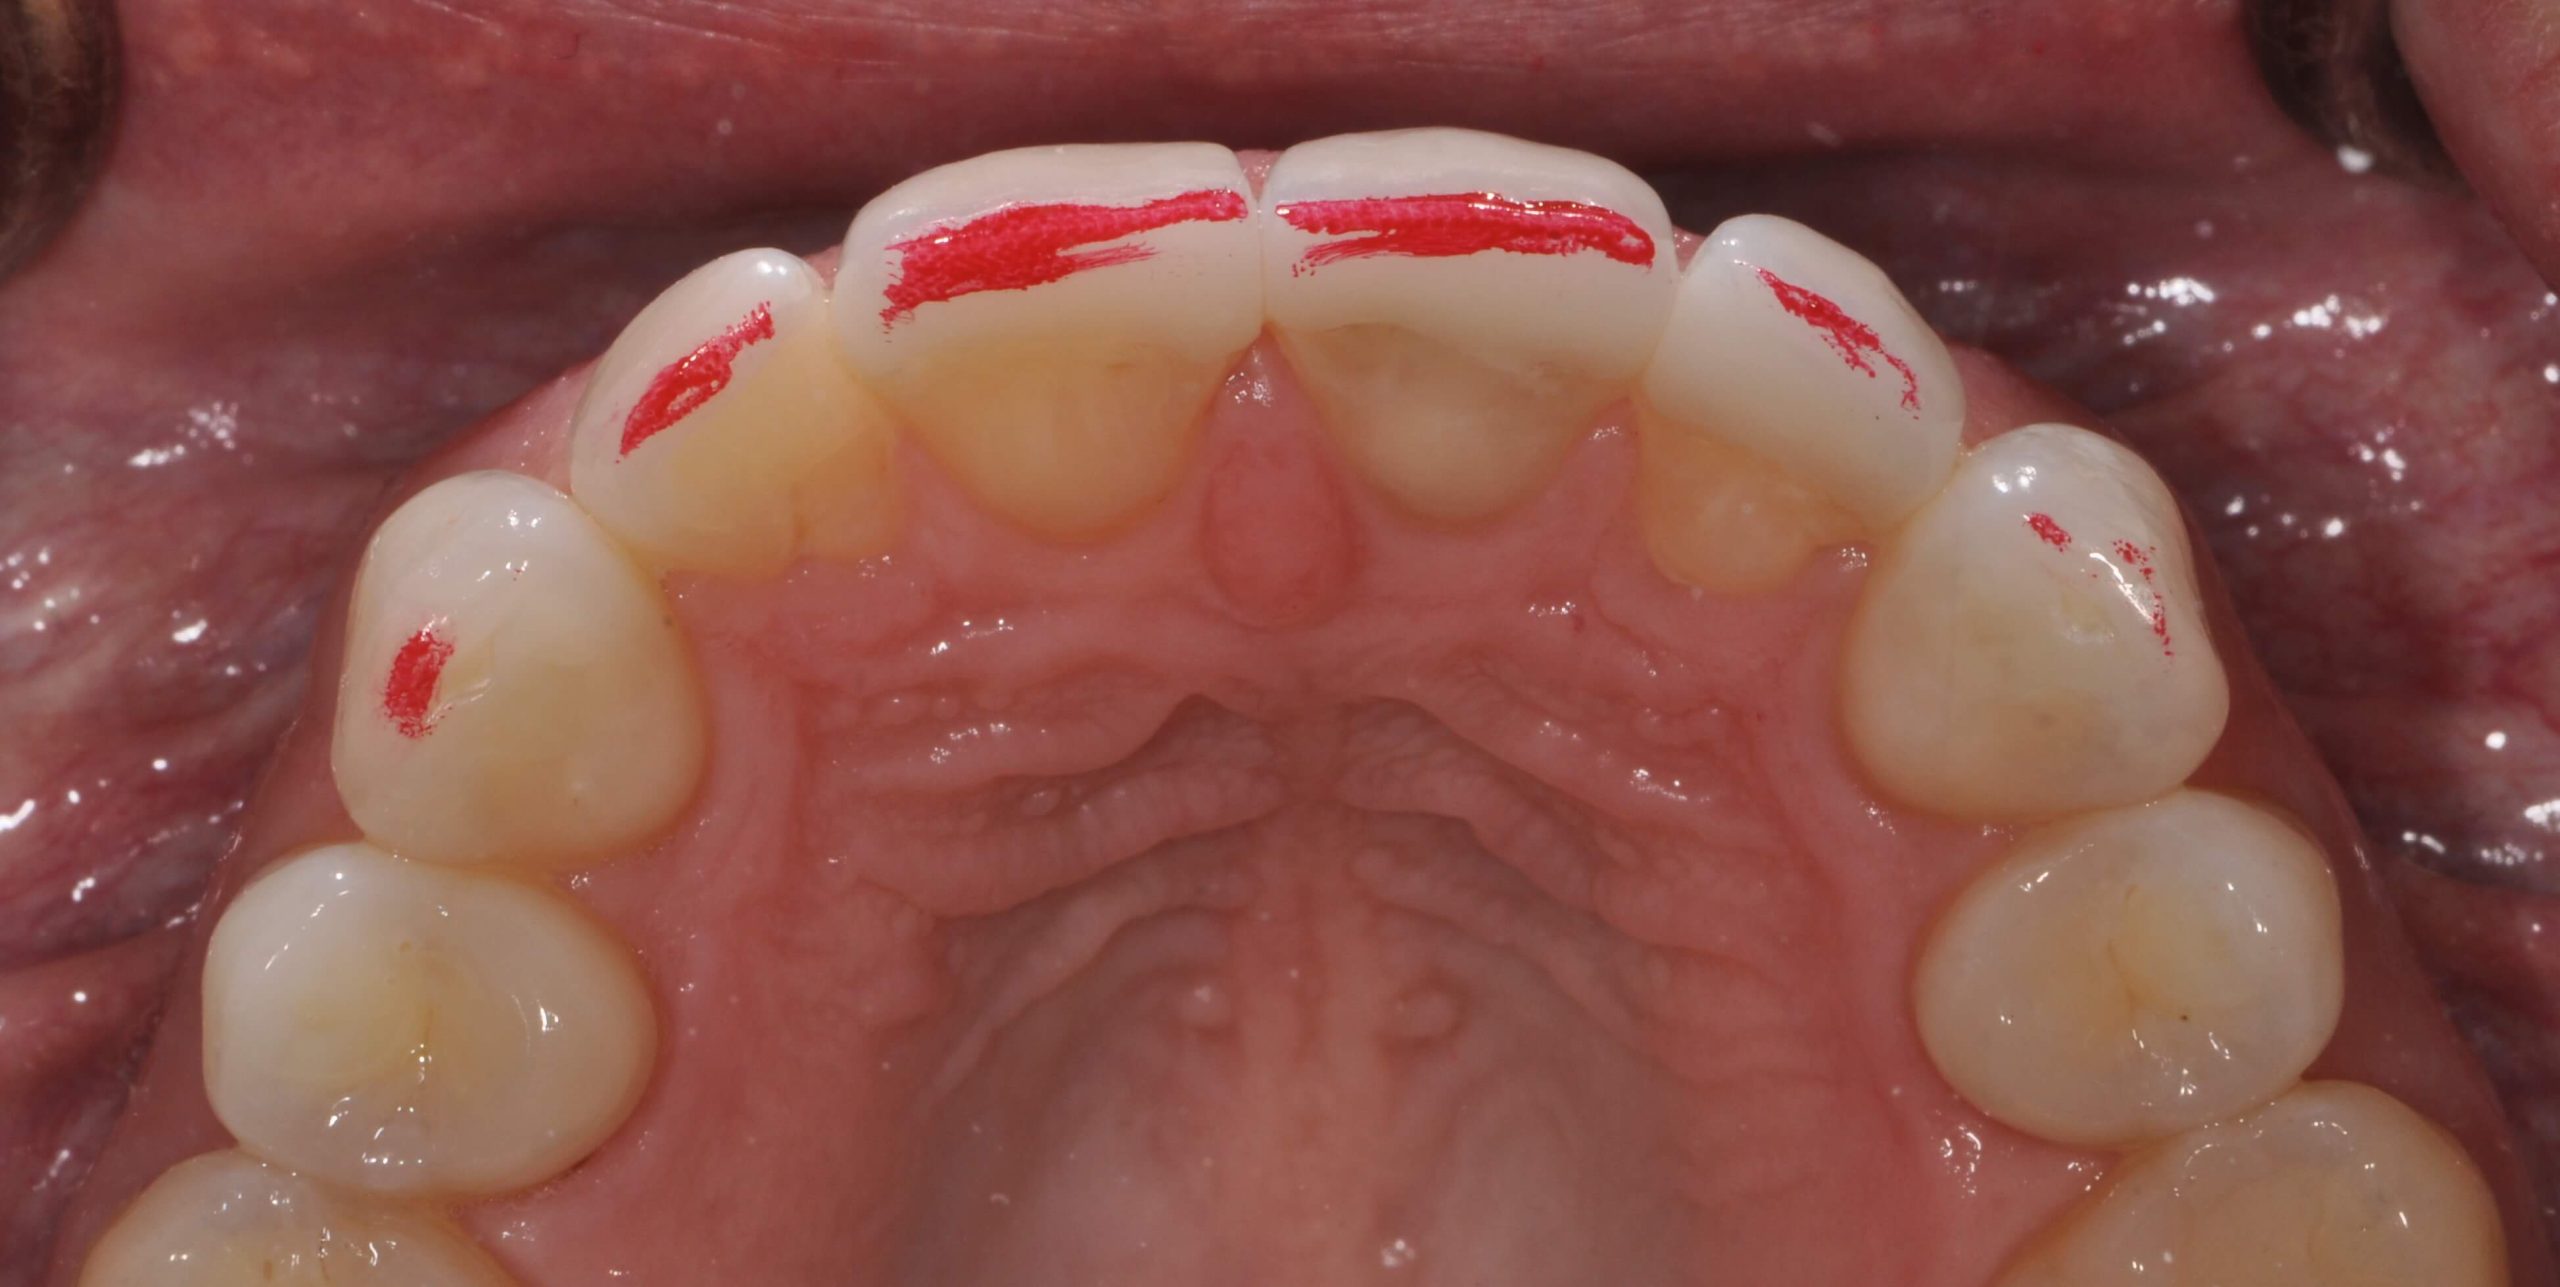
Anterior teeth have a complex incisal edge anatomy that creates both the esthetic appearance of the tooth and the function of the upper and lower incisors against one another.

Often in both ceramics and in composite we do not recreate the full anatomic form of the tooth. This results in both esthetic and functional challenges for the patient.  When we look at incisal edges from a lateral perspective there are three components, the pitch and two bevels. The Pitch is the flat top of the incisal edge. On both the labial and the lingual the transition zone between the pitch and these surfaces is a bevel. One is referred to as the leading edge and one is referred to as the trailing edge.

The Pitch has dimension or labio-lingual width, usually at least 1mm. This width increases as the patient shortens the tooth from Attrition, if they parafunction in an edge to edge position. The pitch is not always parallel to the horizon, but it’s relative position depends on the inclination of the incisor. When the incisors are optimally inclined, just slightly further to the labial at the incisal edge the pitch is slanted upward toward the lingual. This creates the incisal edge esthetic effect of thinner enamel at the labio-incisal junction and creates visual translucence. If the pitch is level to the horizon it changes light reflection and the appearance of the tooth. These two factors together is often what changes in restorative material.

We create a pitch that is level to the horizon, and then to gain translucence we decrease the width of the pitch, sometimes to a knife edge.

The challenge with this, is that patients sit in edge to edge position often to incise food and some for parafunction. If there is insufficient width to the pitch they may experience functional challenges.

The bevels on both sides have a variable width, but can be between a portion of a millimeter to multiple millimeters long. The bevels get longer in patients who grind their teeth in an excursive pathway pattern. Patients who parafunction edge to edge can often eliminate the bevel, making it easier to shear off enamel on the labial or lingual side of the tooth, or chip the edge enamel. The bevel functionally is a transition zone to create smooth functional movement as we pass from excursive movements onto the pitch. The Intercuspal stops on lower incisors is often on or gingival to the bevel.

Whether we are finalizing an equilibration or finalizing the occlusion on composites or ceramics perfecting the anterior guidance requires both pitch and bevel surfaces, it is a perfect example of the marriage between form and function.

Related Course

Crown Lengthening: How It Will Enhance Your Restorative Results

DATE: January 24 2025 @ 2:00 pm - January 24 2025 @ 4:00 pm

Location: Online

CE HOURS: 2

Course Description:   Frustrated by a cusp fractured below the gingiva, or prepping too far sub-gingivally? This lecture will illustrate solutions to these every day dental problems. In this program clinicians…

Learn More>

About Author

User Image
Lee Ann Brady DMD

Dr. Lee Ann Brady is passionate about dentistry, her family and making a difference. She is a general dentist and owns a practice in Glendale, AZ limited to restorative dentistry. Lee’s passion for dental education began as a CE junkie herself, pursuing lots of advanced continuing education focused on Restorative and Occlusion. In 2005, she became a full time resident faculty member for The Pankey Institute, and was promoted to Clinical Director in 2006. Lee joined Spear Education as Executive VP of Education in the fall of 2008 to teach and coordinate the educational curriculum. In June of 2011, she left Spear Education, founded leeannbrady.com and joined the dental practice she now owns as an associate. Today, she teaches at dental meetings and study clubs both nationally and internationally, continues to write for dental journals and her website, sits on the editorial board of the Journal of Cosmetic Dentistry, Inside Dentistry and DentalTown Magazines and is the Director of Education for The Pankey Institute.

FIND A PANKEY DENTIST OR TECHNICIAN

I AM A
I AM INTERESTED IN

VIEW COURSE CALENDAR

3 Tips to Capture Bite Records For Diagnostic Models

September 29, 2017 Lee Ann Brady DMD

We have multiple options when we want to capture bite records for diagnostic models that will be mounted in a seated condylar position. Our approach will depend on specific patients and their needs. This will ensure we can get more accuracy on a more consistent basis. In the end, we’ll have less frustration when we modify our methods to the unique situation.

Here is a great go-to guide for bite records in a variety of circumstances:

3 Tips for Bite Records

1. Patients who need to release muscles or who tighten their muscles as a response to procedures.

In this case, we use bite registration silicone with a leaf gauge or a lucia jig. The leaf gauge allows is to set the vertical dimension to only allow 1mm of thickness of silicone between the posterior teeth. A lucia jig bite record is taken at a more open vertical dimension, but this is the perfect distance for a universal appliance.

Patients with positive muscle findings are most commonly deprogramed through appliance therapy at night, and then true centric relation bite records are taken at the end. Deprogramming can be accomplished with a temporary anterior discluder called a QuickSplint or a more permanent appliance in multiple different designs.

The main challenges with silicone bites include trimming and mounting for an accurate representation and dealing with patients who posture forward.

2. Patients who have relaxed musculature and no findings on a joint & muscle exam.

This situation calls for capturing records with a wax platform. This is a very popular technique at Pankey and produces quite an accurate record result as it is taken at the smallest increase of vertical dimension. Plus, it’s easy to mount while maintaining that high accuracy. As a second choice a leaf gauge with silicone can be used making sure that the fewest number of leaves possible are used just to gain adequate thickness of the silicone.

3. Patients at the end of deprogramming or appliance therapy.

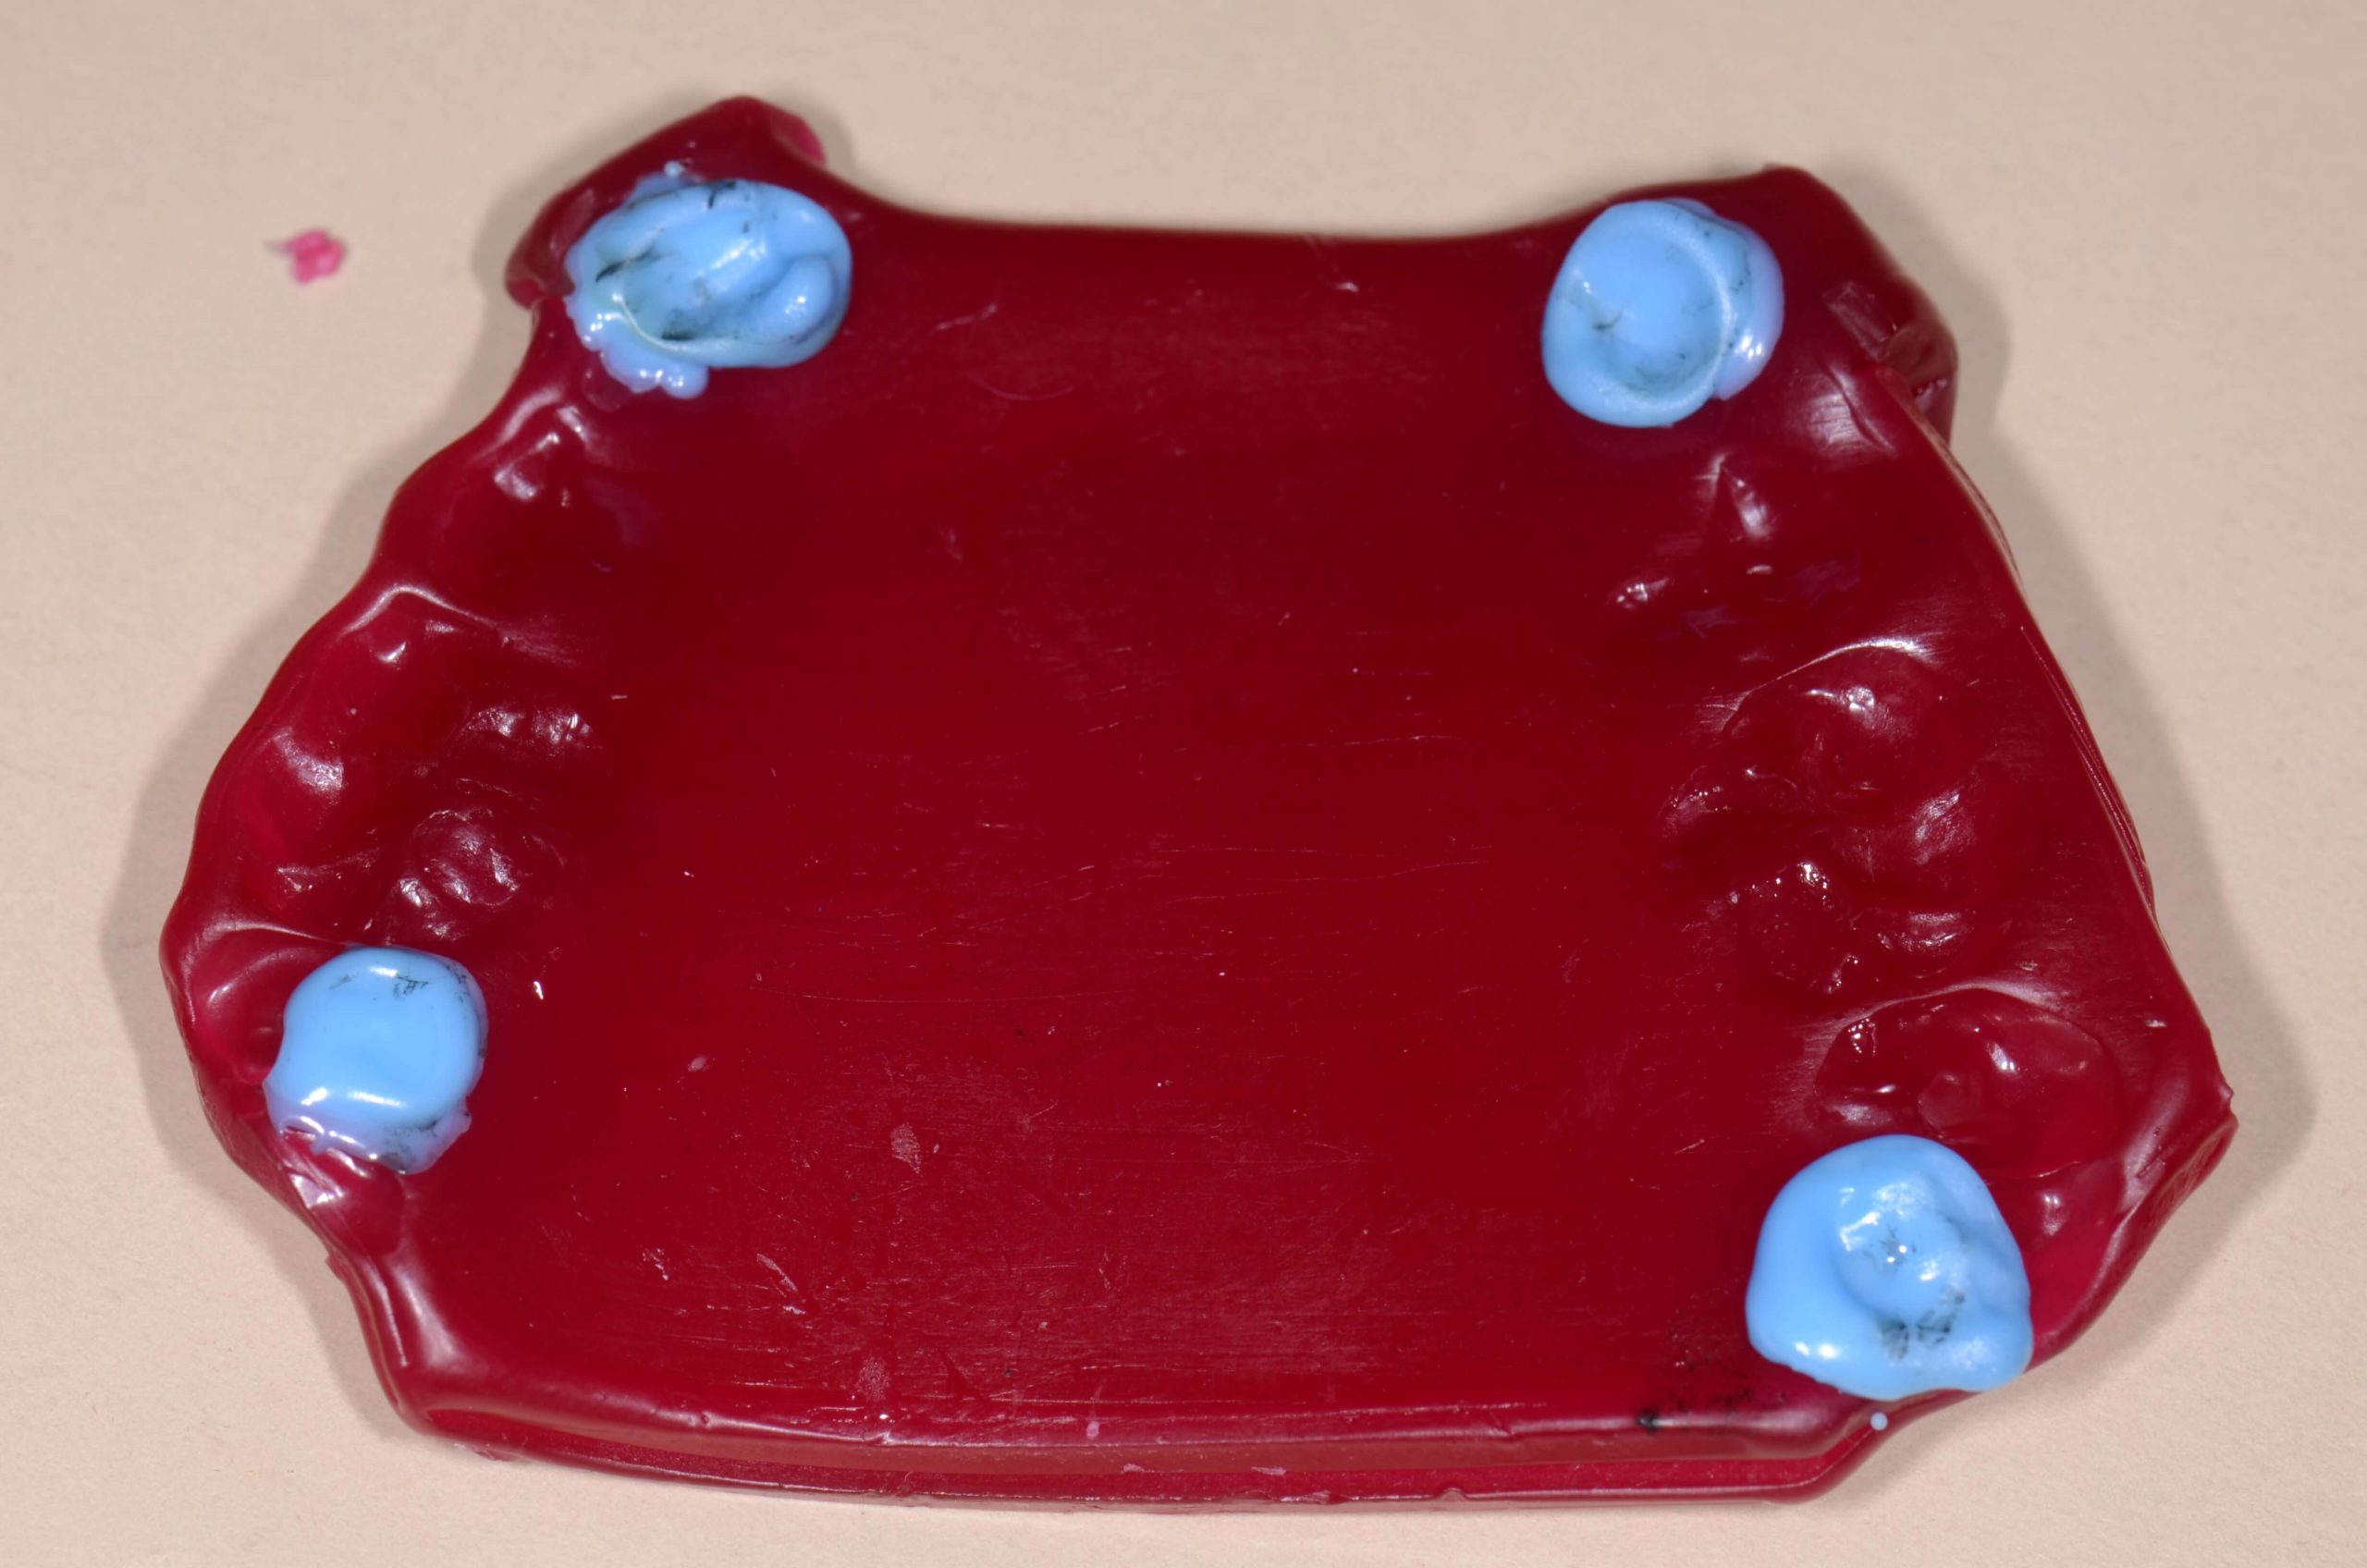
Here again a wax platform record is very advantageous. Wax platforms are made from Schuyler wax. This wax comes in sheets that resemble baseplate, but are a deep red.

For this, you’ll want to tell the patient to take their appliance out to brush and eat breakfast the morning of the appointment. Then they should wear it to the office and then you can take it out to capture the bite record.

For the wax platform: Heat the sheet at the midpoint, cut it in half, then heat each half at the midline, folding to double thickness. Finally, cut the sides for a trapezoid shape. The occlusal stops are placed at the canine and second molar positions and made out of Delar wax. The record is captured using bimanual guidance or can be done with a leaf gauge.

What indicators make you decide to change your technical approach? We’d love to hear from you in the comments! 

Related Course

E2: Occlusal Appliances & Equilibration

DATE: July 19 2026 @ 8:00 am - July 23 2026 @ 2:30 pm

Location: The Pankey Institute

CE HOURS: 44

Dentist Tuition: $ 7500

Single Occupancy with Ensuite Private Bath (per night): $ 355

What if you had one tool that increased comprehensive case acceptance, managed patients with moderate to high functional risk, verified centric relation and treated signs and symptoms of TMD? Appliance…

Learn More>

About Author

User Image
Lee Ann Brady DMD

Dr. Lee Ann Brady is passionate about dentistry, her family and making a difference. She is a general dentist and owns a practice in Glendale, AZ limited to restorative dentistry. Lee’s passion for dental education began as a CE junkie herself, pursuing lots of advanced continuing education focused on Restorative and Occlusion. In 2005, she became a full time resident faculty member for The Pankey Institute, and was promoted to Clinical Director in 2006. Lee joined Spear Education as Executive VP of Education in the fall of 2008 to teach and coordinate the educational curriculum. In June of 2011, she left Spear Education, founded leeannbrady.com and joined the dental practice she now owns as an associate. Today, she teaches at dental meetings and study clubs both nationally and internationally, continues to write for dental journals and her website, sits on the editorial board of the Journal of Cosmetic Dentistry, Inside Dentistry and DentalTown Magazines and is the Director of Education for The Pankey Institute.

FIND A PANKEY DENTIST OR TECHNICIAN

I AM A
I AM INTERESTED IN

VIEW COURSE CALENDAR

Adult Growth of the Dental Arch

September 4, 2017 Roger Solow DDS

Successful restorative dentistry now hinges on an understanding that physiological changes occur over a lifetime. It’s detrimental to treat the dynamic relationship between dental occlusion and adjacent craniofacial structures as static.

We are all generally familiar with the fact that there is a significant change in facial profile (convex to straight) between adolescence and adulthood. Jaw growth usually ends between 17 and 20-ish years old, but 3-dimensional craniofacial skeletal growth and remodeling does not cease after adolescence.

It’s lifelong growth even though it’s slow. As a result, we can’t consider adult patients morphologically stable. This is actually a relatively new concept that we’ve become aware of because of implant dentistry.

So what does this mean for restorations? First, we need more information.

Physiological Changes and Restorative Dentistry: A Quick Overview

These adult growth changes can be seen in both a decrease and increase in the dimensions of the craniofacial skeleton. There is an increase in maxillary and mandibular anterior dentoalveolar heights.

We should also pay attention to vertical growth of the maxilla, which continues after transverse and sagittal growth end. It has been suggested that reductions seen in arch width, depth, and perimeter may be due to interstitial wear and mesial drift. The latter occurs because of an occlusal force stemming from root angulation, mesial eruption force and the direction of occlusal contact during chewing. It’s integral to consider tooth movement because it compensates for wear while maintaining interproximal contacts.

There are different patterns of growth in short-faced and long-faced people. Short-faced individuals have greater transverse maxillary growth. As they mature, their anterior teeth tip forward and enable mesial drift. This process occurs more vertically in long-faced people. Short-faced individuals experience upward buccal movement of the teeth, while long-faced individuals experience lingual movement and continual tooth eruption that supports a normal interarch relationship.

What we now know from recent research is that eruption after the tooth has reached occlusal contact is a compensatory response to occlusal wear. Eruption creates vertical growth if there is no occlusal wear.

A comprehensive understanding of the complex interplay between all of these changes in the dental arch is essential to restorative dentistry.

How do you keep up to date on the latest dental research? We’d love to hear your tips in the comments! 

Related Course

Compromise to Co-Discovery: A Treatment Planning Journey

DATE: October 21 2025 @ 8:00 am - October 23 2025 @ 1:00 pm

Location: Online

CE HOURS: 21

Regular Tuition: $ 2995

Single Occupancy with Ensuite Private Bath (per night): $ 345

The Balance of Communication, Case Planning & Occlusion Dr. Melkers always brings a unique perspective to his workshops and challenges us to the way we think. At Compromise to Co-Discovery,…

Learn More>

About Author

User Image
Roger Solow DDS

Roger Solow received a BA in Biology from UCLA in 1975 and his DDS with honors from University of the Pacific School of Dentistry in 1978. He is a general dentist and has a full time, fee-for-service practice that he limits to restorative dentistry in Mill Valley, California. He is a Pankey Scholar and a lead visiting faculty at the Pankey Institute in Key Biscayne, Florida. He has taught restorative dentistry at UOP Dental School and has lectured to study clubs, dental societies, and the national meetings of the Academy of General Dentistry. Dr. Solow is a Fellow of the American College of Dentistry. Dr. Solow is a frequently published author.

FIND A PANKEY DENTIST OR TECHNICIAN

I AM A
I AM INTERESTED IN

VIEW COURSE CALENDAR

How To Set Splint Therapy Fees

September 1, 2017 James Otten DDS

Splint therapy can be one of the best services we offer our patients, but plan poorly and your headaches will greatly increase as you decrease your patient’s.

We all want to provide our best stuff for our patients, yet sometimes we can find ourselves in a quagmire of complexity and not getting reimbursed for our efforts.

Through the years I’ve seen this scenario play out in my own practice and many others because we lack structure around our fees for splint therapy. If ever there was an example of the failure of unit fees to provide appropriate care and reimbursement, the one size (fee) fits all approach in splint therapy will leave you clenching and grinding.

How to Individualize Splint Therapy Fees

To be equitable for patient and practice, fees for splint therapy must be individualized. To do this, you’ll need to have a good idea of what your production per hour goals are and utilize that as a basis for your fee.

For example, if I have an anterior deprogrammer that requires very little follow up to simply protect the dentition and calm muscle, the fee would consist of a lab fee (I charge this fee even if I make it in house), the time for insert, and the amount of time for follow up, usually one or two short appointments.

For more complex TMD therapy I like to look at it this way: take the same basic fee structure illustrated above and add time for insertion (allow yourself enough time, knowing mandibular/condylar position is likely to change as you adjust), then add for follow up appointments based on your diagnosis and complexity.

Estimating Therapeutic Time

Here are some of the factors I consider when estimating the “therapeutic time.” I’ll routinely add time and/or appointments based on whether it involves:

1) an occluso-muscle disorder

2) an intracapsular disorder

3) the amount of degenerative change in the condyle disc assembly

4) the chronic or acute nature of the problem (acute problems I feel are generally harder to manage)

5) the presence of pain, both quantitative and qualitative

6) the duration of pain and complexity of pain pattern (pain emanating from multiple sources)

7) the behavioral and psychological dynamics involved with the patient

In closing, I’d remember to under-promise and over-deliver in direct proportion to the complexity of the problem. Evaluate, diagnose, and treat wisely and you’ll achieve pain reduction and stability for both you and your patient!

How do you structure fees for splint therapy in your practice? We’d love to hear from you in the comments! 

Related Course

E1: Aesthetic & Functional Treatment Planning

DATE: July 9 2026 @ 8:00 am - July 12 2026 @ 2:30 pm

Location: The Pankey Institute

CE HOURS: 39

Dentist Tuition: $ 6900

Single Occupancy with Ensuite Private Bath (Per Night): $ 355

Transform your experience of practicing dentistry, increase predictability, profitability and fulfillment. The Essentials Series is the Key, and Aesthetic and Functional Treatment Planning is where your journey begins.  Following a system of…

Learn More>

About Author

User Image
James Otten DDS

Dr. James Otten, is a 1981 graduate of the University of Missouri-Kansas City School of Dentistry. He completed a one-year residency in hospital dentistry with emphasis on advanced restoration of teeth and oral surgery at the Veterans Administration Medical Center in Leavenworth, Kansas. He taught crown and bridge dentistry as an Associate Professor at UMKC before entering private practice in 1982.He has completed the rigorous curriculum at two prestigious institutions – The Pankey Institute for Advanced Dental Education and the Dawson Center for Advanced Dental Education. Dr. Otten lectures nationally and internationally. Dentistry’s most prestigious organizations.

FIND A PANKEY DENTIST OR TECHNICIAN

I AM A
I AM INTERESTED IN

VIEW COURSE CALENDAR

Exquisite Alginate Impressions

August 26, 2017 Jeff Baggett DDS

Improving the quality of alginate impressions for diagnostic models requires a fine-tuned technique based on specific materials. These materials are used in conjunction with clever steps that lead to a minimization of voids and bubbles.

Dr. Baggett explains his exact procedure for achieving drastically improved alginate impressions. With these recommendations, you’ll find your confidence and efficiency soaring. Impressions are one part of the treatment puzzle that must be as precise as possible to avoid problems down the road.

How to Improve Alginate Impressions for Diagnostic Models

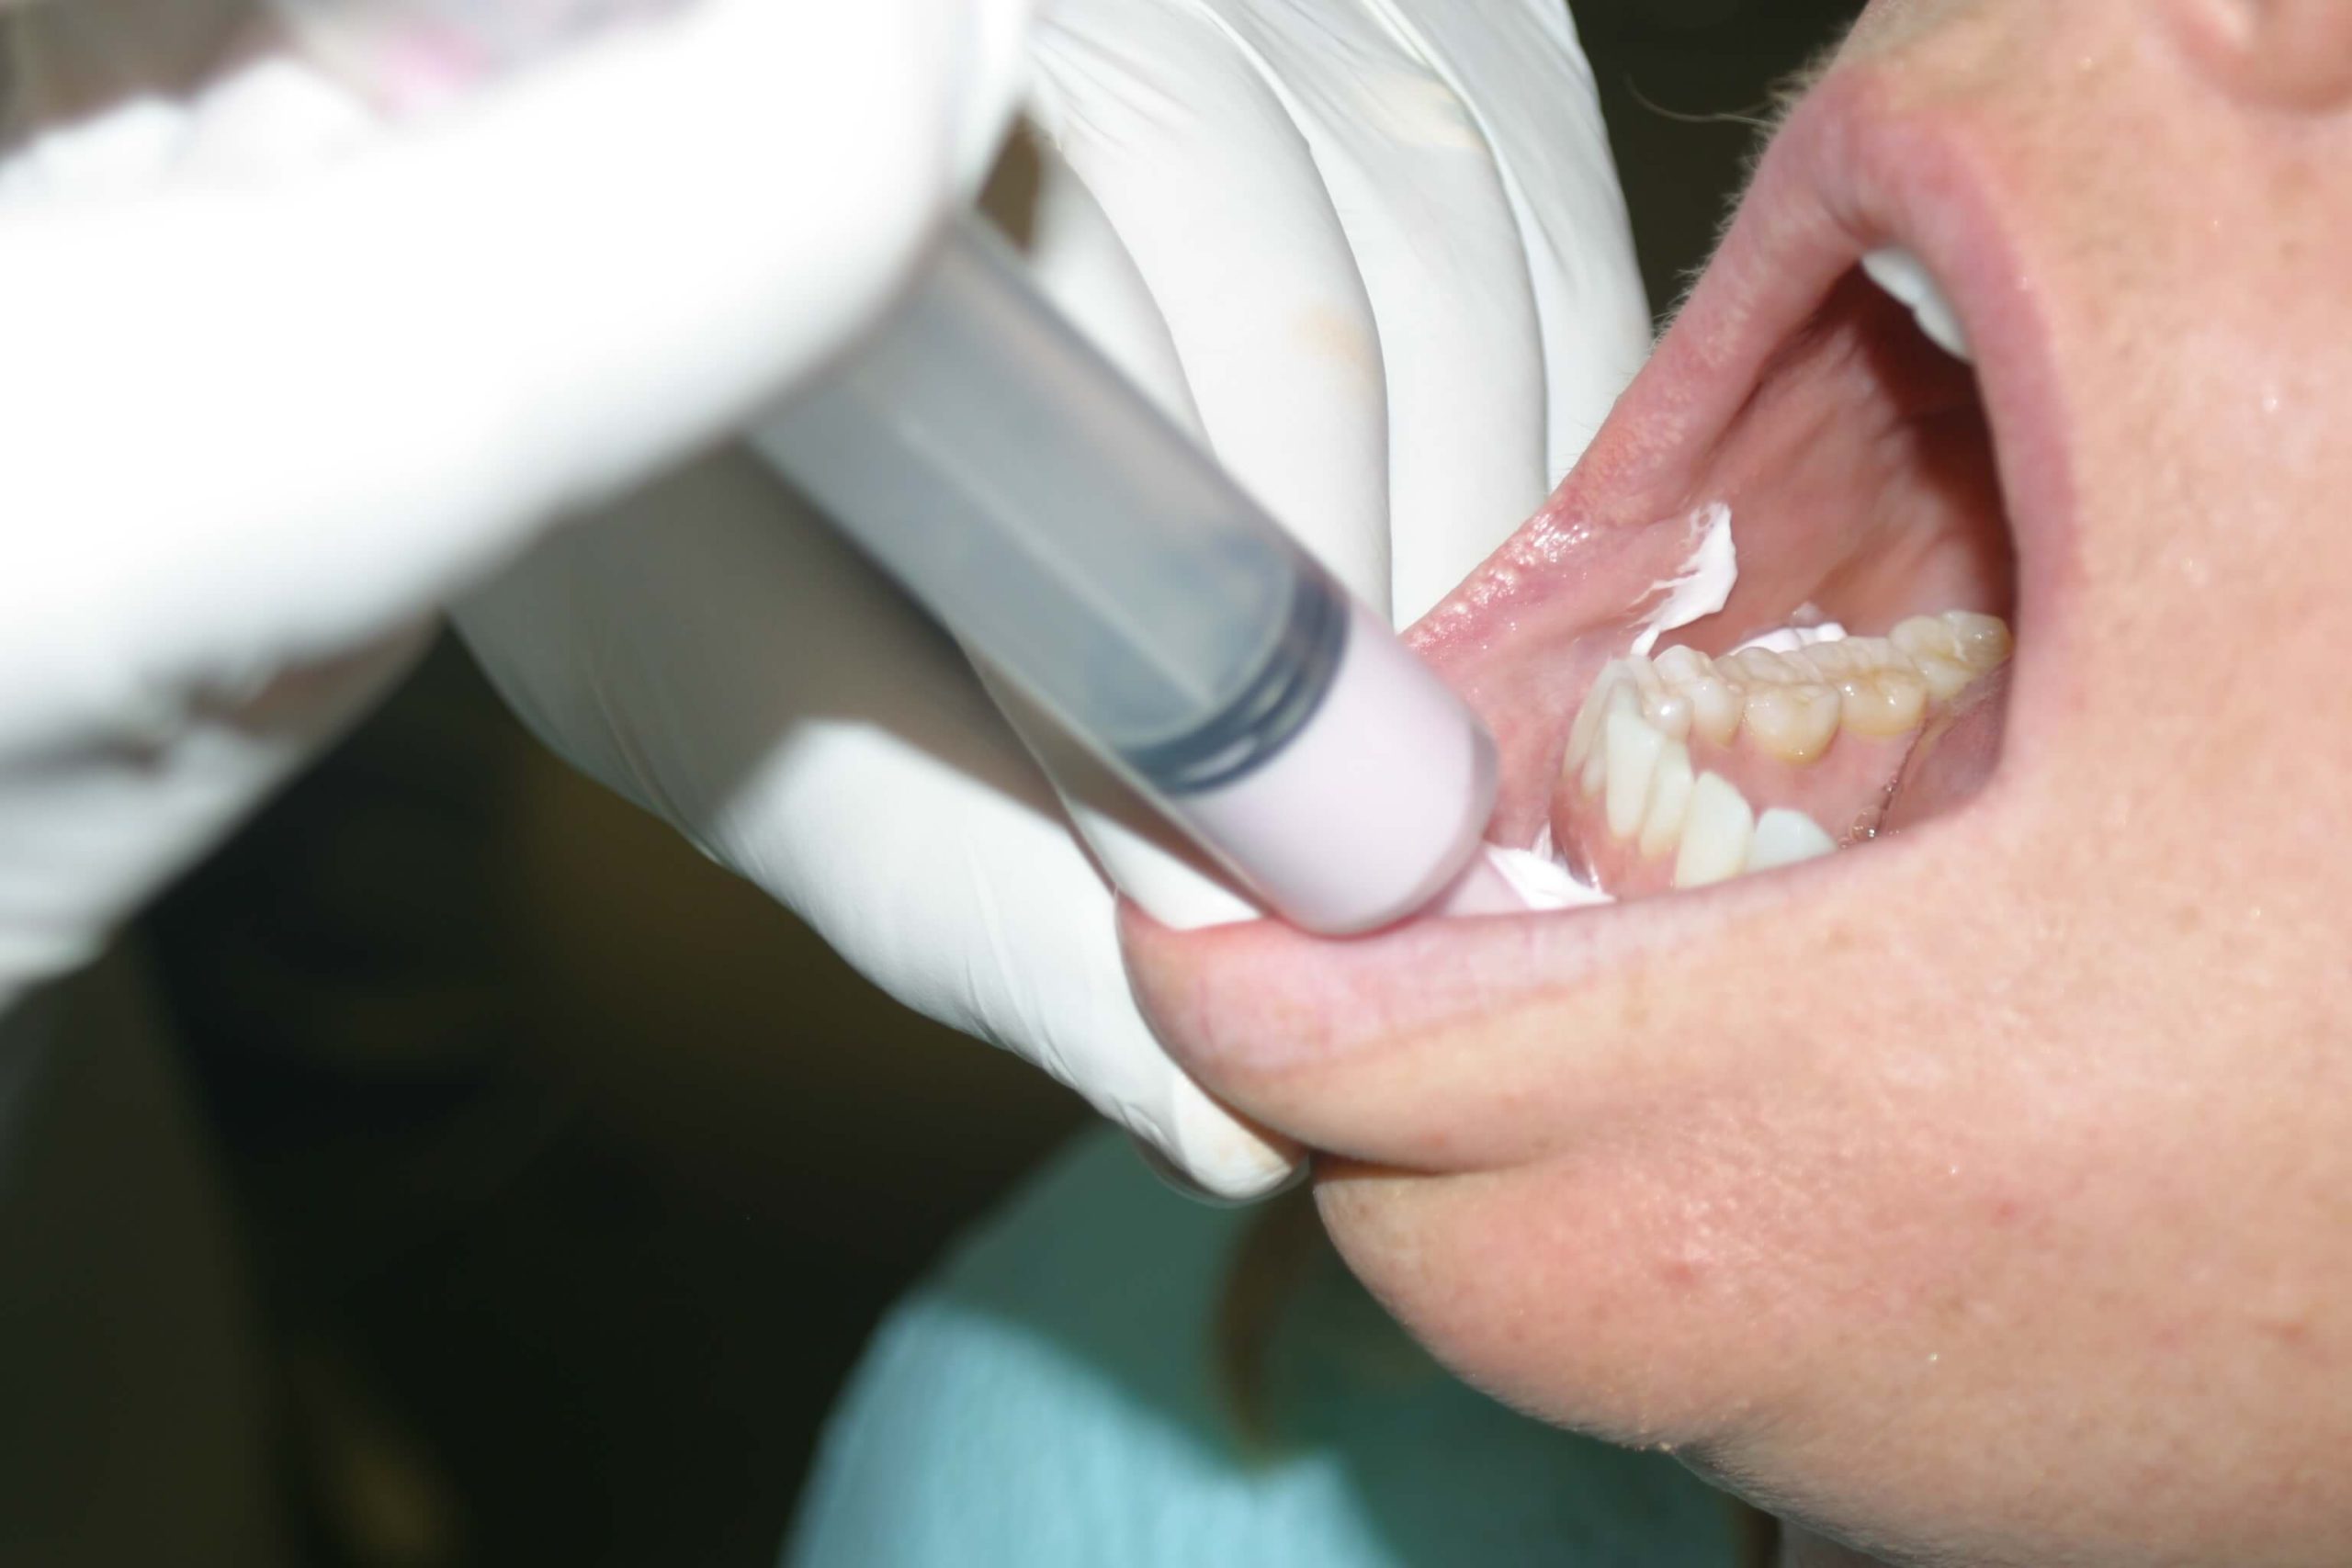
At my practice, we still use alginate impressions as our main impression material for diagnostic models. I generally take them. A very helpful tip to improve the quality of your impressions is to use a 35 ml monoject plastic syringe (from your local dental supplier) and Ivoclar Accudent XD Pre-Sure Tip applicators (Ivoclar Reorder number 67891 Soft Flex Tips).  

By placing the flexible tips on the end of the 35 ml plastic syringes, you are able to squirt excess alginate loaded into the syringe onto the teeth at a 90 degree angle starting at the distals of the second molars. You can do this instead of wiping alginate on the teeth with your fingers before you seat the alginate loaded tray.

This technique results in a lot less bubbles and minimizes the chance for voids distal to the most posterior teeth. The flexible tips are autoclavable, the monoject syringes can be cold sterilized, and petroleum jelly can be applied to the rubber plungers so they can be used again.   

This tip – combined with the use of 1-inch medical tape along the posteriors of our maxillary trays as a post-dam seal – has improved the impressions taken at my practice tremendously.

What aspect of impressions do you find the most challenging and why? We’d love to hear from you in the comments!


Related Course

Mastering Advanced Splint Therapy

DATE: November 13 2025 @ 8:00 am - November 16 2025 @ 1:00 pm

Location: The Pankey Institute

CE HOURS: 29

Dentist Tuition : $ 5900

Single Occupancy with Ensuite Private Bath (per night): $ 345

If you are ready to take what you know about appliance therapy to the next level, then this course is a must. The anatomic appliance is one of the most…

Learn More>

About Author

User Image
Jeff Baggett DDS

Dr. Jeff D. Baggett attended Oklahoma State University where he received his undergraduate degree and attended professional school at the University of Oklahoma College of Dentistry. After obtaining his Doctorate of Dental Surgery degree, Dr. Baggett received postgraduate training at the L.D. Pankey Institute, recognized worldwide for its excellence in advanced technical dentistry. He was accredited as a Pankey Scholar. Practicing for over 30 years, Dr. Baggett is also a visiting faculty member at the L.D. Pankey Institute. He lectures various dental study clubs and dental meetings. He is a guest speaker of the Victim's Impact Panel Against Drunk Driving. A published author, Dr. Baggett wrote sections in the book Photoshop CS3 and PowerPoint 2007 for the Dental Professional. Dr. Baggett is also the team dentist for the Oklahoma City Thunder with his partner, Dr. Lembke. An esteemed member of the dental community, Dr. Baggett is a member of many professional organizations including the American Dental Association, the Oklahoma Dental Association, the Oklahoma County Dental Society, the Southwest Academy of Restorative Dentistry, the McGarry Study Club, the University Oklahoma College of Dentistry Alumni Association and the Oklahoma State University Alumni Association. He also served on the Board of Directors of the Oklahoma County Dental Society.

FIND A PANKEY DENTIST OR TECHNICIAN

I AM A
I AM INTERESTED IN

VIEW COURSE CALENDAR

Digital Bite Splints: Part 2

August 24, 2017 Daren Becker DMD

(Link to Digital Bite Splints: Part 1)

If you’re hesitant to start testing out digital bite splints in your practice, read on to learn why one dentist prefers them for improved efficiency and accuracy.

In Part 1 of my thoughts on this topic, I explained the features I love when working with a lab to create digital bite splints. These bite splints have an incredible fit and allow for customizable retention. Below, I round out the rest of my perspective on why they’re a great option for many dentists.

Occlusal Schemes and Adjusting the Digital Bite Splint Design

I’ve played with different occlusal schemes for digital bite splints. I have utilized:

1. A universal flat plane appliance (upper or lower).

2. An anatomic retainer-type appliance we designed to have a little more detail.

3. One anterior repositioning appliance. It was created for a patient who had some recent trauma. We were trying to keep them from seating all the way for a short period of time.

The idea is that you can design the occlusal scheme any way you want. After we send the scan in and the lab does the initial design, they can send us back screenshots that show us what the design is.

When we look at those screenshots, we can make comments on them. If there’s a lot of change – if we want to shallow the guidance, steepen the guidance, or make it thicker/thinner – we can actually go online live with the lab as they enact the changes. We can watch it happen in real time.

Increasing Efficiency by Reducing Chair, Lab, and Adjustments Time

Digital bite splints are a nice, new way to do things. Personally, I think we’re getting a better result. It’s certainly saving us a ton of time, both in terms of lab time (model work time) and chair time because the patient doesn’t need a lot of reline time. Of course, keeping the nasty acrylic out of the mouth is another significant benefit.

You don’t have to spend a lot of time adjusting. The occlusal adjustments are nominal. If we get the records right with the scan, there is very little in terms of adjustments. In fact, that might be the downfall for some of us because we lose a portion of time for the patient to experience things. Sometimes, I’ll spend more time adjusting than I need to. I ensure the patient is engaged and experiencing what an even bite might feel like relative to their natural occlusion. But, in this case, I wouldn’t have to devote that time if I didn’t need to.

Digital bite splints are also really dense. Breakage is going to be a minor problem. They’re going to hold up and last a long time.

What technology are you considering using in your practice? Please leave your thoughts in the comments!

Related Course

E2: Occlusal Appliances & Equilibration

DATE: July 19 2025 @ 8:00 am - July 23 2026 @ 2:30 pm

Location: The Pankey Institute

CE HOURS: 44

Dentist Tuition: $ 7500

Single Occupancy with Ensuite Private Bath (per night): $ 355

What if you had one tool that increased comprehensive case acceptance, managed patients with moderate to high functional risk, verified centric relation and treated signs and symptoms of TMD? Appliance…

Learn More>

About Author

User Image
Daren Becker DMD

Dr. Becker earned his Bachelors of Science Degree in Computer Science from American International College and Doctor of Dental Medicine from the University of Florida College of Dentistry. He practices full time in Atlanta, GA with an emphasis on comprehensive restorative, implant and aesthetic dentistry. Daren began his advanced studies at the Pankey Institute in 1998 and was invited to be a guest facilitator in 2006 and has been on the visiting faculty since 2009. In addition, in 2006 he began spending time facilitating dental students from Medical College of Georgia College of Dentistry at the Ben Massell Clinic (treating indigent patients) as an adjunct clinical faculty. In 2011 he was invited to be a part time faculty in the Graduate Prosthodontics Residency at the Center for Aesthetic and Implant Dentistry at Georgia Health Sciences University, now Georgia Regents University College of Dental Medicine (formerly Medical College of Georgia). Dr. Becker has been involved in organized dentistry and has chaired and/or served on numerous state and local committees. Currently he is a delegate to the Georgia Dental Association. He has lectured at the Academy of General Dentistry annual meeting, is a regular presenter at ITI study clubs as well as numerous other study clubs. He is a regular contributor at Red Sky Dental Seminars.

FIND A PANKEY DENTIST OR TECHNICIAN

I AM A
I AM INTERESTED IN

VIEW COURSE CALENDAR

Digital Bite Splints: Part 1

August 23, 2017 Daren Becker DMD

The future of dentistry is here: digital bite splints. I’ve used bite splint therapy in my practice successfully for years. I was comfortable with my preferred traditional process until I learned I could work more efficiently and more accurately with the latest technology.

There is no reason to fear implementation of a digital workflow in your practice. In this two part series, I’m going to lay out the reasons why I’ve chosen to switch to digital bite splints for goals like protecting teeth and restorations, deprogramming muscles, and treating TMD.

They’re the productivity solution you didn’t realize you needed.

Less Effective Splint Fabrication Methods

My past process for fabricating occlusal splints (bite splints) was traditional. It included making records, alginate impressions, facebow, mounting, and several bite records (protrusive and centric). We would design and fabricate with cold cure acrylic that we would make by hand, then adjust and modify as needed.

That process works great, which is why most dentists use it. Alternately, some dentists send them off to the lab and have the same process done, possibly in a cured acrylic. But the outstanding process we have transitioned to in my practice is a completely digital designed and fabricated bite splint.

Why I Love the Digital Bite Splint Fabrication Process

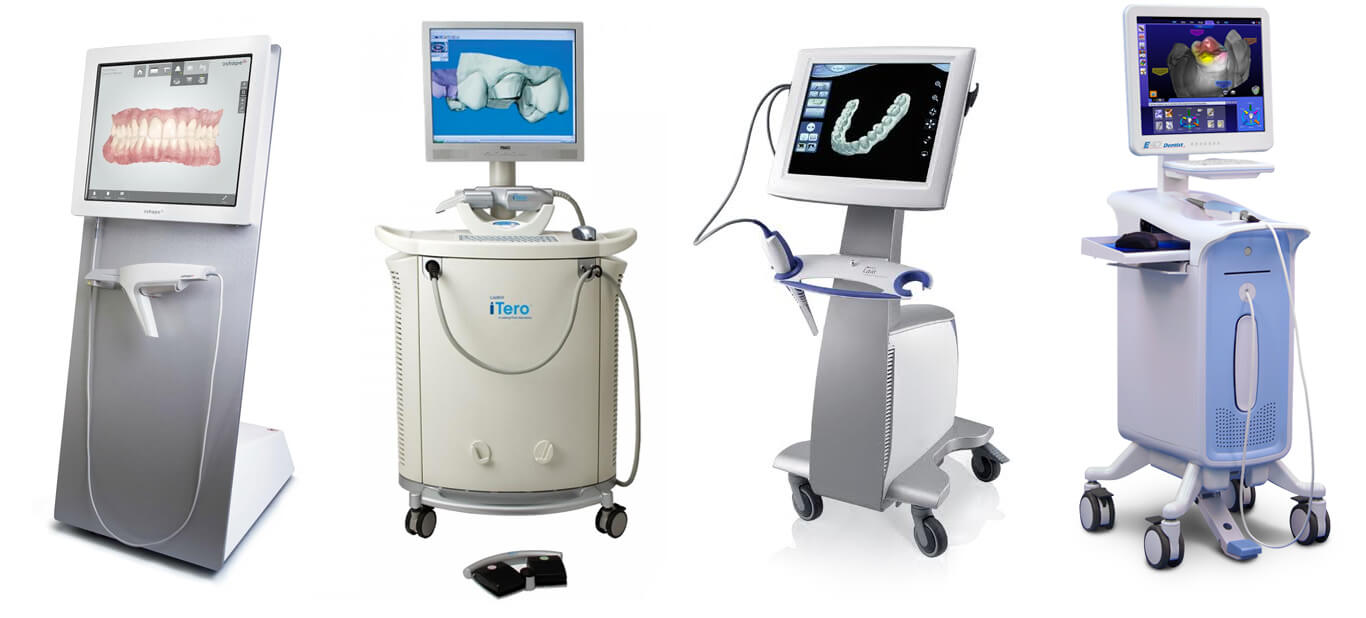
The first step for a digital bite splint is to do an intraoral scan of the patient’s dentition. Any scanner can be used. We then send the scans to a restorative lab, where a software package specifically made for appliance design is utilized. The lab designs the appliances to our specifications and then they are milled out of a solid block of acrylic. This leads to an amazingly dense result that polishes unbelievably well.

The fit is incredible because we can get such an accurate scan with no distortion. With an impression, we usually have distortion of the alginate, distortion of the stone, or distortion of the acrylic as it sets, which is why we have to reline them. I have only had to reline two CAD/CAM designed and milled splints since we’ve been doing them. These bite splints are easy to adjust and it’s easy to read the dots on them. They just drop right in with almost no adjustment needed.

You can also dial in the retention on the software, so we’ve played with it a little bit to figure out what we want in terms of retention. We’ve got it just about right where they’re not too loose and not too tight. They have a nice snug fit that’s stable and retentive enough, but doesn’t squeeze the teeth too much.

Keep your eye out for Part 2 of this digital bite splint blog series. Next week, I’ll describe how we play with different occlusal schemes and work with the lab on customization in real time.

What advancements in dental technology are you hesitant to implement in your practice and why? We’d love to hear your thoughts in the comments!

(Link to Digital Bite Splints: Part 2)

Related Course

TMD & Orofacial Pain: Managing Complex Patients

DATE: January 29 2025 @ 8:00 am - February 2 2025 @ 1:00 pm

Location: The Pankey Institute

CE HOURS: 37

Dentist Tuition: $ 7200

Single Occupancy with Ensuite Private Bath (per night): $ 345

THIS COURSE IS SOLD OUT TMD patients present with a wide range of concerns and symptoms from tension headaches and muscle challenges to significant joint inflammation and breakdown. Accurate thorough…

Learn More>

About Author

User Image
Daren Becker DMD

Dr. Becker earned his Bachelors of Science Degree in Computer Science from American International College and Doctor of Dental Medicine from the University of Florida College of Dentistry. He practices full time in Atlanta, GA with an emphasis on comprehensive restorative, implant and aesthetic dentistry. Daren began his advanced studies at the Pankey Institute in 1998 and was invited to be a guest facilitator in 2006 and has been on the visiting faculty since 2009. In addition, in 2006 he began spending time facilitating dental students from Medical College of Georgia College of Dentistry at the Ben Massell Clinic (treating indigent patients) as an adjunct clinical faculty. In 2011 he was invited to be a part time faculty in the Graduate Prosthodontics Residency at the Center for Aesthetic and Implant Dentistry at Georgia Health Sciences University, now Georgia Regents University College of Dental Medicine (formerly Medical College of Georgia). Dr. Becker has been involved in organized dentistry and has chaired and/or served on numerous state and local committees. Currently he is a delegate to the Georgia Dental Association. He has lectured at the Academy of General Dentistry annual meeting, is a regular presenter at ITI study clubs as well as numerous other study clubs. He is a regular contributor at Red Sky Dental Seminars.

FIND A PANKEY DENTIST OR TECHNICIAN

I AM A
I AM INTERESTED IN

VIEW COURSE CALENDAR

Treating TMD: Yes or No?

August 20, 2017 Michelle Lee DDS

How Studying and Treating TMD Transformed One Dentist’s Practice for the Better

When Dr. Michelle Lee embarked on her dental career, she felt like there was a missing piece in how she approached dentistry. Discovering the power of TMD ultimately made her work more fulfilling and effective.

Dr. Lee relates her journey of achieving professional balance while attending the Pankey Institute, how treating TMD has transformed her practice, and why she believes career fulfillment is crucial to success.

Dr. Michelle Lee on the Power of TMD and Pankey Learning

Very quickly in my dental career after purchasing my dental practice, I knew I needed to expand my dental learning. I was seeing changes and problems within my patient’s dental health where I didn’t know WHY? Though I could easily tell the patient what we needed to do to fix their problem, I couldn’t necessarily explain the reasoning behind it: why a tooth broke, why wear occurred on one tooth but not the others, why the patient was having pain in their face, why pain was in a tooth for no apparent reason.

Not having these answers wasn’t good enough. I knew I needed to know the WHY. I believed if I figured this out I could partner with my patients and help them before problems like failing restorative dentistry, TMD issues, and myofascial pain started to arise. I decided to go down to the Pankey Institute within the same year I purchased my dental practice.

Dr. L.D. Pankey said, “A tooth never walked in the door.”

Attending the Pankey Institute changed my life both professionally and personally. I received a top notch dental education on comprehensive dentistry that included concepts like occlusion and TMD. The learning was presented from a technical, behavioral, and financial perspective. The Pankey Institute also guided me in creating my own personal and professional philosophy to achieve a work-life balance.

I am passionate about learning how the temporomandibular joint, muscles, and dentistry work together. Treating TMD allows me to deliver truly comprehensive dentistry to my patients. It’s like lifting up the hood of a car and examining the engine.

Learning about the TMD joint and the orofacial muscles helped me see dentistry from a new perspective. I am better able to delivery dentistry that is both protective and preventative. I have created a whole new culture within my practice because I show my patients WHY. This has made my work extremely rewarding.

What continuing education has had the most significant impact on your professional life? Please leave your thoughts in the comments!

Related Course

Functional Esthetic Excellence – Utilizing 100% Digital Workflow

DATE: May 8 2025 @ 8:00 am - May 10 2025 @ 2:00 pm

Location: The Pankey Institute

CE HOURS: 25

Dentist Tuition: $ 3195

Single Occupancy with Ensuite Private Bath (per night): $ 345

Embracing Digital Dentistry This course will introduce each participant to the possibilities of complex case planning utilizing 100% digital workflows. Special emphasis will be placed on understanding how software can…

Learn More>

About Author

User Image
Michelle Lee DDS

Dr. Michelle Lee is very proud to provide all aspects of general, family, and cosmetic dentistry to the Fleetwood and Berks county areas. Dr. Lee is a 2004 graduate of the University of Pennsylvania School of Dental Medicine and completed a one-year General Practice Residency program at Abington Memorial Hospital. Dr. Lee continues to keep herself abreast of dental advancements and takes hundreds and hundreds of hours of advanced dental education from the Pankey Institute and other courses for advanced dental training. She also maintains a faculty and advisor position at the Pankey Institute. Professionally, Dr. Lee is member of the Academy of General Dentistry, American Dental Association, Pennsylvania Dental Association, and serves on a committee of the American Equilibration Society. She also volunteers to treat pediatric patients through her local dental society.

FIND A PANKEY DENTIST OR TECHNICIAN

I AM A
I AM INTERESTED IN

VIEW COURSE CALENDAR