Breaking Provisionals: Finding the Flaw in Your Design

October 15, 2017 Lee Ann Brady DMD

The truth can be hard to face: Something is wrong with the design of these provisionals … We may be working on a broken provisional and feel the deep frustration that comes with knowing something went awry.

I challenge you, in these moments, to reframe the ‘problem’ as a mystery to be solved. You are the clinical detective who needs to work backwards a la Sherlock Holmes to figure out ‘whodunit.’

Mystery of the Broken Anterior Provisional

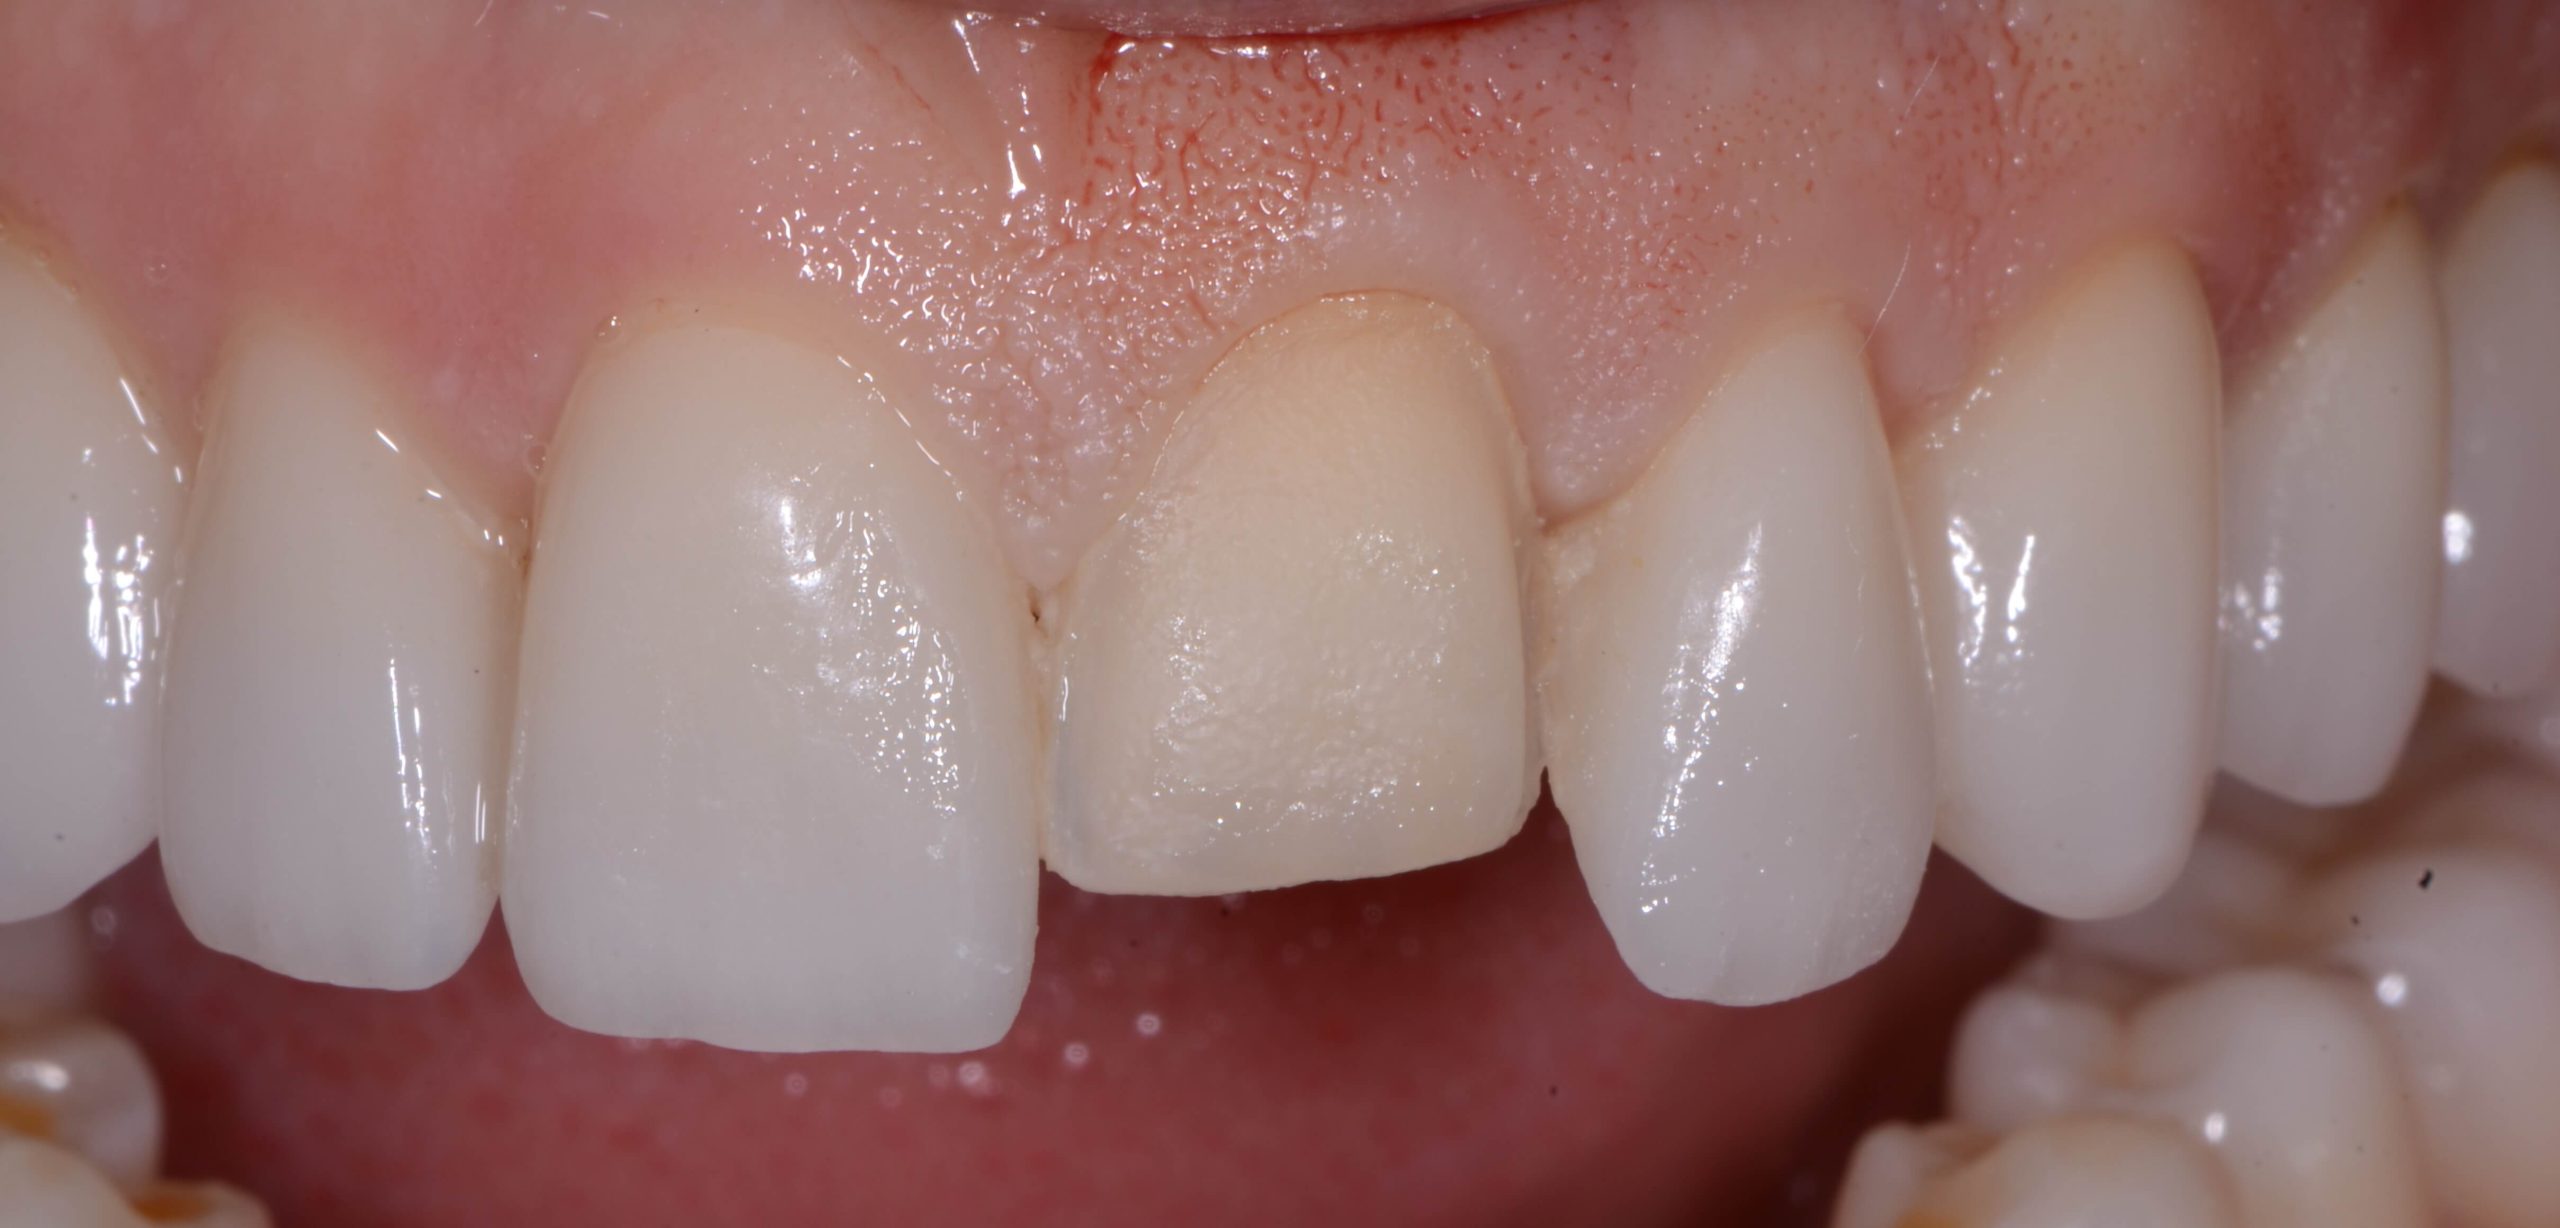
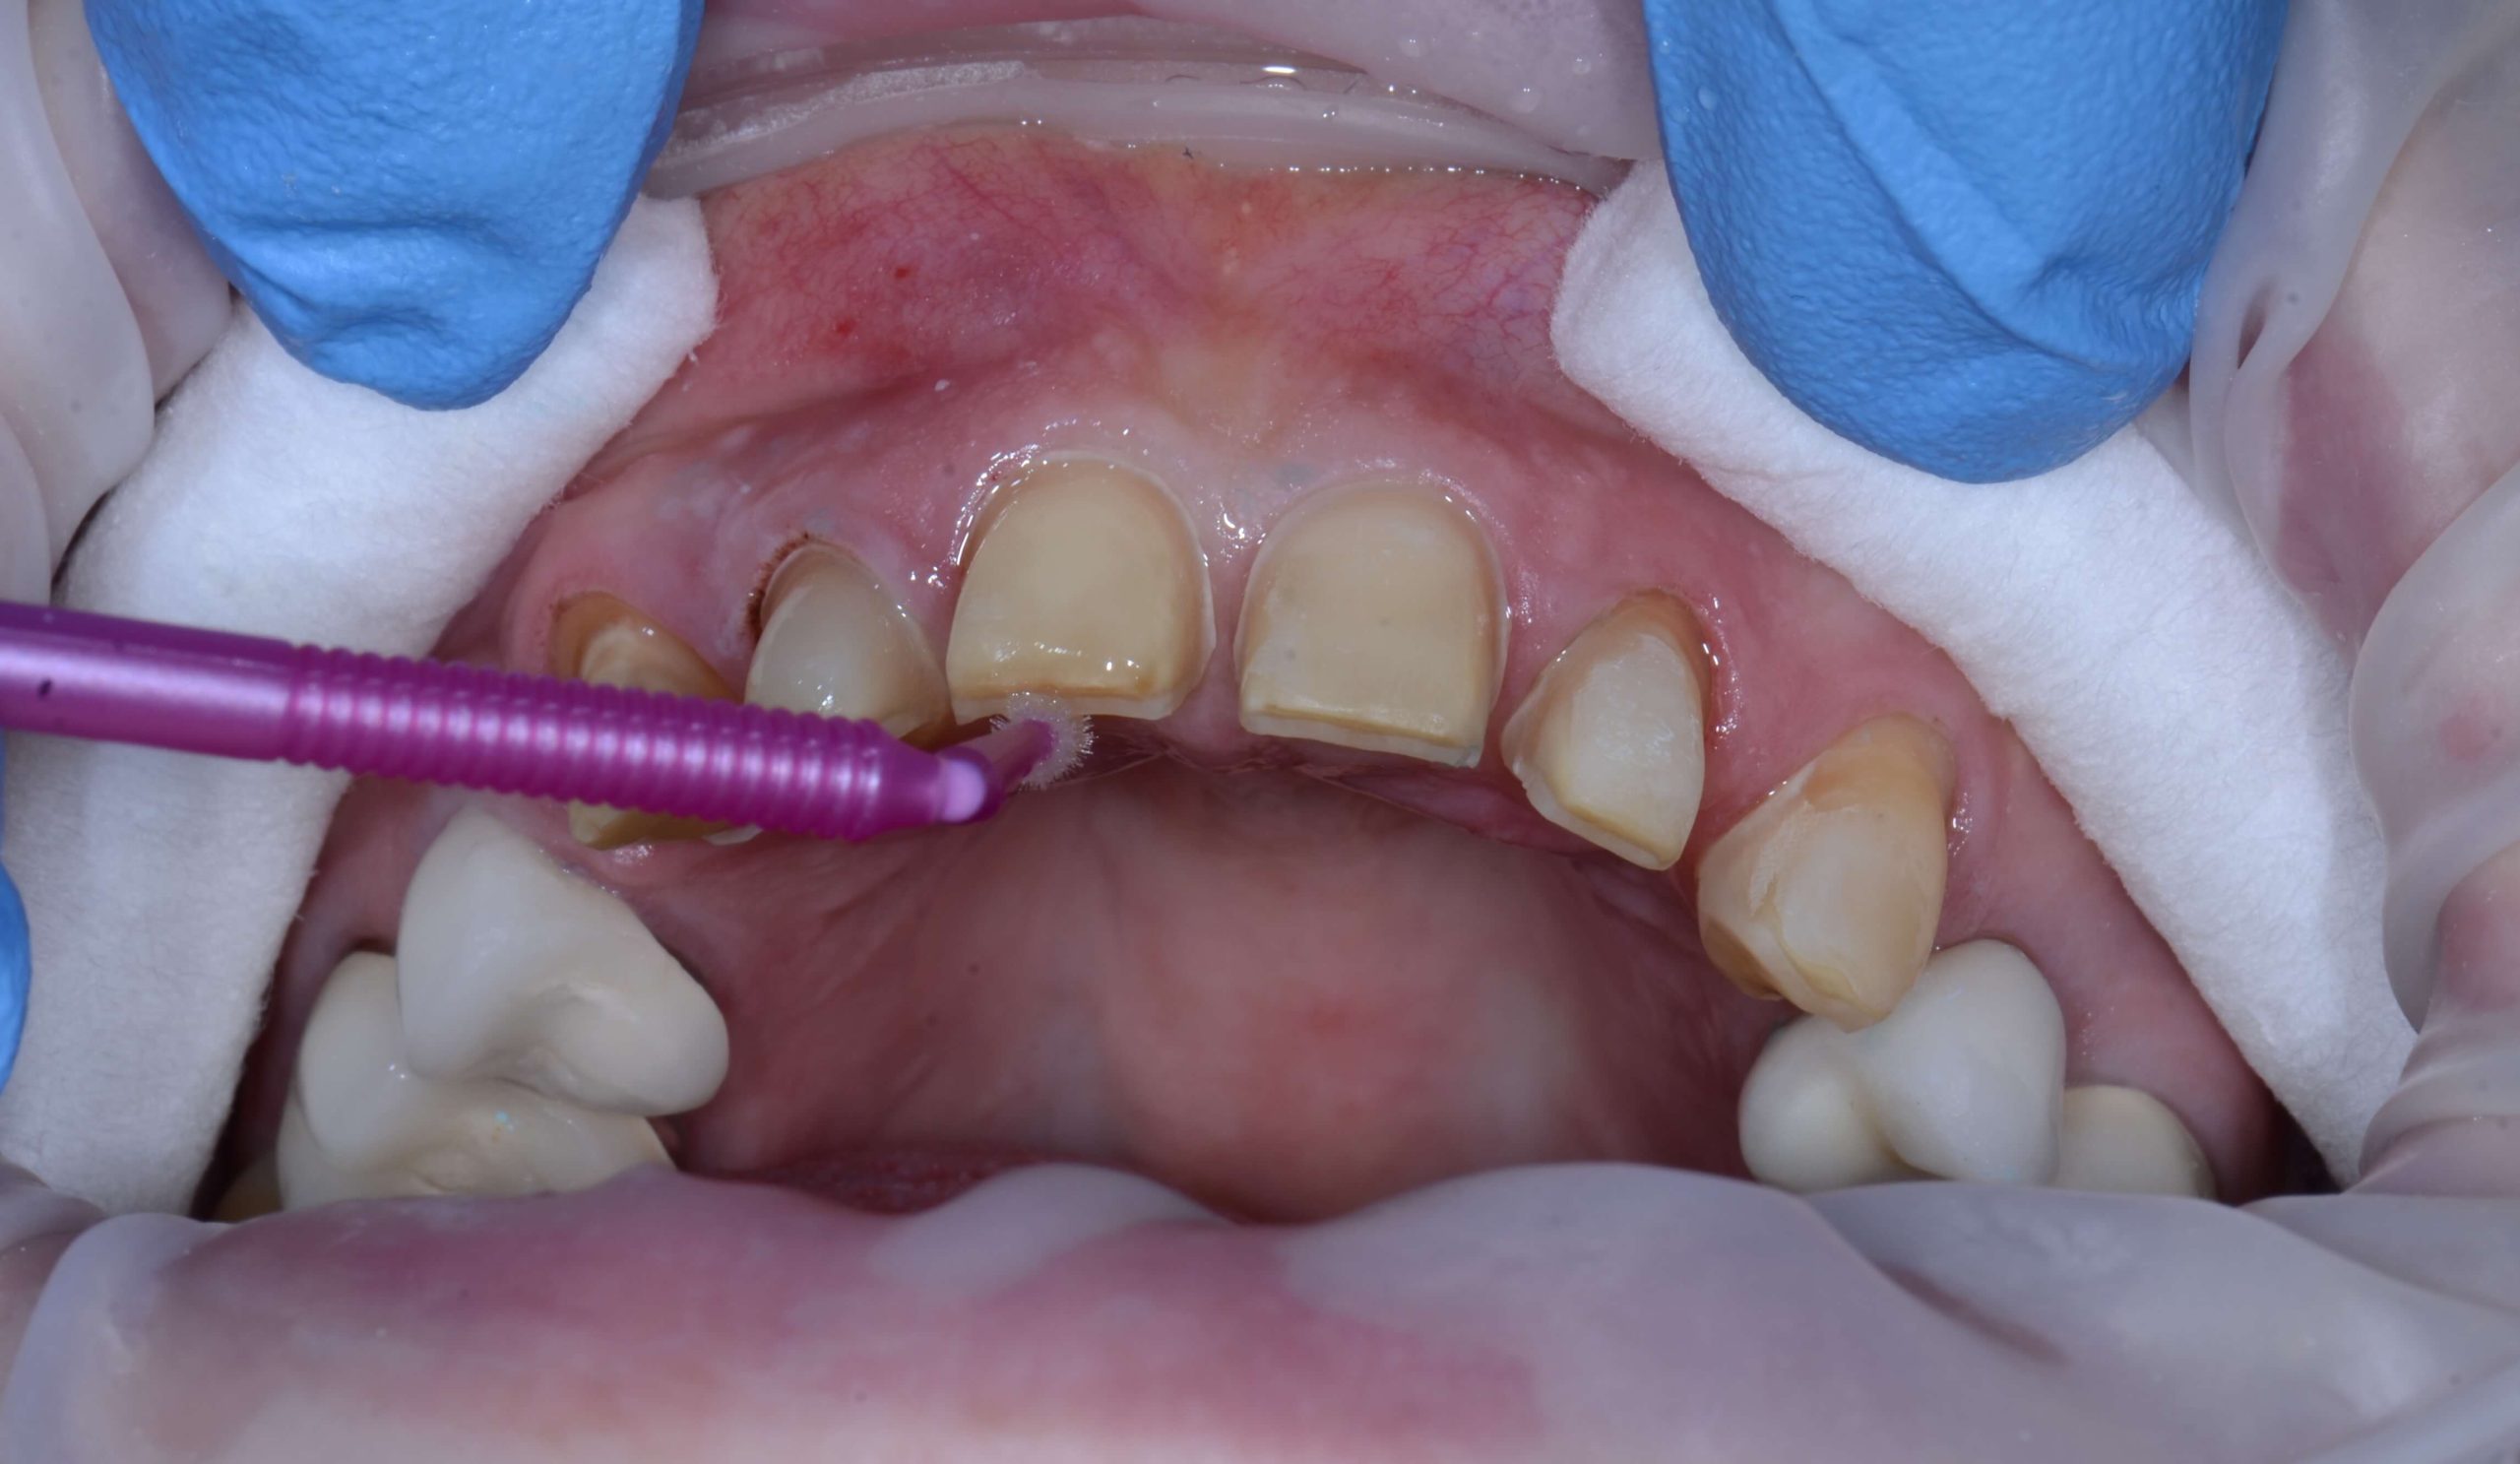
Remaking and adjusting an anterior provisional from the upper right to the upper left canine (for the second time) is a horror story in the making. Before you allow that narrative to take over and call the lab to have them rush the case back, remember to rely on your intuition and technical expertise.

You may not be able to call the lab because you haven’t taken final impressions. Either way, let the provisionals tell you what the flaw in the design is, rather than believe you can run the solution show.

A good first place to look and listen for answers is the occlusion. For example, if the patient reports that they wake up with headaches after you’ve placed the provisionals, you would want to look closely at envelope of fucntion. Is the patient heavy on the centrals and laterals? If so, you can begin the process of adjusting.

Methods of the Dental Detective

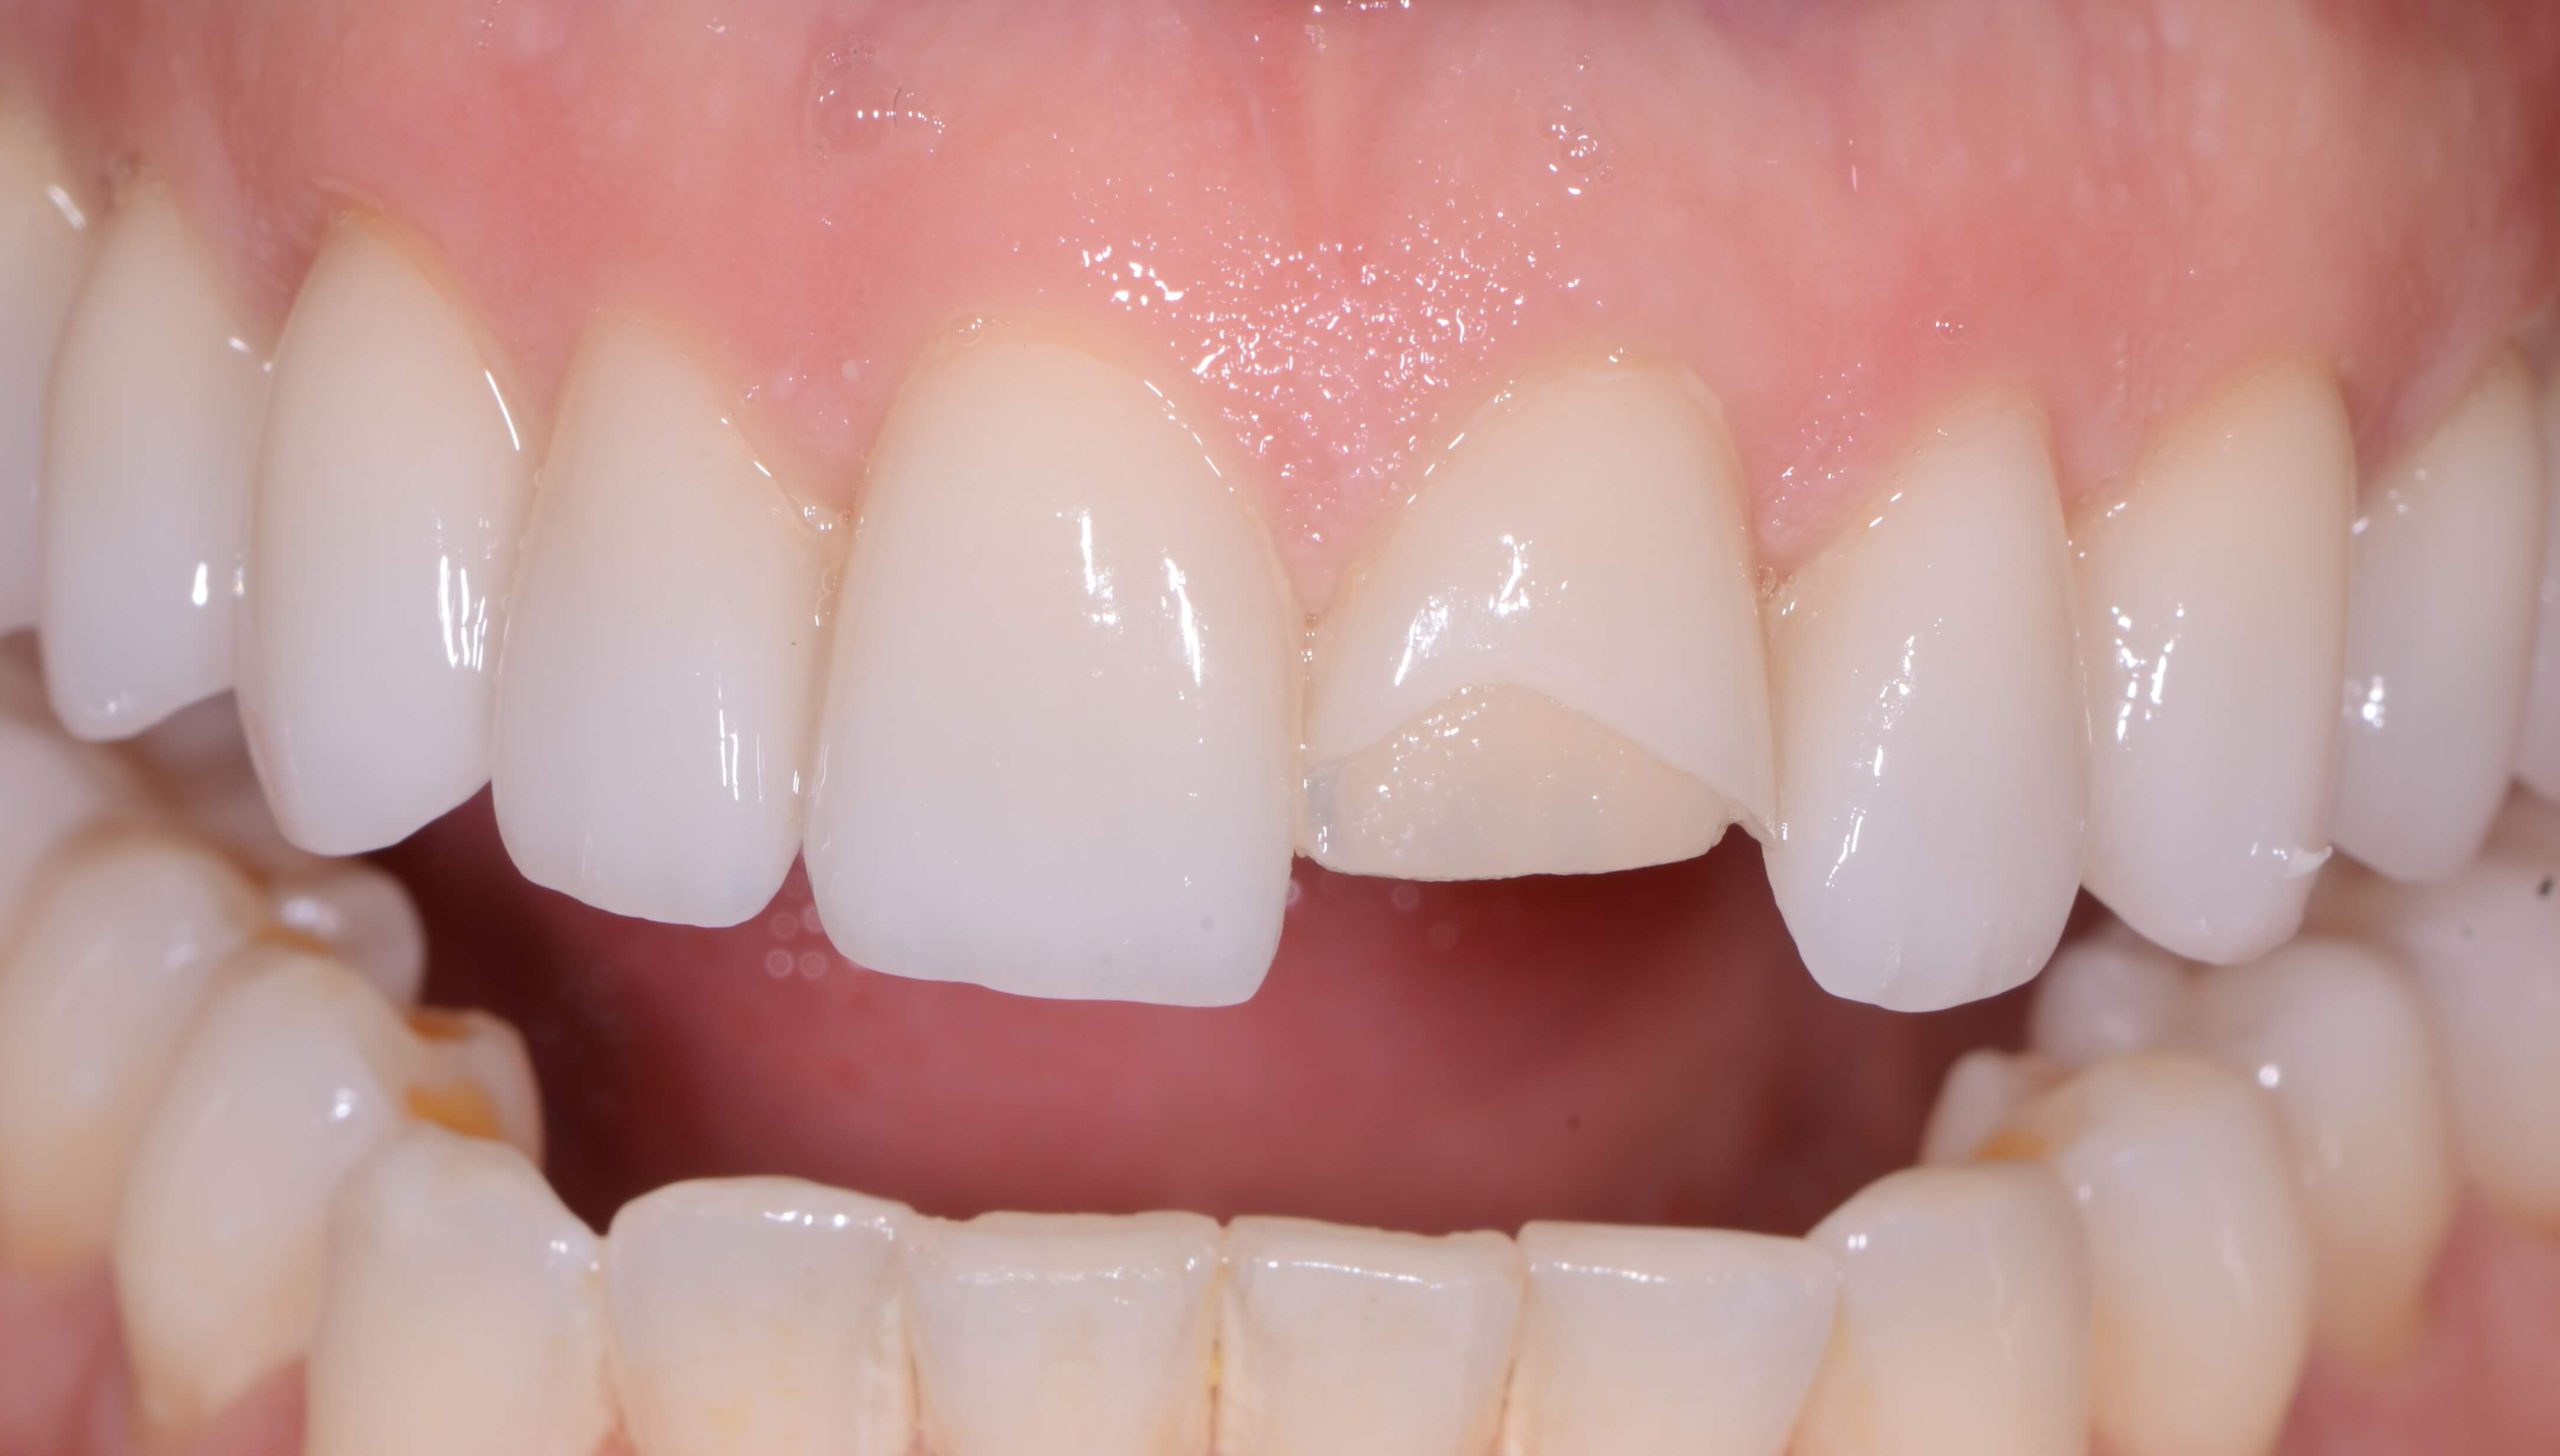
As you examine the issue, you may find other clues, such as that the patient is catching on the incisal edge in their return stroke from protrusive. You continue to adjust, beveling edges for a smoother transition. You leave the guidance shared between the canines and centrals, keep it smooth, but even this doesn’t stop the patient from breaking the provisional.

If you’ve ever seen or read a good detective story, you know this isn’t the time to quit. When things seem most opaque, the detective is usually at a breaking point where the parts might finally start to fit together. Once they do this, the flood gates open and they rush toward the explanation.

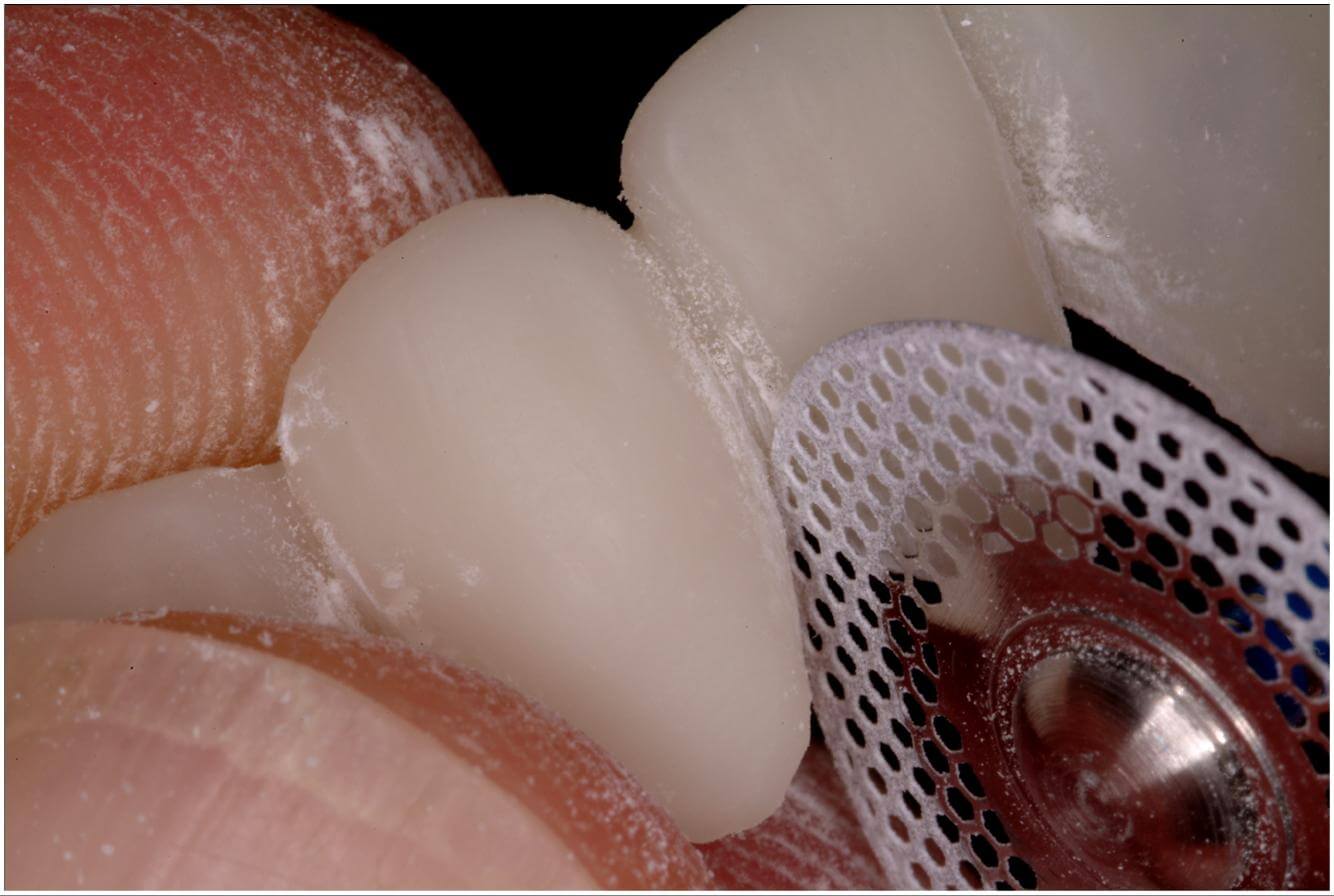
You will reach this point while adjusting again. In response to what you’ve learned, you begin to shallow the patient’s guidance and share protrusive with the premolars. You decide to shorten lower anteriors and increase overjet by proclining the restoration. Here, you’ve come to the solution. You need to work it out on an articulator perhaps and then go back to the mouth.

The main lesson is that we have the most to learn from cases that don’t go perfectly. Plus, it would get pretty boring if there were no dental mysteries left to solve …

Related Course

Masters’ Week

DATE: June 2 2025 @ 8:00 am - June 5 2025 @ 2:00 pm

Location: The Pankey Institute

CE HOURS: 27

Dentist Tuition: $ 8500

Single Occupancy with Ensuite Private Bath (per night): $ 345

Master Your Skills Masters’ Week is a unique learning experience each and every year where we bring together a group of talented speakers to share on a range of topics….

Learn More>

About Author

User Image
Lee Ann Brady DMD

Dr. Lee Ann Brady is passionate about dentistry, her family and making a difference. She is a general dentist and owns a practice in Glendale, AZ limited to restorative dentistry. Lee’s passion for dental education began as a CE junkie herself, pursuing lots of advanced continuing education focused on Restorative and Occlusion. In 2005, she became a full time resident faculty member for The Pankey Institute, and was promoted to Clinical Director in 2006. Lee joined Spear Education as Executive VP of Education in the fall of 2008 to teach and coordinate the educational curriculum. In June of 2011, she left Spear Education, founded leeannbrady.com and joined the dental practice she now owns as an associate. Today, she teaches at dental meetings and study clubs both nationally and internationally, continues to write for dental journals and her website, sits on the editorial board of the Journal of Cosmetic Dentistry, Inside Dentistry and DentalTown Magazines and is the Director of Education for The Pankey Institute.

FIND A PANKEY DENTIST OR TECHNICIAN

I AM A
I AM INTERESTED IN

VIEW COURSE CALENDAR

When Ceramic Debonds: Part 2

September 6, 2017 Lee Ann Brady DMD

Click Here for When Ceramic Debonds: Part 1

A Methodical Process for Examining the Frustrating Reasons Behind Why

One of the most disheartening and emotionally upsetting situations is when a ceramic restoration debonds. Our ability to act constructively in the moment is key to our future case success.

In Part 1 of this series, I explained why it’s important to acknowledge your frustration without letting it control you. I also outlined the beginning of a methodical thought process that will help you figure out why ceramic debonds.

The following steps assume you’ve already looked at the resin and determined if the ceramic was prepared, cleaned, or conditioned properly.

Completing Your Investigative Process When Ceramic Debonds

You have a different set of explanations for what happened if all of the resin cement is on the ceramic and the tooth is clean.

Clean the tooth thoroughly to remove all trace of the temporary cement. The issue may have occurred when the enamel and dentin were etched, regardless of whether you used a total etch or a self etch technique.

Next, ask yourself about the amount of enamel you have versus the amount of dentin. This involves taking a second look at the prep, because secondary dentin can be quite problematic when bonding.

Another area you may need to reconsider is your technique for dentin adhesive. Did you accurately follow the steps? Could poor isolation have led to a contaminated tooth during the process?

Lastly, sometimes there is some resin on the tooth and some on the ceramic. In this case when resin is in both places, you can benefit from rethinking the occlusal forces on the tooth and the functional design. Your patient may have higher functional risk or you might have lacked complete precision while adjusting the final occlusion. A good clue that you’ll find resin on the tooth and the ceramic is if it fails under load.

You can better target your problem solving and decrease the risk of the same technical issue recurring in the future by identifying where the resin is located. Follow the thought process in this series and you’re well on your way to smoother cases.

How do you respond when ceramic debonds? Please let us know your thoughts in the comments!

Related Course

The Pankey Administrative Team: Inspiring Front Office Excellence

DATE: February 6 2025 @ 8:00 am - February 7 2025 @ 2:00 pm

Location: The Pankey Institute

CE HOURS: 16

Regular Tuition: $ 2150

Single Occupancy Room with Ensuite Bath (Per Night): $ 345

The Pankey Administrative Team: Inspiring front office excellence Front office systems for a Pankey-trained dentist hold very specific differences compared to a  typical dental office.  Learning how to differentiate your…

Learn More>

About Author

User Image
Lee Ann Brady DMD

Dr. Lee Ann Brady is passionate about dentistry, her family and making a difference. She is a general dentist and owns a practice in Glendale, AZ limited to restorative dentistry. Lee’s passion for dental education began as a CE junkie herself, pursuing lots of advanced continuing education focused on Restorative and Occlusion. In 2005, she became a full time resident faculty member for The Pankey Institute, and was promoted to Clinical Director in 2006. Lee joined Spear Education as Executive VP of Education in the fall of 2008 to teach and coordinate the educational curriculum. In June of 2011, she left Spear Education, founded leeannbrady.com and joined the dental practice she now owns as an associate. Today, she teaches at dental meetings and study clubs both nationally and internationally, continues to write for dental journals and her website, sits on the editorial board of the Journal of Cosmetic Dentistry, Inside Dentistry and DentalTown Magazines and is the Director of Education for The Pankey Institute.

FIND A PANKEY DENTIST OR TECHNICIAN

I AM A
I AM INTERESTED IN

VIEW COURSE CALENDAR

When Ceramic Debonds: Part 1

September 5, 2017 Lee Ann Brady DMD

Methodical Process for Examining the Frustrating Causes

Dentistry is not solely a clinical, emotionless skillset that uses techniques to achieve outcomes. It’s also emotional, fraught with the normal human frustrations of mistakes and complications. One of the situations where I see this most frequently is when a ceramic restoration debonds.

Acknowledging and Embracing Our Emotions When Ceramic Debonds

On an average day at the dental practice, we experience the full range of human emotions: happiness, curiosity, boredom, excitement, frustration, etc. But sometimes, this is interrupted by a situation that becomes far more dramatic.

Ceramic that debonds creates a highly disconcerting scenario. It makes us feel powerless and consequently we find it difficult to resolve the issue with the full spectrum of our scientific learning.

Before we can return to ourselves and work toward a resolution, we have to acknowledge that it’s okay to be human! You cannot outrun trouble and messiness. When ceramic debonds, you’re upset and the patient is upset. The confluence of these factors leads to the struggle of regaining control over your brain’s analytic functions.

Having a plan for these types of situations, a methodical set of steps to take and questions to answer amidst the blinders of upset can help you carry out the task at hand.

Questions to Ask During a Methodical Ceramic Process

There are two initial queries in our method for sleuthing out the cause when ceramic debonds. First, we ask why the ceramic restoration came off and how we can minimize or eliminate the possibility of it occurring again.

We must also then ask: Where is the resin cement?

The process for discovering this involves examining the tooth and the internal surfaces of the ceramic through the lenses of our dental loupes. Attempting to visualize the resin is ineffective compared to scratching the surface using an explorer.

If we’ve completed this test, finding that all of the resin is attached to the tooth and a clean ceramic interface, we proceed to the next step. We must consider the process of bonding to the ceramic and whether or not the ceramic was adequately prepared.

Dental ceramics can have many different preparation requirements depending on the type. They can have different etching times, distinctive percentages of hydrofluoric acid, or can require preparation with air abrasion. Oil secreted from hands, in addition to blood, saliva, die stone, or try in paste, could have contaminated the ceramic. If it wasn’t cleaned properly, the result was marred. One step where problems are more likely is when ceramic is conditioned with silane or Monobond Plus…

You can learn about other causes in the upcoming second installment of Dr. Brady’s ‘Why Ceramic Debonds’ series. How do you feel when you face this problem? Please leave your thoughts in the comments!

Related Course

Functional Esthetic Excellence – Utilizing 100% Digital Workflow

DATE: May 8 2025 @ 8:00 am - May 10 2025 @ 2:00 pm

Location: The Pankey Institute

CE HOURS: 25

Dentist Tuition: $ 3195

Single Occupancy with Ensuite Private Bath (per night): $ 345

Embracing Digital Dentistry This course will introduce each participant to the possibilities of complex case planning utilizing 100% digital workflows. Special emphasis will be placed on understanding how software can…

Learn More>

About Author

User Image
Lee Ann Brady DMD

Dr. Lee Ann Brady is passionate about dentistry, her family and making a difference. She is a general dentist and owns a practice in Glendale, AZ limited to restorative dentistry. Lee’s passion for dental education began as a CE junkie herself, pursuing lots of advanced continuing education focused on Restorative and Occlusion. In 2005, she became a full time resident faculty member for The Pankey Institute, and was promoted to Clinical Director in 2006. Lee joined Spear Education as Executive VP of Education in the fall of 2008 to teach and coordinate the educational curriculum. In June of 2011, she left Spear Education, founded leeannbrady.com and joined the dental practice she now owns as an associate. Today, she teaches at dental meetings and study clubs both nationally and internationally, continues to write for dental journals and her website, sits on the editorial board of the Journal of Cosmetic Dentistry, Inside Dentistry and DentalTown Magazines and is the Director of Education for The Pankey Institute.

FIND A PANKEY DENTIST OR TECHNICIAN

I AM A
I AM INTERESTED IN

VIEW COURSE CALENDAR

6-Handed Bonding

August 22, 2017 Mike Crete DDS

How an Extra Dental Assistant Can Improve Your Protocol for Restorations

Restorations and adhesive dentistry have rapidly advanced over the past few decades. Changes in materials necessitate corresponding changes in protocol. Read on to learn the adjustment that drastically improved Dr. Mike Crete’s bonding process.

30 Years of Significant Advances in Clinical Dentistry

I have been practicing for a little over 30 years and often find myself looking back amazed at how many advances have occurred in clinical dentistry. Dental school requirements were focused on metal restorations that were either: (1) condensed into place (amalgam and gold foil) with “retention form” the key to success, or (2) cemented with the likes of zinc phosphate. Ah, the good ‘ol days of mixing on a cool glass slab!

My favorite general advancement over the years has been the concept of adhesive dentistry.  Not a day goes by in my practice where I don’t either bond a direct composite, bond a crown or two, or place an entire arch of bonded porcelain veneers.

Why 4-Handed Dentistry Fell Short for My Restorations

I must admit when I first started placing bonded restorations I was gun shy and felt like I would never be as adept as I was at carving amalgams or burnishing exquisite gold margins. I fumbled through bonded porcelain and composite like it was the same as metal restorations. I had mastered working with one chairside assistant. I could almost do dentistry blindfolded and 4-handed dentistry made me look great.

After about 3 years of really not liking treatment that involved bonding and finding myself justifying in my head how amalgam and gold were better, I finally had an aha moment when a mentor told me, ”You can’t do something new the old way.” I was a bit puzzled and asked, ”Why not?” My colleague then introduced me to the concept of 6-handed bonding.

6-Handed Dentistry Makes For a Better Bonding Protocol

Every time I do either a single unit or multiple indirect bonded restorations, I utilize both a chairside assistant and a “tray-side” or tertiary dental assistant. The tertiary assistant has the 5th and 6th hands.

The tertiary assistant helps by efficiently preparing the restorations for bonding (cleaning, silane, etch, prime, bond, resin adhesive, etc.) while the chairside assistant helps me keep the teeth isolated, etch the teeth, and place the restorations with precision and a very high level of accuracy. The chairside assistant can be totally focused on me and the patient, while the tertiary assistant prepares and hands me the indirect restorations.

Consider modifying your protocol to include a 3rd pair of hands and make 6-handed bonding part of your daily routine.

What is the most significant change in clinical dentistry you’ve noticed over the years? We’d love to hear from you in the comments!

Related Course

Masters’ Week

DATE: June 2 2025 @ 8:00 am - June 5 2025 @ 2:00 pm

Location: The Pankey Institute

CE HOURS: 27

Dentist Tuition: $ 8500

Single Occupancy with Ensuite Private Bath (per night): $ 345

Master Your Skills Masters’ Week is a unique learning experience each and every year where we bring together a group of talented speakers to share on a range of topics….

Learn More>

About Author

User Image
Mike Crete DDS

Dr. Mike Crete lives and practices in Grand Rapids, MI. He graduated from the University of Michigan dental school over 30 years ago. He has always been an avid learner and dedicated to advanced continuing education., After completing the entire curriculum at The Pankey Institute, Mike returned to join the visiting faculty. Mike is an active member of the Pankey Board of Directors, teaches in essentials one and runs two local Pankey Learning Groups in Grand Rapids.

FIND A PANKEY DENTIST OR TECHNICIAN

I AM A
I AM INTERESTED IN

VIEW COURSE CALENDAR