When Ceramic Debonds: Part 2

September 6, 2017 Lee Ann Brady DMD

Click Here for When Ceramic Debonds: Part 1

A Methodical Process for Examining the Frustrating Reasons Behind Why

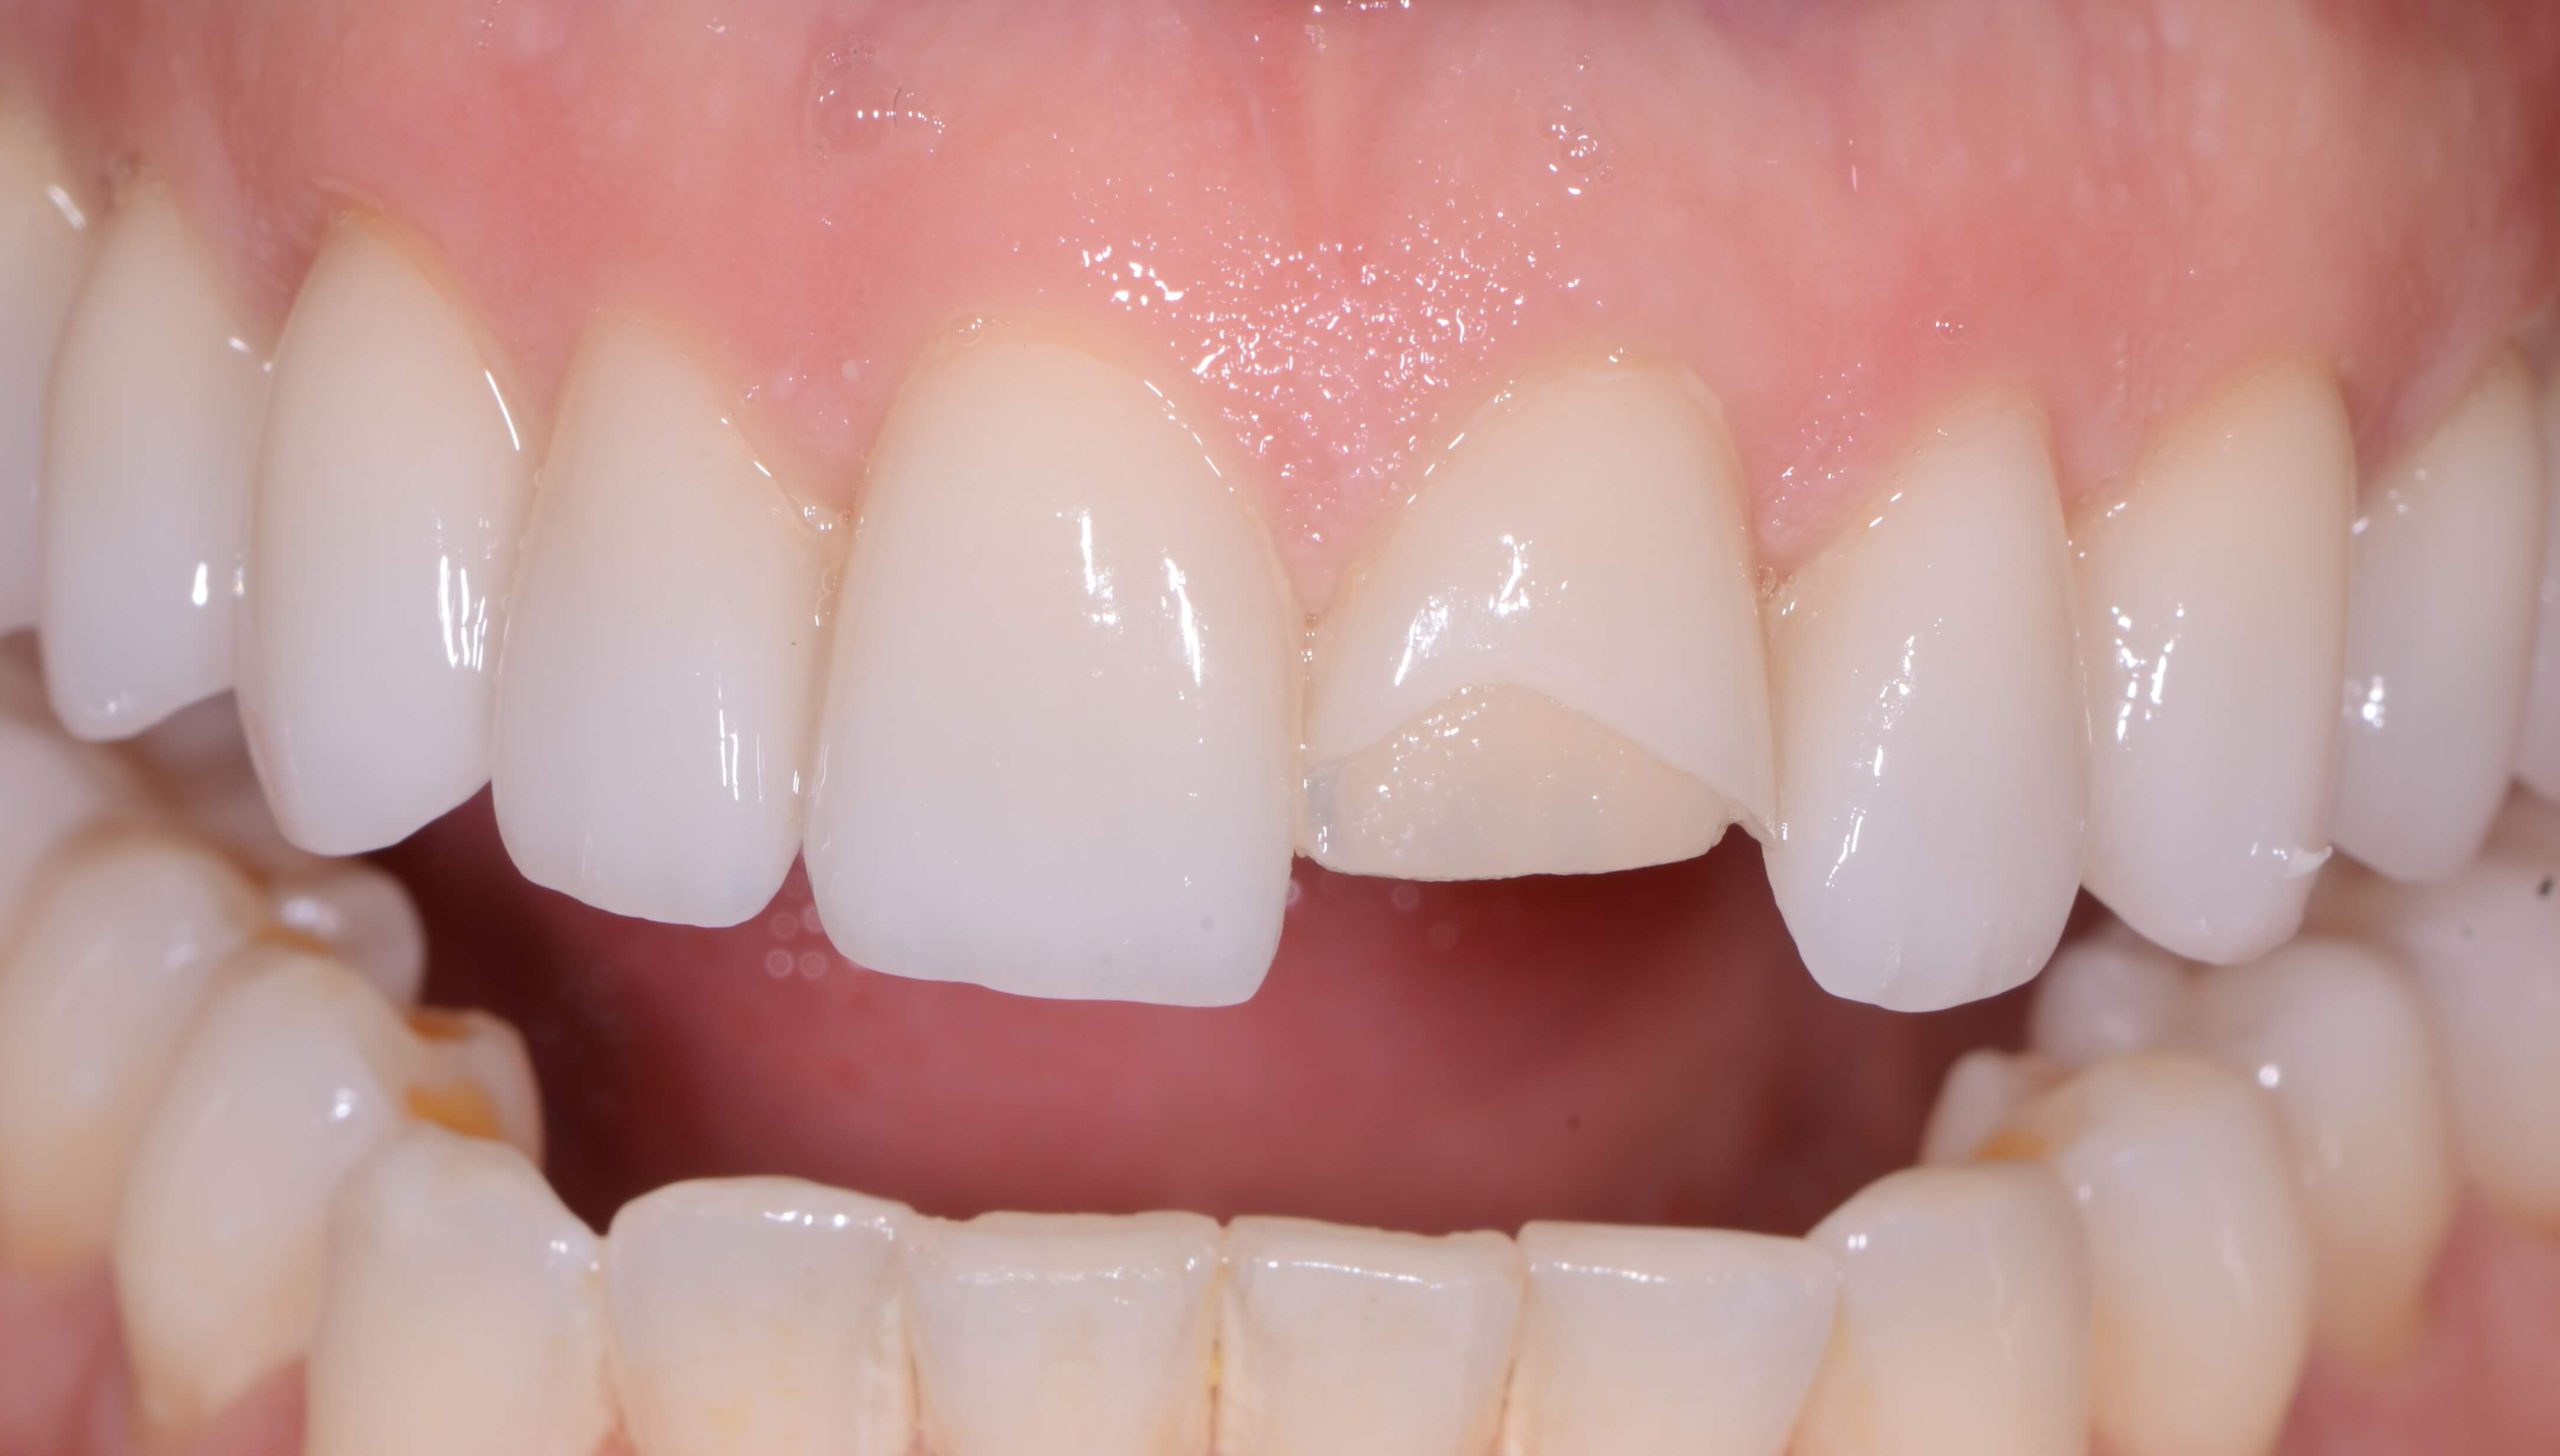
One of the most disheartening and emotionally upsetting situations is when a ceramic restoration debonds. Our ability to act constructively in the moment is key to our future case success.

In Part 1 of this series, I explained why it’s important to acknowledge your frustration without letting it control you. I also outlined the beginning of a methodical thought process that will help you figure out why ceramic debonds.

The following steps assume you’ve already looked at the resin and determined if the ceramic was prepared, cleaned, or conditioned properly.

Completing Your Investigative Process When Ceramic Debonds

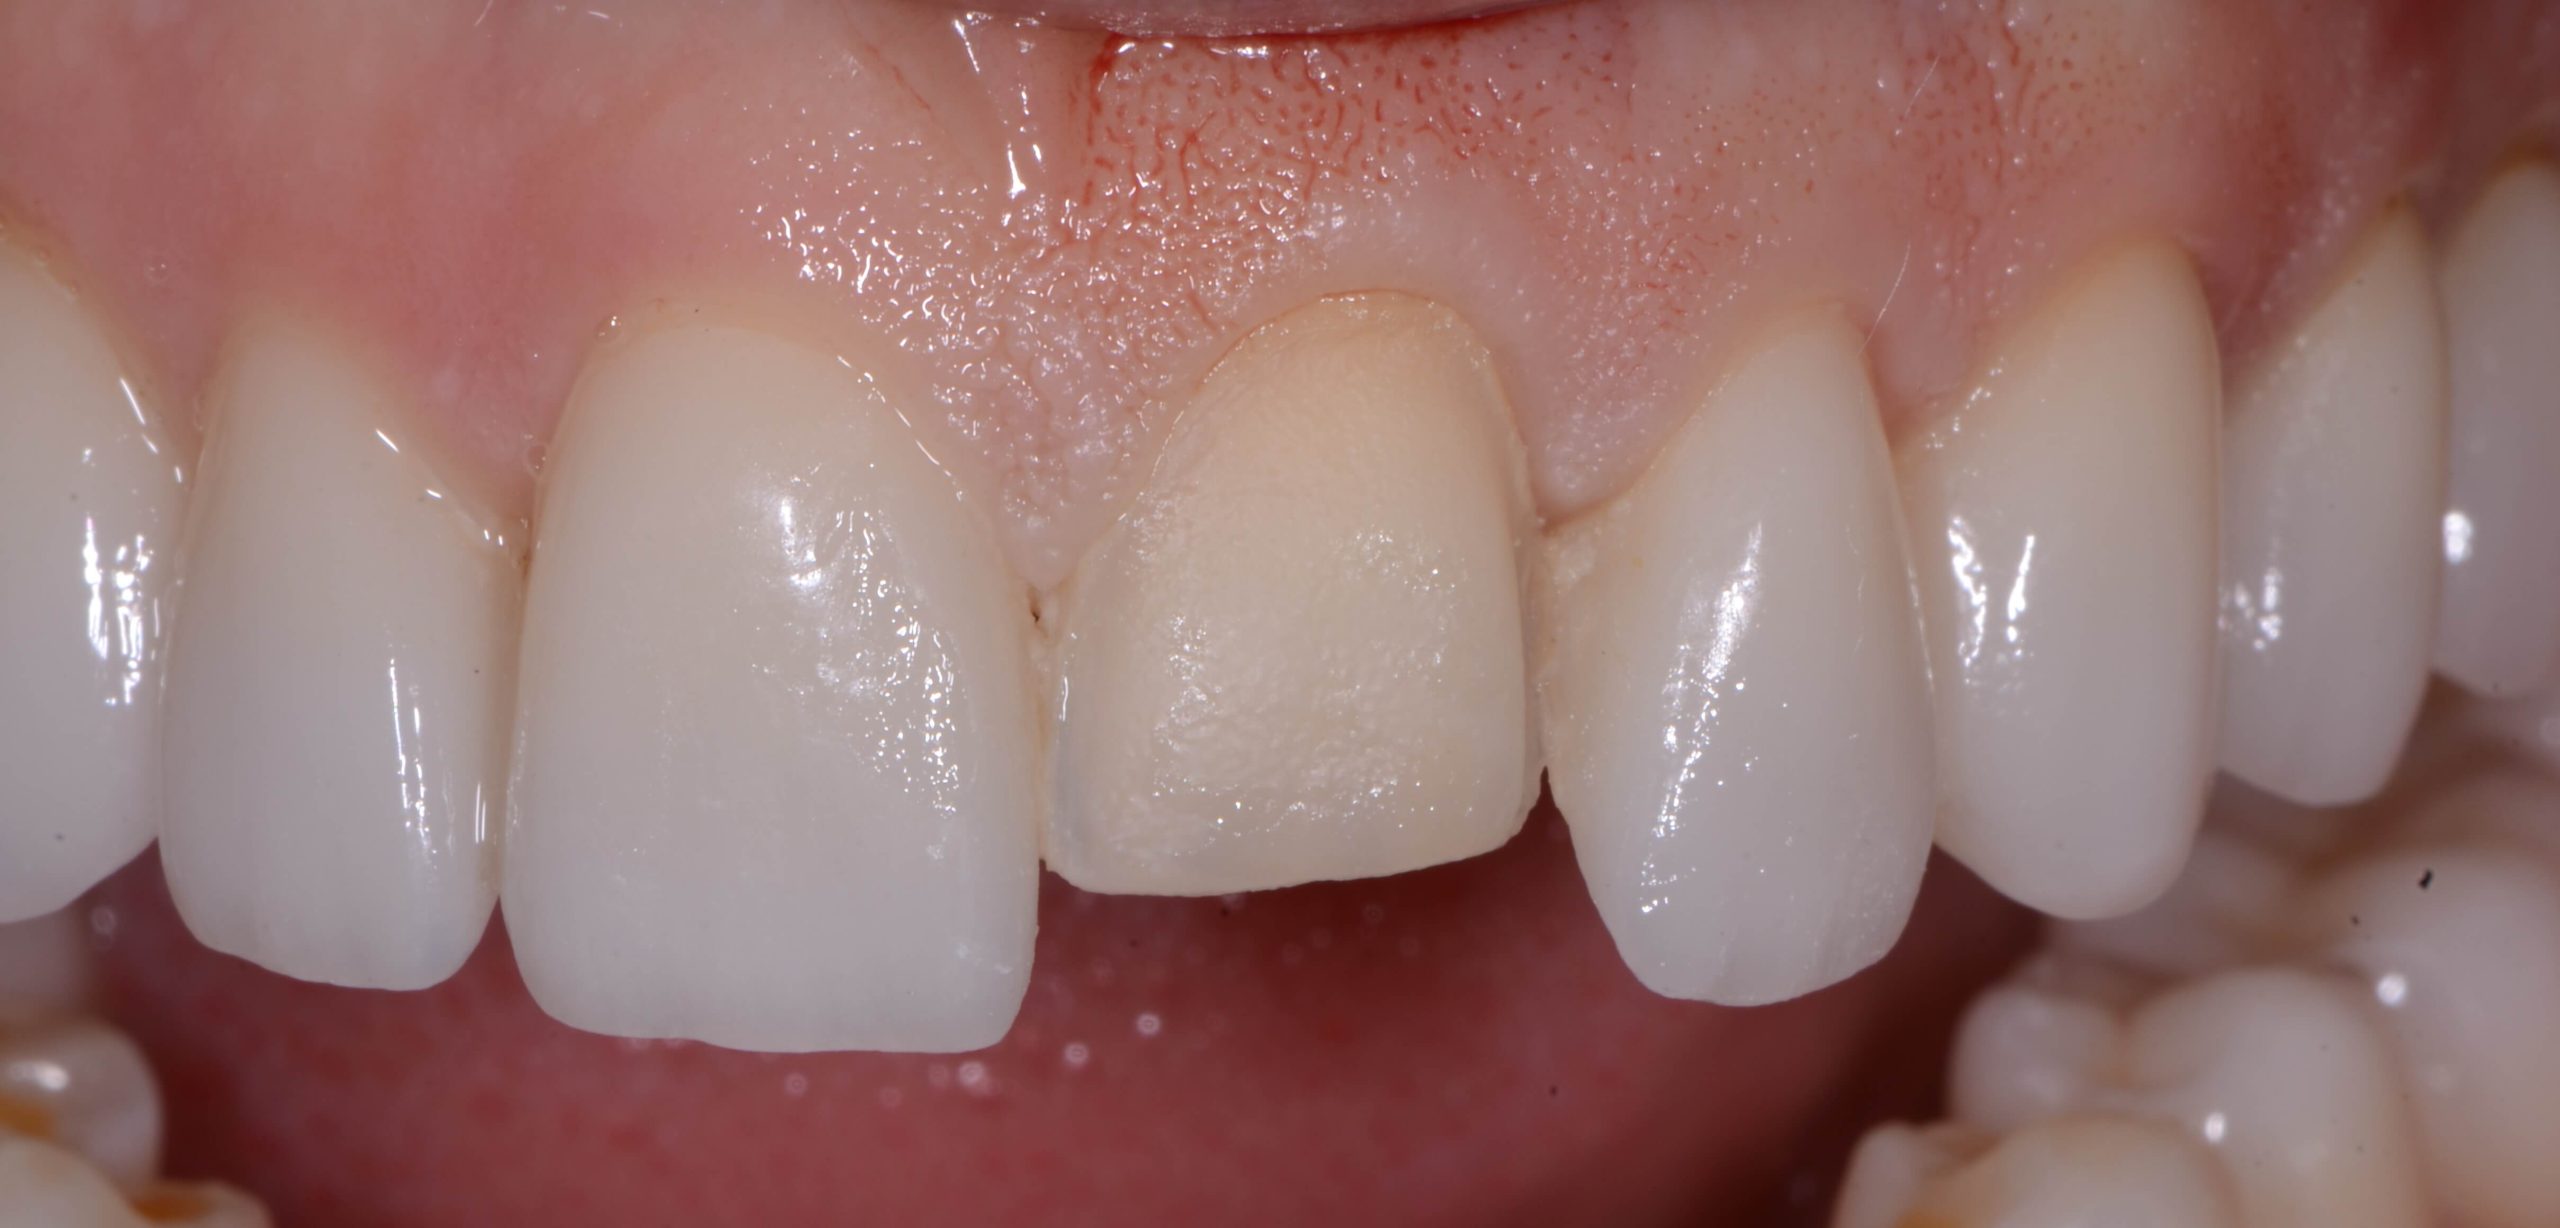
You have a different set of explanations for what happened if all of the resin cement is on the ceramic and the tooth is clean.

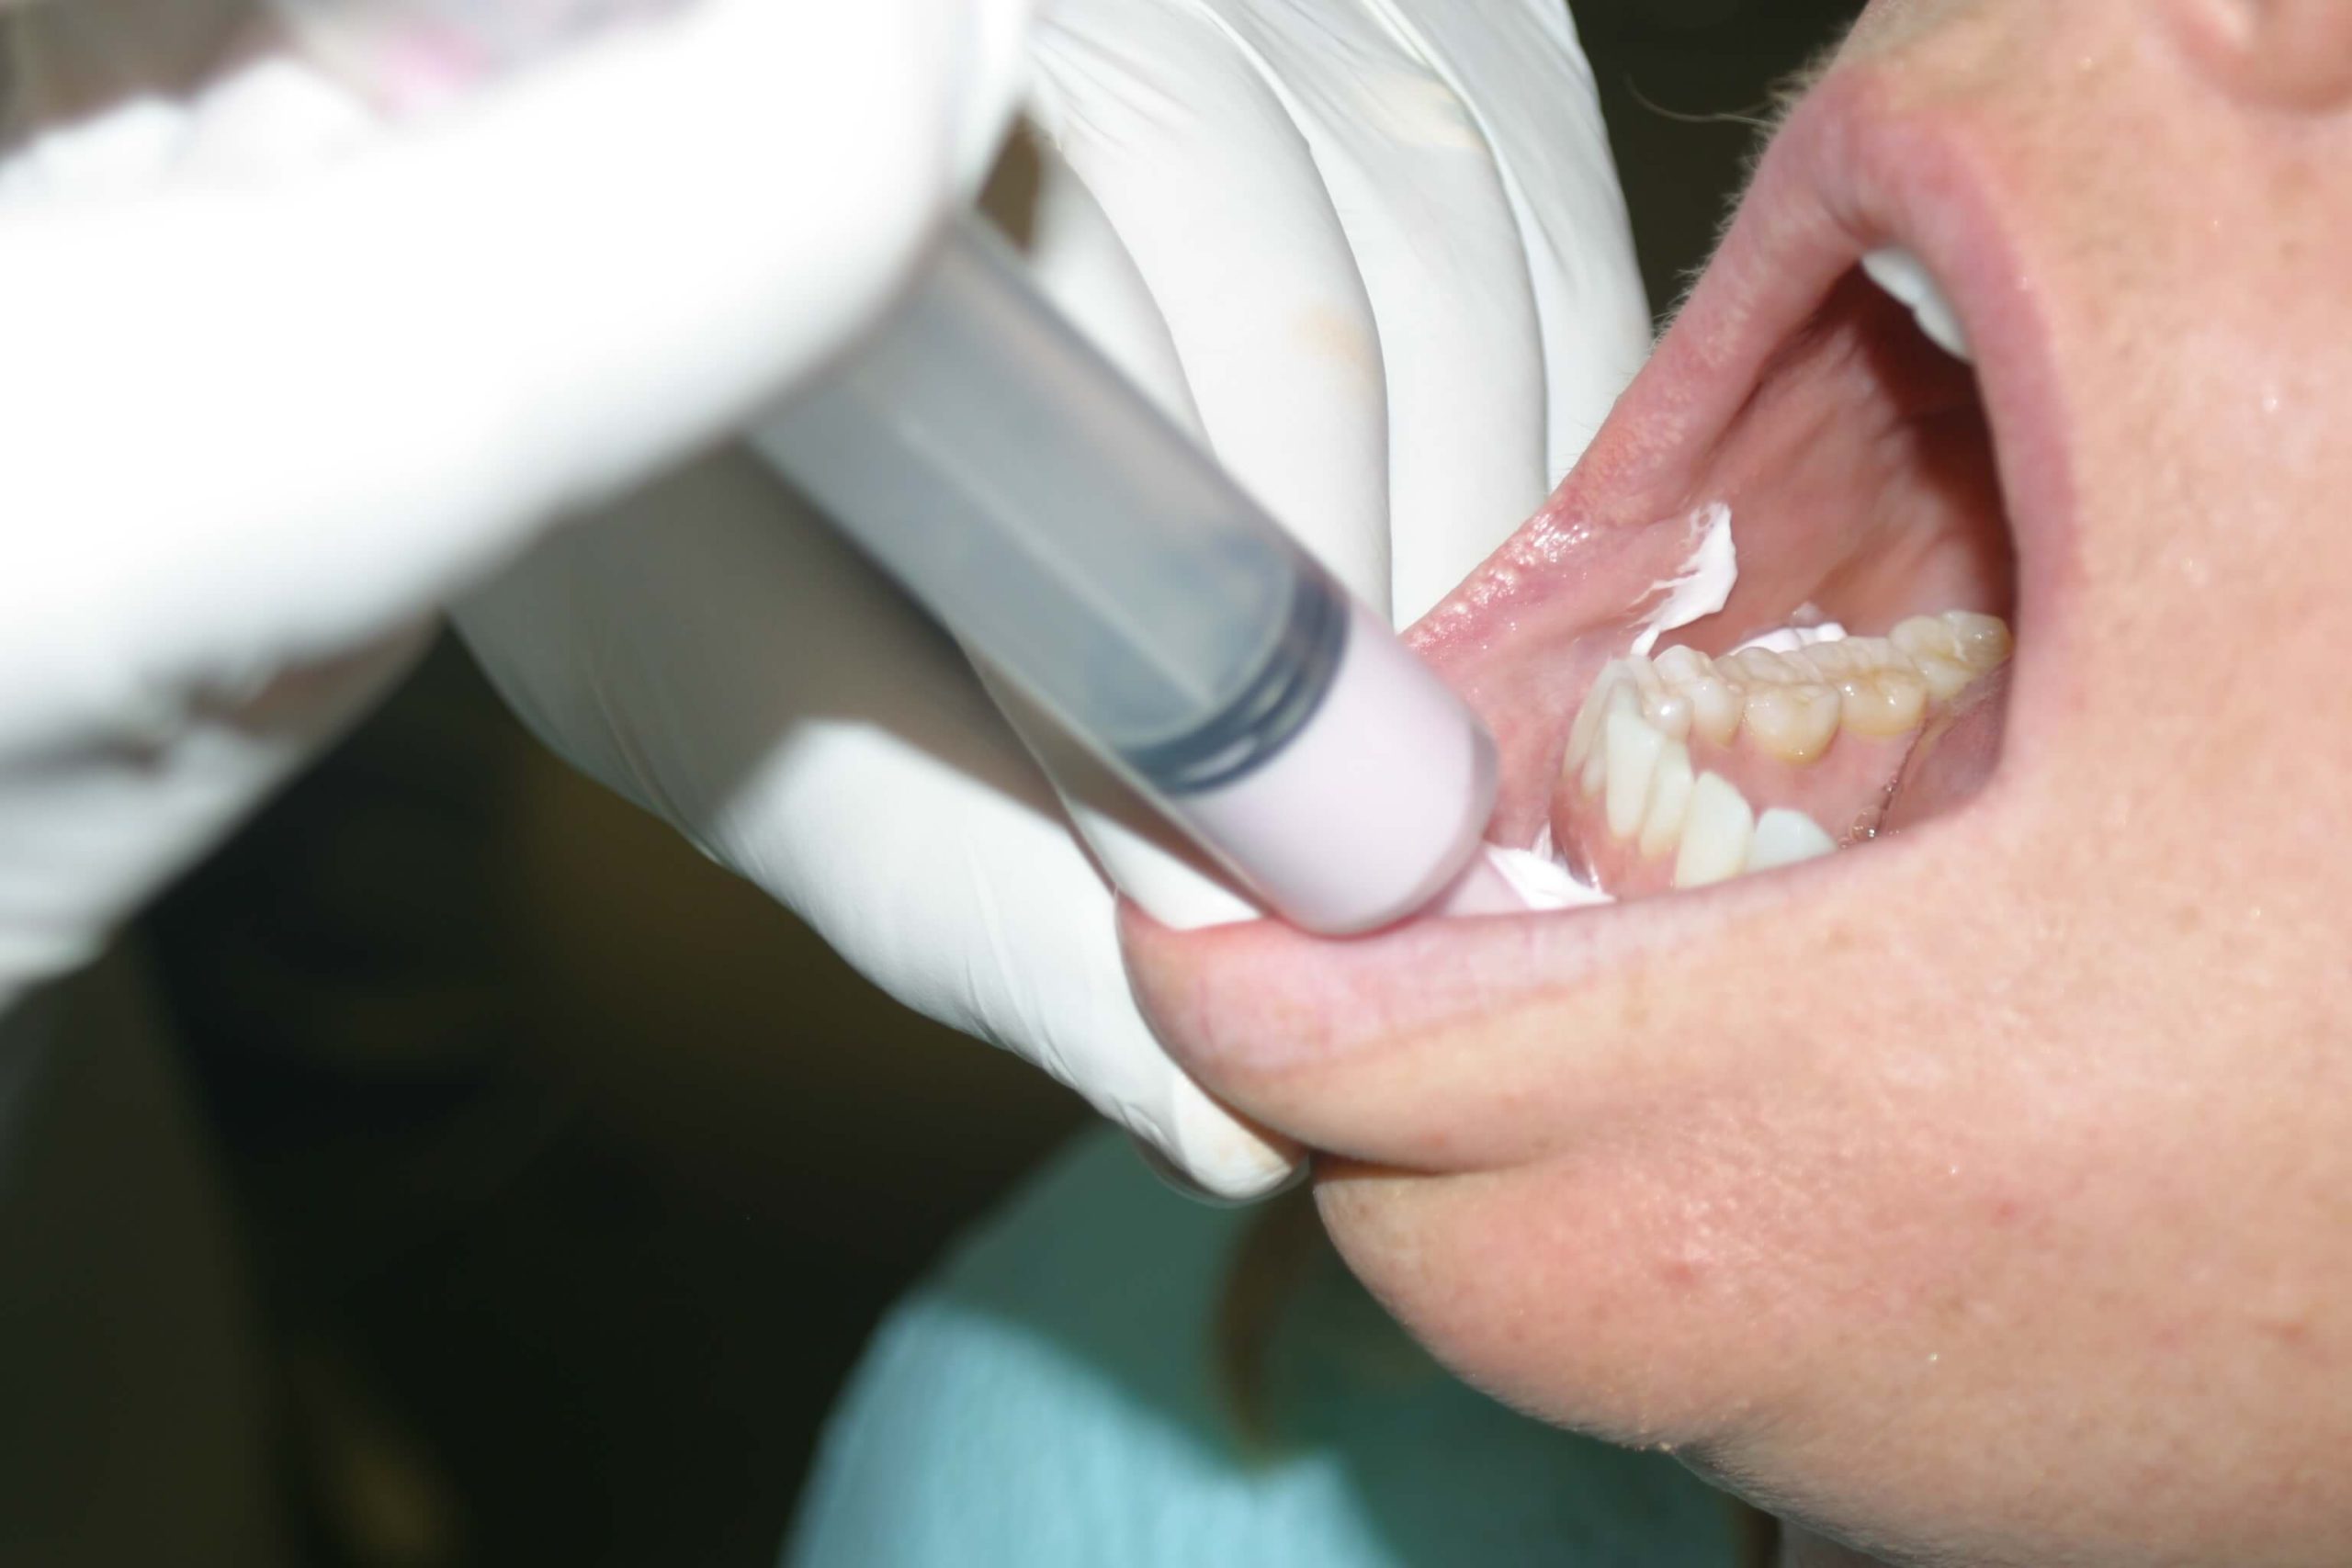
Clean the tooth thoroughly to remove all trace of the temporary cement. The issue may have occurred when the enamel and dentin were etched, regardless of whether you used a total etch or a self etch technique.

Next, ask yourself about the amount of enamel you have versus the amount of dentin. This involves taking a second look at the prep, because secondary dentin can be quite problematic when bonding.

Another area you may need to reconsider is your technique for dentin adhesive. Did you accurately follow the steps? Could poor isolation have led to a contaminated tooth during the process?

Lastly, sometimes there is some resin on the tooth and some on the ceramic. In this case when resin is in both places, you can benefit from rethinking the occlusal forces on the tooth and the functional design. Your patient may have higher functional risk or you might have lacked complete precision while adjusting the final occlusion. A good clue that you’ll find resin on the tooth and the ceramic is if it fails under load.

You can better target your problem solving and decrease the risk of the same technical issue recurring in the future by identifying where the resin is located. Follow the thought process in this series and you’re well on your way to smoother cases.

How do you respond when ceramic debonds? Please let us know your thoughts in the comments!

Related Course

Utilizing Clear Aligner Therapy in a Digital Workflow

DATE: September 26 2024 @ 6:00 pm - September 28 2024 @ 2:00 pm

Location: The Pankey Institute

CE HOURS: 0

Dentist Tuition: $ 1695

Single Occupancy with Ensuite Private Bath (per night): $ 290

Enhance Restorative Outcomes This one-and-a-half-day course is designed for Invisalign providers who want to improve restorative outcomes with clear aligner therapy. The course focuses on the digital workflow for comprehensive…

Learn More>

About Author

User Image
Lee Ann Brady DMD

Dr. Lee Ann Brady is passionate about dentistry, her family and making a difference. She is a general dentist and owns a practice in Glendale, AZ limited to restorative dentistry. Lee’s passion for dental education began as a CE junkie herself, pursuing lots of advanced continuing education focused on Restorative and Occlusion. In 2005, she became a full time resident faculty member for The Pankey Institute, and was promoted to Clinical Director in 2006. Lee joined Spear Education as Executive VP of Education in the fall of 2008 to teach and coordinate the educational curriculum. In June of 2011, she left Spear Education, founded leeannbrady.com and joined the dental practice she now owns as an associate. Today, she teaches at dental meetings and study clubs both nationally and internationally, continues to write for dental journals and her website, sits on the editorial board of the Journal of Cosmetic Dentistry, Inside Dentistry and DentalTown Magazines and is the Director of Education for The Pankey Institute.

FIND A PANKEY DENTIST OR TECHNICIAN

I AM A
I AM INTERESTED IN

VIEW COURSE CALENDAR

When Ceramic Debonds: Part 1

September 5, 2017 Lee Ann Brady DMD

Methodical Process for Examining the Frustrating Causes

Dentistry is not solely a clinical, emotionless skillset that uses techniques to achieve outcomes. It’s also emotional, fraught with the normal human frustrations of mistakes and complications. One of the situations where I see this most frequently is when a ceramic restoration debonds.

Acknowledging and Embracing Our Emotions When Ceramic Debonds

On an average day at the dental practice, we experience the full range of human emotions: happiness, curiosity, boredom, excitement, frustration, etc. But sometimes, this is interrupted by a situation that becomes far more dramatic.

Ceramic that debonds creates a highly disconcerting scenario. It makes us feel powerless and consequently we find it difficult to resolve the issue with the full spectrum of our scientific learning.

Before we can return to ourselves and work toward a resolution, we have to acknowledge that it’s okay to be human! You cannot outrun trouble and messiness. When ceramic debonds, you’re upset and the patient is upset. The confluence of these factors leads to the struggle of regaining control over your brain’s analytic functions.

Having a plan for these types of situations, a methodical set of steps to take and questions to answer amidst the blinders of upset can help you carry out the task at hand.

Questions to Ask During a Methodical Ceramic Process

There are two initial queries in our method for sleuthing out the cause when ceramic debonds. First, we ask why the ceramic restoration came off and how we can minimize or eliminate the possibility of it occurring again.

We must also then ask: Where is the resin cement?

The process for discovering this involves examining the tooth and the internal surfaces of the ceramic through the lenses of our dental loupes. Attempting to visualize the resin is ineffective compared to scratching the surface using an explorer.

If we’ve completed this test, finding that all of the resin is attached to the tooth and a clean ceramic interface, we proceed to the next step. We must consider the process of bonding to the ceramic and whether or not the ceramic was adequately prepared.

Dental ceramics can have many different preparation requirements depending on the type. They can have different etching times, distinctive percentages of hydrofluoric acid, or can require preparation with air abrasion. Oil secreted from hands, in addition to blood, saliva, die stone, or try in paste, could have contaminated the ceramic. If it wasn’t cleaned properly, the result was marred. One step where problems are more likely is when ceramic is conditioned with silane or Monobond Plus…

You can learn about other causes in the upcoming second installment of Dr. Brady’s ‘Why Ceramic Debonds’ series. How do you feel when you face this problem? Please leave your thoughts in the comments!

Related Course

Masters’ Week

DATE: June 2 2025 @ 8:00 am - June 5 2025 @ 2:00 pm

Location: The Pankey Institute

CE HOURS: 27

Dentist Tuition: $ 8500

Single Occupancy with Ensuite Private Bath (per night): $ 345

Master Your Skills Masters’ Week is a unique learning experience each and every year where we bring together a group of talented speakers to share on a range of topics….

Learn More>

About Author

User Image
Lee Ann Brady DMD

Dr. Lee Ann Brady is passionate about dentistry, her family and making a difference. She is a general dentist and owns a practice in Glendale, AZ limited to restorative dentistry. Lee’s passion for dental education began as a CE junkie herself, pursuing lots of advanced continuing education focused on Restorative and Occlusion. In 2005, she became a full time resident faculty member for The Pankey Institute, and was promoted to Clinical Director in 2006. Lee joined Spear Education as Executive VP of Education in the fall of 2008 to teach and coordinate the educational curriculum. In June of 2011, she left Spear Education, founded leeannbrady.com and joined the dental practice she now owns as an associate. Today, she teaches at dental meetings and study clubs both nationally and internationally, continues to write for dental journals and her website, sits on the editorial board of the Journal of Cosmetic Dentistry, Inside Dentistry and DentalTown Magazines and is the Director of Education for The Pankey Institute.

FIND A PANKEY DENTIST OR TECHNICIAN

I AM A
I AM INTERESTED IN

VIEW COURSE CALENDAR

Exquisite Alginate Impressions

August 26, 2017 Jeff Baggett DDS

Improving the quality of alginate impressions for diagnostic models requires a fine-tuned technique based on specific materials. These materials are used in conjunction with clever steps that lead to a minimization of voids and bubbles.

Dr. Baggett explains his exact procedure for achieving drastically improved alginate impressions. With these recommendations, you’ll find your confidence and efficiency soaring. Impressions are one part of the treatment puzzle that must be as precise as possible to avoid problems down the road.

How to Improve Alginate Impressions for Diagnostic Models

At my practice, we still use alginate impressions as our main impression material for diagnostic models. I generally take them. A very helpful tip to improve the quality of your impressions is to use a 35 ml monoject plastic syringe (from your local dental supplier) and Ivoclar Accudent XD Pre-Sure Tip applicators (Ivoclar Reorder number 67891 Soft Flex Tips).  

By placing the flexible tips on the end of the 35 ml plastic syringes, you are able to squirt excess alginate loaded into the syringe onto the teeth at a 90 degree angle starting at the distals of the second molars. You can do this instead of wiping alginate on the teeth with your fingers before you seat the alginate loaded tray.

This technique results in a lot less bubbles and minimizes the chance for voids distal to the most posterior teeth. The flexible tips are autoclavable, the monoject syringes can be cold sterilized, and petroleum jelly can be applied to the rubber plungers so they can be used again.   

This tip – combined with the use of 1-inch medical tape along the posteriors of our maxillary trays as a post-dam seal – has improved the impressions taken at my practice tremendously.

What aspect of impressions do you find the most challenging and why? We’d love to hear from you in the comments!


Related Course

Masters’ Week

DATE: June 3 2024 @ 8:00 am - June 6 2024 @ 2:00 pm

Location: The Pankey Institute

CE HOURS: 27

Regular Tuition: $ 8500

Night with private bath: $ 290

Master Your Skills Masters’ Week is a unique learning experience each and every year where we bring together a group of talented speakers to share on a range of topics….

Learn More>

About Author

User Image
Jeff Baggett DDS

Dr. Jeff D. Baggett attended Oklahoma State University where he received his undergraduate degree and attended professional school at the University of Oklahoma College of Dentistry. After obtaining his Doctorate of Dental Surgery degree, Dr. Baggett received postgraduate training at the L.D. Pankey Institute, recognized worldwide for its excellence in advanced technical dentistry. He was accredited as a Pankey Scholar. Practicing for over 30 years, Dr. Baggett is also a visiting faculty member at the L.D. Pankey Institute. He lectures various dental study clubs and dental meetings. He is a guest speaker of the Victim's Impact Panel Against Drunk Driving. A published author, Dr. Baggett wrote sections in the book Photoshop CS3 and PowerPoint 2007 for the Dental Professional. Dr. Baggett is also the team dentist for the Oklahoma City Thunder with his partner, Dr. Lembke. An esteemed member of the dental community, Dr. Baggett is a member of many professional organizations including the American Dental Association, the Oklahoma Dental Association, the Oklahoma County Dental Society, the Southwest Academy of Restorative Dentistry, the McGarry Study Club, the University Oklahoma College of Dentistry Alumni Association and the Oklahoma State University Alumni Association. He also served on the Board of Directors of the Oklahoma County Dental Society.

FIND A PANKEY DENTIST OR TECHNICIAN

I AM A
I AM INTERESTED IN

VIEW COURSE CALENDAR

Digital Bite Splints: Part 2

August 24, 2017 Daren Becker DMD

(Link to Digital Bite Splints: Part 1)

If you’re hesitant to start testing out digital bite splints in your practice, read on to learn why one dentist prefers them for improved efficiency and accuracy.

In Part 1 of my thoughts on this topic, I explained the features I love when working with a lab to create digital bite splints. These bite splints have an incredible fit and allow for customizable retention. Below, I round out the rest of my perspective on why they’re a great option for many dentists.

Occlusal Schemes and Adjusting the Digital Bite Splint Design

I’ve played with different occlusal schemes for digital bite splints. I have utilized:

1. A universal flat plane appliance (upper or lower).

2. An anatomic retainer-type appliance we designed to have a little more detail.

3. One anterior repositioning appliance. It was created for a patient who had some recent trauma. We were trying to keep them from seating all the way for a short period of time.

The idea is that you can design the occlusal scheme any way you want. After we send the scan in and the lab does the initial design, they can send us back screenshots that show us what the design is.

When we look at those screenshots, we can make comments on them. If there’s a lot of change – if we want to shallow the guidance, steepen the guidance, or make it thicker/thinner – we can actually go online live with the lab as they enact the changes. We can watch it happen in real time.

Increasing Efficiency by Reducing Chair, Lab, and Adjustments Time

Digital bite splints are a nice, new way to do things. Personally, I think we’re getting a better result. It’s certainly saving us a ton of time, both in terms of lab time (model work time) and chair time because the patient doesn’t need a lot of reline time. Of course, keeping the nasty acrylic out of the mouth is another significant benefit.

You don’t have to spend a lot of time adjusting. The occlusal adjustments are nominal. If we get the records right with the scan, there is very little in terms of adjustments. In fact, that might be the downfall for some of us because we lose a portion of time for the patient to experience things. Sometimes, I’ll spend more time adjusting than I need to. I ensure the patient is engaged and experiencing what an even bite might feel like relative to their natural occlusion. But, in this case, I wouldn’t have to devote that time if I didn’t need to.

Digital bite splints are also really dense. Breakage is going to be a minor problem. They’re going to hold up and last a long time.

What technology are you considering using in your practice? Please leave your thoughts in the comments!

Related Course

E2: Occlusal Appliances & Equilibration

DATE: July 21 2024 @ 8:00 am - July 25 2024 @ 2:30 pm

Location: The Pankey Institute

CE HOURS: 44

Dentist Tuition: $ 7200

night with private bath: $ 290

What if you had one tool that increased comprehensive case acceptance, managed patients with moderate to high functional risk, verified centric relation and treated signs and symptoms of TMD? Appliance…

Learn More>

About Author

User Image
Daren Becker DMD

Dr. Becker earned his Bachelors of Science Degree in Computer Science from American International College and Doctor of Dental Medicine from the University of Florida College of Dentistry. He practices full time in Atlanta, GA with an emphasis on comprehensive restorative, implant and aesthetic dentistry. Daren began his advanced studies at the Pankey Institute in 1998 and was invited to be a guest facilitator in 2006 and has been on the visiting faculty since 2009. In addition, in 2006 he began spending time facilitating dental students from Medical College of Georgia College of Dentistry at the Ben Massell Clinic (treating indigent patients) as an adjunct clinical faculty. In 2011 he was invited to be a part time faculty in the Graduate Prosthodontics Residency at the Center for Aesthetic and Implant Dentistry at Georgia Health Sciences University, now Georgia Regents University College of Dental Medicine (formerly Medical College of Georgia). Dr. Becker has been involved in organized dentistry and has chaired and/or served on numerous state and local committees. Currently he is a delegate to the Georgia Dental Association. He has lectured at the Academy of General Dentistry annual meeting, is a regular presenter at ITI study clubs as well as numerous other study clubs. He is a regular contributor at Red Sky Dental Seminars.

FIND A PANKEY DENTIST OR TECHNICIAN

I AM A
I AM INTERESTED IN

VIEW COURSE CALENDAR

Digital Bite Splints: Part 1

August 23, 2017 Daren Becker DMD

The future of dentistry is here: digital bite splints. I’ve used bite splint therapy in my practice successfully for years. I was comfortable with my preferred traditional process until I learned I could work more efficiently and more accurately with the latest technology.

There is no reason to fear implementation of a digital workflow in your practice. In this two part series, I’m going to lay out the reasons why I’ve chosen to switch to digital bite splints for goals like protecting teeth and restorations, deprogramming muscles, and treating TMD.

They’re the productivity solution you didn’t realize you needed.

Less Effective Splint Fabrication Methods

My past process for fabricating occlusal splints (bite splints) was traditional. It included making records, alginate impressions, facebow, mounting, and several bite records (protrusive and centric). We would design and fabricate with cold cure acrylic that we would make by hand, then adjust and modify as needed.

That process works great, which is why most dentists use it. Alternately, some dentists send them off to the lab and have the same process done, possibly in a cured acrylic. But the outstanding process we have transitioned to in my practice is a completely digital designed and fabricated bite splint.

Why I Love the Digital Bite Splint Fabrication Process

The first step for a digital bite splint is to do an intraoral scan of the patient’s dentition. Any scanner can be used. We then send the scans to a restorative lab, where a software package specifically made for appliance design is utilized. The lab designs the appliances to our specifications and then they are milled out of a solid block of acrylic. This leads to an amazingly dense result that polishes unbelievably well.

The fit is incredible because we can get such an accurate scan with no distortion. With an impression, we usually have distortion of the alginate, distortion of the stone, or distortion of the acrylic as it sets, which is why we have to reline them. I have only had to reline two CAD/CAM designed and milled splints since we’ve been doing them. These bite splints are easy to adjust and it’s easy to read the dots on them. They just drop right in with almost no adjustment needed.

You can also dial in the retention on the software, so we’ve played with it a little bit to figure out what we want in terms of retention. We’ve got it just about right where they’re not too loose and not too tight. They have a nice snug fit that’s stable and retentive enough, but doesn’t squeeze the teeth too much.

Keep your eye out for Part 2 of this digital bite splint blog series. Next week, I’ll describe how we play with different occlusal schemes and work with the lab on customization in real time.

What advancements in dental technology are you hesitant to implement in your practice and why? We’d love to hear your thoughts in the comments!

(Link to Digital Bite Splints: Part 2)

Related Course

TMD & Orofacial Pain: Managing Complex Patients

DATE: January 29 2025 @ 8:00 am - February 2 2025 @ 1:00 pm

Location: The Pankey Institute

CE HOURS: 37

Dentist Tuition: $ 7200

Single Occupancy with Ensuite Private Bath (per night): $ 345

TMD patients present with a wide range of concerns and symptoms from tension headaches and muscle challenges to significant joint inflammation and breakdown. Accurate thorough diagnosis is the first step…

Learn More>

About Author

User Image
Daren Becker DMD

Dr. Becker earned his Bachelors of Science Degree in Computer Science from American International College and Doctor of Dental Medicine from the University of Florida College of Dentistry. He practices full time in Atlanta, GA with an emphasis on comprehensive restorative, implant and aesthetic dentistry. Daren began his advanced studies at the Pankey Institute in 1998 and was invited to be a guest facilitator in 2006 and has been on the visiting faculty since 2009. In addition, in 2006 he began spending time facilitating dental students from Medical College of Georgia College of Dentistry at the Ben Massell Clinic (treating indigent patients) as an adjunct clinical faculty. In 2011 he was invited to be a part time faculty in the Graduate Prosthodontics Residency at the Center for Aesthetic and Implant Dentistry at Georgia Health Sciences University, now Georgia Regents University College of Dental Medicine (formerly Medical College of Georgia). Dr. Becker has been involved in organized dentistry and has chaired and/or served on numerous state and local committees. Currently he is a delegate to the Georgia Dental Association. He has lectured at the Academy of General Dentistry annual meeting, is a regular presenter at ITI study clubs as well as numerous other study clubs. He is a regular contributor at Red Sky Dental Seminars.

FIND A PANKEY DENTIST OR TECHNICIAN

I AM A
I AM INTERESTED IN

VIEW COURSE CALENDAR