Setting Condylar Guidance
One Easy Method That Will Increase Restoration Accuracy by Customizing An Articulator to the Actual Angle of the Eminence
When we rely too heavily on ‘assumptions’ to determine the angle of the eminence during a restoration, we risk creating a faulty end result for a significant amount of patients.
About 80-85% of patients will not present an issue. You can set the angle of the condylar path on the articulator, basing your efforts on a design assumption that most patients have an eminence with a steeper angle. The lab creates posterior disclusion on the articulator and there is equal or greater disclusion.
Problems arise when you end up with a patient who falls into one of two eminence categories.
Two Types of Patients Who Need Customization to the Angle of the Eminence
For 15-20% of the patients you treat, customization is necessary. These patients often fall into two categories:
- Eminence is flatter than the assumption.
The restorations did not touch on the articulator, yet you’ll have to remove posterior differences chairside in these patients.
- Eminence is steeper than the assumption.
These patients tend to experience less chewing efficiency. They complain that bits of snack food pack onto their restorations. This packing occurs on the occlusal table.
In both cases, a solution is needed. Creating posterior excursive disclusion or interferences relies on how well the angle of the eminence works with the angle of the anterior guidance. To achieve great results for patients outside the norm, there are two options.
How a Photograph Can Enable Restoration Customization
Accuracy is the ultimate goal for final restorations. Many dentists who find themselves dealing with a patient in the less common eminence percentile decide to take a protrusive bite record. My advice is to choose an alternative option that requires less effort.
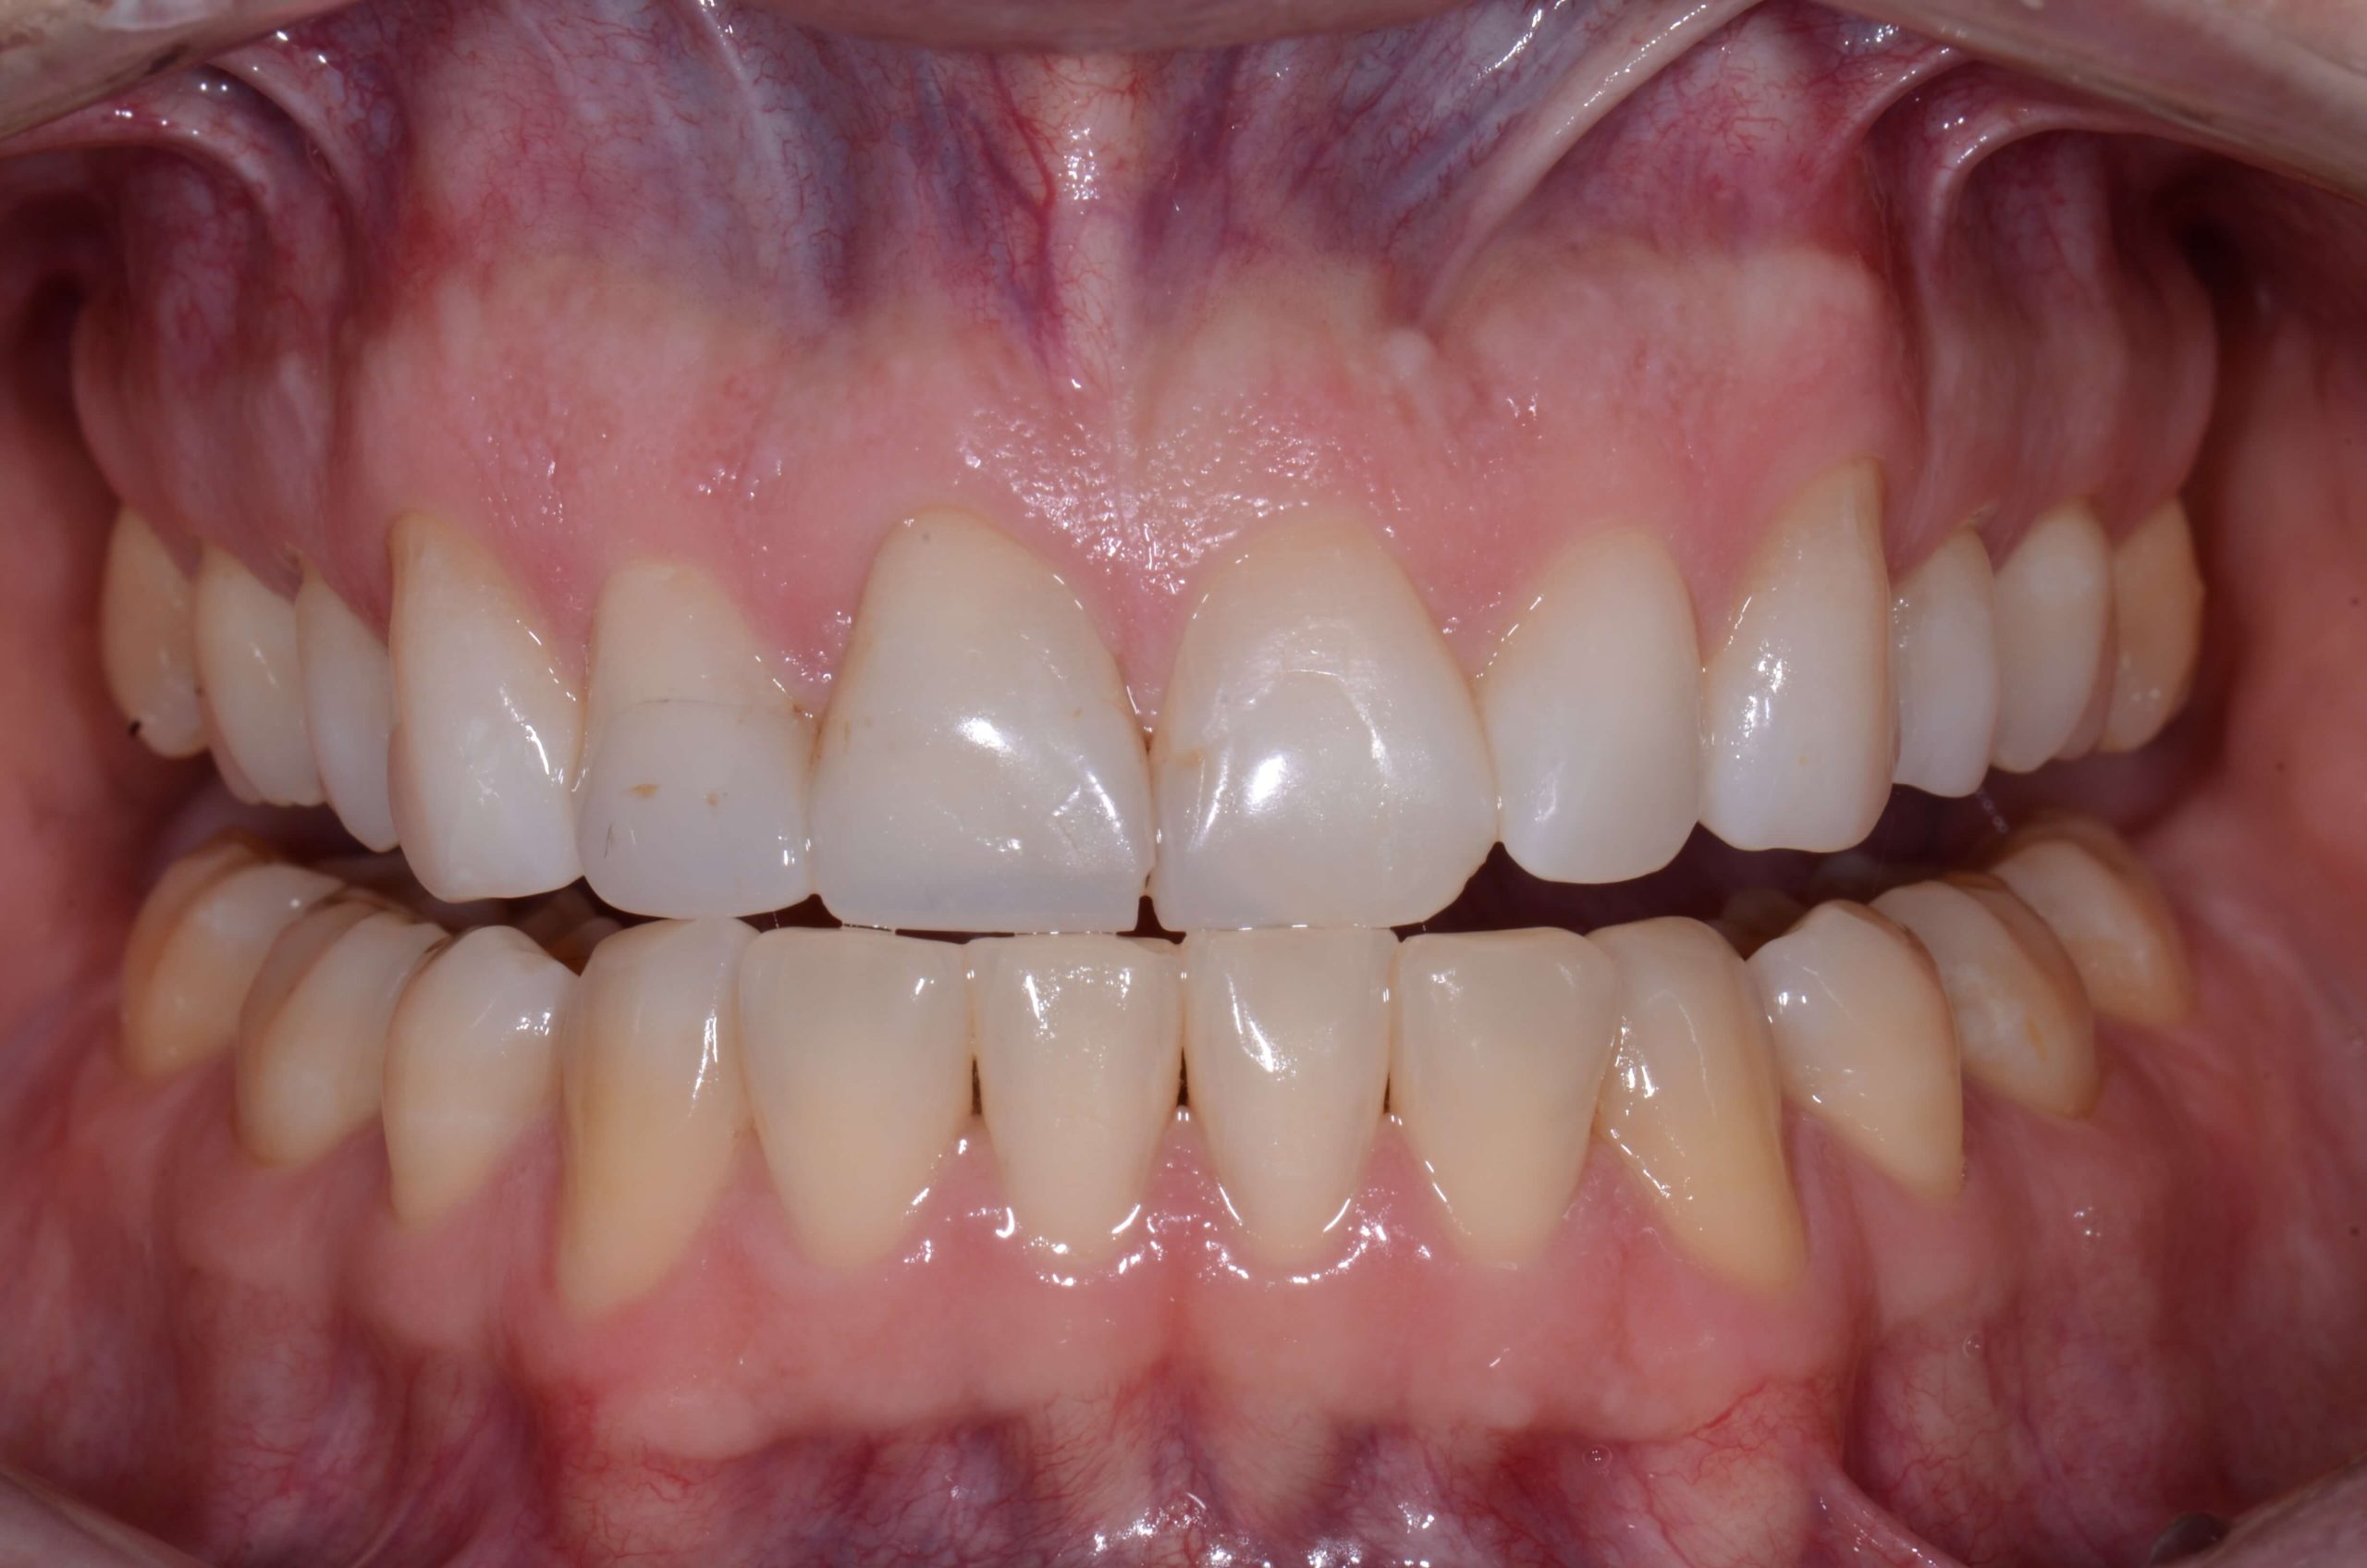
The easier way also uses a semi-adjustable articulator. You still customize the articulator to match the patient’s actual angle of eminence. But instead of the protrusive bite record, send the lab an end-to-end retracted photograph.
For this image:
- The incisors should rest on the incisal edges.
- The second molars should be visible and in focus.
The lab can use this image to create posterior disclusion. They simply dial the condylar setting to match the photograph and use a sharpie to record it on the model.
What method do you prefer for customizing the articulator? We’d love to hear from you in the comments!
Related Course
How to Sell Your Best Stuff – Hint: It’s NOT the dentistry
DATE: January 17 2025 @ 2:00 pm - January 17 2025 @ 4:00 pmLocation: Online
CE HOURS: 2
Description: As dentists, our training with patients in school was all about becoming adept at the skills necessary to provide predictably successful dental procedures for them. We examined them for…
Learn More>


i would love to add “Who needs it?”-100% If you are going to go to the trouble of mounting, why not take the extra 30 seconds to record and program?”
I agree Mike. This is something so easy to do, and it really increases the accuracy of what we see and do on the articulator in the excursvie movements.